Sushi Rice Recipe: Perfect Sticky Rice Every Time
Ingredients
Scale
This foolproof sushi rice recipe delivers perfectly sticky, glossy, seasoned rice for rolls, nigiri, and bowls — no rice cooker required.
This sushi rice recipe is the foundation of every great roll, bowl, and piece of nigiri you'll ever make at home. Glossy, gently sticky, perfectly seasoned with a balance of vinegar, sugar, and salt — it's the difference between sushi night that feels like takeout and sushi night that feels like the real thing. The good news? You don't need a rice cooker, a sushi chef's apprenticeship, or any specialty equipment beyond a heavy pot with a tight lid.
I started making rice this way after years of being intimidated by the idea — surely the rice was the part that took ten years to master? Turns out, with the right ratio and a little patience, you can pull off restaurant-quality results in about thirty minutes. This complete sushi rice recipe walks you through every step, from picking the right grain to that final fold of seasoned vinegar that gives it the signature pearly shine.
Whether you're prepping homemade sushi rolls for date night, a quick poke bowl recipe for lunch, or a dramatic sushi bake for a crowd, this sushi rice recipe is the base you want. Let's get into it.
Sushi rice is short-grain Japanese rice that's been cooked, then seasoned with a mixture of rice vinegar, sugar, and salt. The Japanese name for the seasoned rice is shari or sumeshi, and it's distinct from plain Japanese steamed rice (called gohan) in that final vinegar step. The seasoning isn't only for flavor — the acidity helps the grains hold their shape and gives them that telltale gloss.
The rice itself is what makes everything work. Short-grain rice has a high amylopectin starch content, which means the grains cling together while still keeping their individual structure. Medium-grain calrose works beautifully and is widely available at US supermarkets, while koshihikari (often labeled premium Japanese rice) is the gold standard if you want to splurge. Avoid long-grain varieties like basmati or jasmine — they're too dry and separate to do the job here.
When shopping, look for brands like Nishiki, Kokuho Rose, Tamaki Gold, or Lundberg organic sushi rice. The bag will usually say sushi rice, calrose, or short-grain Japanese-style rice. Anything in that family will give you the right texture.
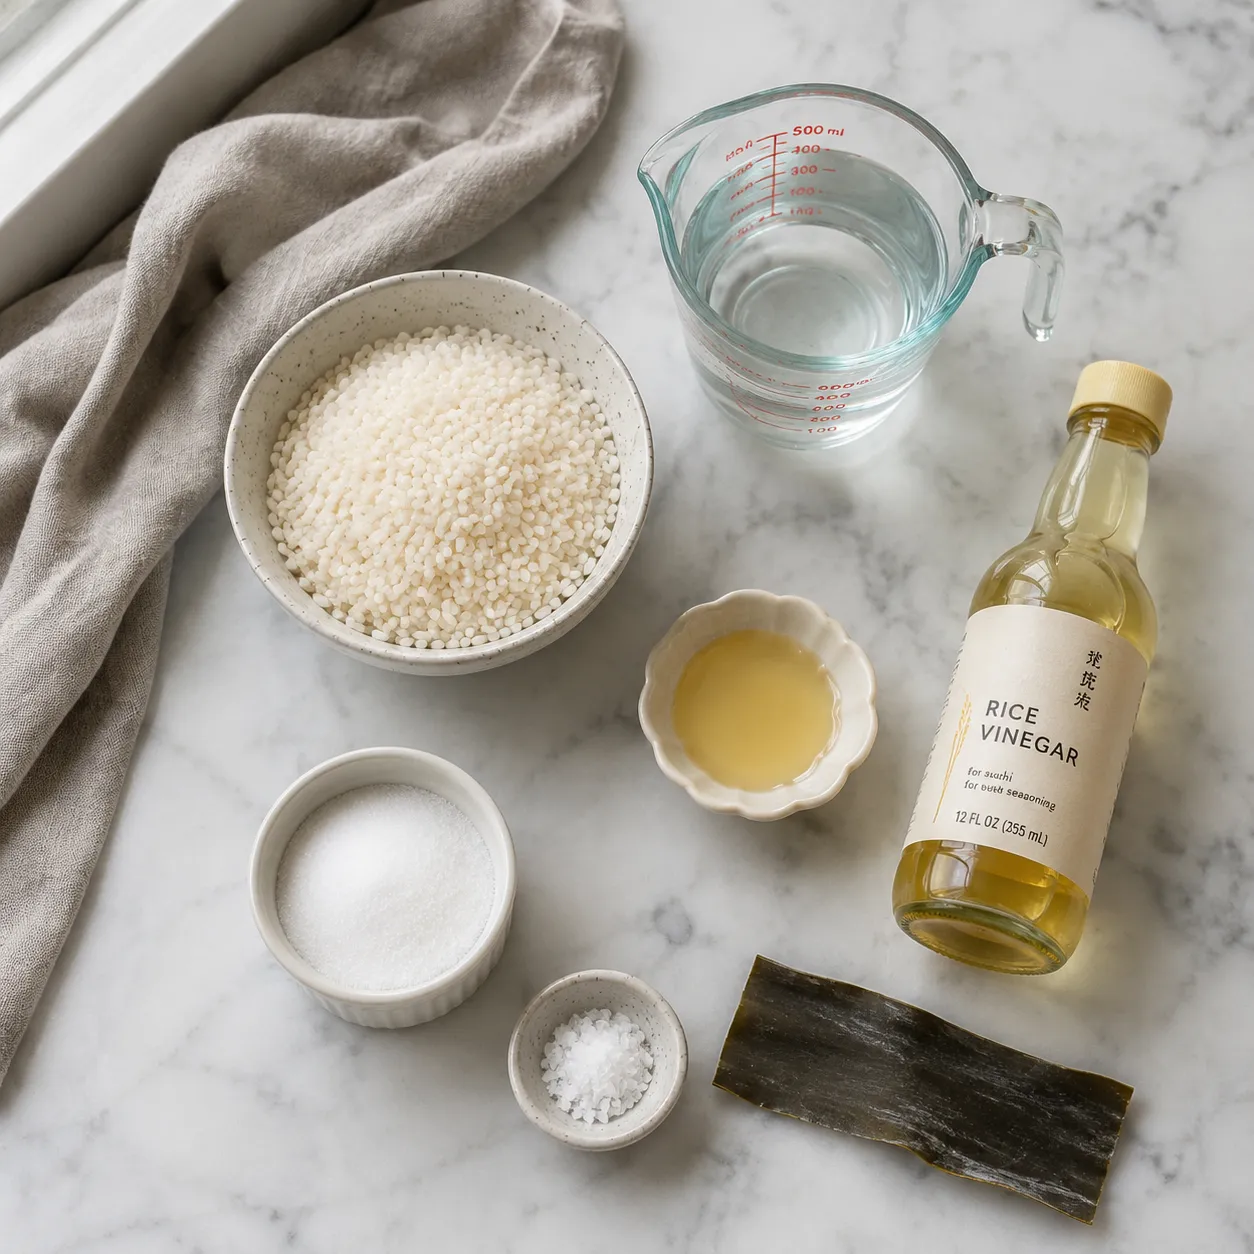
The ingredient list is short, but every component matters. Here's what you're working with and why:
The classic Japanese ratio for sushi vinegar is 3:2:1 — three parts rice vinegar to two parts sugar to one part salt. It's a starting point you can adjust to taste; some chefs go a touch sweeter for nigiri, a touch sharper for rolls. Need a rice vinegar substitute? Apple cider vinegar or distilled white vinegar diluted lightly with water will get you close enough for a weeknight, though the flavor will be slightly less rounded.
How to make sushi rice at home comes down to four moves: rinse, cook, season, and fold. None of them are difficult on their own, but together they decide whether your rice ends up gummy, dry, or just right.
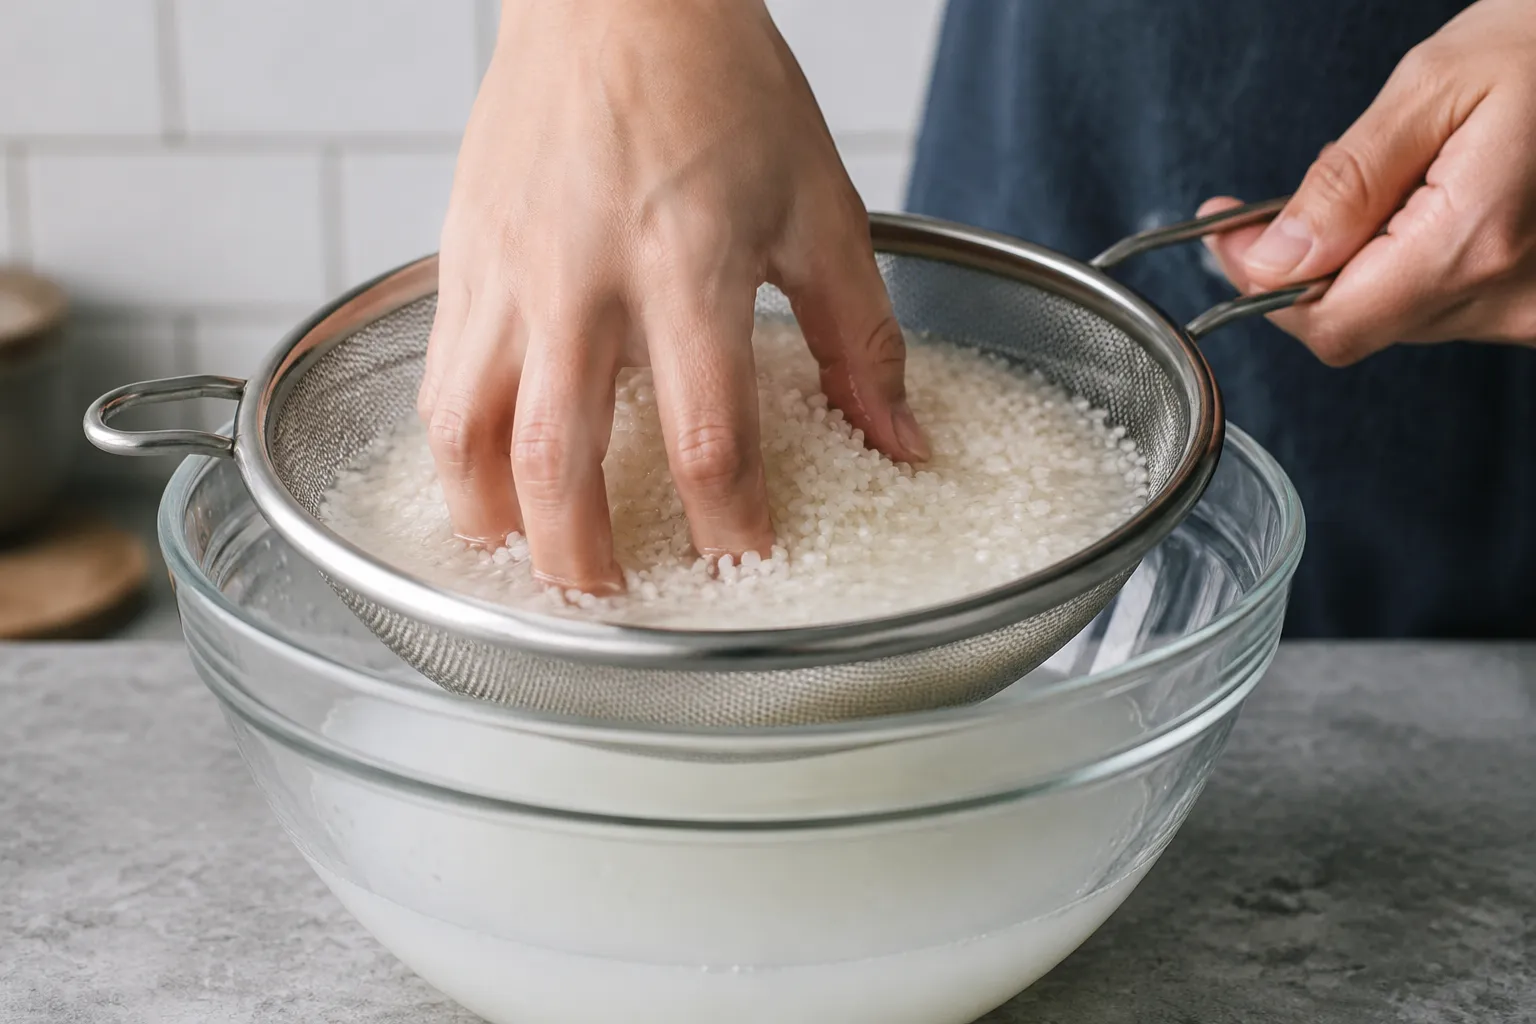
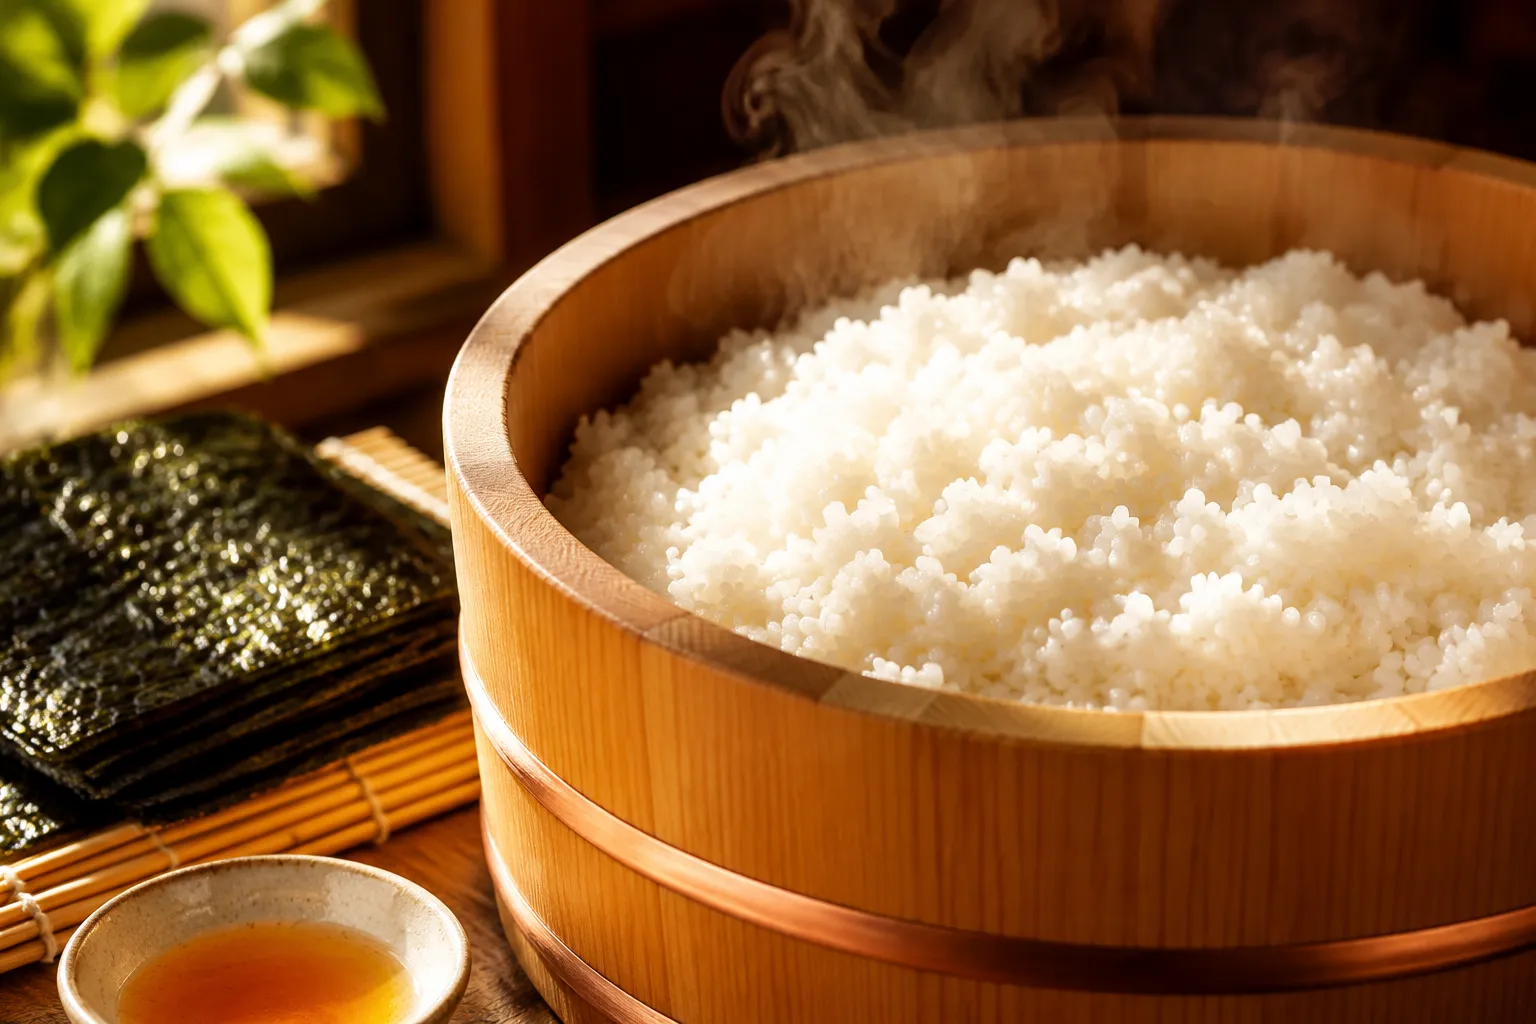
Place the rice in a bowl or fine-mesh strainer and rinse it under cool water, gently swirling with your fingers. The first wash will look milky white from surface starch — that's exactly what you want to remove. Drain and repeat three or four times until the water runs nearly clear. Skipping this step is the single biggest reason home sushi rice turns out gummy.
After rinsing, drain the rice well and let it sit in fresh measured water for about 30 minutes before cooking. Soaking lets the grains hydrate evenly so they cook through to the center without the outsides getting blown out. If you're truly short on time, you can skip this — but the texture difference is noticeable.
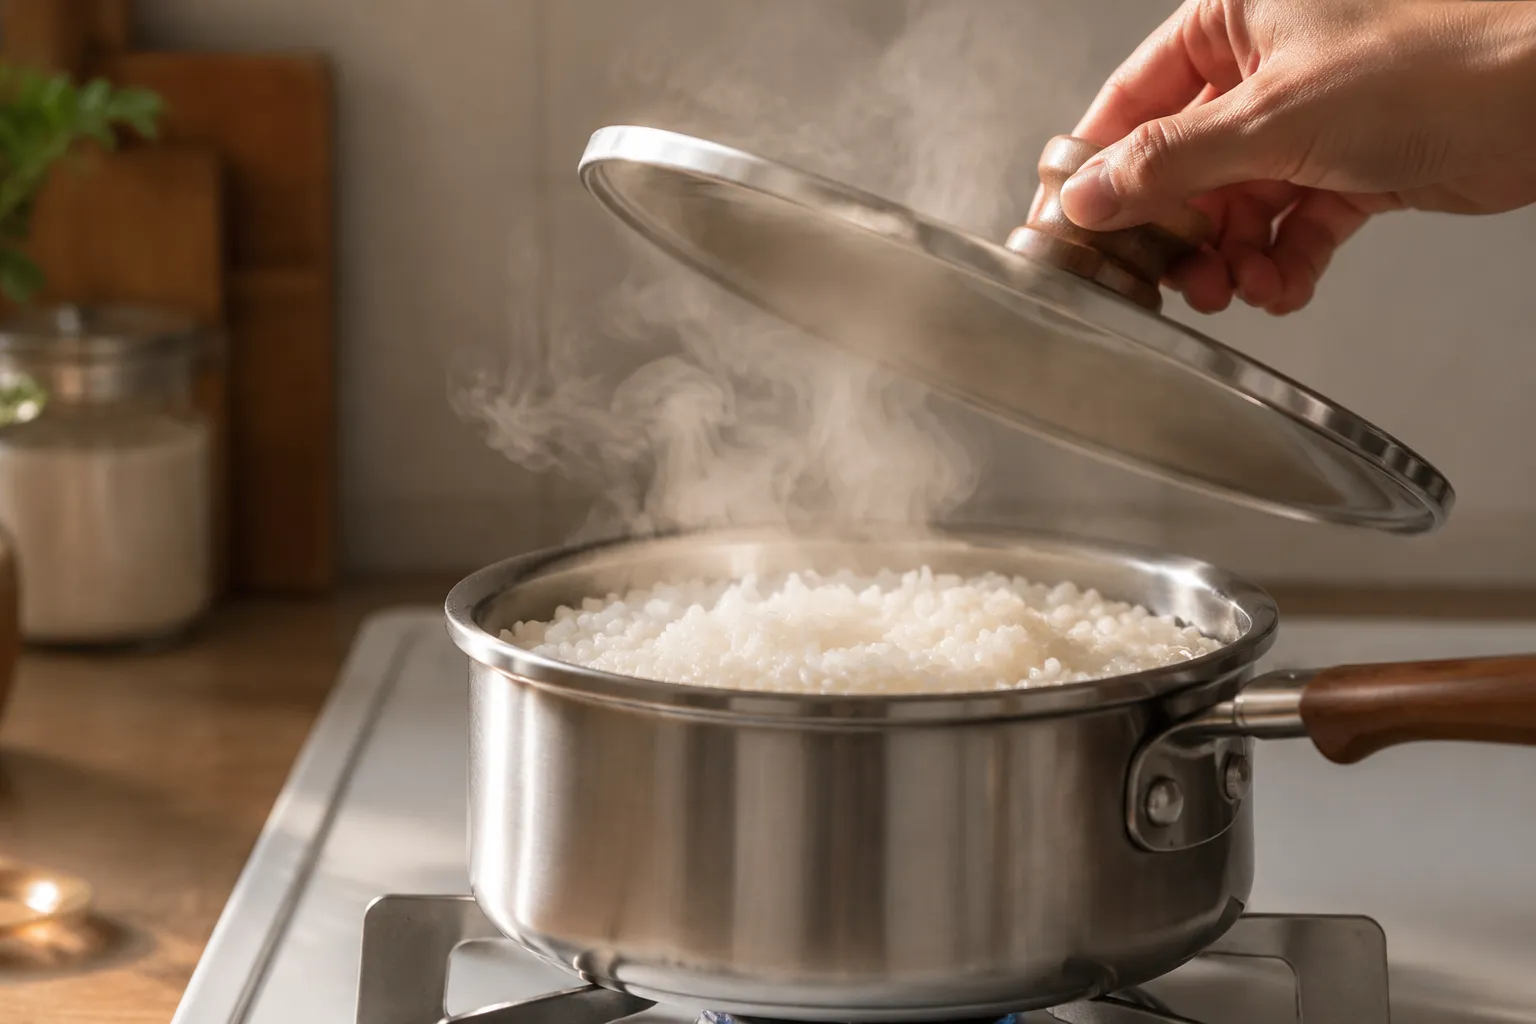
Bring the soaked rice and its water to a boil in a heavy pot, then immediately drop the heat to low and clamp the lid on tight. Simmer for 18 minutes without lifting the lid or stirring. When the timer goes off, pull the pot off the heat and let it rest, still covered, for another 10 full minutes. This is the trust-the-process part — and that quiet rest is where the texture comes together.
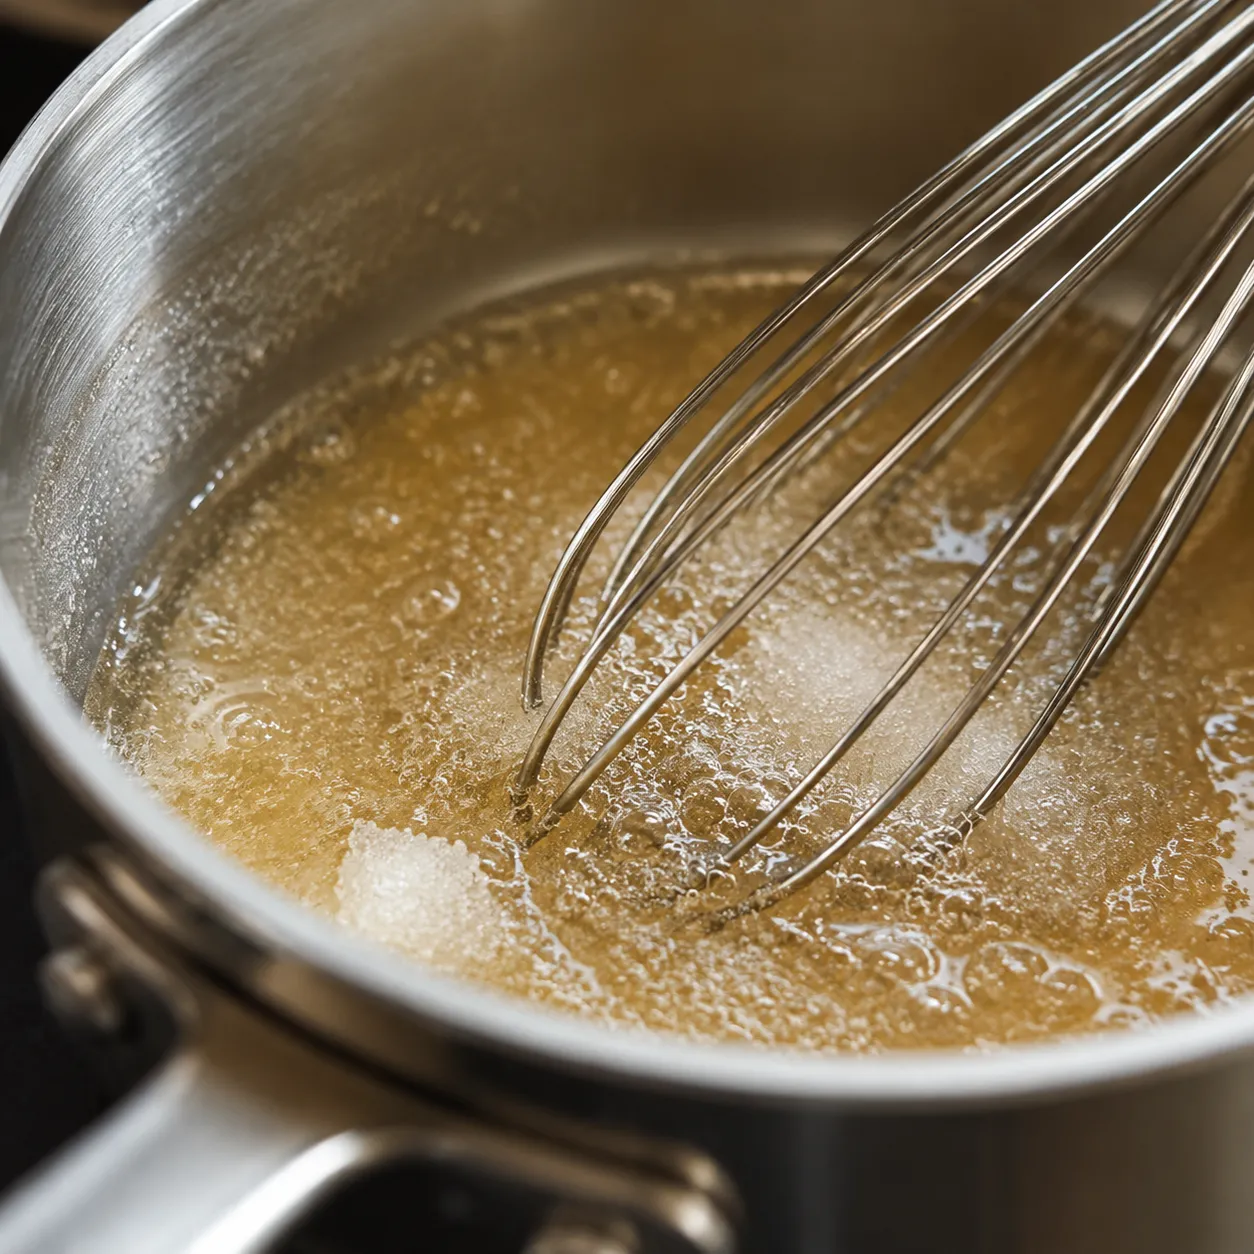
While the rice soaks (or cooks), combine the rice vinegar, sugar, and salt in a small saucepan. Warm gently over low heat, whisking until the sugar dissolves completely. Don't let it boil — you're not cooking it, just helping everything come together. Pull it off the heat and let it cool to room temperature before using.
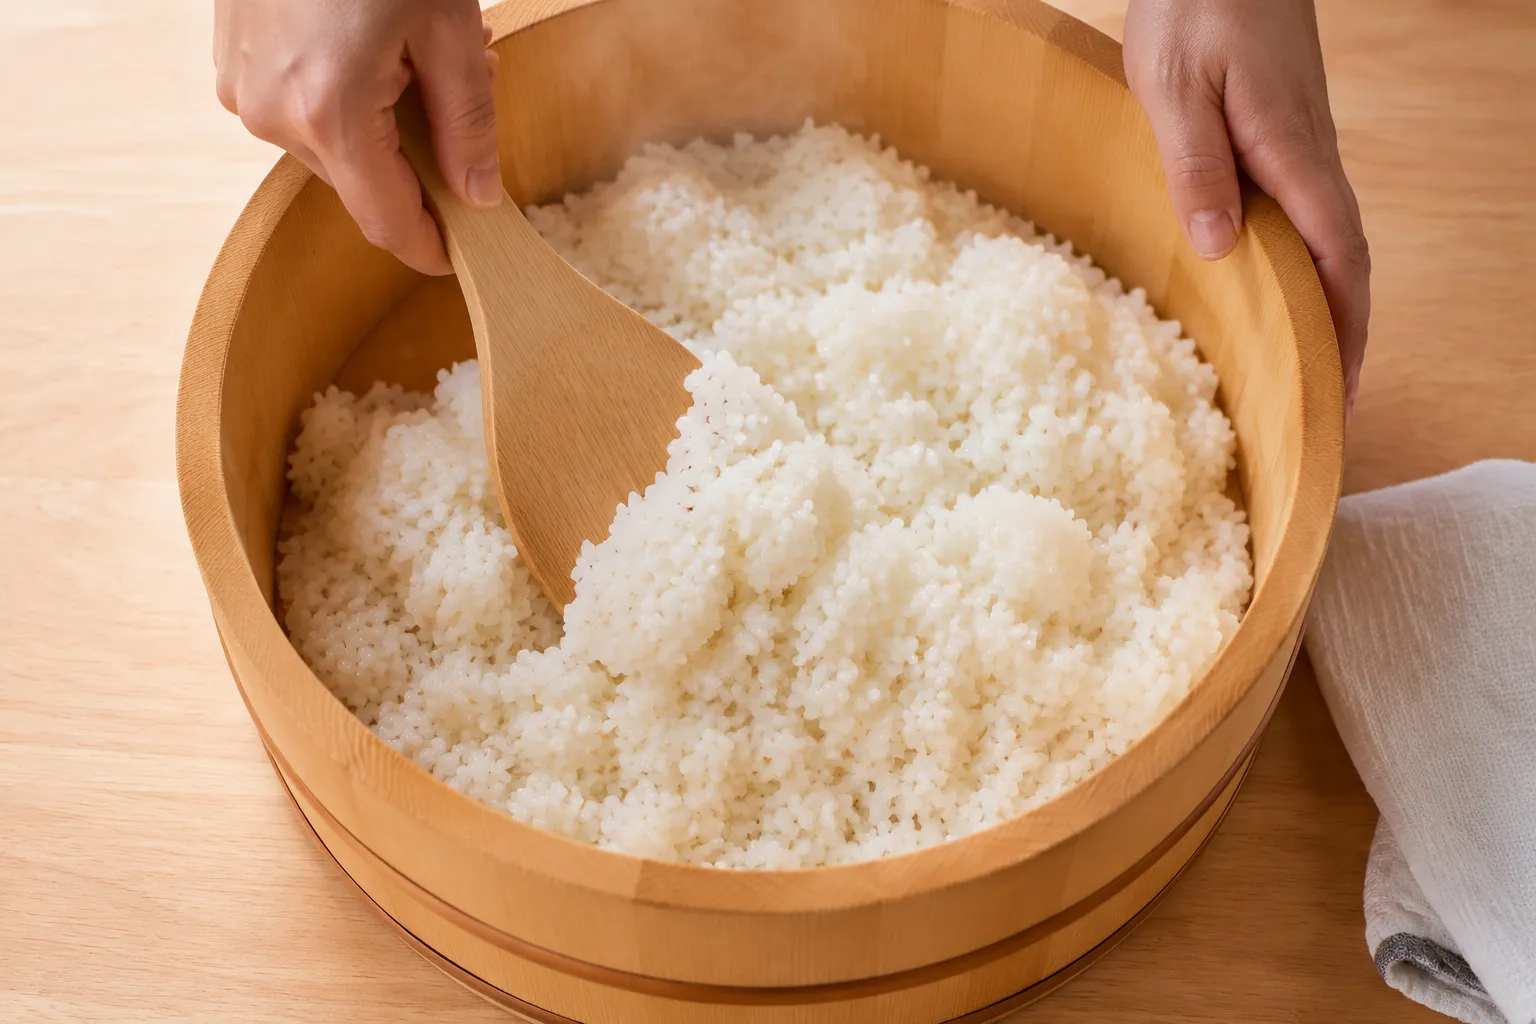
Once the rice has rested, transfer it to a wide, shallow bowl — wooden if you have one. Drizzle the cooled sushi vinegar over the surface and use a flat paddle or rubber spatula to fold it in with cutting, slicing motions. Don't stir or mash; you want to coat the grains without breaking them. Fanning the rice while you fold cools it quickly and gives it that signature glossy shine.
If you don't own a rice cooker, the stovetop method is honestly just as reliable once you nail the ratio and timing. Use slightly more water than the rice volume but slightly less than you'd use for plain Japanese steamed rice — for 2 cups of rinsed and soaked short-grain rice, that's 2 1/4 cups of water (a small adjustment for evaporation in an open pot).
Bring the rice and water to a rolling boil over medium-high heat with the lid off. The moment it hits a full boil, drop the heat to the lowest setting and cover with a tight-fitting lid. If your lid doesn't seal well, lay a clean kitchen towel over the pot before putting the lid on and tuck the corners up over the top so they don't catch fire. Cook for exactly 18 minutes — set a timer.
When the timer goes off, pull the pot off the heat without lifting the lid and let it rest for 10 full minutes. This rest is non-negotiable. The residual steam finishes cooking the grains evenly and keeps the bottom from going crusty. After resting, fluff with a paddle and you're ready to season.
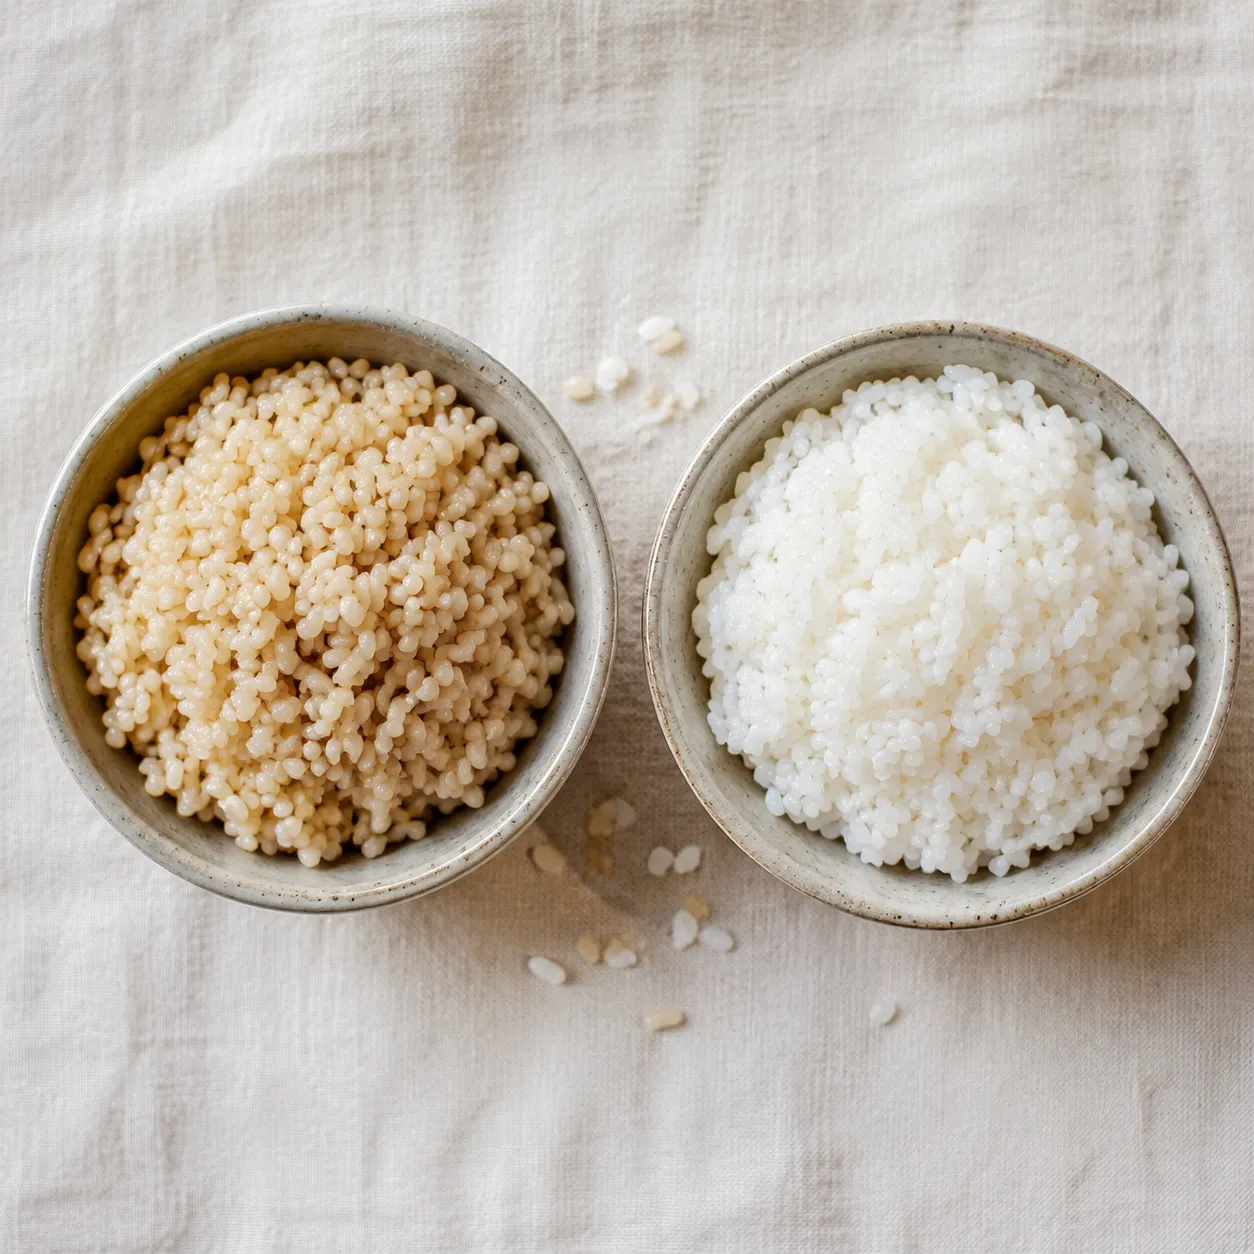
For a whole-grain version, brown short-grain rice (sometimes labeled brown sushi rice) gives you nuttier flavor and more fiber while still holding together well enough to roll. The technique shifts slightly: use 1 1/2 cups water per cup of rice, soak for at least an hour (or overnight in the fridge), and extend the simmer to 35-40 minutes. Rest for 15 minutes off the heat instead of 10.
The texture won't be quite as glossy as white rice — that's just the nature of intact bran — but a good fold of warm sushi vinegar still gives you a sticky, well-seasoned base. Brown sushi rice is especially good for poke bowls, sushi bowls, and chunky hand rolls where the heartier chew is a feature, not a bug. It's also a little more forgiving with thicker fillings since the grain itself has more body to push back against the wrap.
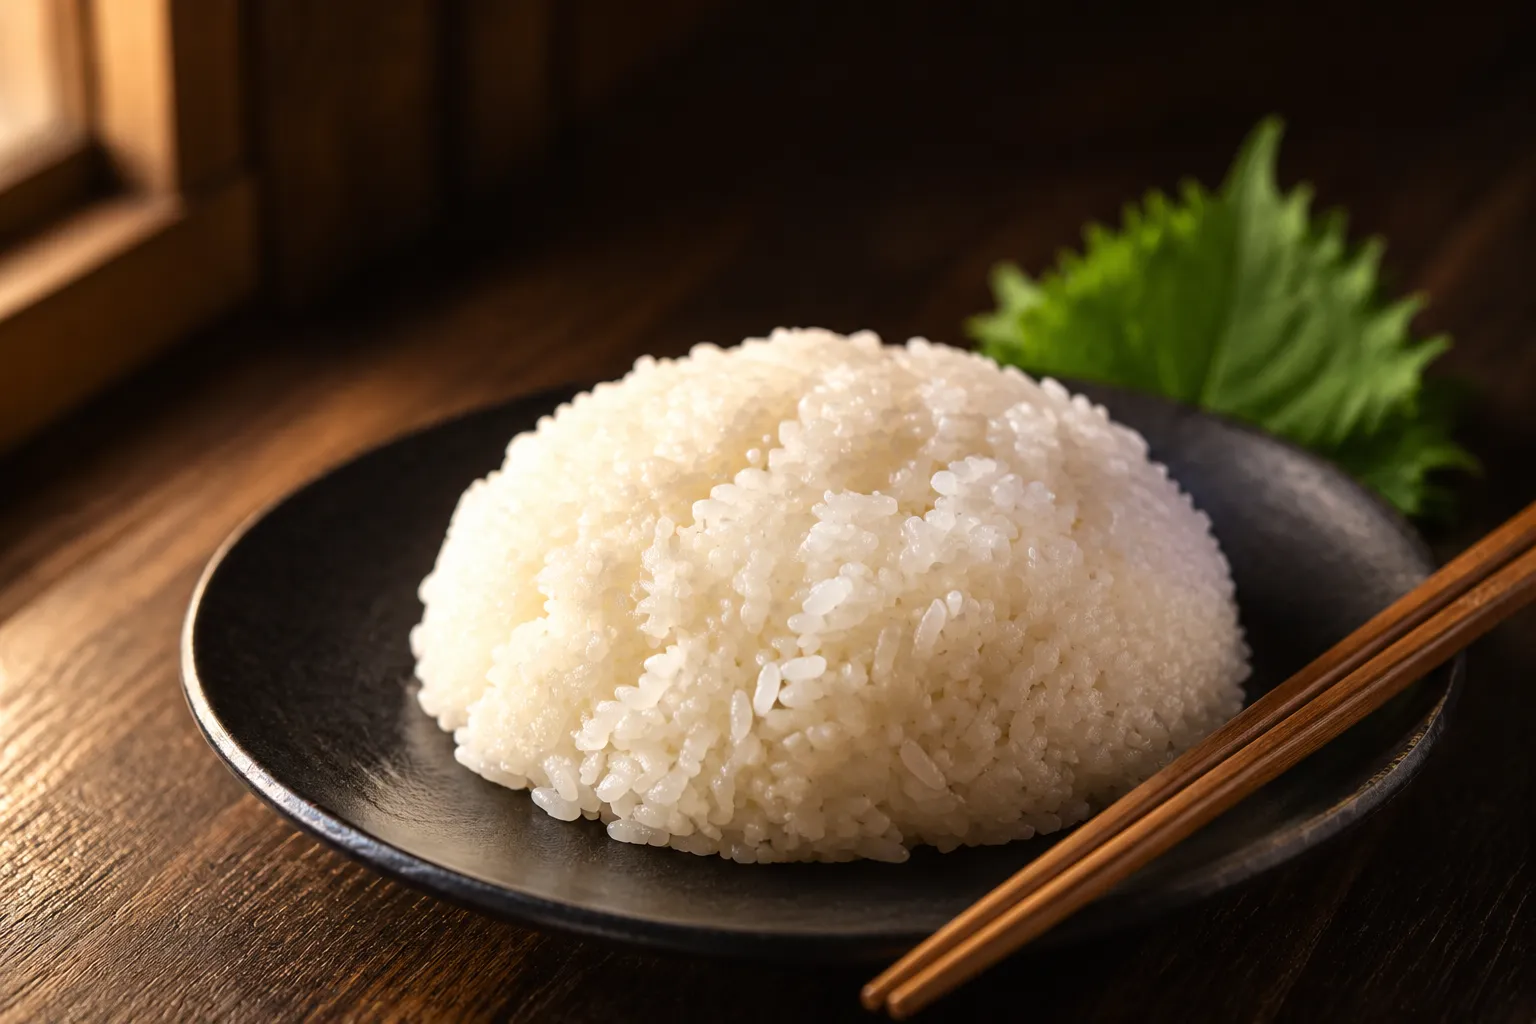
Once your rice is seasoned and cooled to just-warm (think baby-bath temperature), keep it covered with a damp kitchen towel until you're ready to use it. Cold rice clumps and cracks; warm-but-not-hot rice spreads easily and holds its shape on nori or in a bowl.
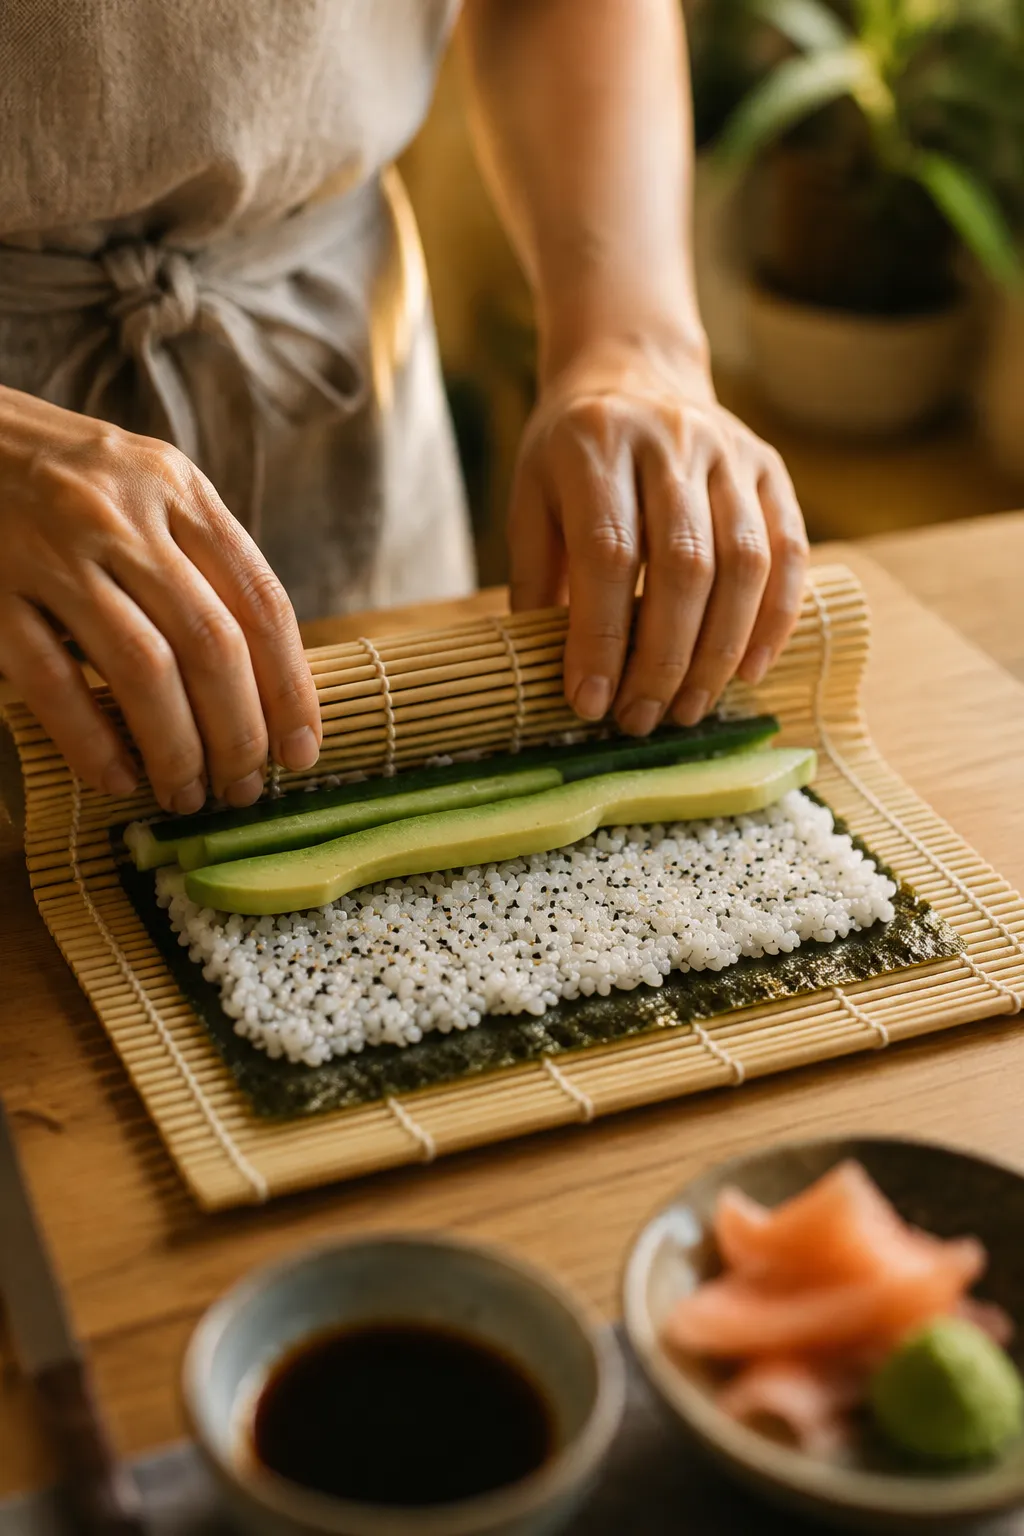
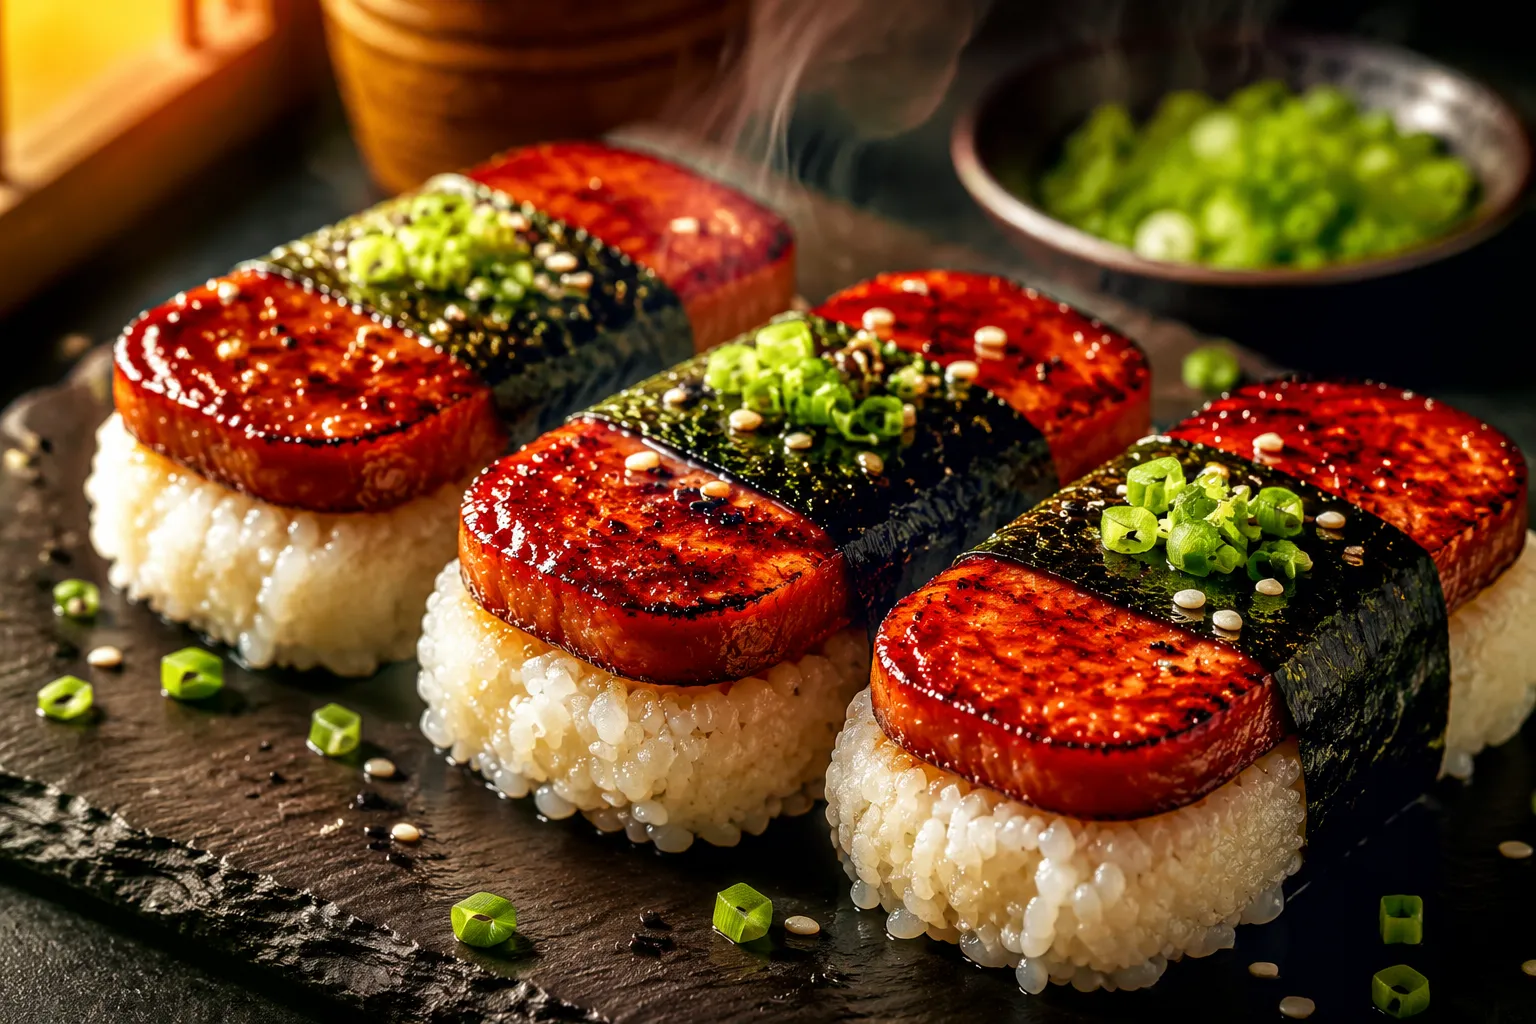
This is where the rice goes from ingredient to dinner. Spread it thinly across a sheet of nori for maki rolls — anything from a classic California roll recipe with crab and avocado to a fiery spicy tuna roll with sriracha mayo. Press it gently into oblong mounds for nigiri, top with a slice of sashimi-grade fish, and you've got something that wouldn't look out of place at a sushi counter. Pile it into bowls topped with cubed salmon, edamame, mango, and spicy mayo for a fast weeknight dinner. It's also the foundation of trendy sushi bakes, onigiri, temaki hand rolls, and crispy rice bites.
A perfectly seasoned bowl of grains will make you wonder why you ever ordered out. With one good sushi rice recipe in your back pocket, the whole world of Japanese-style home cooking opens up — and once you've got the rhythm down, you'll be folding vinegar into hot rice without even glancing at the page.
Once you've got the master recipe down, the seasoning is endlessly tweakable. Most Japanese households have a slightly different vinegar blend they swear by, and you should too. Try these spins:
Sushi rice is at its best within a few hours of being seasoned. Keep it at room temperature in a covered bowl with a damp kitchen towel laid over the surface — refrigeration hardens the starch and makes the grains crack when you try to roll them. If you absolutely must store leftovers, transfer the rice to an airtight container and refrigerate for up to two days.
To revive cold rice, sprinkle 1-2 teaspoons of water over a single portion and microwave covered for 30-45 seconds, or steam it in a heatproof bowl set over simmering water for a couple of minutes. Let it cool back to just-warm before using. Cooked unseasoned plain rice can also be frozen in single-serve portions for up to a month; thaw, reheat, then add the sushi vinegar fresh for the best texture.