Nigiri Sushi at Home: Easy Step-by-Step Guide
Ingredients
Scale

Nigiri is the elegant two-bite sushi that lets fresh fish shine over hand-pressed seasoned rice. Here's exactly how to make it at home.
Nigiri is one of those foods that looks impossibly refined until you understand the rhythm of it: warm seasoned rice, cool glossy fish, a tiny swipe of wasabi, and one gentle press of the hand. It is the kind of Japanese cuisine that rewards patience more than fancy equipment, and once you try it at home, you may never look at takeout sushi the same way again.
This guide walks you through the home-cook version: how to make balanced sushi rice, how to choose and slice sushi-grade fish, and how to shape those elegant little rice pillows without packing them too tightly. Think of it as a calm, practical workshop in your own kitchen, with all the details that make each piece feel restaurant-worthy.
Nigiri sushi is a hand-pressed style of sushi made with a small oval of seasoned sushi rice topped with a slice of fish, seafood, egg, or another topping. Unlike rolls wrapped in nori, the beauty here is direct and minimal: rice below, topping above, and just enough wasabi or soy sauce to sharpen the flavor. The rice should be tender and lightly compacted, never dense, so it supports the fish without feeling heavy. A great piece is usually eaten in one or two bites, with the topping and rice balanced in both size and seasoning.
The easiest way to understand the sushi family is to look at what includes rice. Sashimi is simply sliced raw fish or seafood, served without rice, which is why knife work and fish quality are everything. Maki is rolled sushi, usually with rice and fillings wrapped in nori, then sliced into rounds; if you already love a spicy tuna roll, maki is the category you know best. Hand-pressed sushi sits in the middle visually: simple like sashimi, but built on seasoned rice like maki.
Nigirizushi became popular in Edo, present-day Tokyo, as a fast, flavorful street food. Early versions were larger than the delicate pieces served today and were often lightly cured, marinated, or brushed for preservation and flavor. Over time, refrigeration and better seafood distribution allowed fresh fish to become the star, and the form became smaller, more elegant, and more precise. That history is part of what makes this dish so compelling: it is humble food refined through generations of craft.
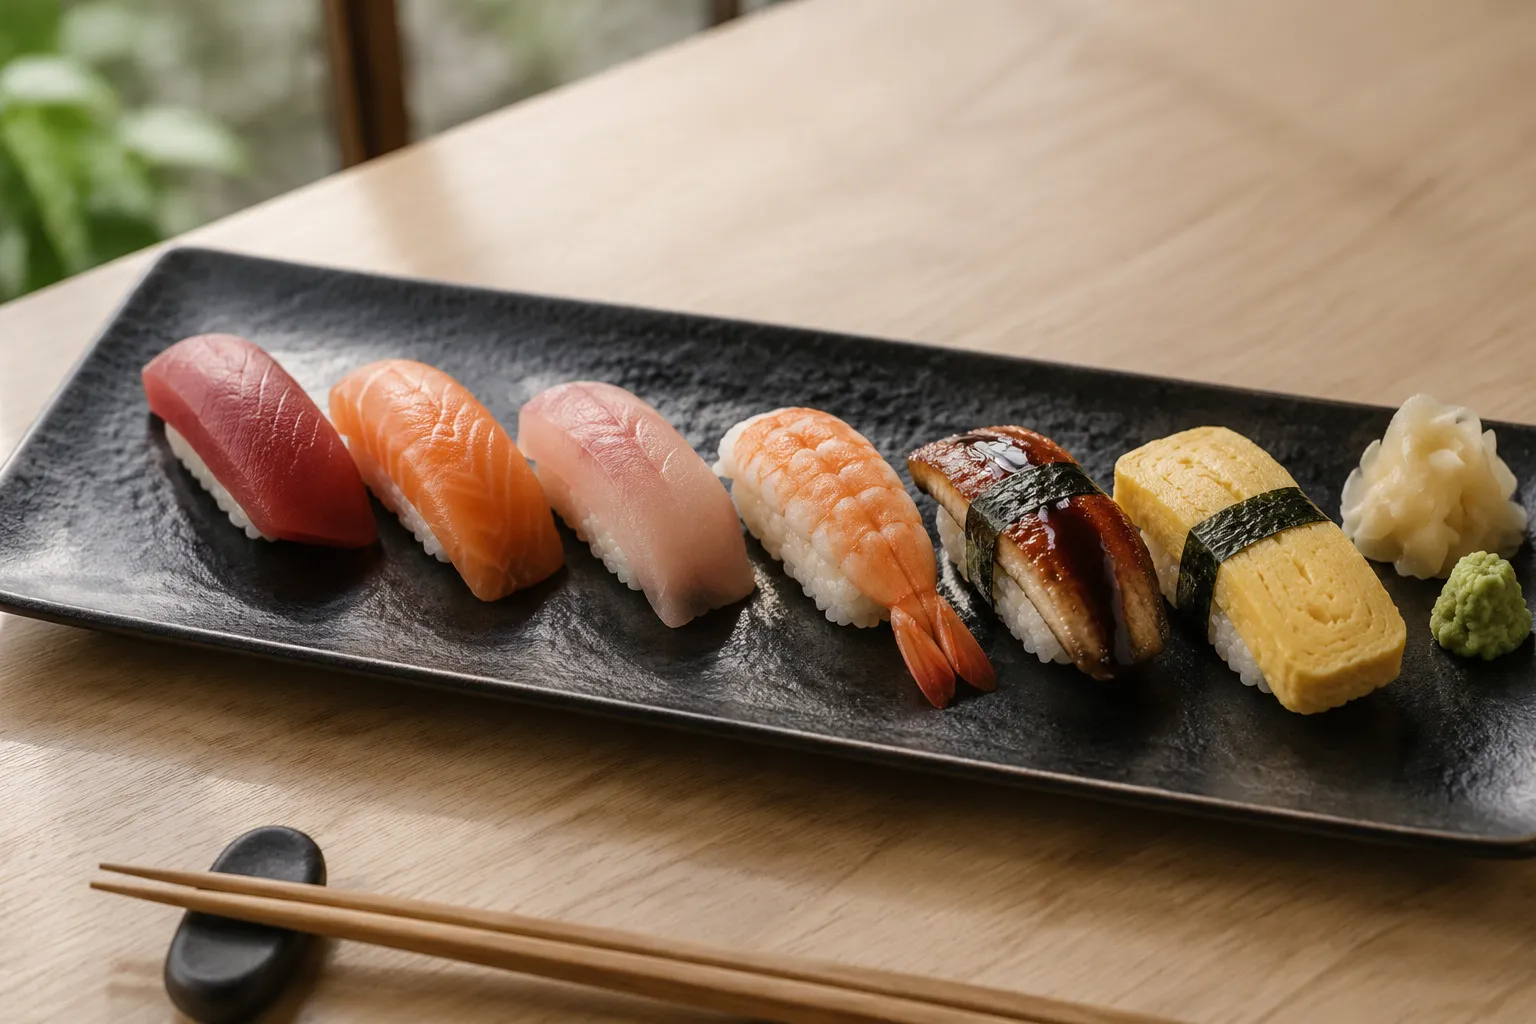
Tuna, salmon, yellowtail, shrimp, eel, and tamago are some of the most familiar toppings, but there are dozens of beautiful options depending on season and region. Tuna can range from lean and clean-tasting to rich and buttery, while salmon brings a soft texture and vivid color. Cooked shrimp is a friendly starting point if raw fish makes you nervous, and tamago, a sweet layered omelet, is a classic test of a sushi chef’s skill. At home, choose two or three toppings rather than trying to recreate an entire restaurant case.
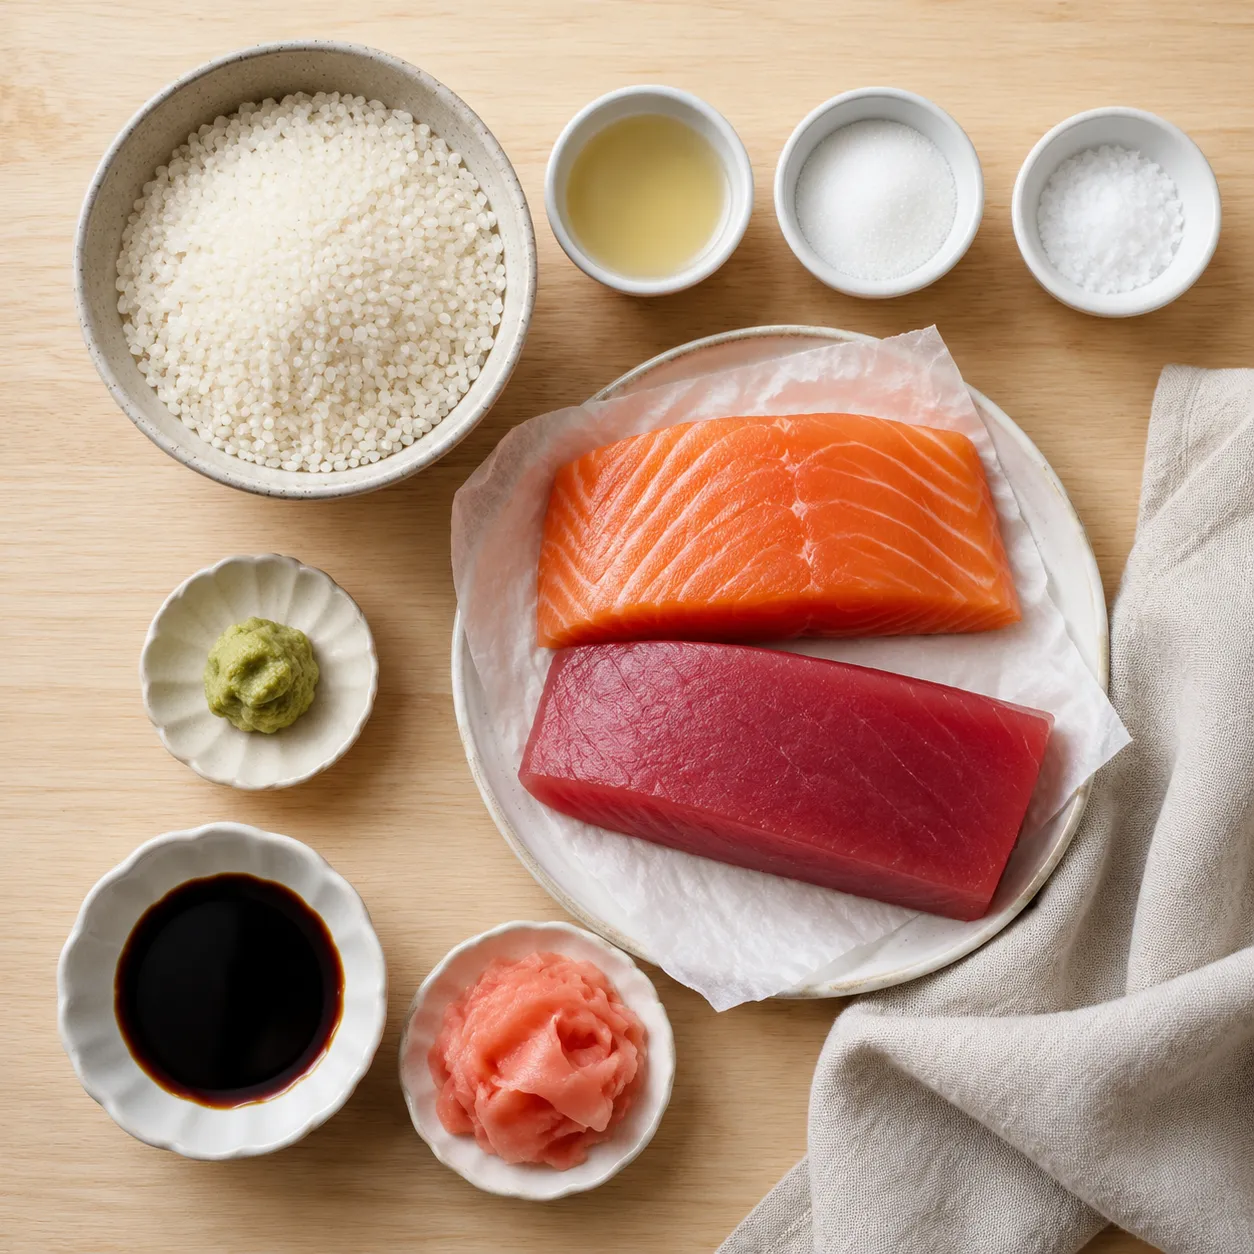
The ingredient list is short, which means each piece matters. You need short-grain sushi rice, rice vinegar, sugar, salt, sushi-grade fish, wasabi, soy sauce, and pickled ginger for serving. If you want a simple side-by-side guide to rice ratios and seasoning, a reliable sushi rice recipe is worth bookmarking before you begin. This is not a pantry-emptying dinner; it is a small, intentional spread where texture, temperature, and freshness do most of the work.
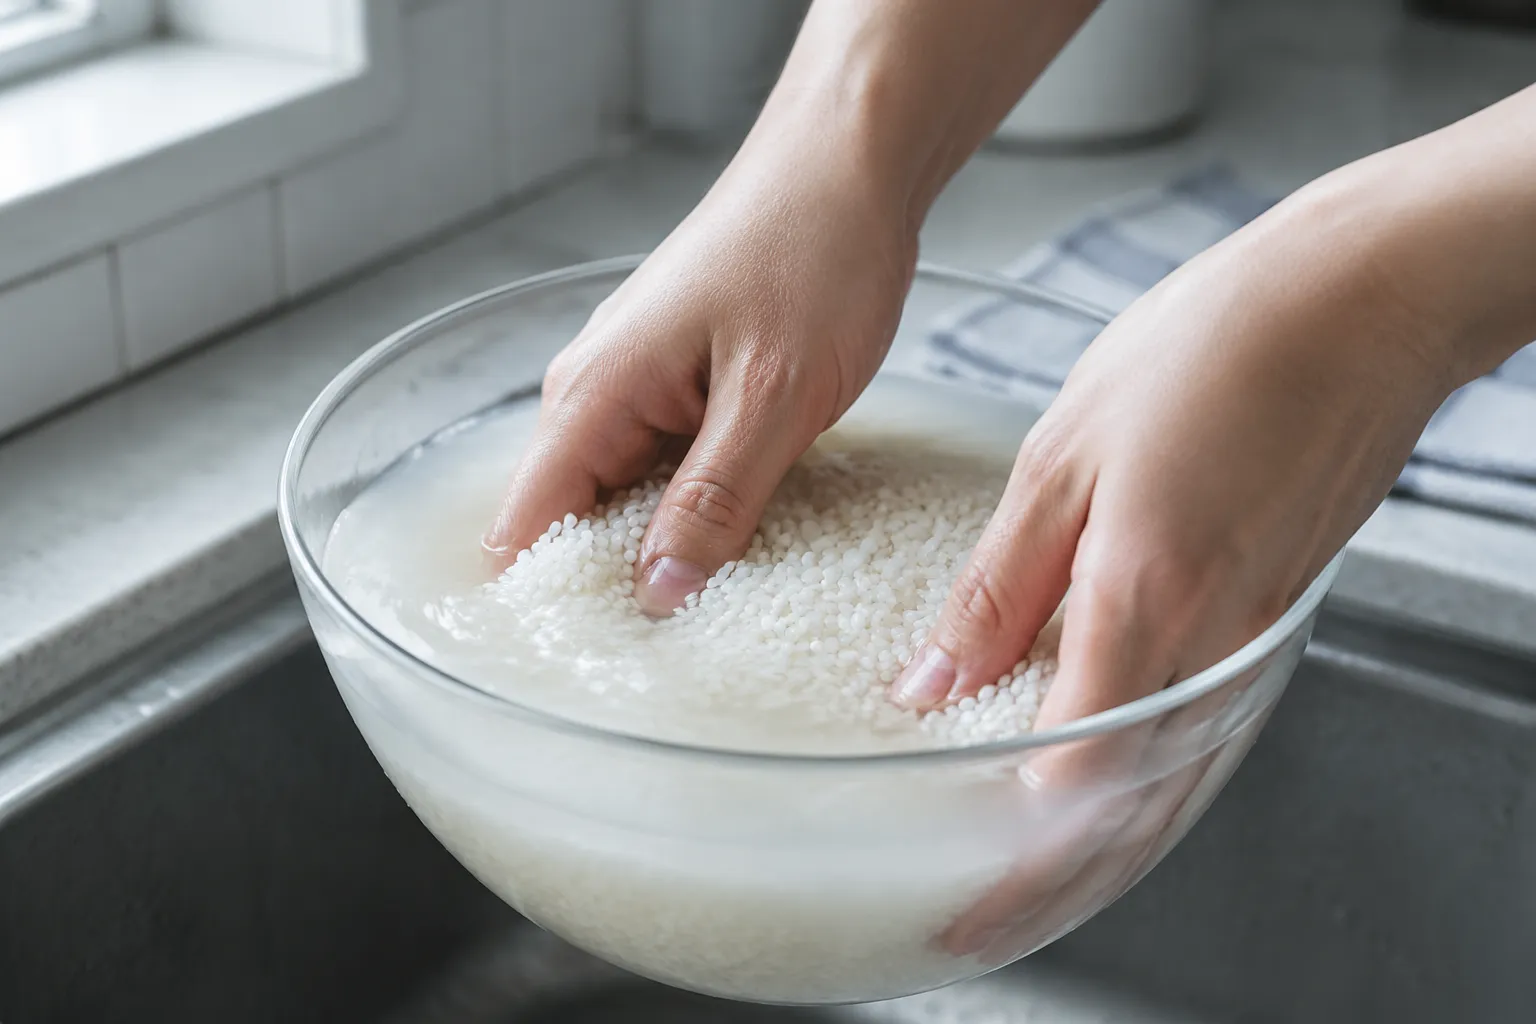
Use Japanese-style short-grain rice, not jasmine, basmati, or long-grain white rice. Short-grain rice has the right amount of starch to cling together while still staying tender when seasoned properly. Rinsing is essential because excess surface starch can make the cooked rice gummy instead of glossy. Once cooked, the rice gets dressed with seasoned rice vinegar while hot, then cooled until it is just warm to the touch.
For raw preparations, buy from a trusted Japanese market, reputable seafood counter, or online supplier that understands sushi-grade fish. The term is not federally regulated in the United States, so trust, handling, and transparency matter more than the label alone. Ask when the fish arrived, how it was stored, and whether it is intended for raw consumption; a good fishmonger should answer confidently. If you want a deeper purchasing checklist, look up a sushi-grade fish guide before shopping.
The seasoning mixture for sushi rice is simple: rice vinegar for brightness, sugar for roundness, and salt to make every grain taste alive. Fresh wasabi has a delicate heat and floral edge, but a good prepared paste works well for home cooking. Soy sauce should be used lightly, more like seasoning than a dipping bath, so the rice does not fall apart or become overly salty. Pickled ginger is served between pieces as a palate cleanser, not piled directly on top.
Sushi rice is the quiet foundation of the whole plate, and it deserves as much care as the fish. Start by rinsing the grains in several changes of cool water until the water runs mostly clear, then drain well before cooking. This step removes excess starch from the surface while preserving the rice’s natural stickiness. The cooked grains should be plump, shiny, and separate enough to see individually.
A rice cooker makes this process wonderfully consistent, but a heavy saucepan with a tight-fitting lid also works. After rinsing, let the rice rest briefly in its measured water before cooking so the grains hydrate evenly. Avoid lifting the lid during cooking, and let the rice steam off heat for a few minutes once done. That final rest helps the moisture settle evenly from top to bottom.
Warm the rice vinegar, sugar, and salt just until dissolved; there is no need to boil it. Transfer the hot rice to a wide bowl, ideally a hangiri if you have one, then drizzle the seasoning over the surface. Use a rice paddle to slice and fold rather than stir, which keeps the grains intact. Fan the rice as you mix if you want that classic glossy finish and quicker cooling.
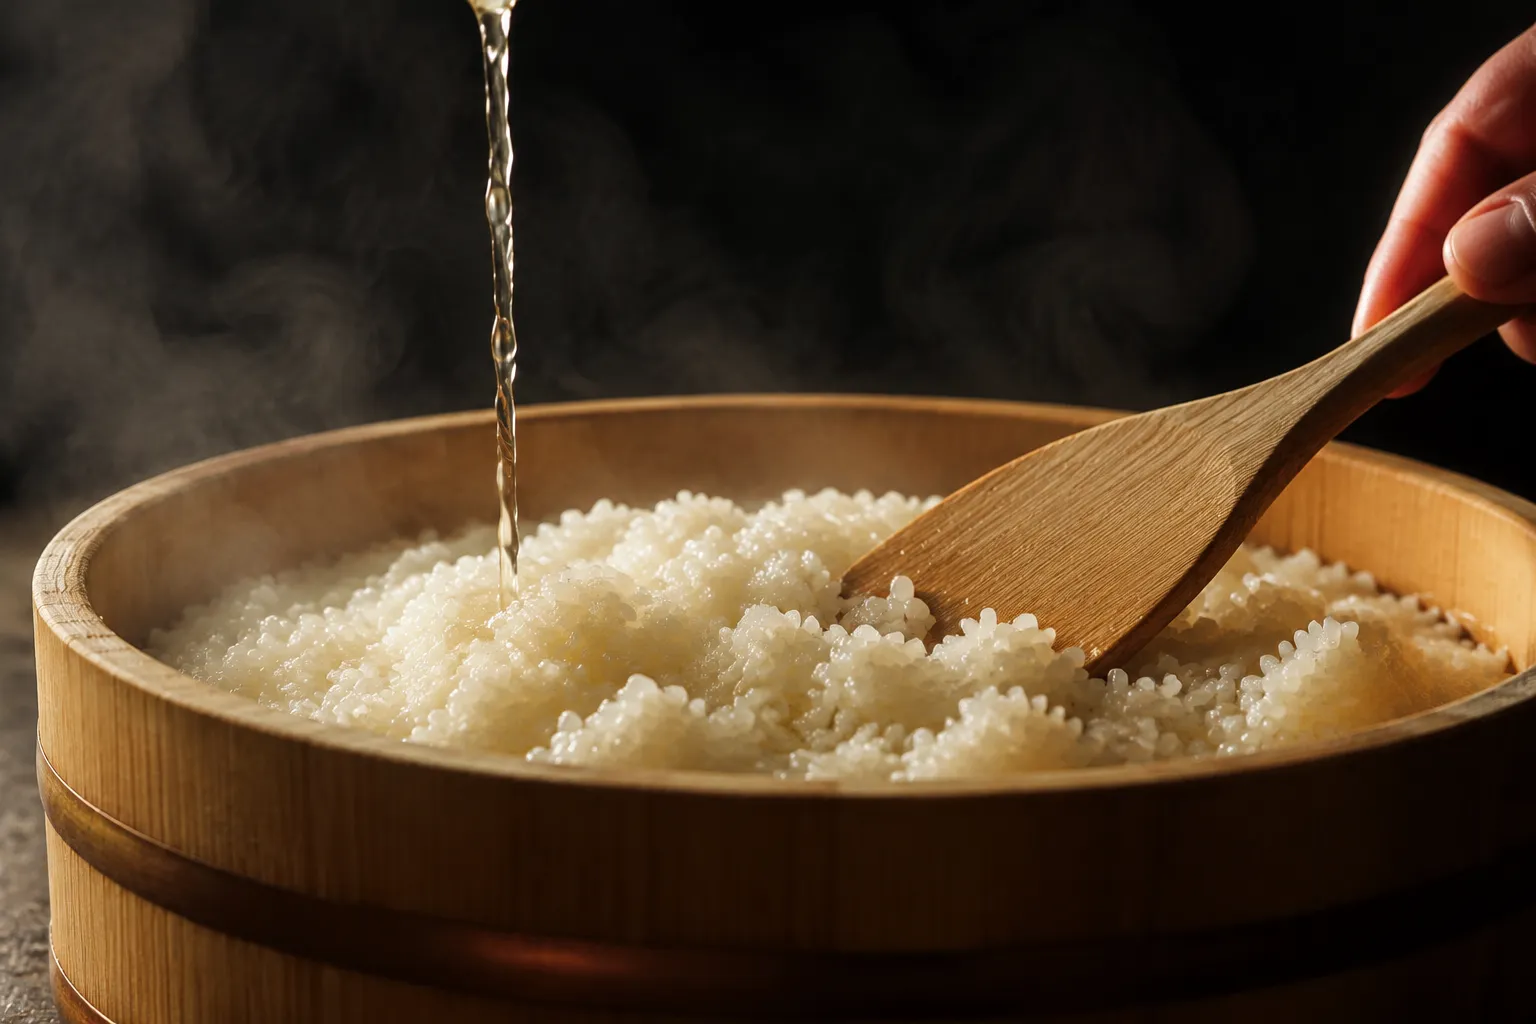
The rice should be slightly warm when shaped, close to body temperature, not hot and not refrigerator-cold. Warm rice molds easily and tastes fuller against cool fish, while chilled rice becomes firm and dull. Cover it with a damp towel while you set up your fish and tools so the surface does not dry out. If the rice feels sticky on your hands, that is normal; tezu water will make shaping much easier.
Good slicing turns a beautiful block of fish into supple pieces that drape naturally over the rice. A yanagiba, the long single-bevel Japanese knife used for sushi, is lovely if you own one, but a very sharp chef’s knife is perfectly acceptable at home. The goal is one confident pull cut rather than a sawing motion, which can tear the flesh and make the surface look ragged. If you are learning how to slice sashimi, the same principles apply here: sharp knife, cold fish, clean board, and calm movements.

Use the sharpest knife you have and wipe the blade between cuts with a damp towel. A long blade makes it easier to cut in a single stroke, but sharpness matters more than knife style. Keep the fish cold until just before slicing, because firm fish is easier to handle cleanly. Set a separate cutting board for seafood and keep your workspace tidy to maintain both food safety and focus.
Place the fish so the grain and shape of the block guide your angle, then slice on a slight diagonal to create broad, thin pieces. Each slice should be large enough to cover the rice pillow with a little overhang on the sides. Too thick and it can feel chewy; too thin and it loses its luxurious texture. Aim for pieces around 2 1/2 to 3 inches long and about 1/4 inch thick, adjusting for the fish you have.
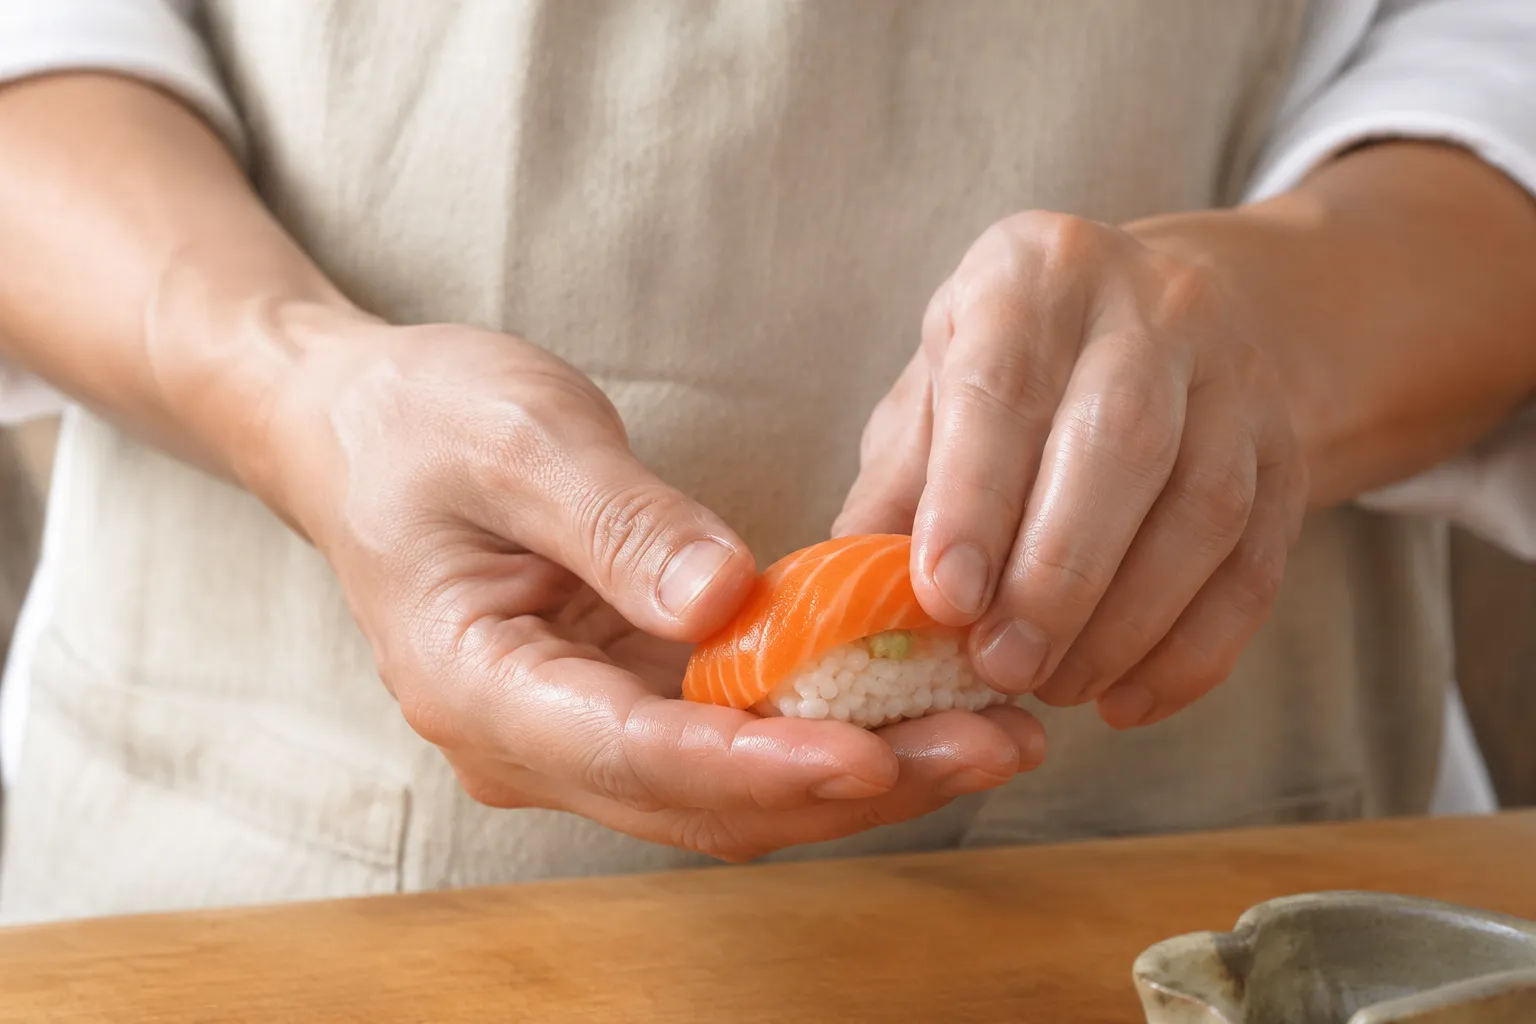
Shaping is less about squeezing and more about guiding the rice into a soft oval that holds together. Dip your fingertips lightly in tezu water, shake off the excess, and pick up a small amount of seasoned rice—about 2 tablespoons. Use your fingers and palm to form an oblong pillow, compact enough to lift but loose enough that it gently breaks apart when eaten. If you press too hard, the rice becomes dense; if you press too little, it will crumble before it reaches the plate.
Add the smallest swipe of wasabi to the underside of the fish, then place the rice on top of it while the fish rests across your fingers. Turn the whole piece over so the fish is on top, then use two fingers to press along the top while your thumb and palm shape the sides. This final press marries fish and rice without flattening either one. After a few pieces, your hands will find a rhythm, and each one will look a little more natural than the last.
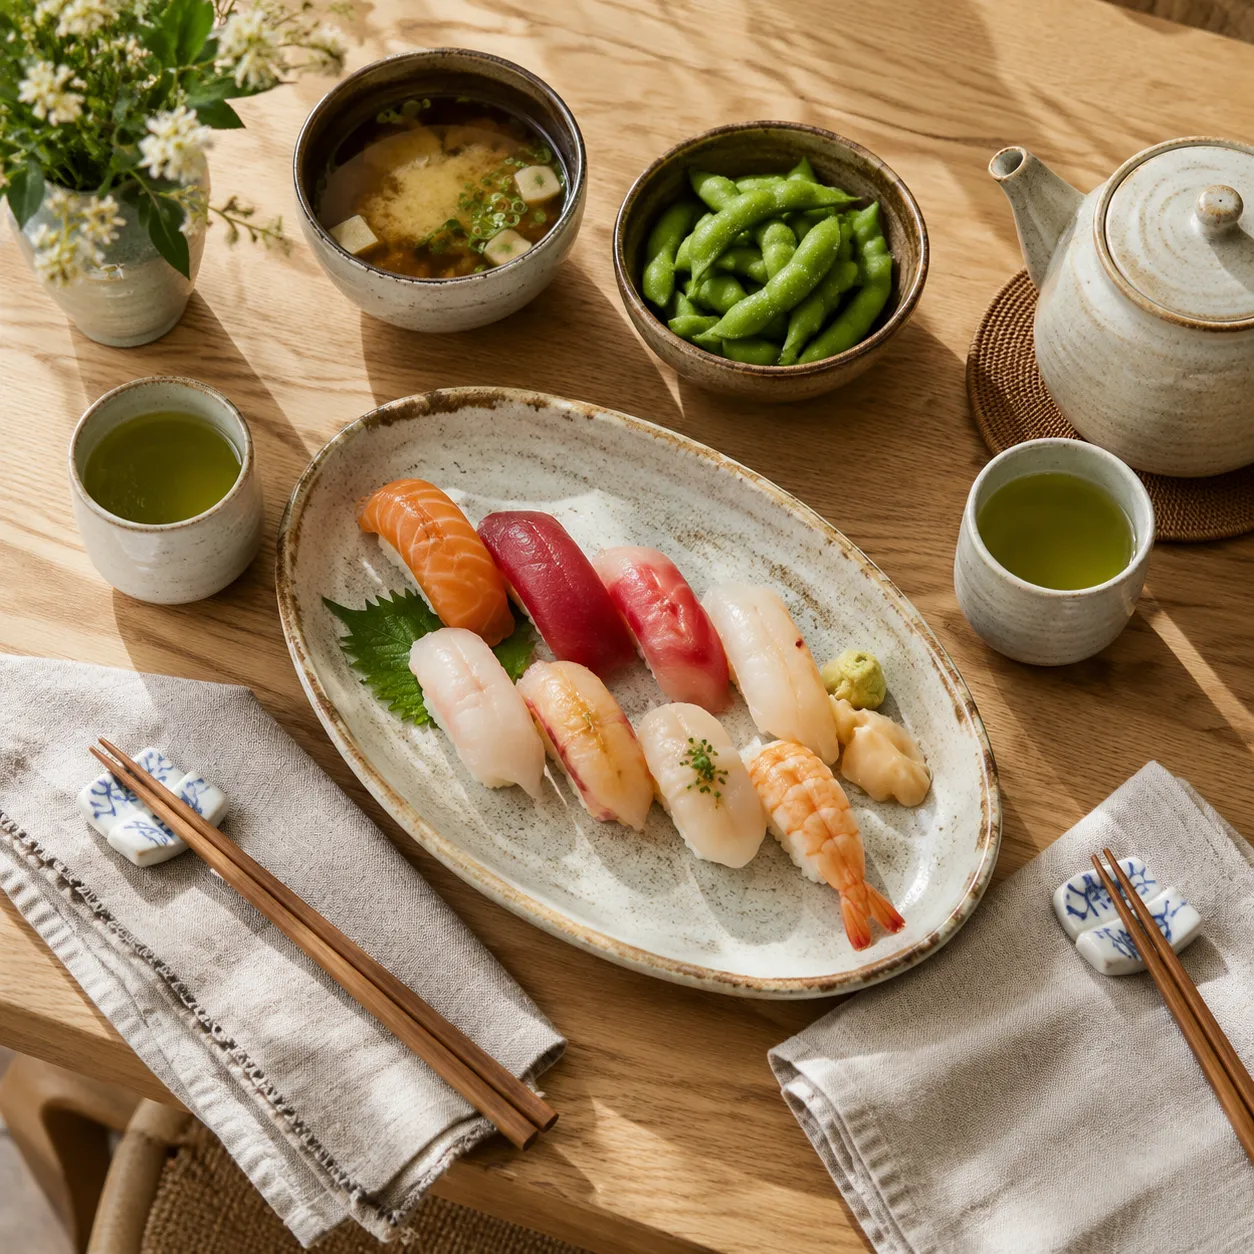
Arrange finished pieces in a simple row or gentle curve on a ceramic plate, slate board, or wooden tray. Keep garnishes minimal: a small mound of pickled ginger, a pea-sized dab of wasabi, and a shallow dish of soy sauce are plenty. For a full Japanese-inspired meal, add edamame, cucumber salad, or a cozy miso soup recipe alongside the sushi. If you like making sauces from scratch, a homemade soy dipping sauce can be a lovely addition, especially when kept light and not too sweet.
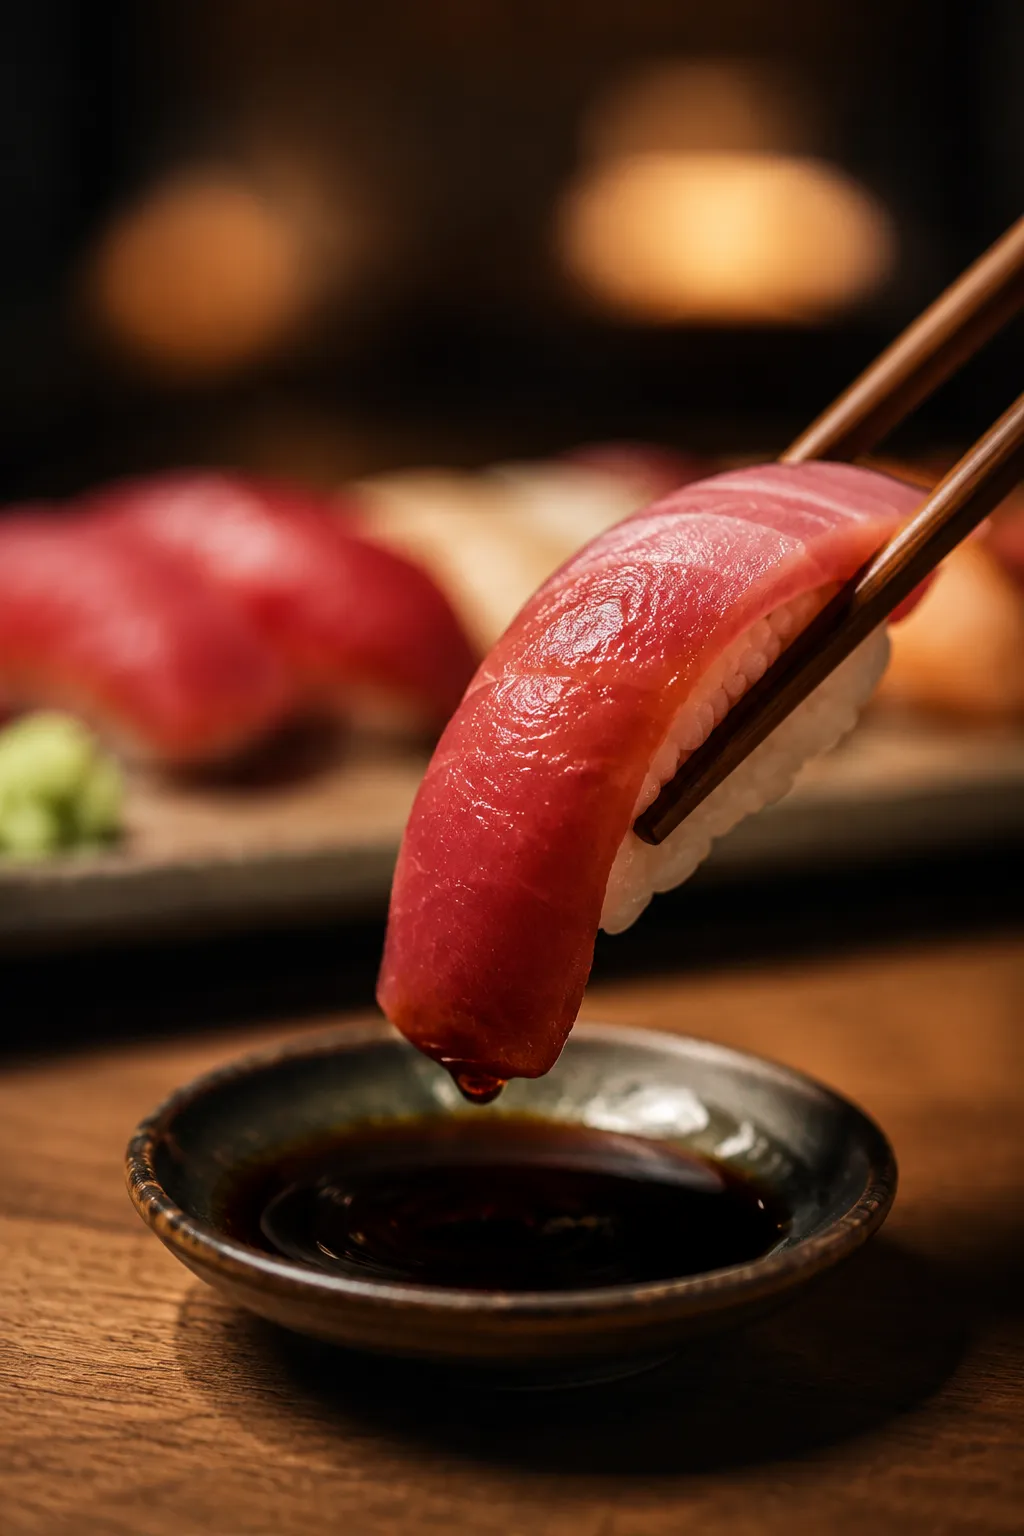
Pick up each piece with clean fingers or chopsticks and turn it fish-side down before dipping. The fish should touch the soy sauce, not the rice, because rice absorbs liquid quickly and can fall apart. Eat each piece in one bite if possible so the topping, wasabi, and seasoned rice land together. Use pickled ginger between different fish varieties to refresh your palate.
Because this meal is delicate, choose sides that feel clean and balanced rather than heavy. Miso soup, steamed edamame, simple greens with sesame dressing, chilled tofu, or a small seaweed salad all work beautifully. If you want to include a roll for guests who prefer something familiar, a spicy tuna roll is an easy companion to a platter of hand-pressed pieces. Green tea, sparkling water, or a crisp dry sake keeps the table feeling light and celebratory.
Raw fish dishes are all about timing, temperature, and sourcing. Keep fish refrigerated until you are ready to slice, work with clean hands and sanitized surfaces, and avoid leaving the finished platter at room temperature for long stretches. If you are serving guests, shape the pieces close to mealtime rather than hours in advance. For anyone pregnant, immunocompromised, elderly, or very young, consider cooked toppings such as shrimp, eel, tamago, or seared fish instead.
Making this style of sushi at home is a small act of attention: rinse the rice well, season it while warm, slice the fish cleanly, and press with a gentle hand. You do not need a restaurant counter or years of training to create a beautiful plate, just good ingredients and a little patience. Once you understand the feel of the rice and the angle of the knife, the process becomes wonderfully meditative. Serve it simply, eat it right away, and let the fresh fish and seasoned rice do what they do best.
This sushi is best eaten immediately after shaping, while the rice is tender and slightly warm and the fish is still cool and glossy. If you absolutely need to hold it, cover the platter loosely and refrigerate for up to 4 hours, understanding that the rice will firm up and the raw fish quality will decline quickly.
Do not leave raw fish sushi at room temperature for more than about 1 hour, especially in a warm kitchen. Leftover raw fish pieces are not ideal for next-day eating; if you anticipate extras, keep the fish and rice separate and assemble only what you plan to serve.