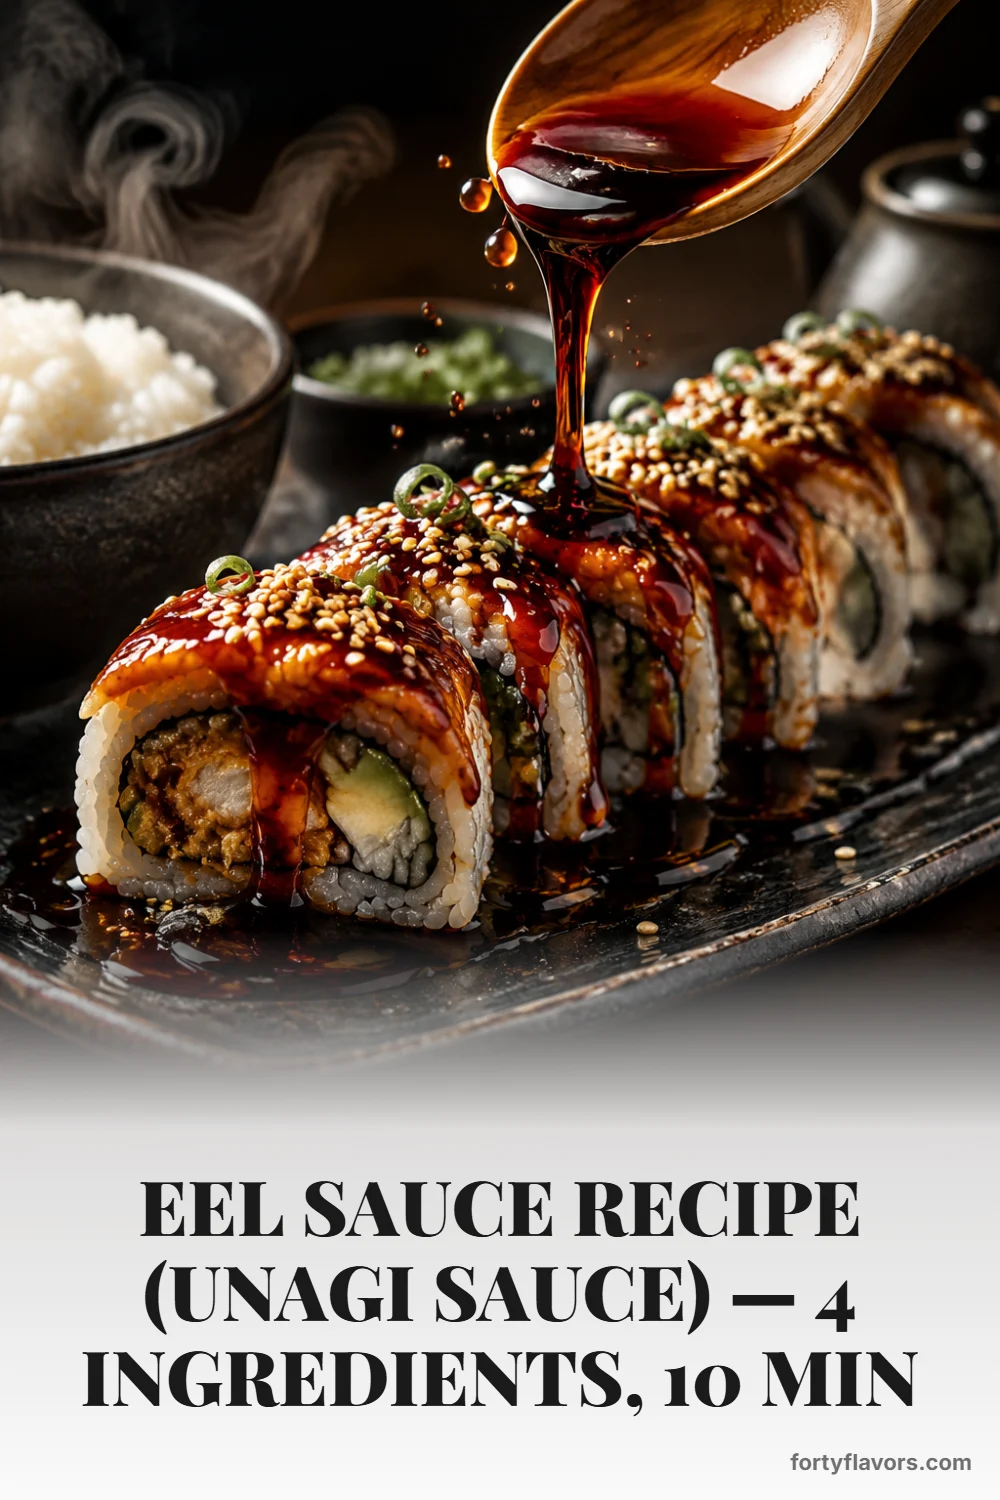

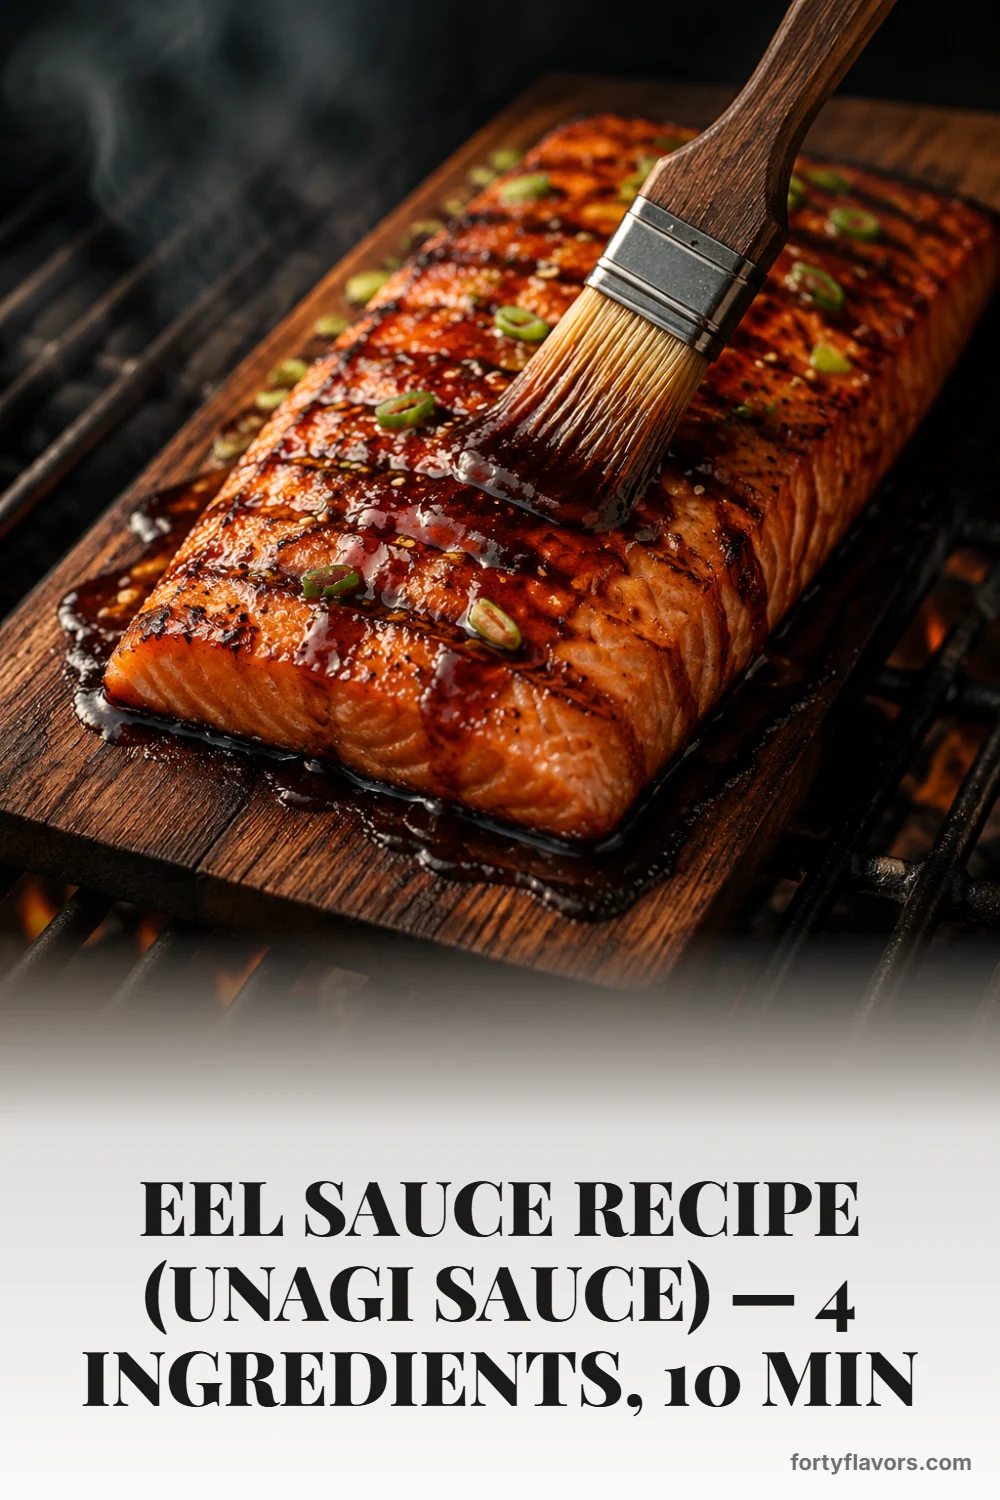
Eel Sauce Recipe (Unagi Sauce) — 4 Ingredients, 10 Min
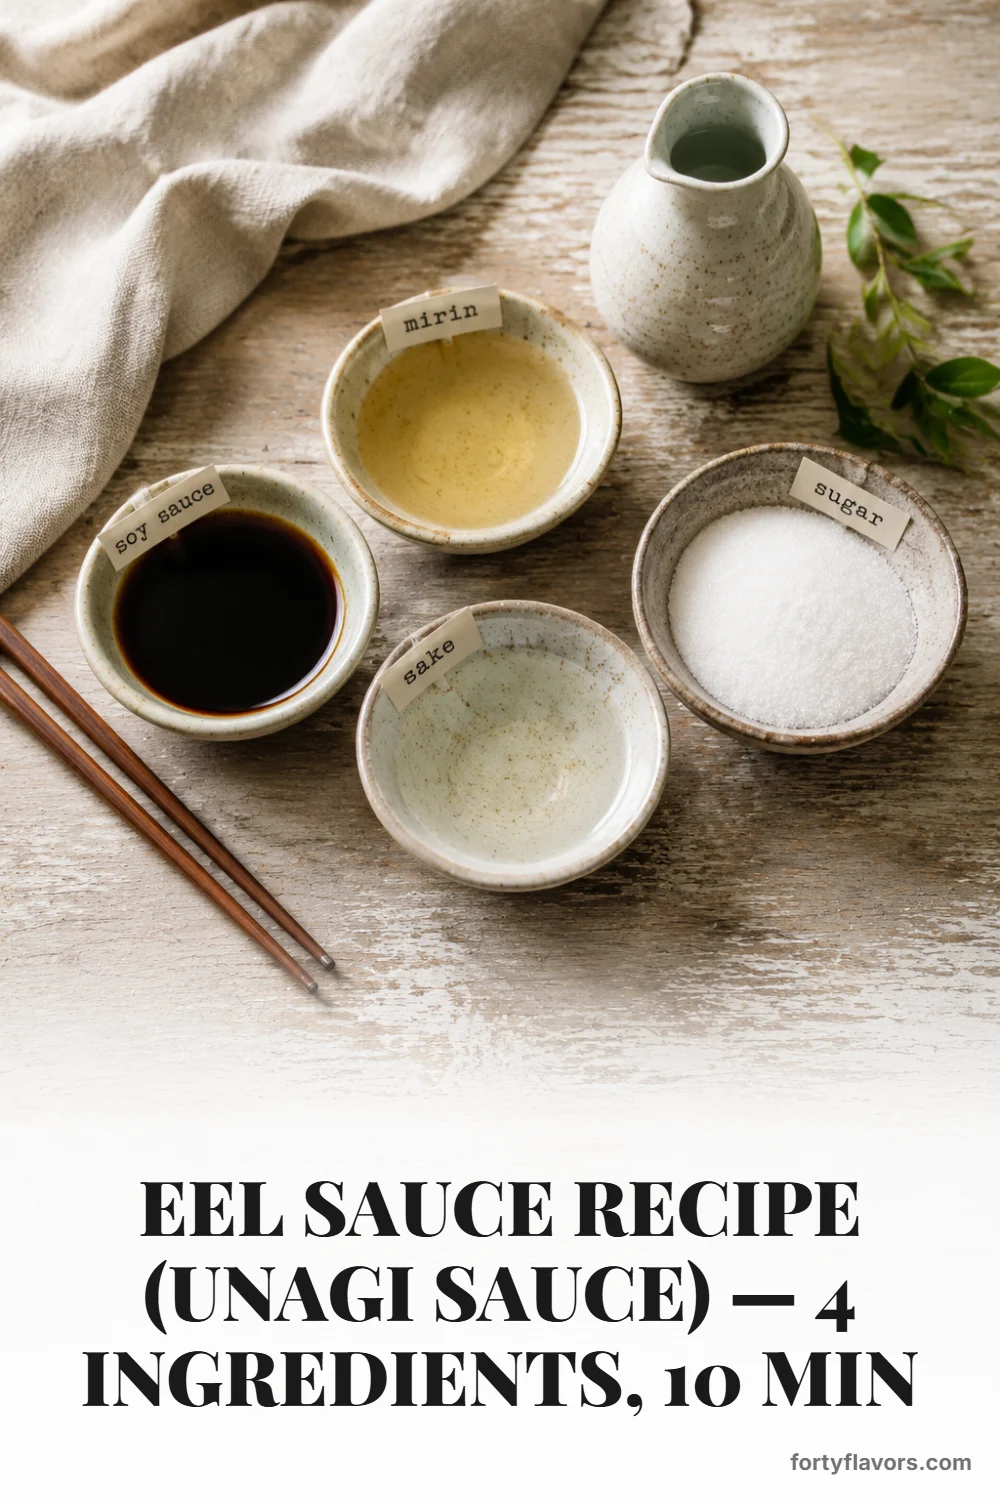
Ingredients
Scale
This homemade eel sauce tastes better than the bottled stuff and comes together with 4 pantry ingredients in under 10 minutes — glossy, sweet, and deeply savory.
Eel sauce is the glossy, sweet-savory Japanese restaurant drizzle that makes sushi rolls, grilled fish, and rice bowls taste instantly more special. If you have ever chased the last mahogany streaks across a takeout tray with a piece of avocado roll, this is that sauce — only fresher, deeper, and made in about 10 minutes with four pantry-friendly ingredients.
This simple eel sauce recipe, also known as unagi sauce or nitsume, reduces soy sauce, mirin, sake, and sugar into a syrupy glaze with big umami energy. It is not complicated, and it does not need cornstarch, bottled shortcuts, or a long simmer. The magic is in letting the mixture bubble just long enough to become shiny, slightly sticky, and pourable.
I love keeping a small jar in the fridge for quick weeknight bowls, salmon, tofu, and homemade sushi nights. A spoonful can make plain sushi rice feel restaurant-level, and it plays beautifully with creamy sauces like spicy mayo for sushi when you want that sweet-heat finish. Think of it as your tiny bottle of sushi-bar confidence.
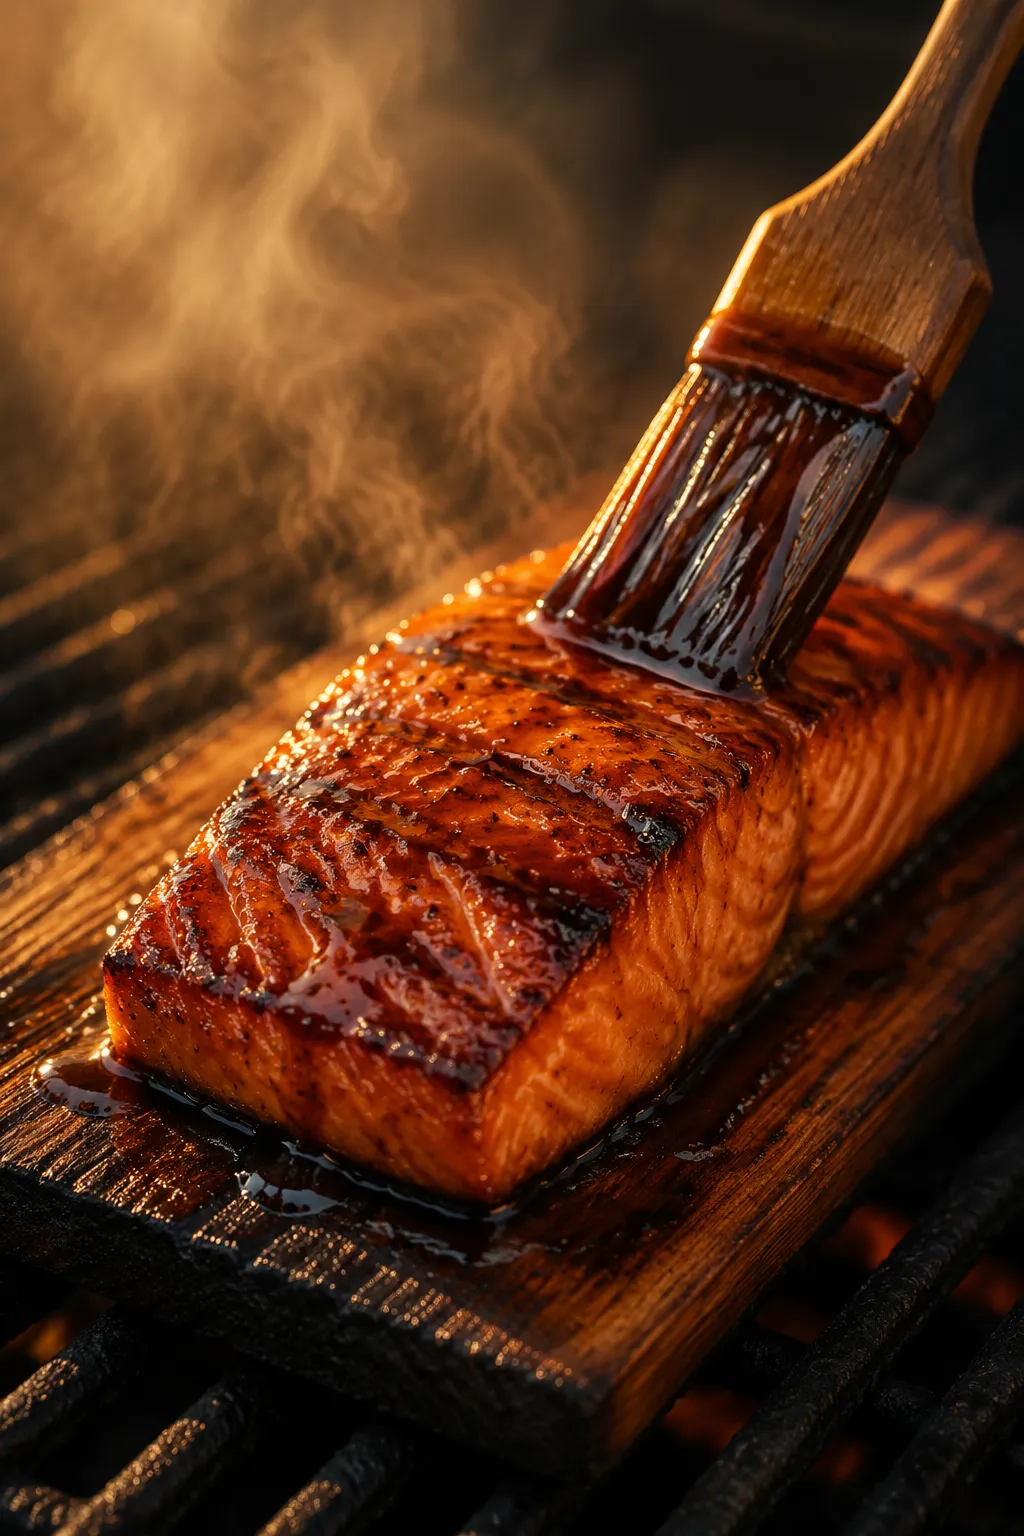
In Japanese cooking, this dark, glossy glaze is most famously brushed over grilled freshwater eel, or unagi, which is where the English name comes from. You may also see it called nitsume, a reduced sauce traditionally used for eel and certain sushi preparations, or unagi no tare, which refers to the seasoning sauce for unagi. The classic profile is sweet, salty, and deeply savory, with a texture somewhere between maple syrup and a light glaze.
Despite the name, the sauce does not contain eel. It is named for how it is used, not what is in it, much like barbecue sauce does not contain barbecue. The basic formula is built on soy sauce for salt and umami, mirin for sweetness and gloss, sake for aroma and balance, and sugar for body. As it reduces, those ingredients concentrate into a dark, lacquered sushi sauce that clings beautifully to fish, rice, and vegetables.
It is often compared to teriyaki, and the two sauces do share a soy-sugar backbone. But homemade teriyaki sauce usually stays a little looser and may include ginger, garlic, or other aromatics, while this glaze is cleaner, darker, and more concentrated. That simplicity is exactly why it tastes so familiar on dragon rolls, unagi nigiri, and takeout-style bowls.
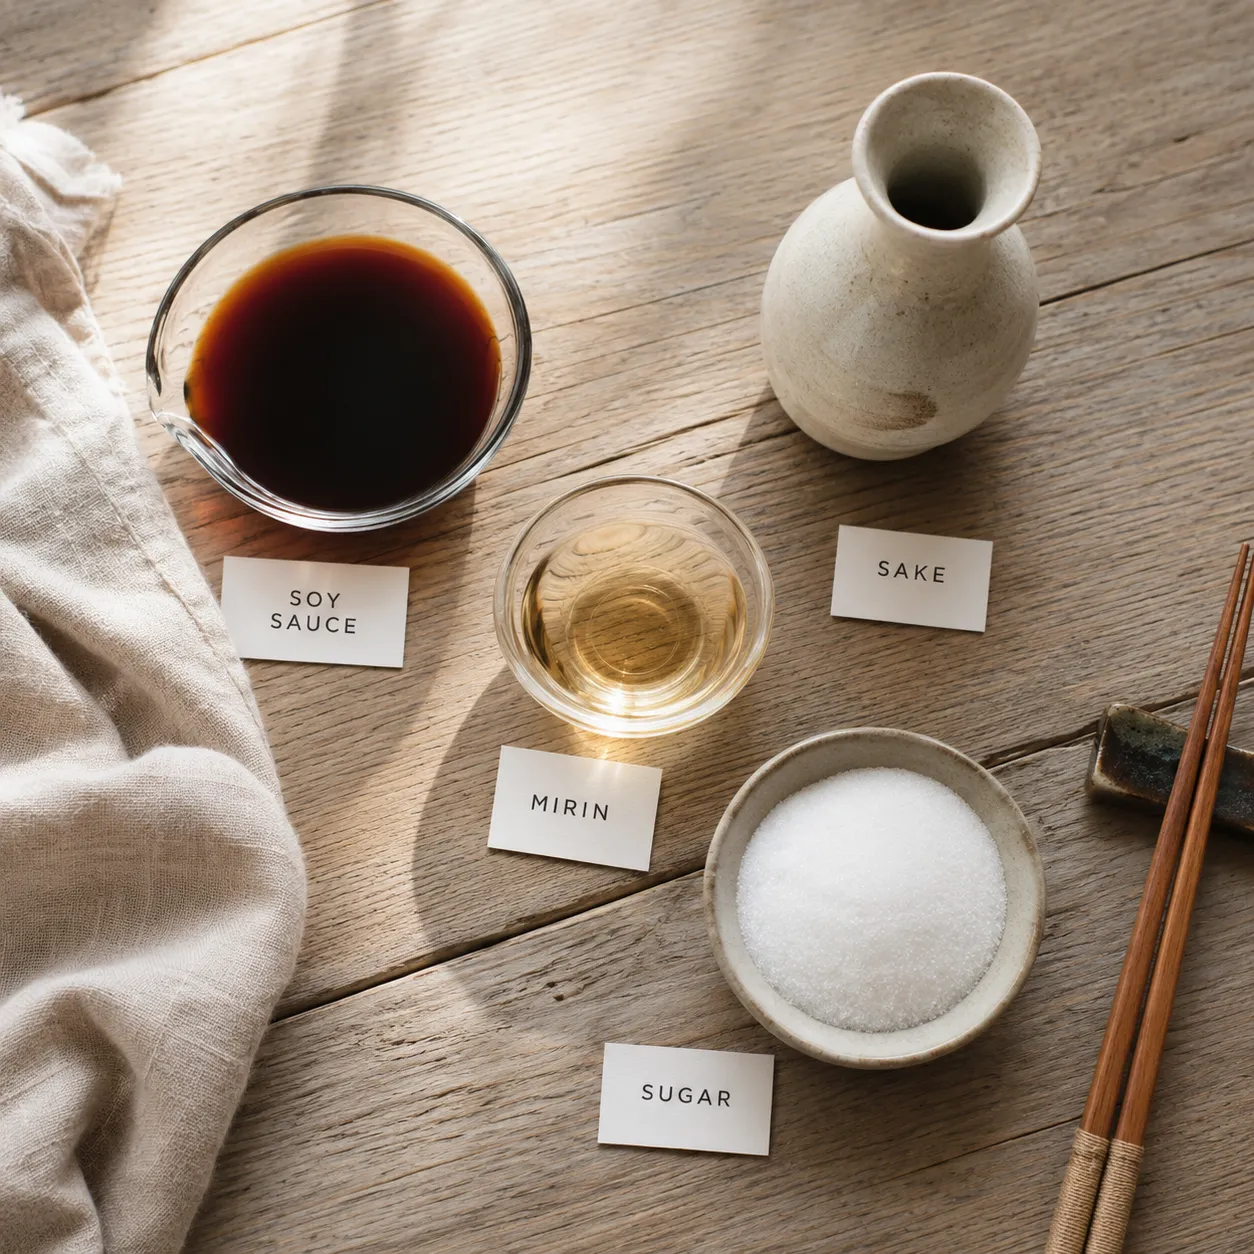
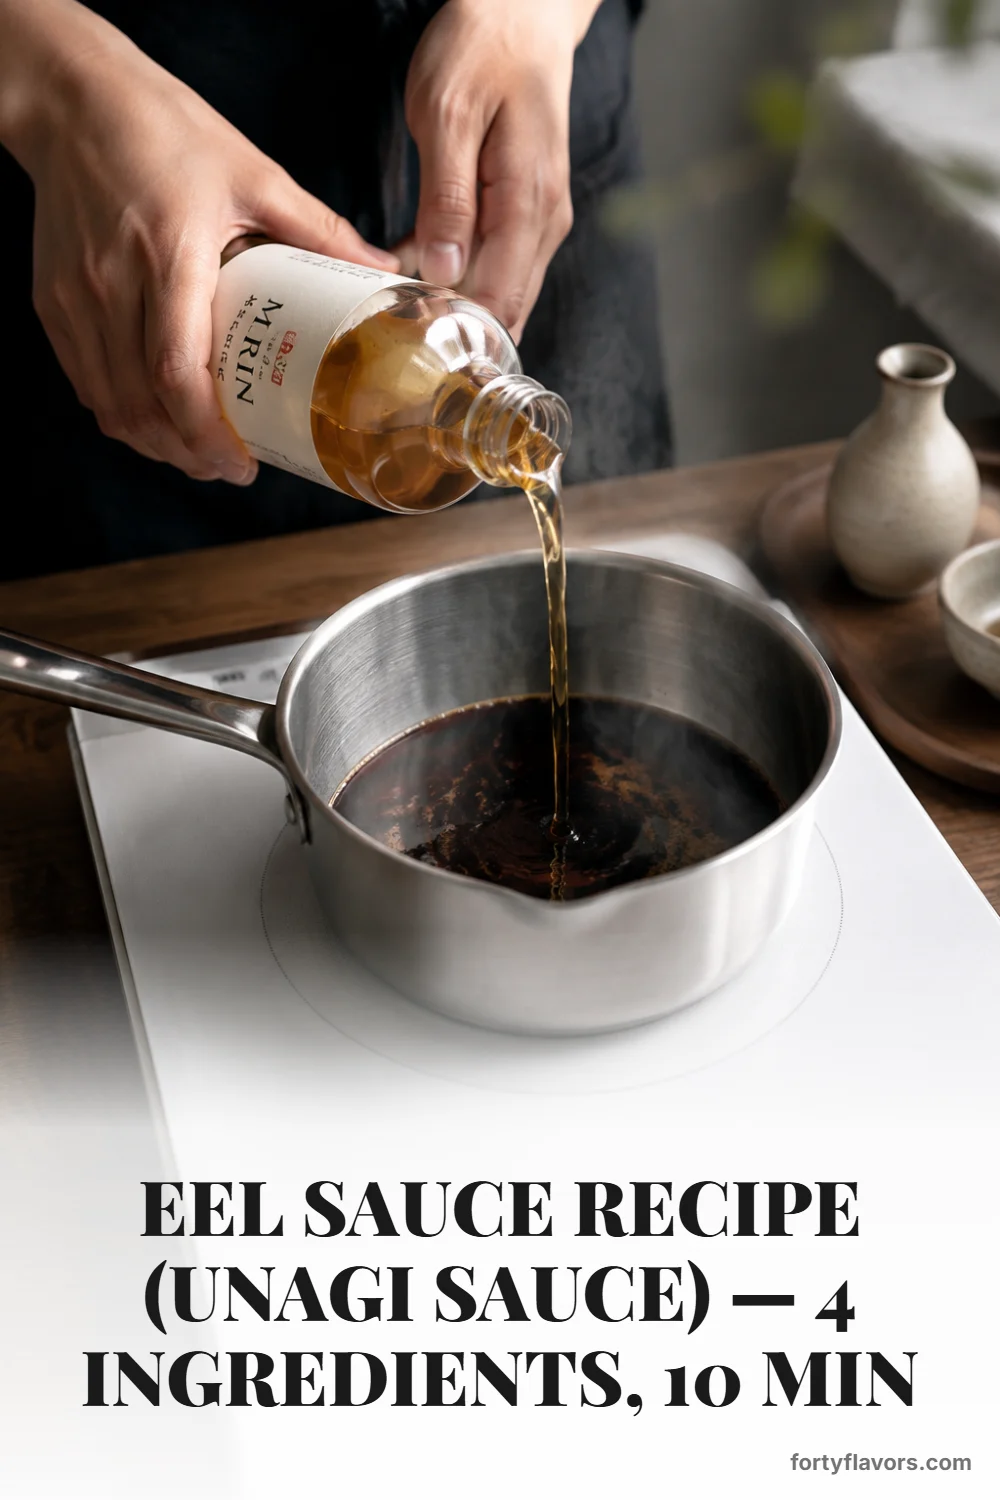
You only need four ingredients for the base, which is one reason this recipe is so satisfying to make at home. Choose a good everyday soy sauce, because it forms the backbone of the glaze. Japanese-style soy sauce such as Kikkoman works well here: salty, rounded, and not overly harsh once reduced. If you are cooking gluten-free, use tamari in the same amount and check that your other ingredients are certified gluten-free.
Mirin brings gentle sweetness, a little acidity, and that signature sheen. Look for hon mirin if you can find it, but aji-mirin will also work in a practical home kitchen. Sake adds fragrance and keeps the sweetness from tasting flat; as it simmers, the alcohol cooks off and leaves behind a subtle depth. If you avoid alcohol completely, you can use water plus a tiny splash of rice vinegar, though the flavor will be less rounded.
Sugar is what helps the sauce reduce into a glossy ribbon rather than a thin salty liquid. White sugar gives the cleanest restaurant-style finish, while light brown sugar adds a faint molasses note that is delicious with grilled salmon or chicken. Some cooks like to add a small splash of dashi for extra savoriness, but it is optional and not needed for a classic four-ingredient version. Keep the formula simple the first time, then adjust future batches based on how you like to use it.
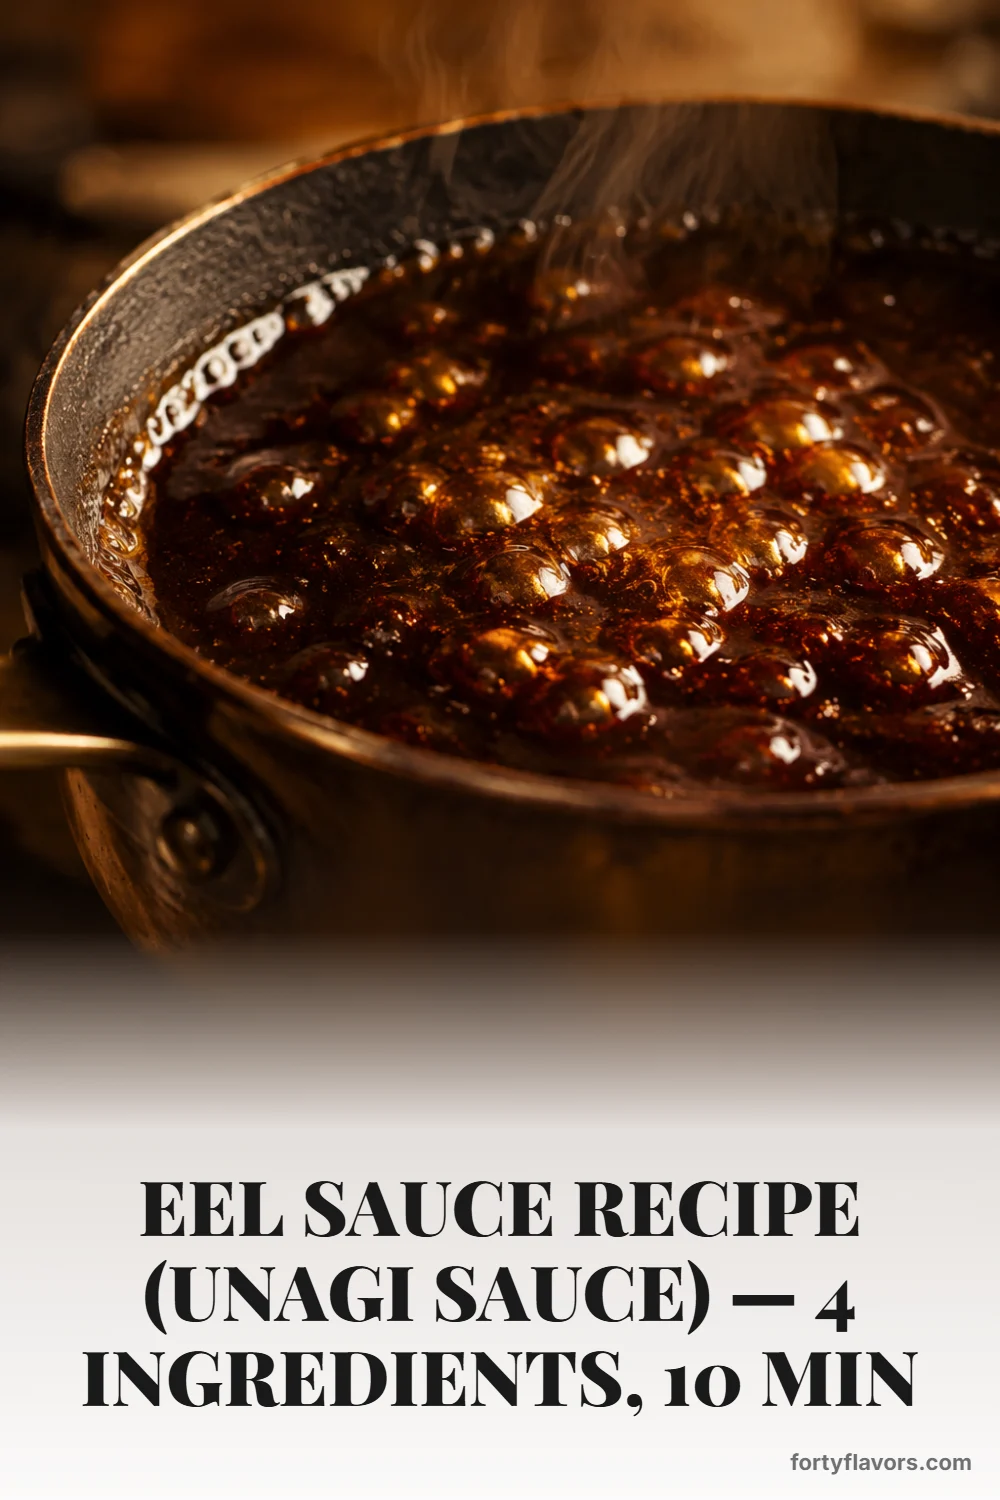
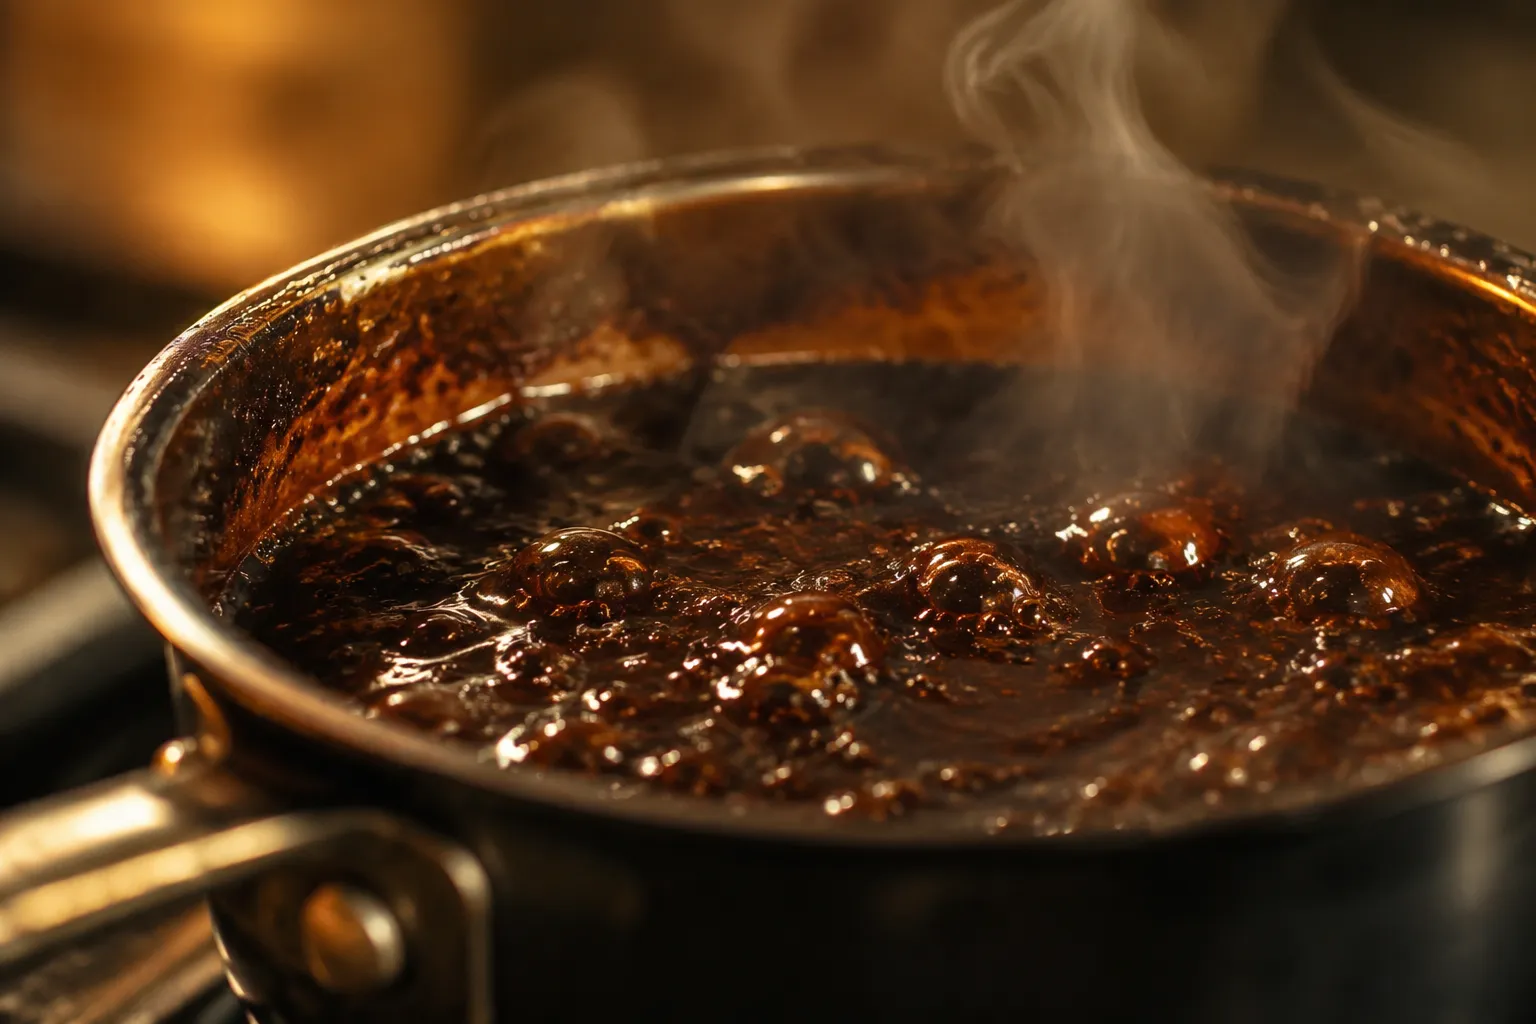
The method is wonderfully low-effort: combine, simmer, reduce, and cool. Use a small saucepan with enough room for the mixture to bubble, because sugar-based sauces can rise a bit as they heat. Stir everything together before turning on the burner so the sugar begins dissolving evenly. Once the mixture comes to a gentle boil, reduce the heat to a steady simmer rather than an aggressive rolling boil.
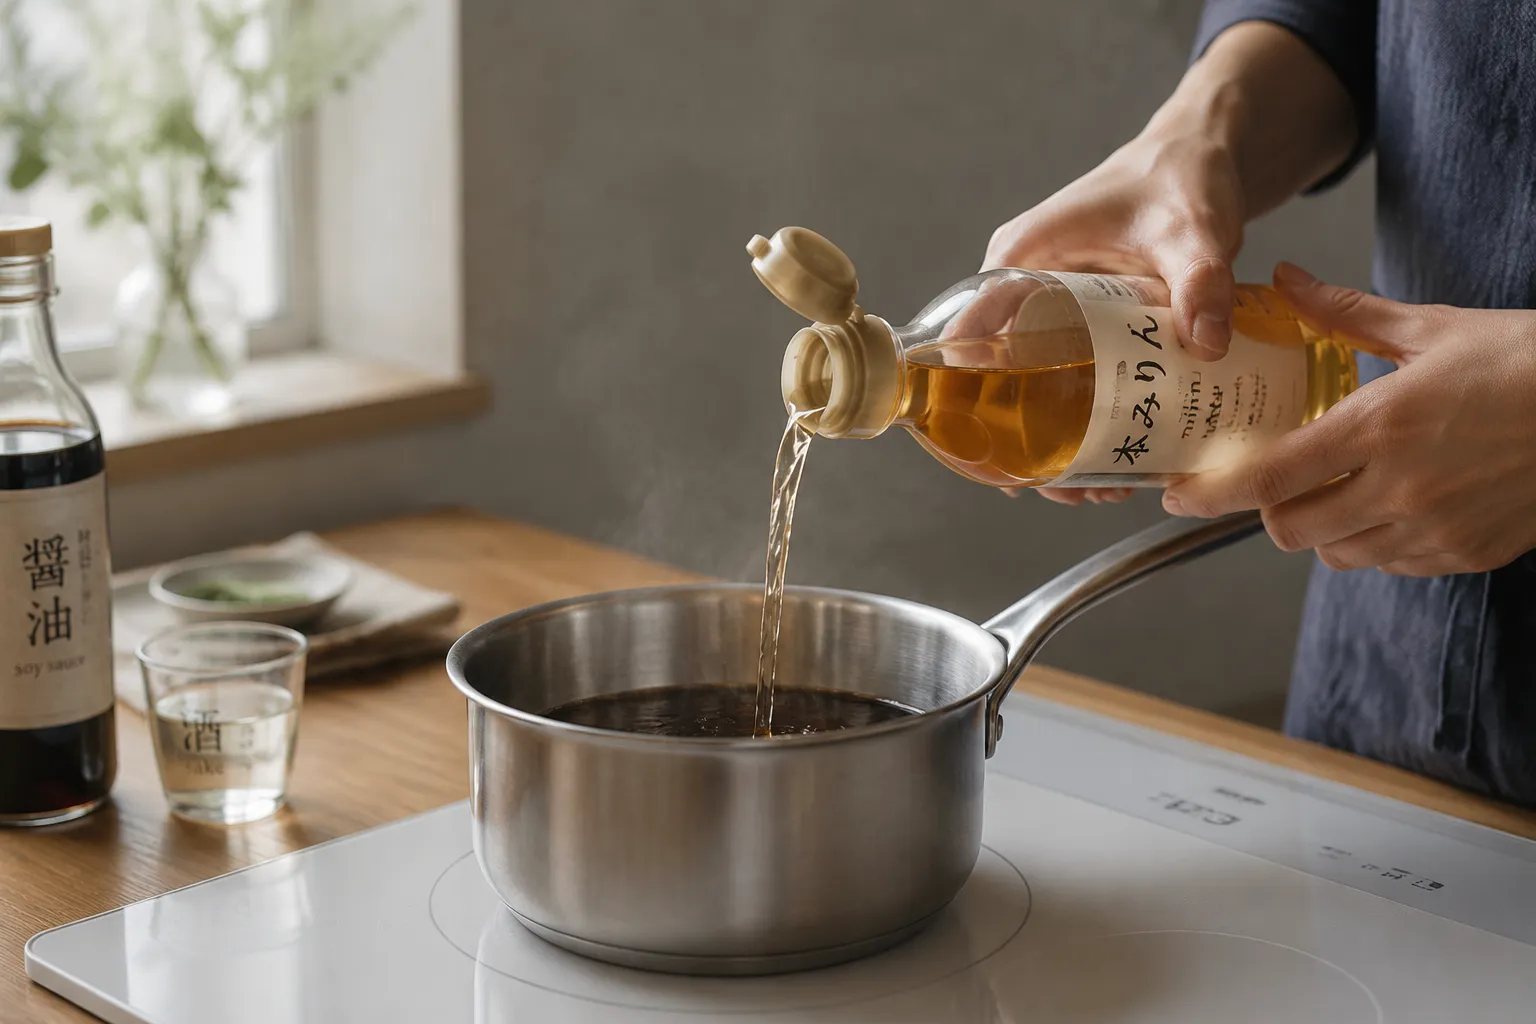
The reduction stage is where the flavor and texture develop. In about 6 to 8 minutes, the liquid will darken, the bubbles will look slower and glossier, and the sauce will lightly coat the back of a spoon. It may still seem a little thin in the pan, but remember that it thickens as it cools. Pull it off the heat when it looks like warm maple syrup, not hot caramel.
If you reduce it too far, do not panic. Whisk in a teaspoon or two of water while it is still warm to loosen it back to a drizzleable texture. If it is too thin after cooling, return it to the pan and simmer for another minute. This flexibility is part of what makes this eel sauce recipe so forgiving for weeknight cooking.
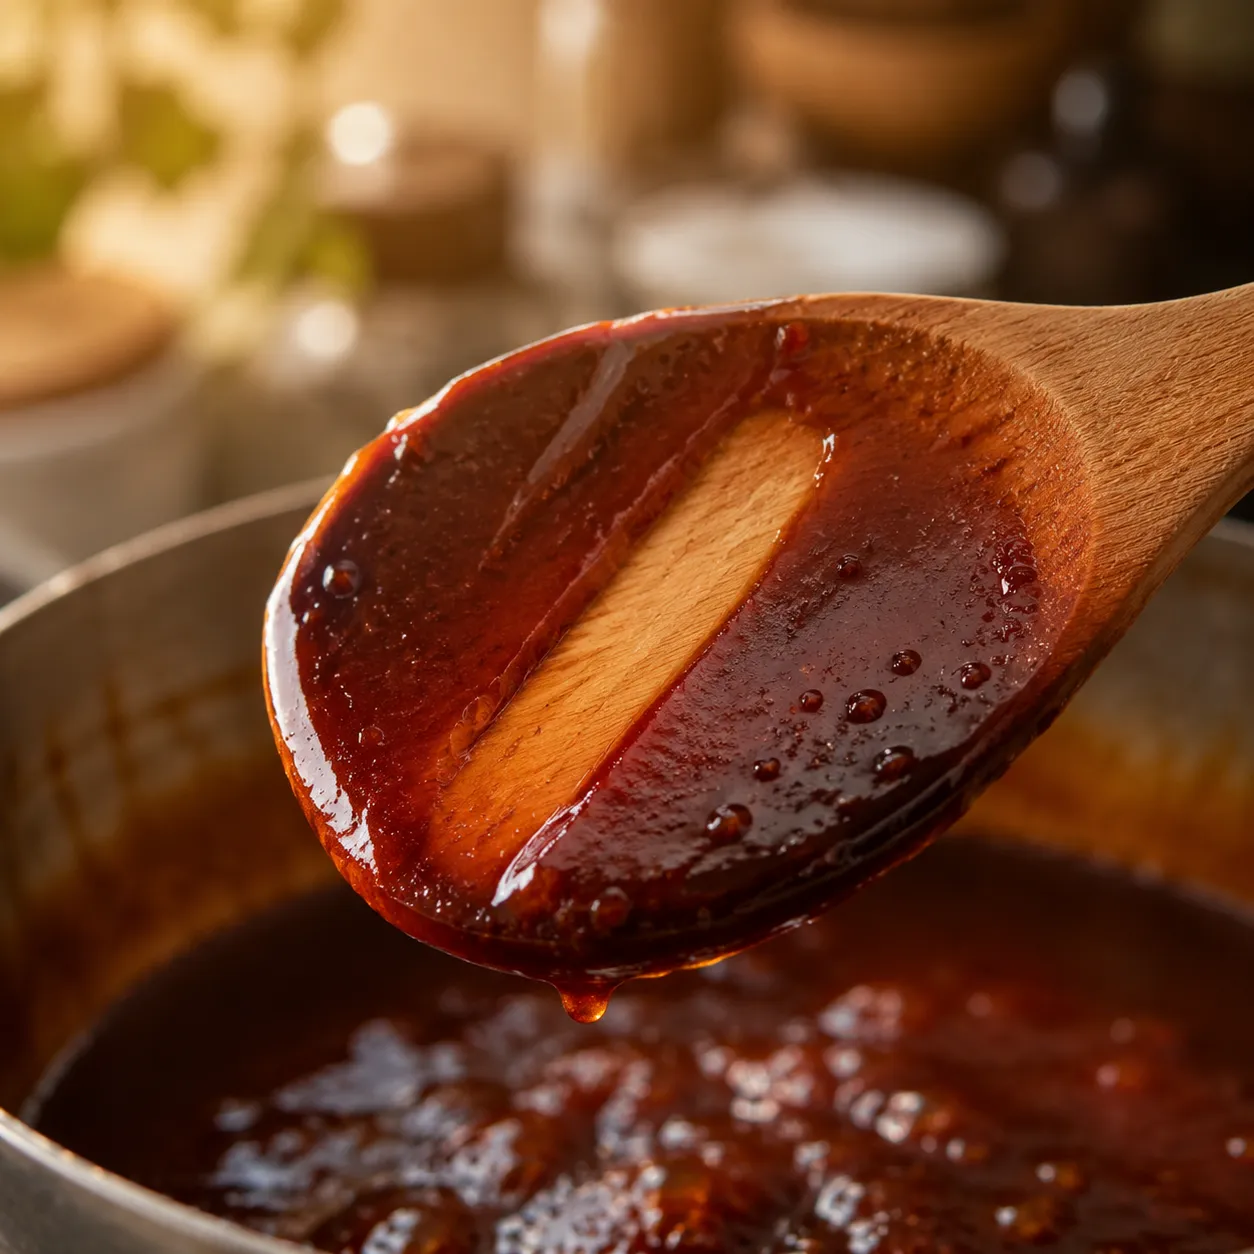
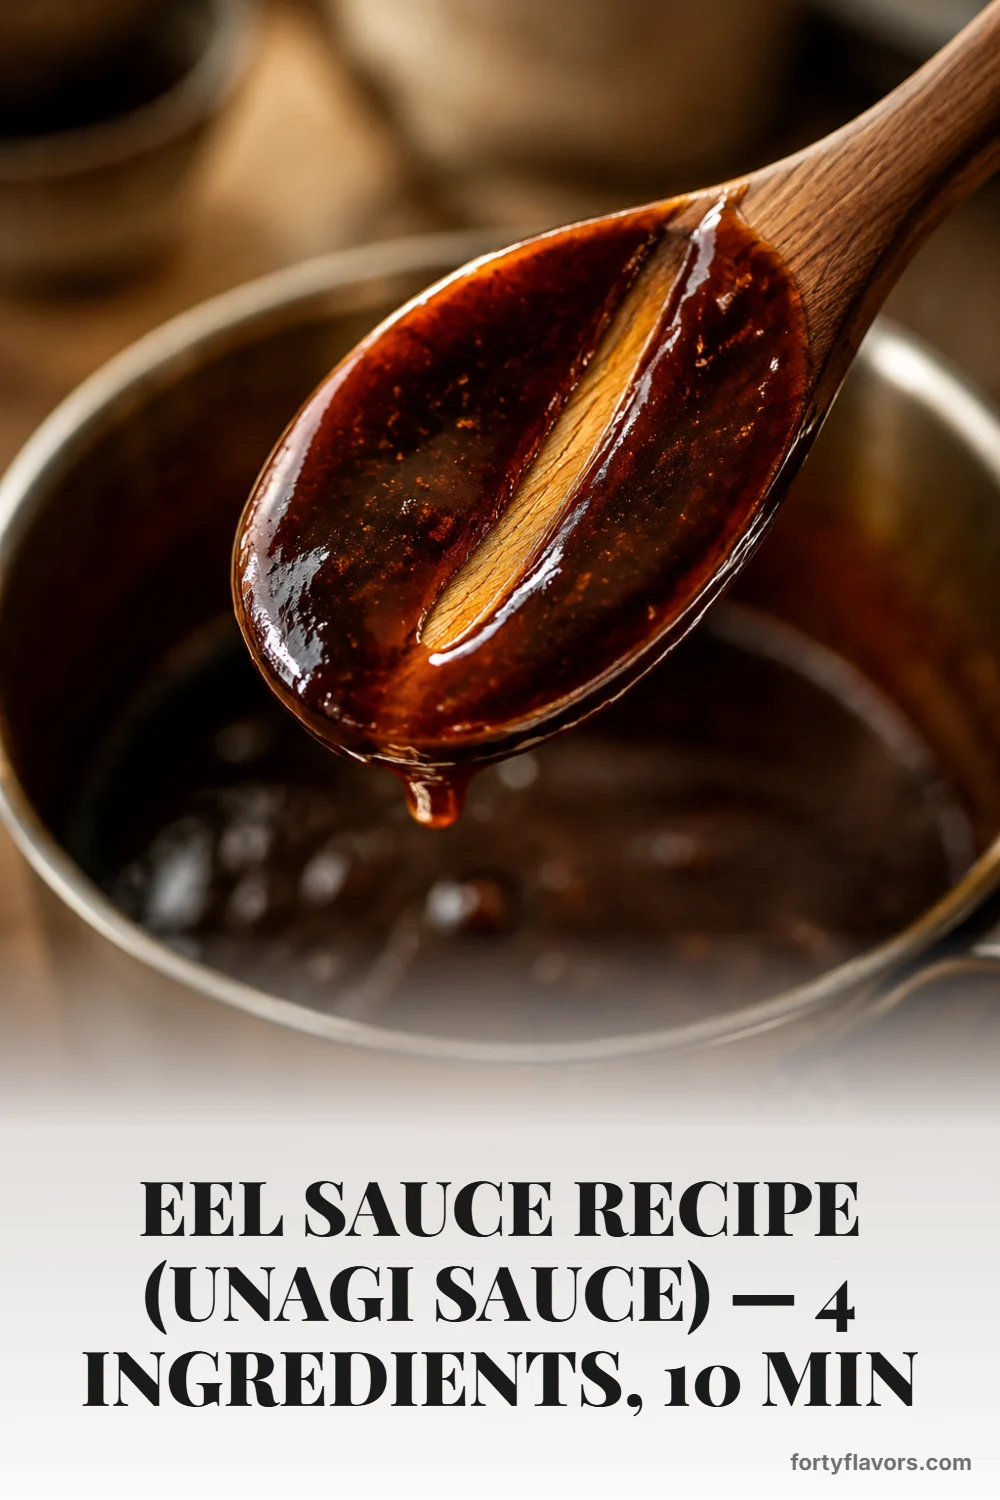
Once the sauce is off the heat, let it cool for a few minutes before pouring it into a clean jar. The color should be deep mahogany, and the texture should fall from a spoon in a smooth, shiny ribbon. I like to taste it once cooled because the saltiness and sweetness are more obvious at room temperature than when hot. If you want a softer finish, stir in a teaspoon of water; if you want a more intense glaze, simmer it just a touch longer next time.
The biggest difference between homemade and bottled versions is freshness. Bottled sauces can be convenient, but they are often overly sweet, very thick, or slightly dull from stabilizers and long storage. Here, the flavor is concentrated but clean: salty soy, sweet mirin, aromatic sake, and just enough sugar to create that signature lacquer. It tastes like the drizzle from your favorite sushi spot, only warmer and more alive.
The short ingredient list also makes the balance easy to control. Want it more savory? Add a splash more soy next time. Prefer it sweeter for chicken skewers or tofu? Use brown sugar or add one extra teaspoon of sugar. Because there are no thickeners, the texture comes from reduction alone, which gives the sauce a silky, natural finish instead of a gummy one.
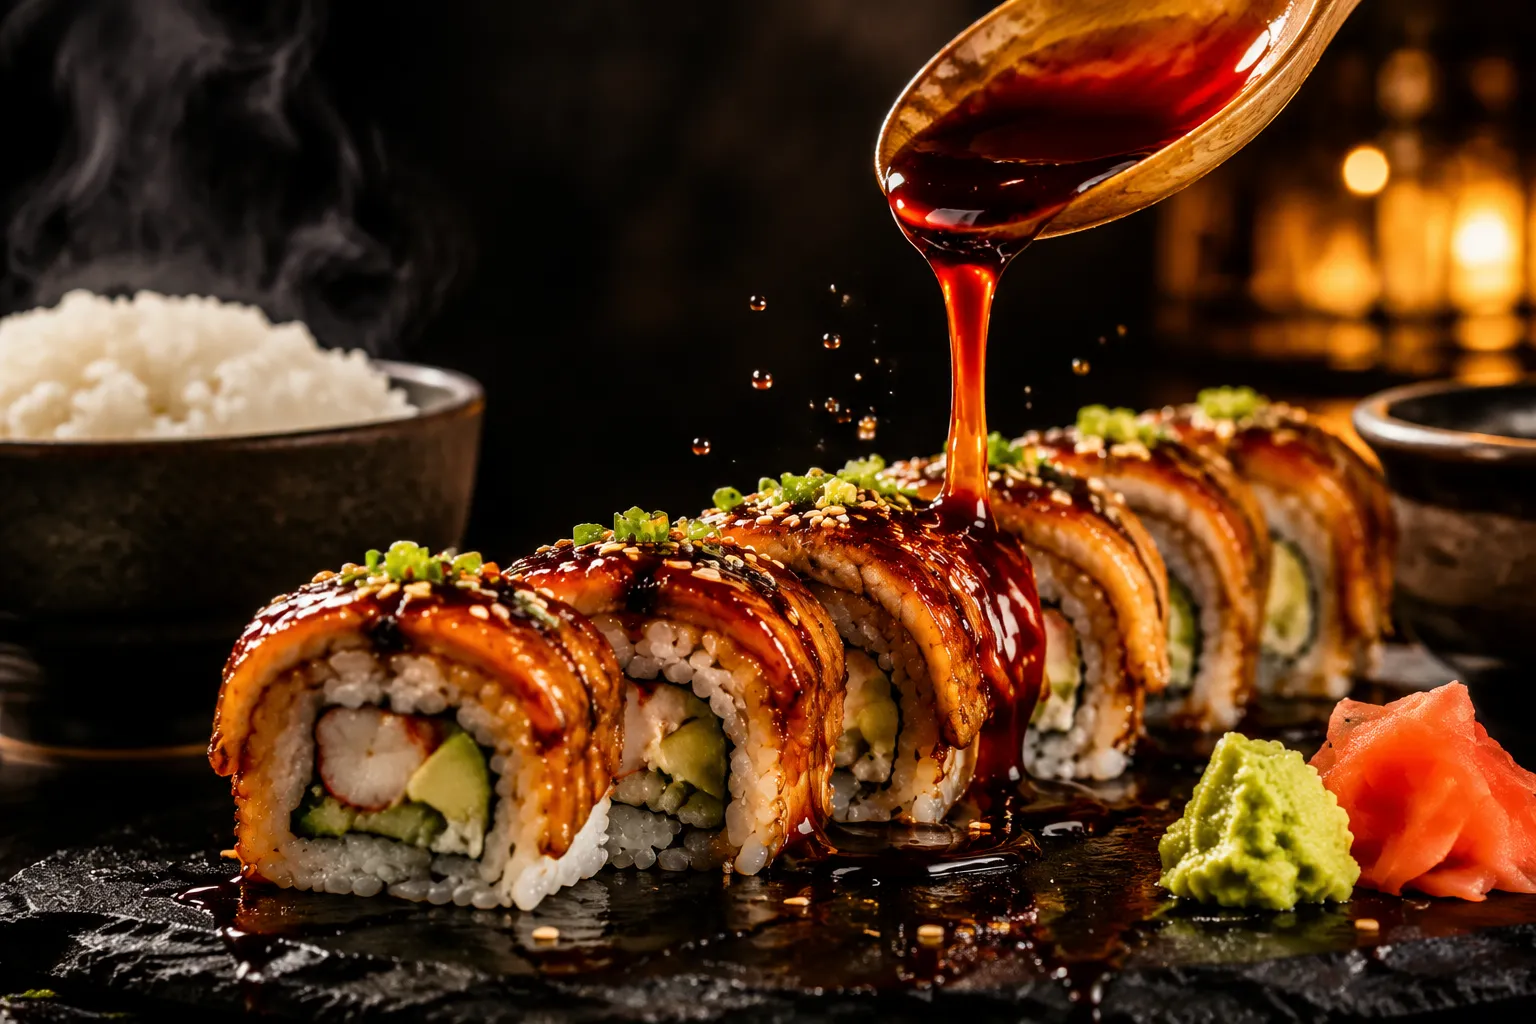
This is also a lovely make-once, use-all-week kind of condiment. A small jar can carry you through sushi bowls, roasted vegetables, quick lunches, and broiled fish. Spoon it over avocado, cucumber, or crispy tofu and suddenly the simplest plate feels intentional. That little bit of shine goes a long way.
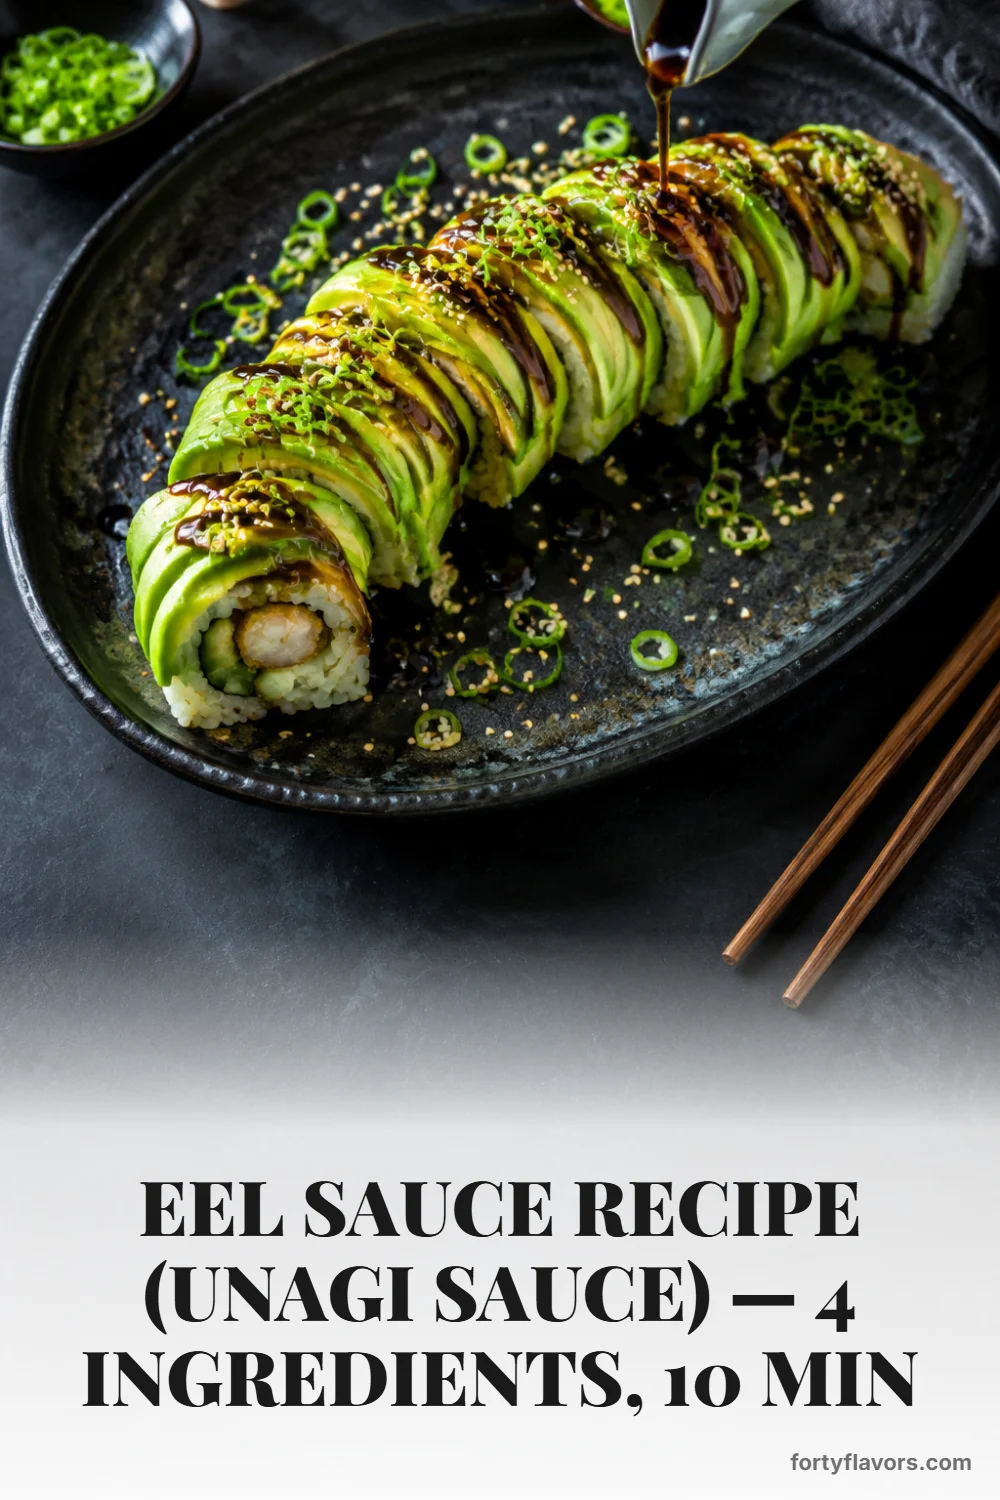
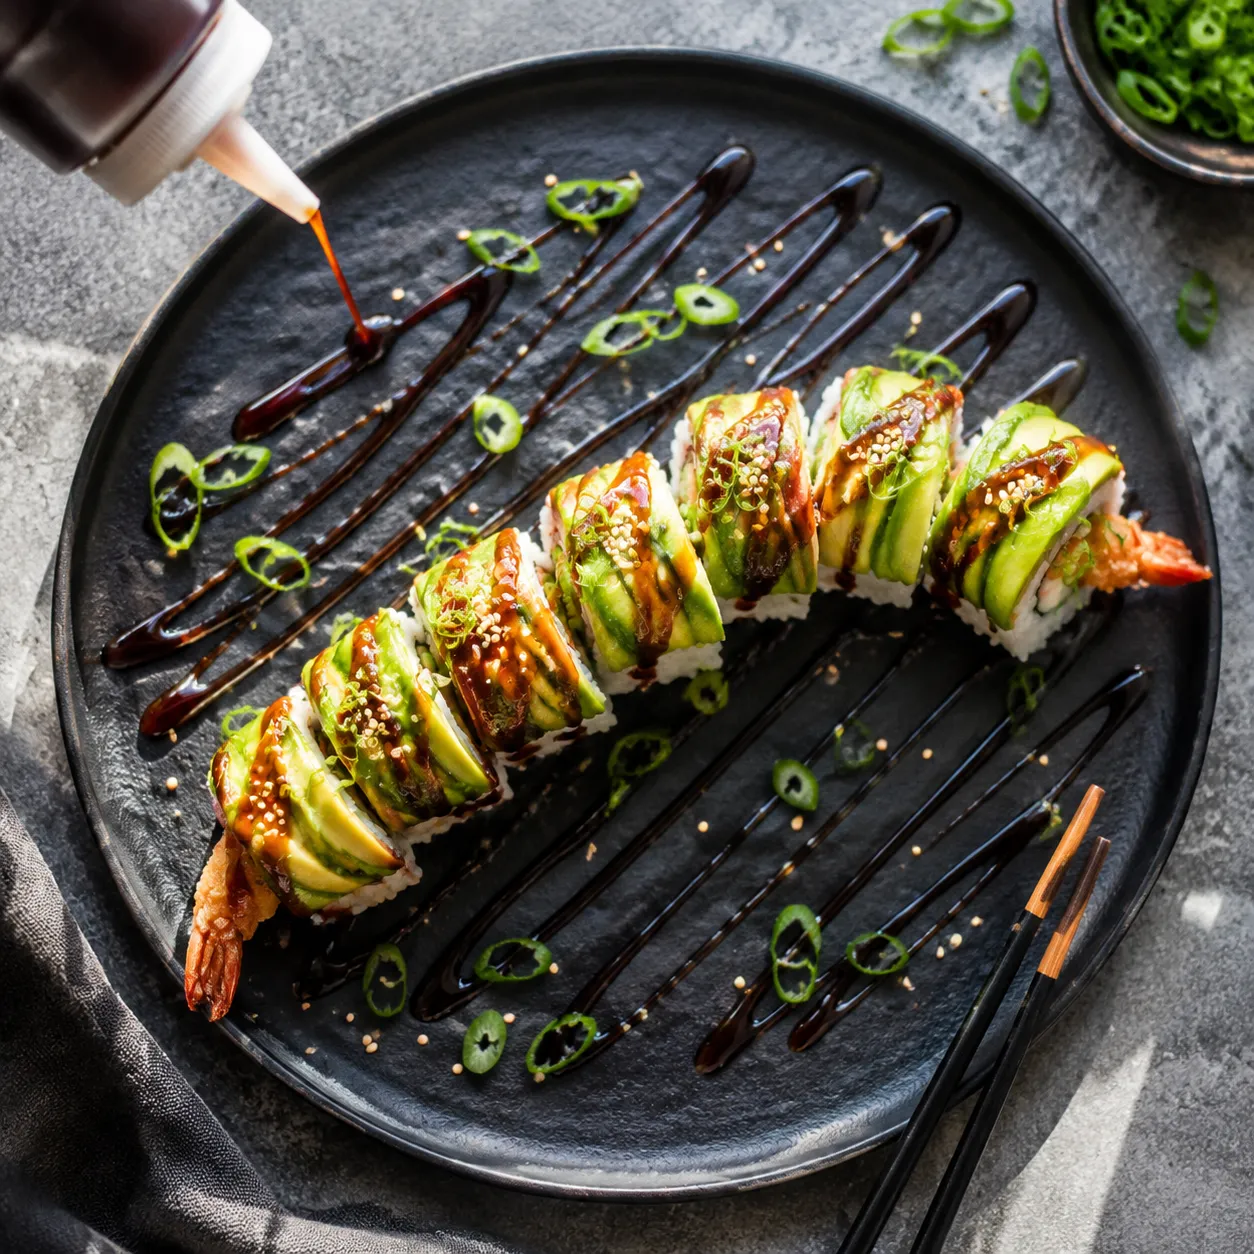
The most obvious use is sushi night. Drizzle it over maki rolls, nigiri, hand rolls, or a homemade salmon sushi bake for the sticky-sweet finish you expect from takeout. It is especially good with rich fish, creamy avocado, cucumber, imitation crab, shrimp tempura, and anything wrapped in crisp nori. A small squeeze bottle makes the prettiest thin lines, but a spoon works just fine.
It is also wonderful brushed over grilled or broiled proteins. Try it with salmon in the last minute or two of cooking so the glaze warms and shines without burning. Chicken thighs, shrimp skewers, and crispy tofu all take beautifully to the sweet-salty finish. If you are making unagi don, this is the sauce you want spooned over the eel and rice just before serving.
For bowls, use it as the finishing drizzle that ties everything together. Start with warm rice, add roasted vegetables, cucumbers, edamame, fish, tofu, or a jammy egg, then finish with the sauce and sesame seeds. It is also excellent next to creamy condiments: a zigzag of yum yum sauce gives hibachi-style richness, while spicy mayo brings heat and body. The contrast of glossy, salty-sweet glaze and creamy sauce is exactly why restaurant sushi rolls taste so craveable.
Because this sauce thickens as it cools, visual cues matter more than the timer. In the pan, look for slower bubbles, a slightly reduced volume, and a surface that appears shiny rather than watery. Dip in a spoon and run your finger carefully across the back; if the line holds for a moment, you are close. It should pour easily while warm and settle into a thicker ribbon once cooled.
If you plan to use it for sushi, keep it a little looser so it drizzles cleanly. If you are glazing grilled fish or chicken, reduce it slightly more so it clings to the surface. The difference can be as little as 30 to 60 seconds on the stove, so stay nearby once it begins to look syrupy. A small saucepan helps the liquid reduce efficiently without needing a long cook time.
For a simple sushi-inspired dinner, make a pot of seasoned rice, slice cucumbers and avocado, and set out nori sheets, sesame seeds, pickled ginger, and wasabi. Add salmon, shrimp, tofu, or crab stick, then let everyone build bowls or hand rolls at the table. A drizzle of eel sauce turns those simple ingredients into something that feels special without requiring restaurant-level knife skills.
This sauce also loves leftovers. Spoon it over cold rice with flaked salmon, warm it over a skillet of vegetables, or brush it onto broiled eggplant for a fast savory-sweet side. It is bold enough that you only need a little, which makes it a smart way to wake up plain ingredients. Keep the rest sealed in glass jars, and future you will be very happy when lunch needs a quick upgrade.
Once you make it from scratch, it is hard to go back to the bottled version. The flavor is clearer, the texture is silkier, and the ingredient list is refreshingly short. Whether you are building a sushi platter, glazing salmon, or finishing a quick rice bowl, this little jar of eel sauce brings the restaurant moment home.
This classic version is intentionally simple, but it is easy to tailor depending on how you plan to serve it. Keep the core ratio intact the first time, then use these small adjustments for different flavor profiles.
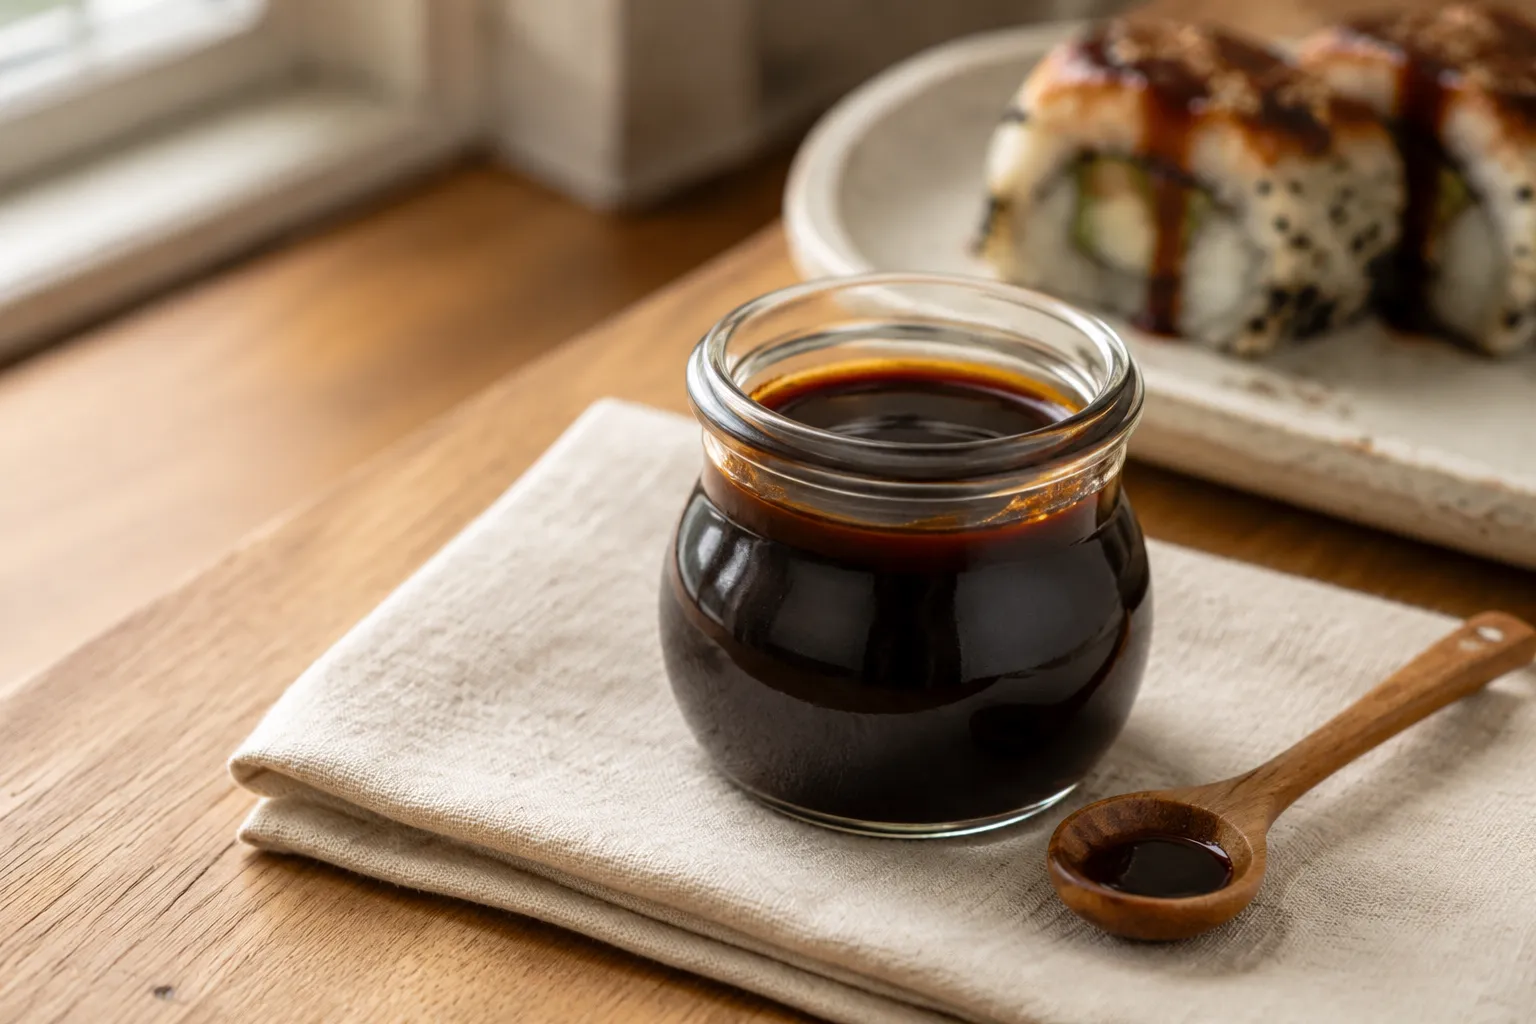
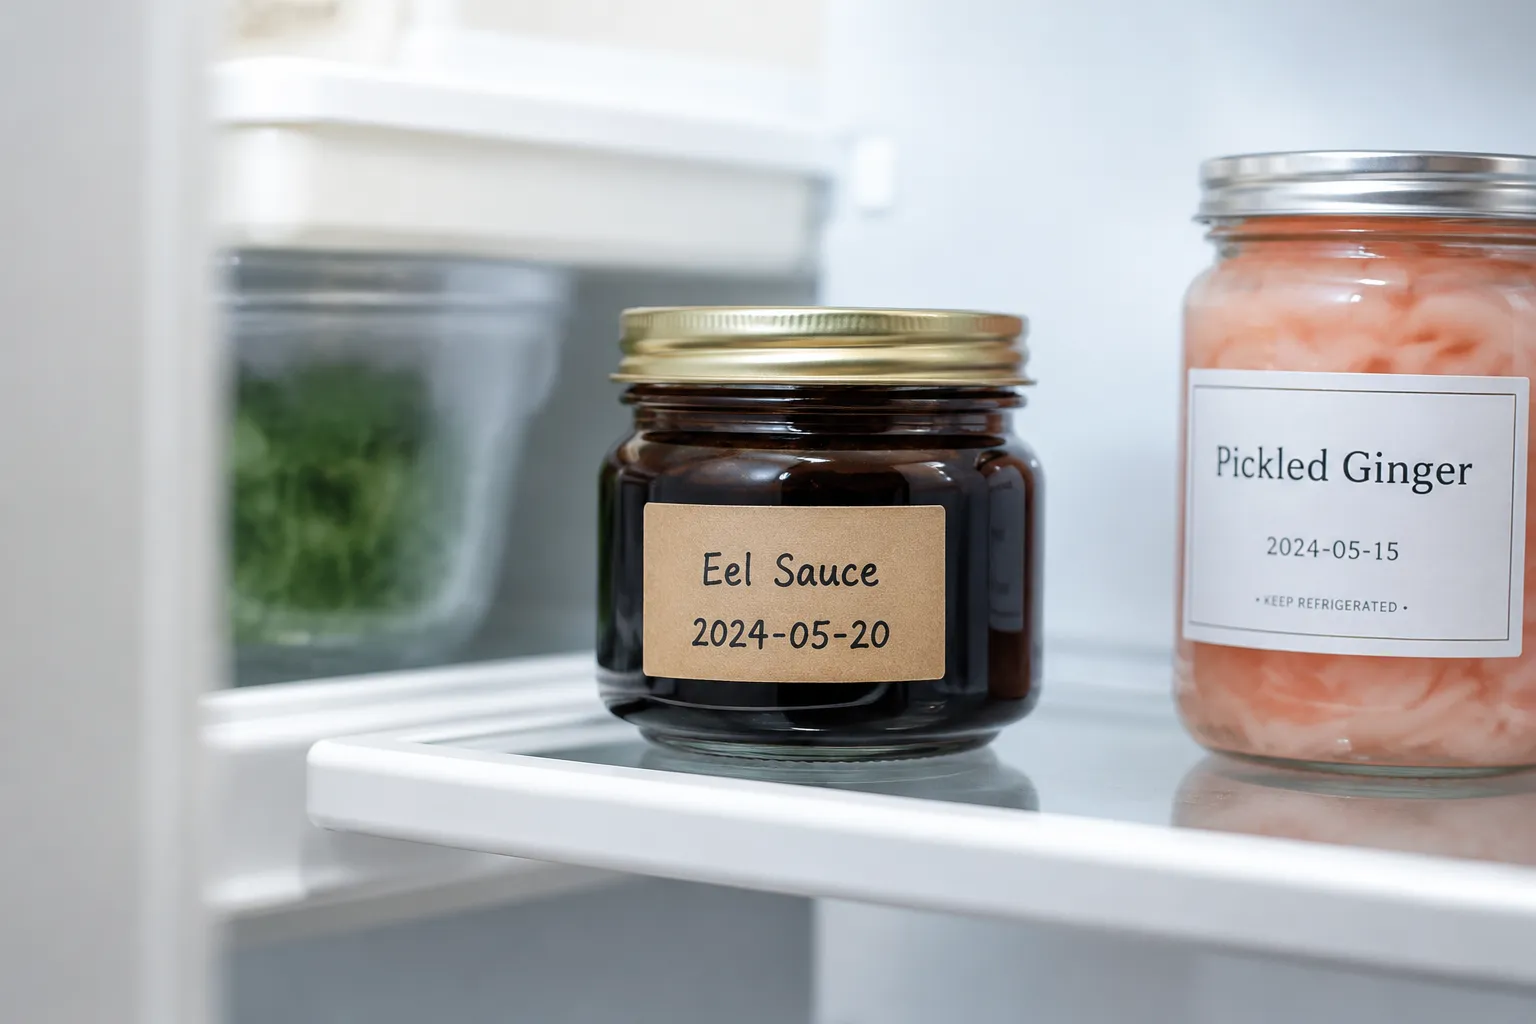
Store cooled sauce in a clean airtight jar or squeeze bottle in the refrigerator for up to 2 months. Because it is a reduced soy-and-sugar sauce, it keeps well, but always use a clean spoon and discard it if you notice cloudiness, mold, or an off smell.
You can also freeze it in small portions for longer storage. Thaw overnight in the refrigerator, then warm gently in a small saucepan or microwave-safe bowl; if it is too thick after chilling or freezing, stir in a teaspoon or two of warm water until smooth and pourable.
Hover any image and hit “Pin it” to save it to your Pinterest boards.