Homemade Strawberry Syrup Recipe (3 Ingredients)
Ingredients
Scale
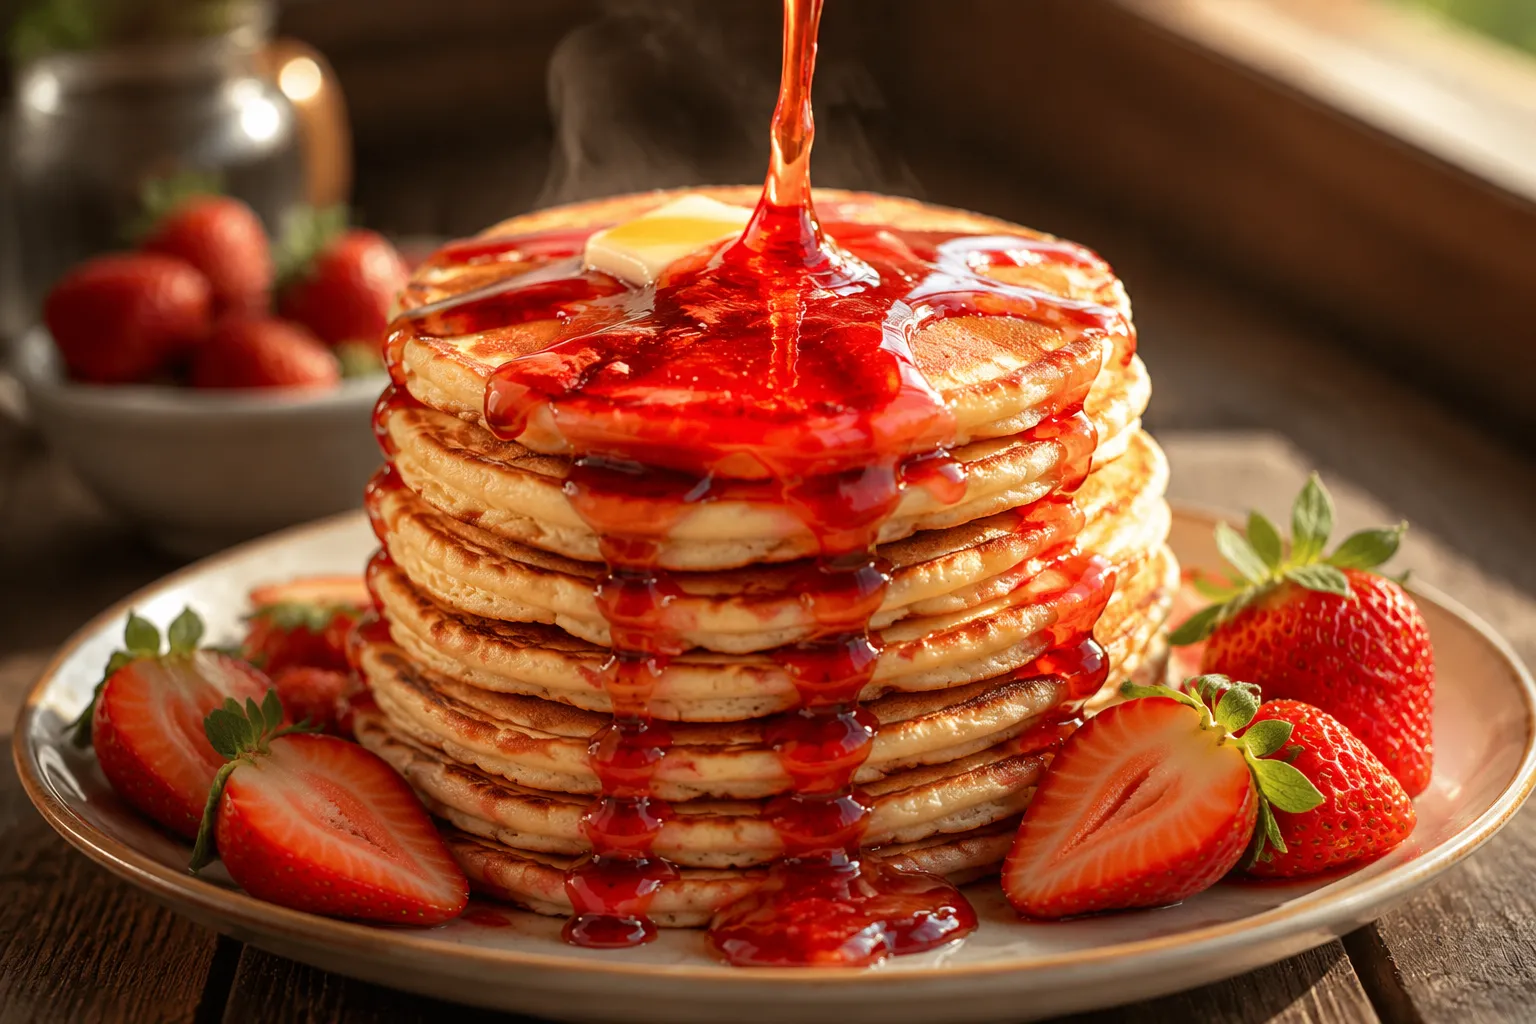
This homemade strawberry syrup is silky, ruby-red, and bursting with real berry flavor. Three ingredients, 20 minutes, and one small saucepan are all you need.
This strawberry syrup is the kind of small-batch staple that turns ordinary breakfasts into something worth photographing. Three ingredients, one little saucepan, and about 20 minutes is all it takes to transform a pint of berries into a glossy, ruby-red sauce that tastes like summer concentrated into a spoonful. No high-fructose corn syrup, no artificial flavor, no neon dye — just real fruit doing its thing on the stove.
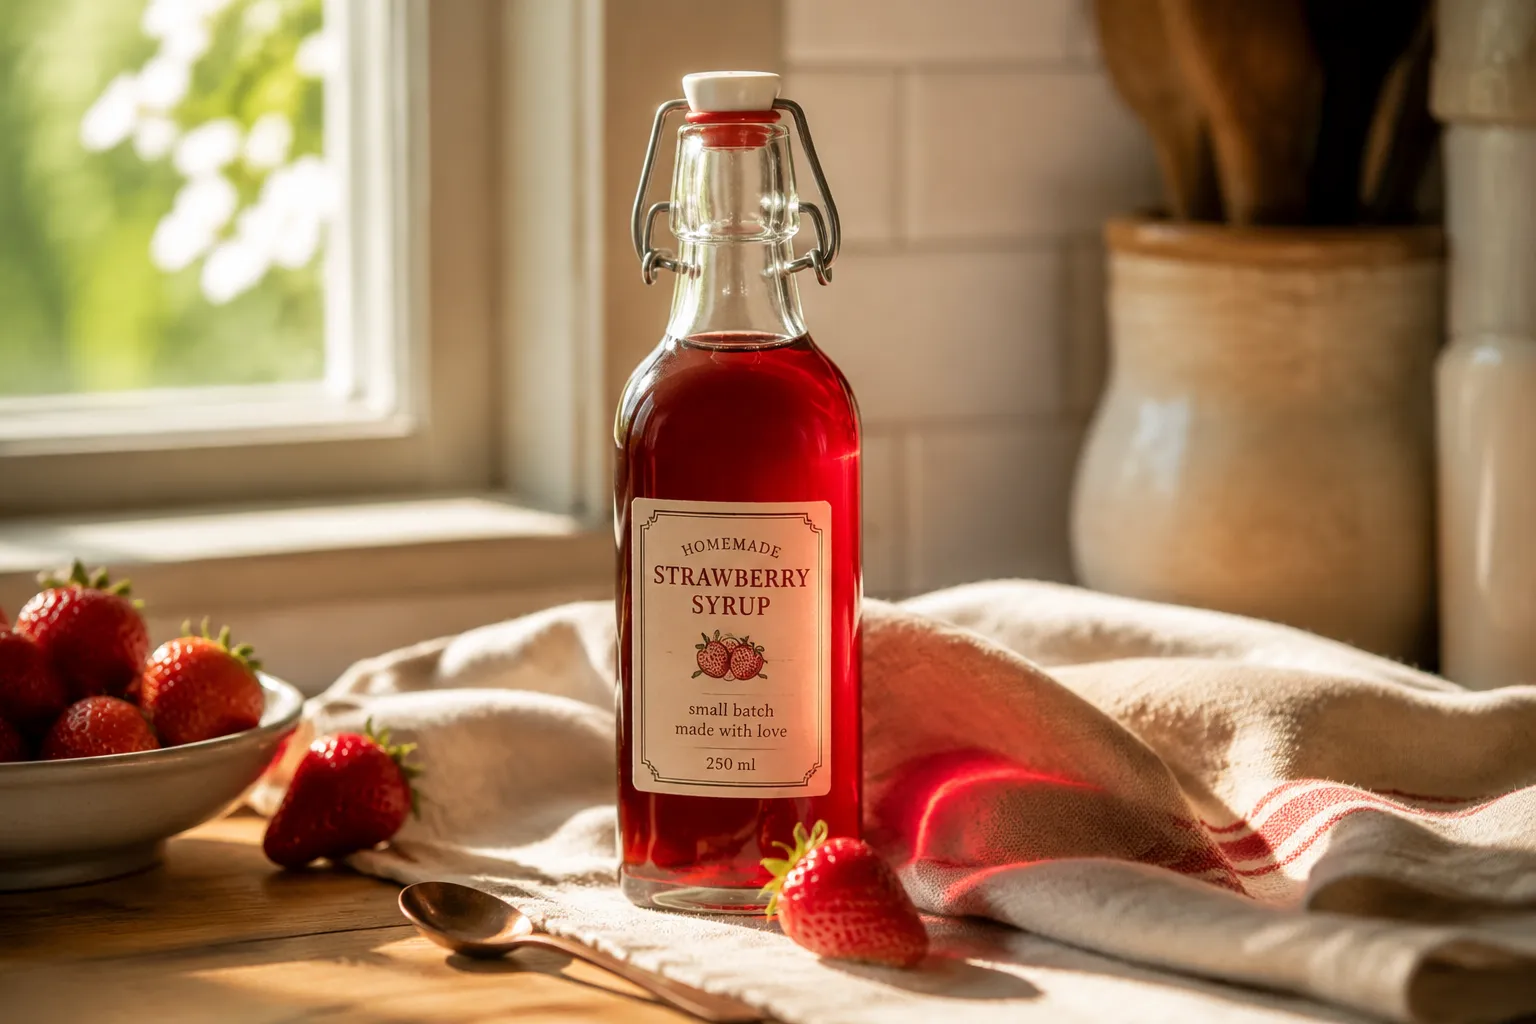
I've been making this exact recipe on repeat for years, and every spring when the first local berries hit the farmers market, it's the first thing I cook. It started as a way to stretch a half-flat of overripe strawberries that were one day from being too soft, and somewhere along the way it became the only pancake topping my household will accept. The technique is forgiving enough for a half-asleep Sunday morning and pretty enough to bottle up as a hostess gift in a swing-top jar with a kraft tag.
What makes this version worth bookmarking is the flexibility. Cook it for ten minutes and you've got a thin, pourable pancake syrup. Strain it and reduce it further and you've got a true strawberry simple syrup for cocktails and lemonade. Leave the fruit chunks in and you've got a fresh strawberry compote for spooning over ice cream or warm biscuits. One master recipe, three textures, endless uses — and a freezer stash that means you can put real berry flavor on a stack of waffles in February.
## Ingredients You'll NeedThe whole thing rests on three pantry staples plus a quarter of a lemon. That simplicity is part of why the result tastes so loud — there's nothing competing with the fruit, so the berries have to be the star.
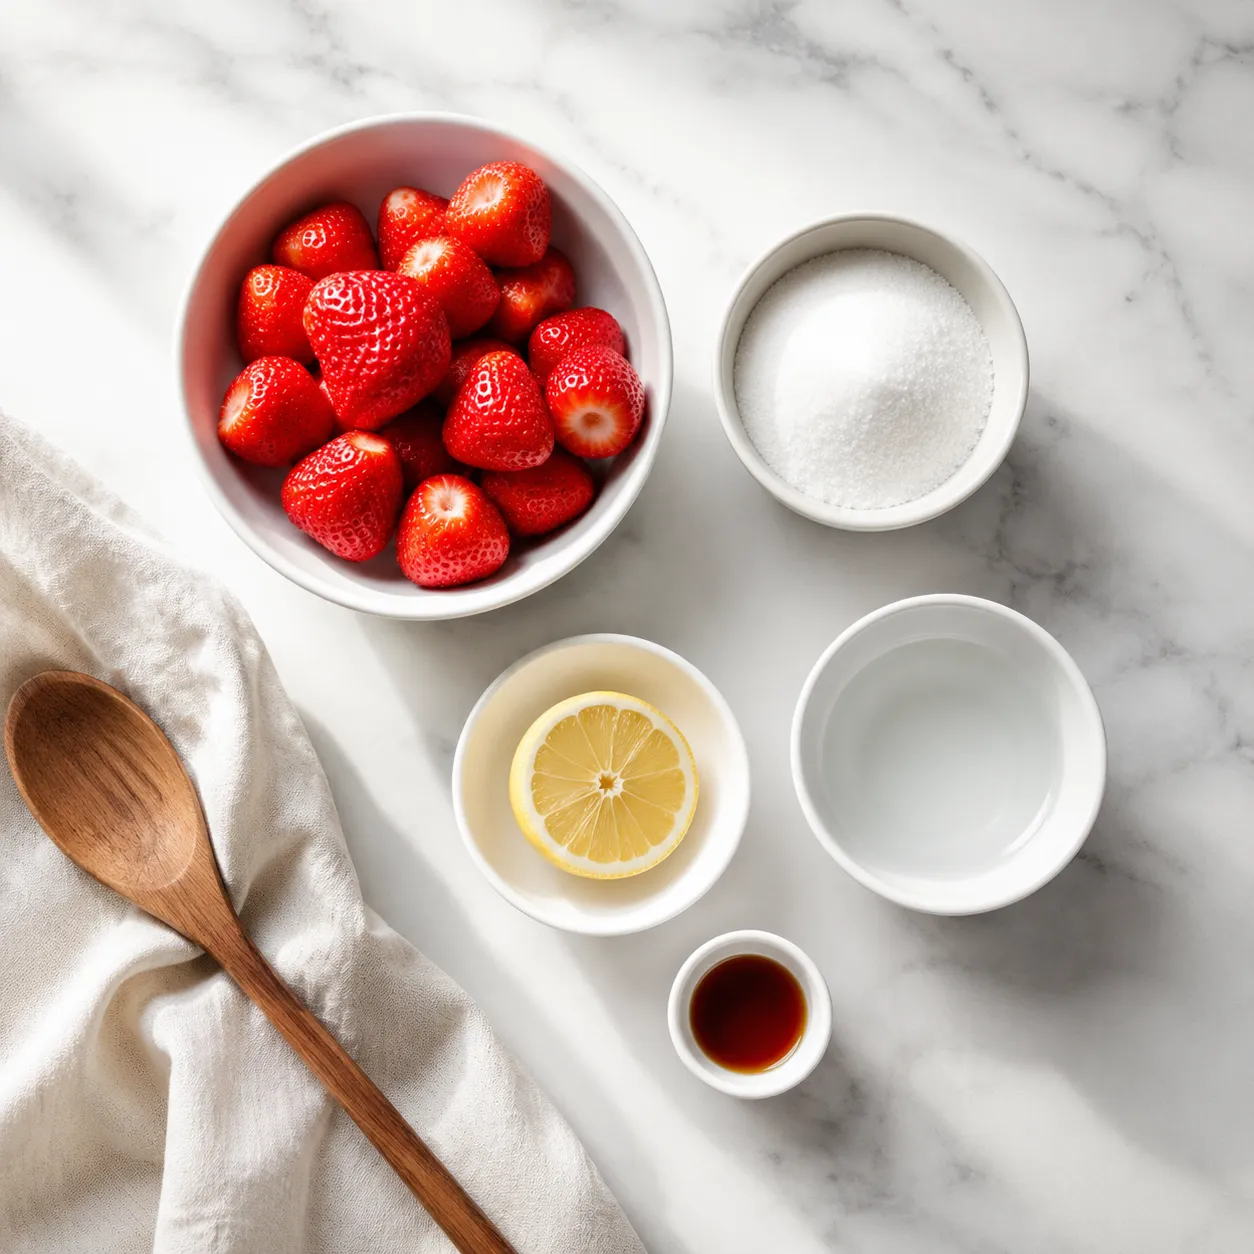
Strawberries. Use whatever you have. Peak-season fresh strawberries are obviously the gold standard, especially the small, deeply red, almost wild-looking ones at the farmers market. But frozen strawberries are honestly fantastic here — they're picked and flash-frozen at full ripeness, and they break down faster because the freezing process ruptures their cell walls. No need to thaw, just dump them in straight from the bag. If you're working with fresh, it's worth knowing how to hull strawberries quickly with a paring knife or a little hulling tool — once you get the rhythm, you can prep two cups in under a minute.
Granulated sugar. Standard white granulated sugar gives you the cleanest flavor and the brightest red color, which is part of what makes this syrup look so jewel-like in the jar. You can swap in light brown sugar for a slight caramel note, or use coconut sugar (the syrup will turn deeper red and taste more molasses-like). For sugar-free, allulose and monk fruit blends work at a 1:1 ratio without crystallizing the way erythritol can.
Lemon juice. A tablespoon of fresh lemon juice does three things: it balances the sweetness, brightens the berry flavor, and helps the syrup set up with a little extra body thanks to the natural pectin reaction. Bottled juice works in a pinch, but fresh tastes noticeably cleaner.
Optional vanilla. A half teaspoon of pure vanilla extract added off the heat at the end rounds everything out. It's the single best optional add-in, and it's what nudges this from "good" to "what is in this, can I have the recipe." If you have a vanilla bean lying around, scrape half of one in instead — gorgeous.
## How to Make Strawberry SyrupThe method is essentially: macerate, simmer, strain (or don't). The full numbered instructions live in the recipe card below, but here's the rhythm so you know what to expect and what to look for at each stage.
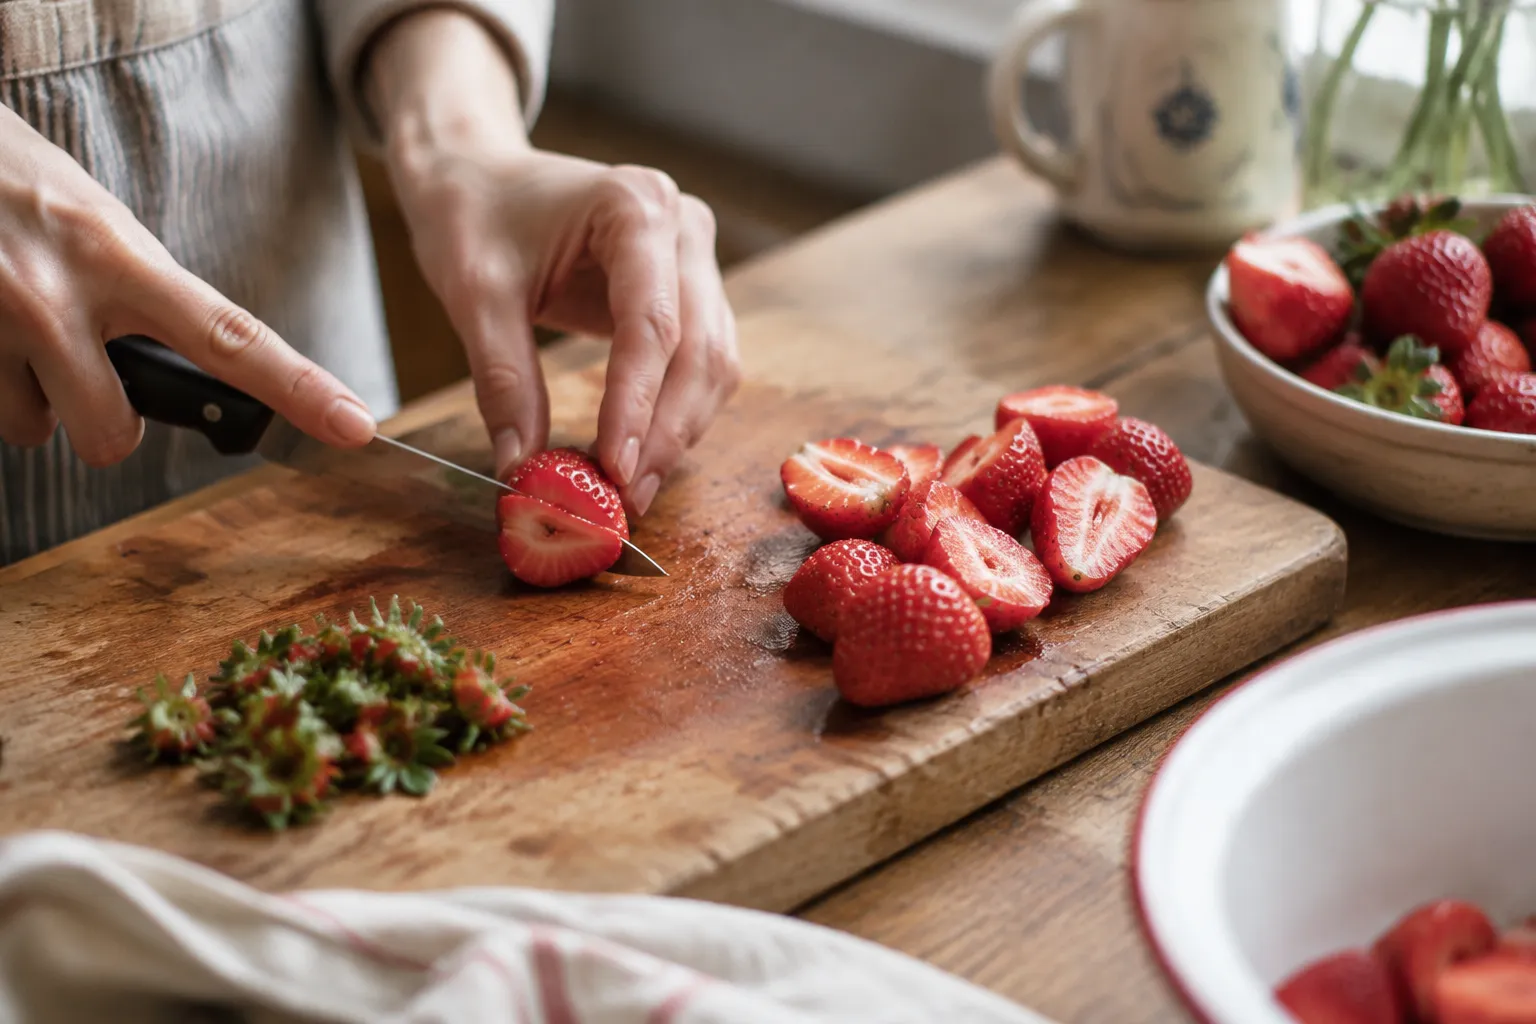
Start by hulling and halving your berries. Halves expose more surface area than whole berries and give you a faster, more even cook. Toss them in a small saucepan with the sugar and water, give it a gentle stir, and let it sit for five minutes while you make coffee or set the table. That little maceration window pulls juice out of the fruit before any heat hits the pan, which means a more concentrated berry flavor in the finished sauce. You'll see liquid pool in the bottom of the pan within a minute or two.
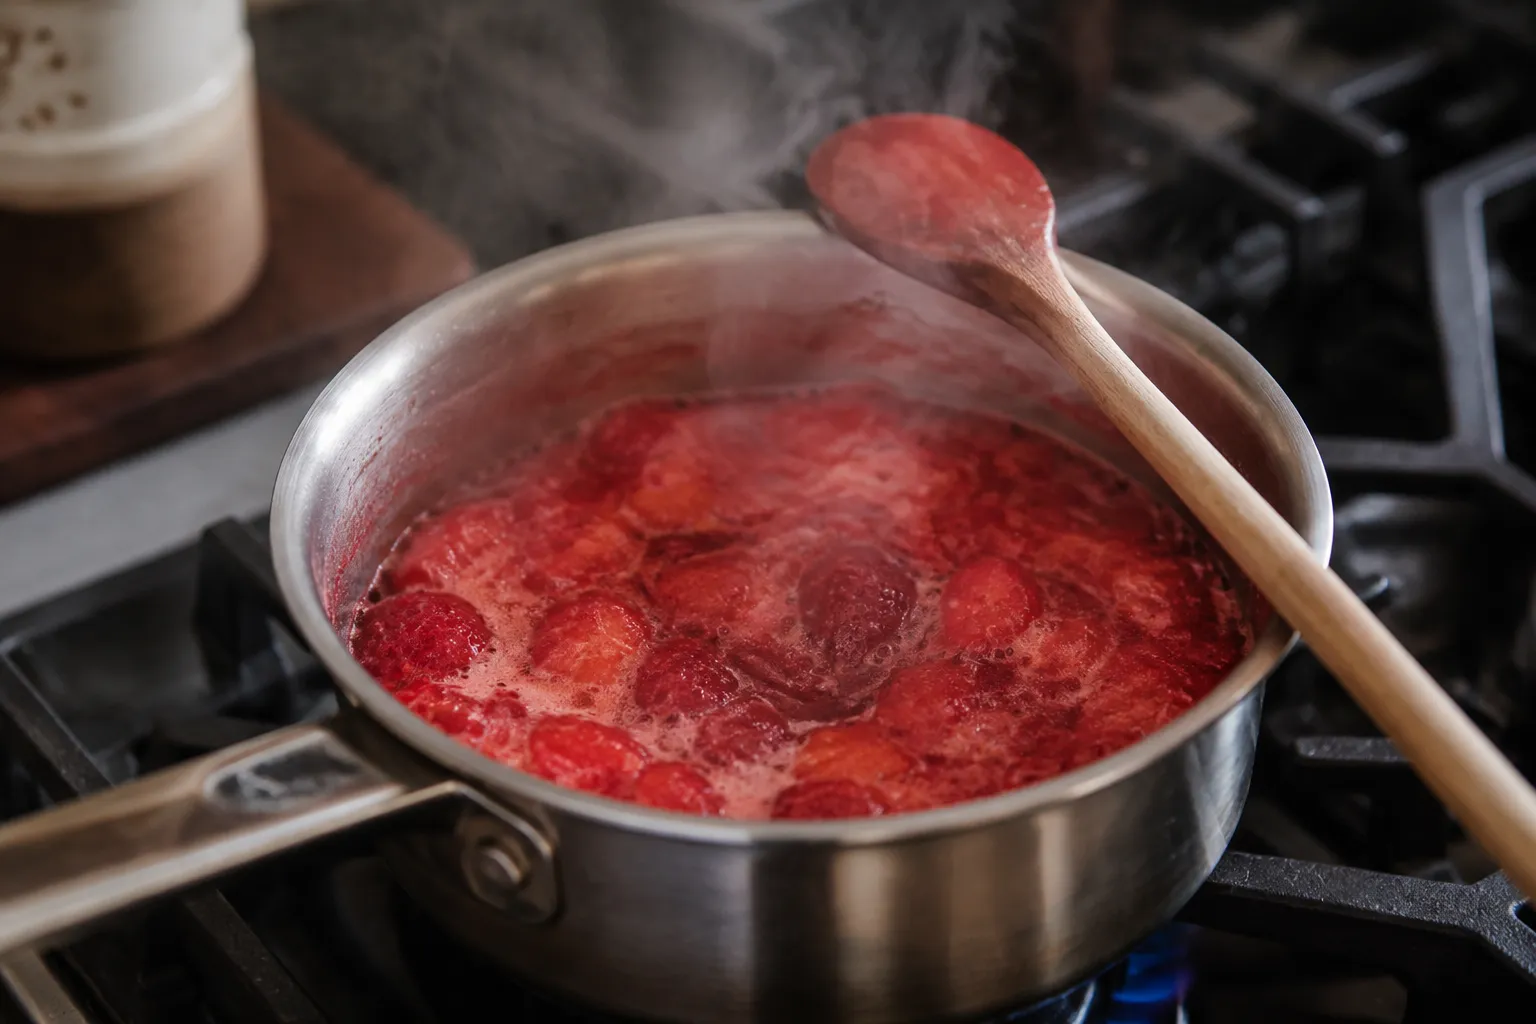
Bring the pan to a gentle simmer over medium heat, then drop it down to medium-low. You want lazy, lazy bubbles, not a hard rolling boil — a hard boil cooks off too much liquid too fast and can give the sugar a faint burnt edge. Stir occasionally, gently mashing the berries against the side of the pan with the back of a wooden spoon. After about 12 to 15 minutes, the fruit will have collapsed almost completely and the liquid will be deeply red, slightly thickened, and unmistakably fragrant. Stir in the lemon juice in the last minute.
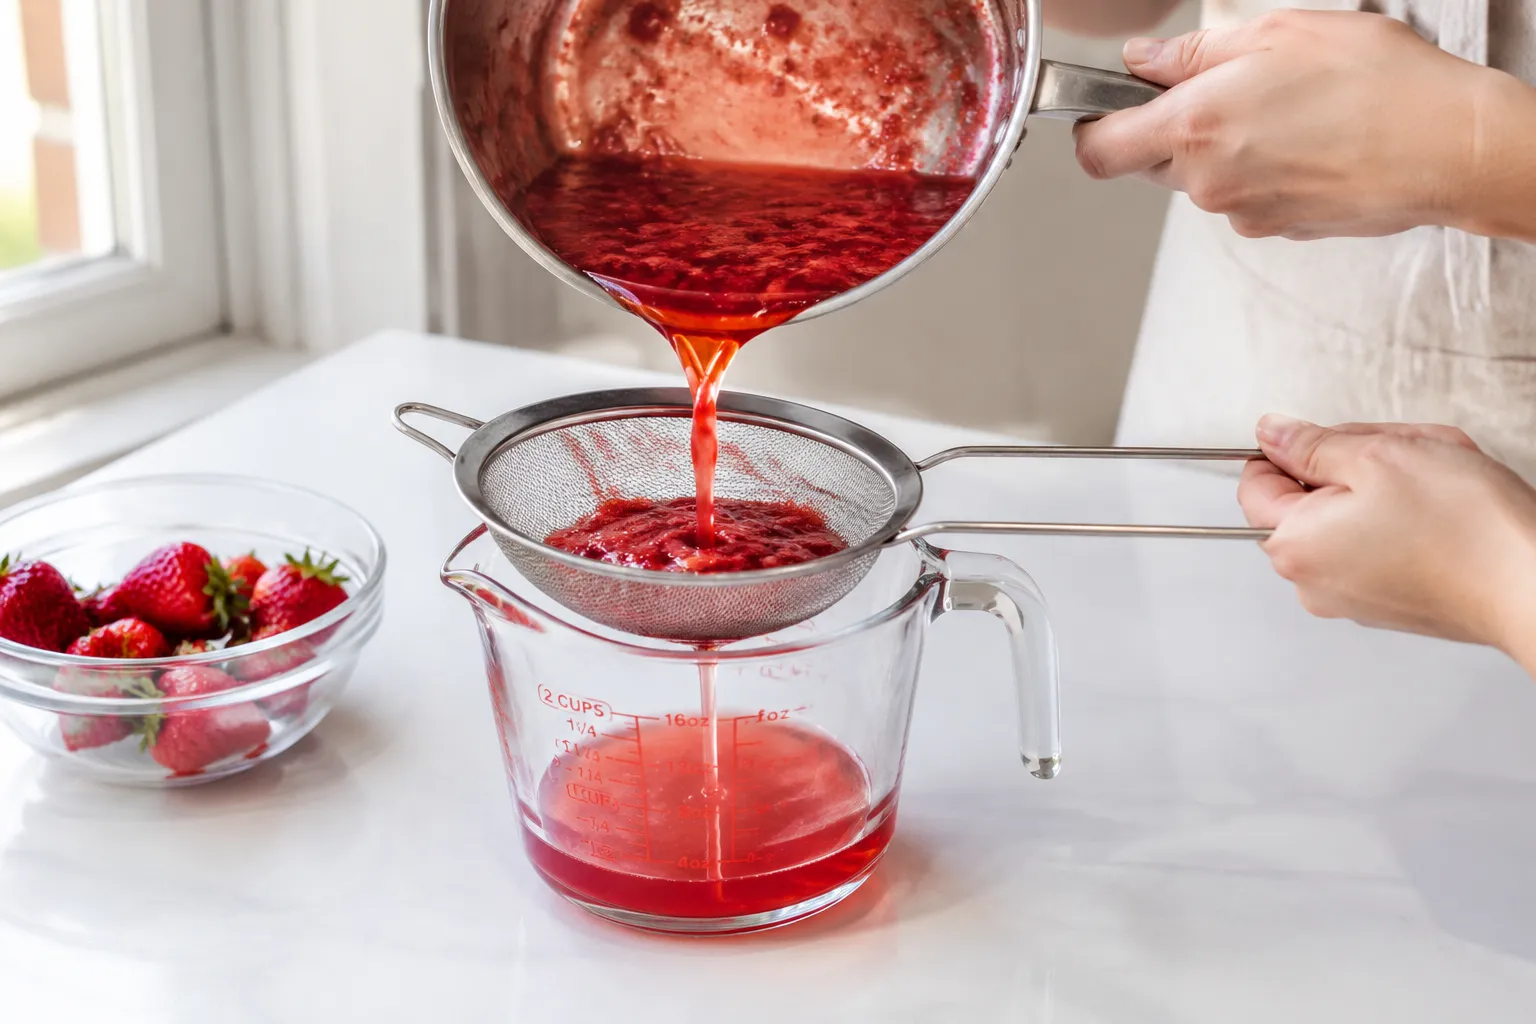
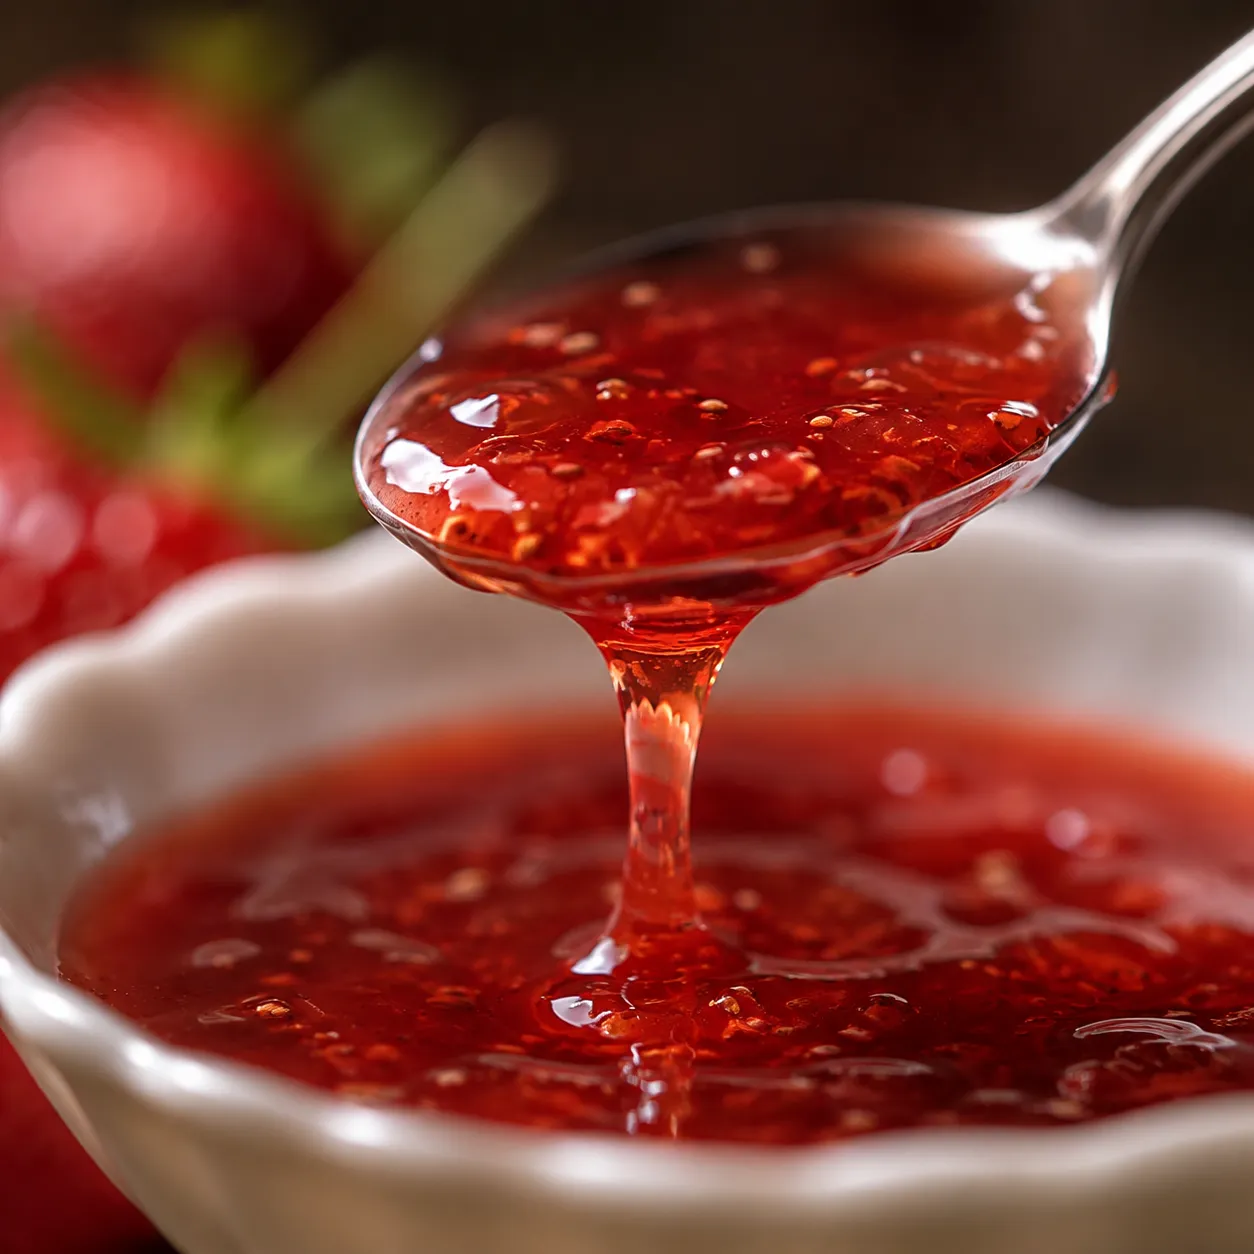
Now comes the choose-your-own-adventure step. For pourable, restaurant-style syrup, set a fine mesh strainer over a heatproof measuring cup or jar and pour the whole pan through it. Press lightly on the solids with a spoon to extract every last drop, but don't push the pulp through unless you want a thicker, slightly cloudy result. For a chunky homemade strawberry sauce that you'd spoon over yogurt or shortcake, skip the strainer entirely and just transfer the contents of the pan to a jar. (Don't toss the strained pulp, by the way — stir it into oatmeal or swirl it through softened cream cheese for a quick bagel spread.)
Stir in vanilla if using, and let the syrup cool to room temperature in the jar before sealing. It will thicken noticeably as it cools — the difference between hot syrup and refrigerated syrup is dramatic, so don't be tempted to over-reduce while it's still on the stove. If your hot syrup looks just slightly thinner than what you want, you're exactly where you should be.
## Thin vs. Thick: Choosing Your ConsistencyOne of the things I love about this base recipe is that you can dial the texture up or down without changing a single ingredient. The only variable is time on the stove and whether you strain.
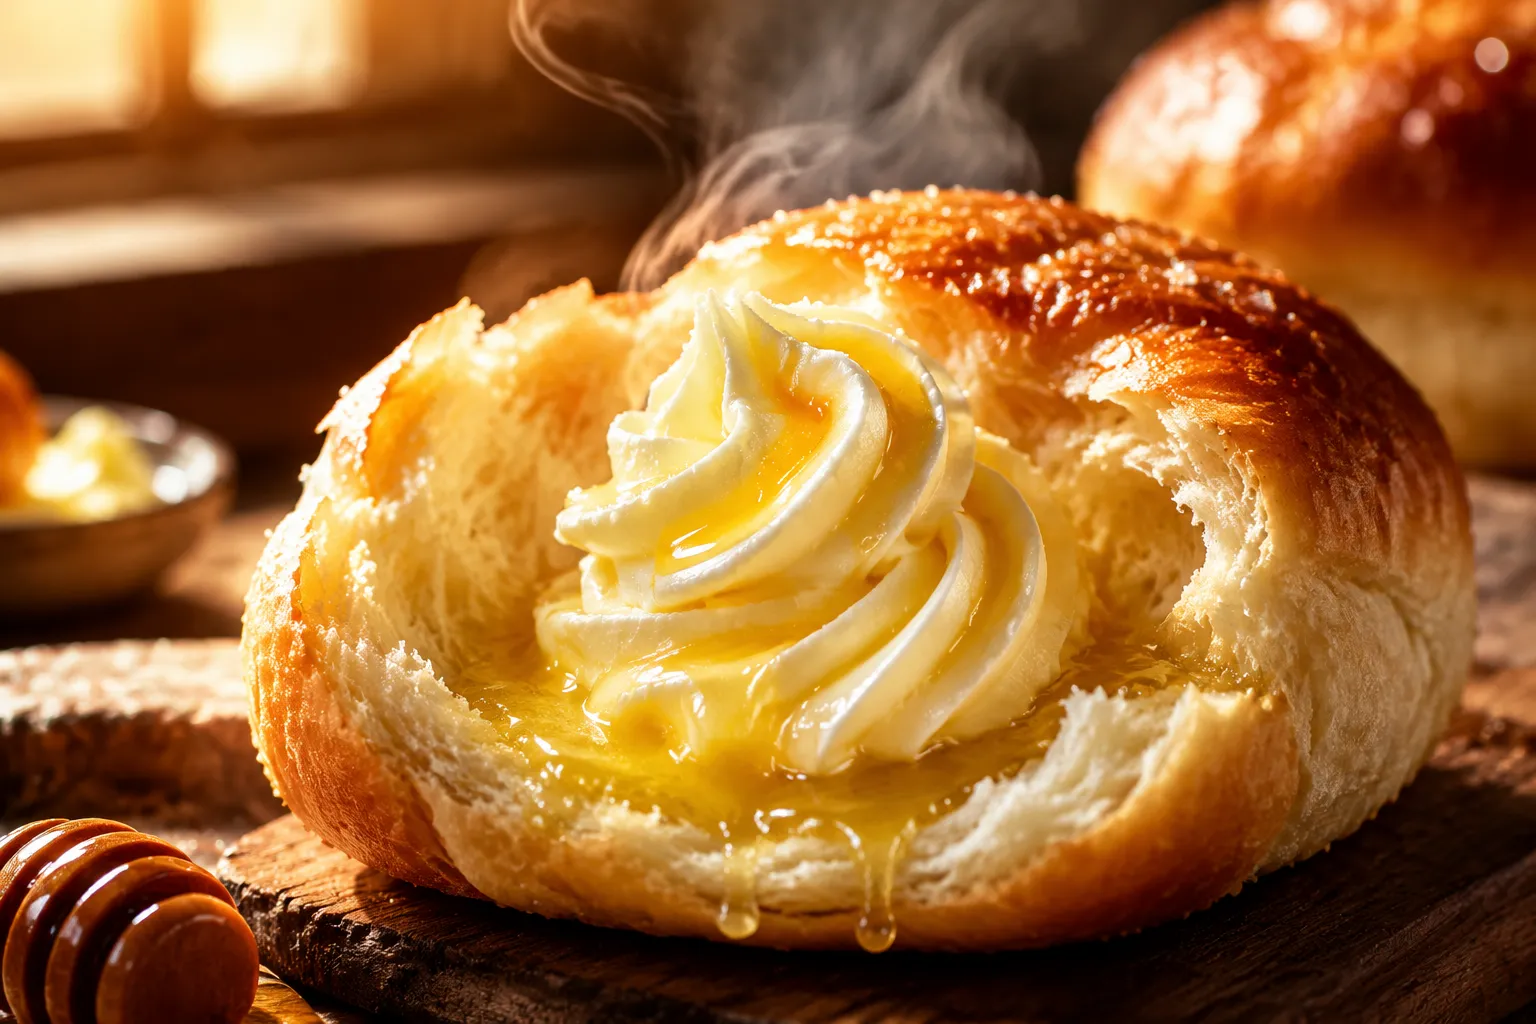
For pancake-pourable syrup, simmer for the full 12 to 15 minutes and strain. It should coat the back of a spoon but still flow freely when you tip it — think real maple syrup viscosity. This is the one to bottle up for vanilla buttermilk pancakes, golden waffles, or thick-cut brioche French toast. It's also the one I keep on hand for kid breakfasts because it actually pours instead of plopping.
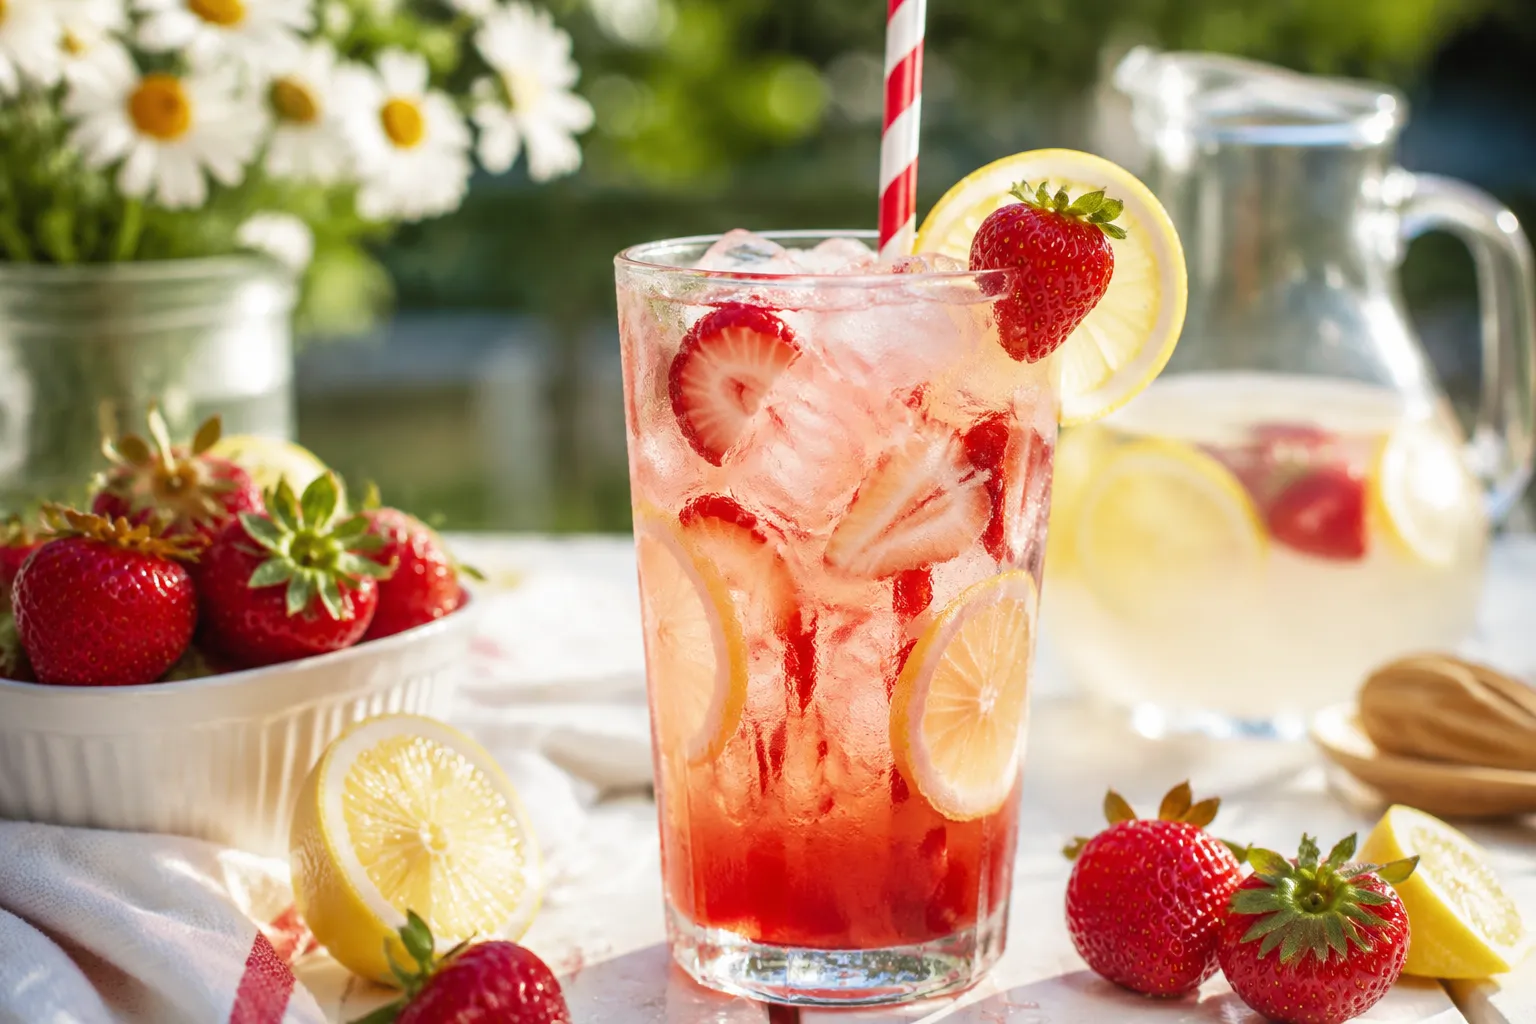
For a cocktail simple syrup, strain the syrup early (around 10 minutes) and add an extra tablespoon of water if it looks too thick. You want it thin enough to dissolve instantly into cold drinks. This is what to reach for when you're stirring up strawberry lemonade, gin spritzes, mojitos, or daiquiris — it integrates where muddled fresh berries leave grit and seeds behind. Bartenders call this style of fruit-infused simple syrup "oleo," and it's a game changer for batch cocktails.
For a thick ice cream topping or pastry filling, simmer 5 minutes longer (or until a spoon dragged across the bottom of the pan leaves a brief trail before the liquid closes back over it). You can also whisk in a teaspoon of cornstarch slurry in the last minute for a glossy, almost glaze-like finish that clings to scoops of vanilla without sliding off into a sad pink puddle.
## Ways to Use Strawberry SyrupOnce you have a jar of this in the fridge, you'll find an excuse to use it on basically everything. A few of my standby moves from heaviest rotation:
Pancakes, waffles, and French toast. The obvious one, but worth saying out loud — a generous drizzle over fluffy buttermilk pancakes is genuinely hard to beat. Try it on cornmeal waffles, sourdough French toast, or alongside whipped ricotta on a brunch board.
Lemonade, sodas, and cocktails. Stir two tablespoons into a tall glass of lemonade for instant pink-hued strawberry lemonade, or top with chilled sparkling water for a homemade Italian soda. For grown-up drinks, it's incredible in a margarita, a vodka spritz, or shaken with bourbon and lemon for a quick smash.
Ice cream, cheesecake, and yogurt bowls. Spoon the chunky version over vanilla bean ice cream, swirl it through Greek yogurt with granola for a quick parfait, or pour it over a wedge of plain cheesecake. It also works as a filling between cake layers, or warmed and spooned over pound cake with a cloud of whipped cream.
Lattes and milkshakes. Two tablespoons in a vanilla iced latte makes a homemade strawberry latte that out-performs any chain version, no syrup pump required. Blended into milk and ice, it's an instant strawberry shake.
Whether you're making this for Saturday pancakes, a brunch crowd, or just because you have a flat of berries about to turn soft on the counter — this is the recipe to know by heart. It's the kind of small, useful skill that makes everything else in your kitchen taste a little more homemade, and a single batch will earn its place in your fridge again and again.
This base recipe is a launchpad — once you've made it once, you can swing it in a dozen different directions just by adjusting the aromatics, the sugar, or the pairing fruit. A few of my favorite riffs:
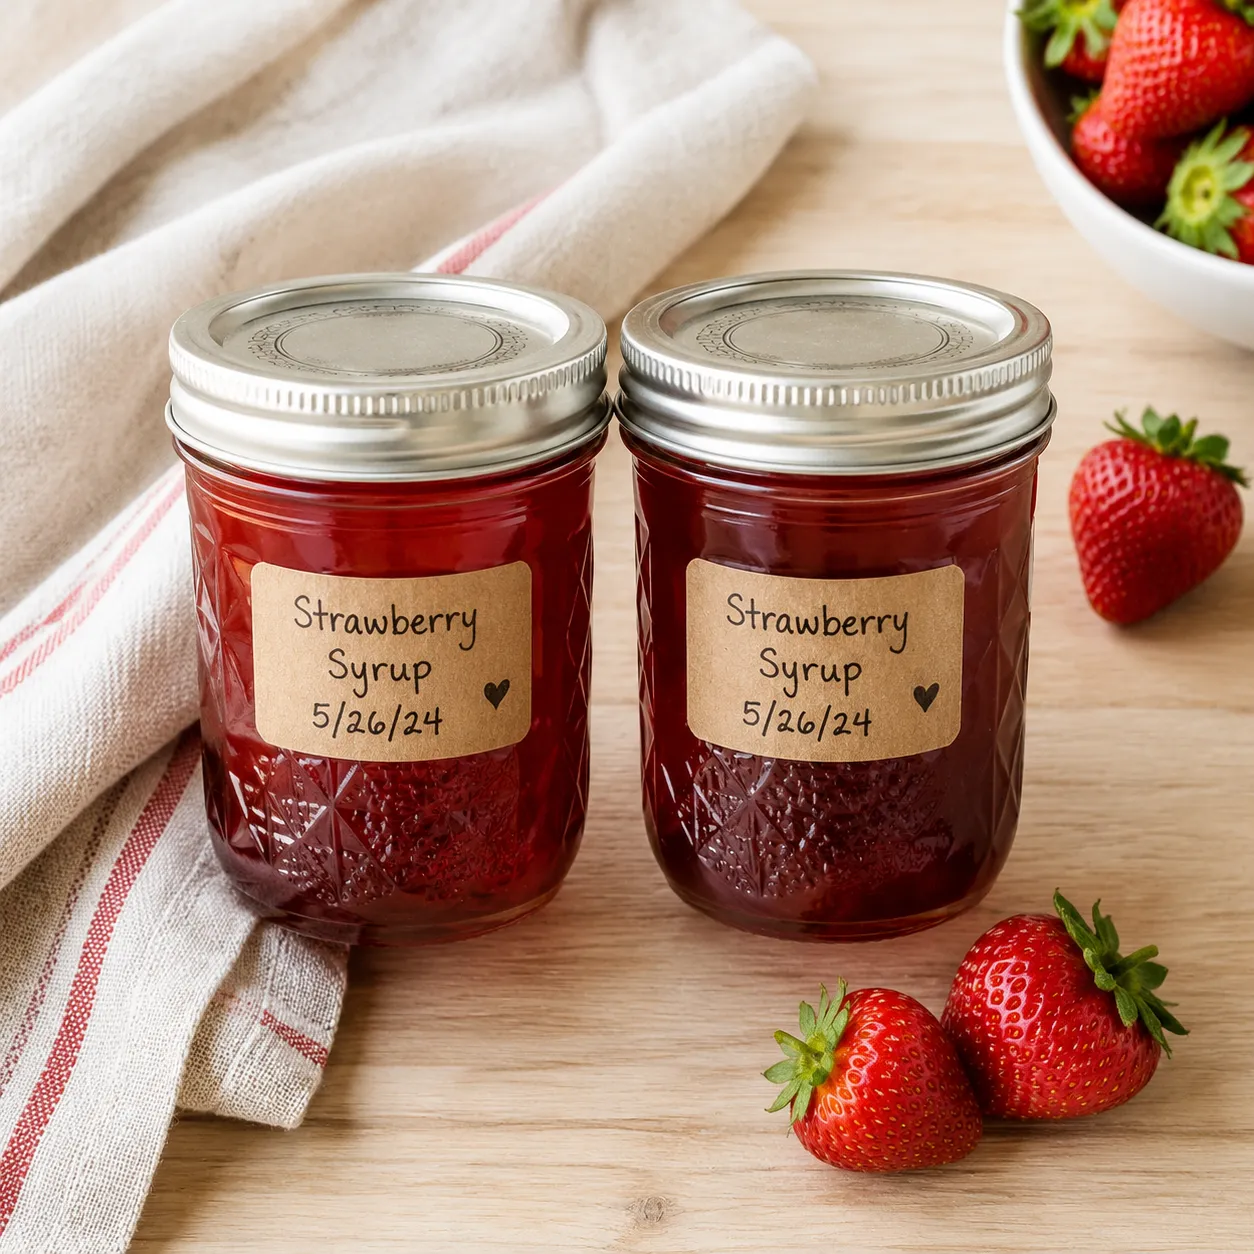
Pour the cooled syrup into a clean glass jar or swing-top bottle and refrigerate for up to 2 weeks. It stays fresh longer than you'd expect because of the sugar content and the lemon juice acidity, both of which slow microbial growth. Always use a clean spoon when scooping to keep bacteria out, and don't return any unused syrup from a serving dish back into the storage jar.
For longer storage, freeze the syrup in ice cube trays, pop the cubes into a labeled freezer bag, and use them within 3 months. Thaw in the fridge overnight, melt directly into hot drinks, or drop a frozen cube straight into a cocktail shaker as a built-in sweetener. The texture stays perfect after freezing — no separation or graininess. Note that this recipe isn't formulated for shelf-stable canning unless you significantly increase the sugar and acid and follow a tested USDA process; for everyday cooking, fridge or freezer is the way to go.