Great Northern Beans Recipe (Creamy Southern-Style)
Ingredients
Scale
This great northern beans recipe simmers up creamy, smoky, and deeply savory in one pot. Pantry staples, slow-cooked flavor, weeknight friendly.
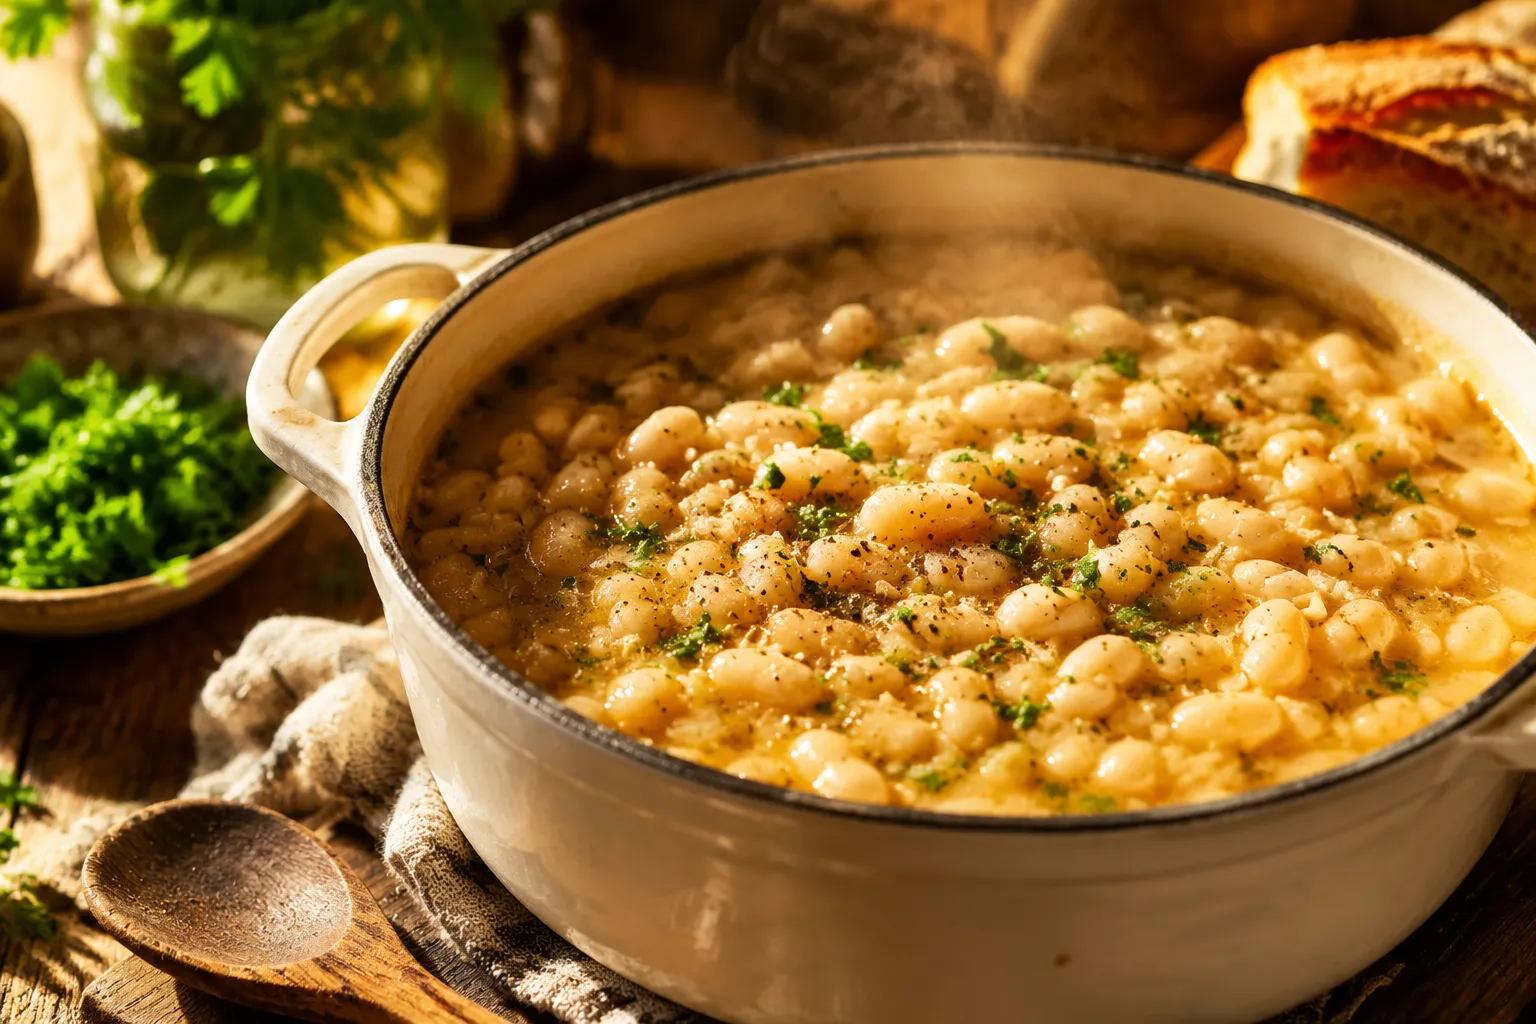
This great northern beans recipe simmers up creamy, smoky, and unapologetically Southern, with tender white beans melting into a glossy ham-flecked broth that practically begs for a wedge of cornbread. It's the kind of one-pot supper that turns a few pantry staples into something that tastes like it has been on the stove all day, because, honestly, it pretty much has. Slow heat, a smoked ham hock, and a final splash of vinegar are all it takes to coax serious flavor out of humble beans.
I grew up eating bowls of beans like this, the kind my grandmother would set out next to a cast-iron skillet of cornbread and a saucer of pickled peppers. Hers were never fussy, but they always had that rib-sticking, deeply savory backbone you cannot fake with a can opener. This version honors that pot, slow-simmered, lightly smoky, and finished with just enough bright acid to keep every spoonful interesting. Out of all the great northern bean recipes I've tested over the years, the smoky-Southern style is the one I keep coming back to.
Whether you are cozying up to a chilly Sunday or stretching your grocery budget without sacrificing flavor, this great northern beans recipe is one you'll come back to over and over. It plays beautifully with weeknight meals, doubles for company, and only gets better the next day.
Great northern beans are a medium-sized white bean grown across the American Midwest, with a thin skin, mild nutty flavor, and a creamy, almost custardy interior when fully cooked. They sit somewhere between navy beans and cannellini beans on the size scale and are prized in Southern and heartland kitchens for the way they soak up smoky, savory broths without turning to mush.
If a recipe calls for great northerns and you've only got navy beans on hand, you can usually swap. Navy beans are smaller and break down faster, which is why they are the go-to for a classic navy bean soup. Cannellini are bigger, denser, and hold their shape better, beautiful in salads and Tuscan stews. Great northerns split the difference: substantial enough to keep their shape in a long simmer, soft enough to melt into the broth at the edges.
The flavor is delicate and slightly nutty, which is exactly why they shine here. They take on whatever you cook them in, so a smoky base with aromatics and a long, gentle simmer transforms them into something deeply comforting. Compared to earthy beans like Southern pinto beans, great northerns lean lighter and creamier, which makes them perfect for a brothy, ham-forward pot.
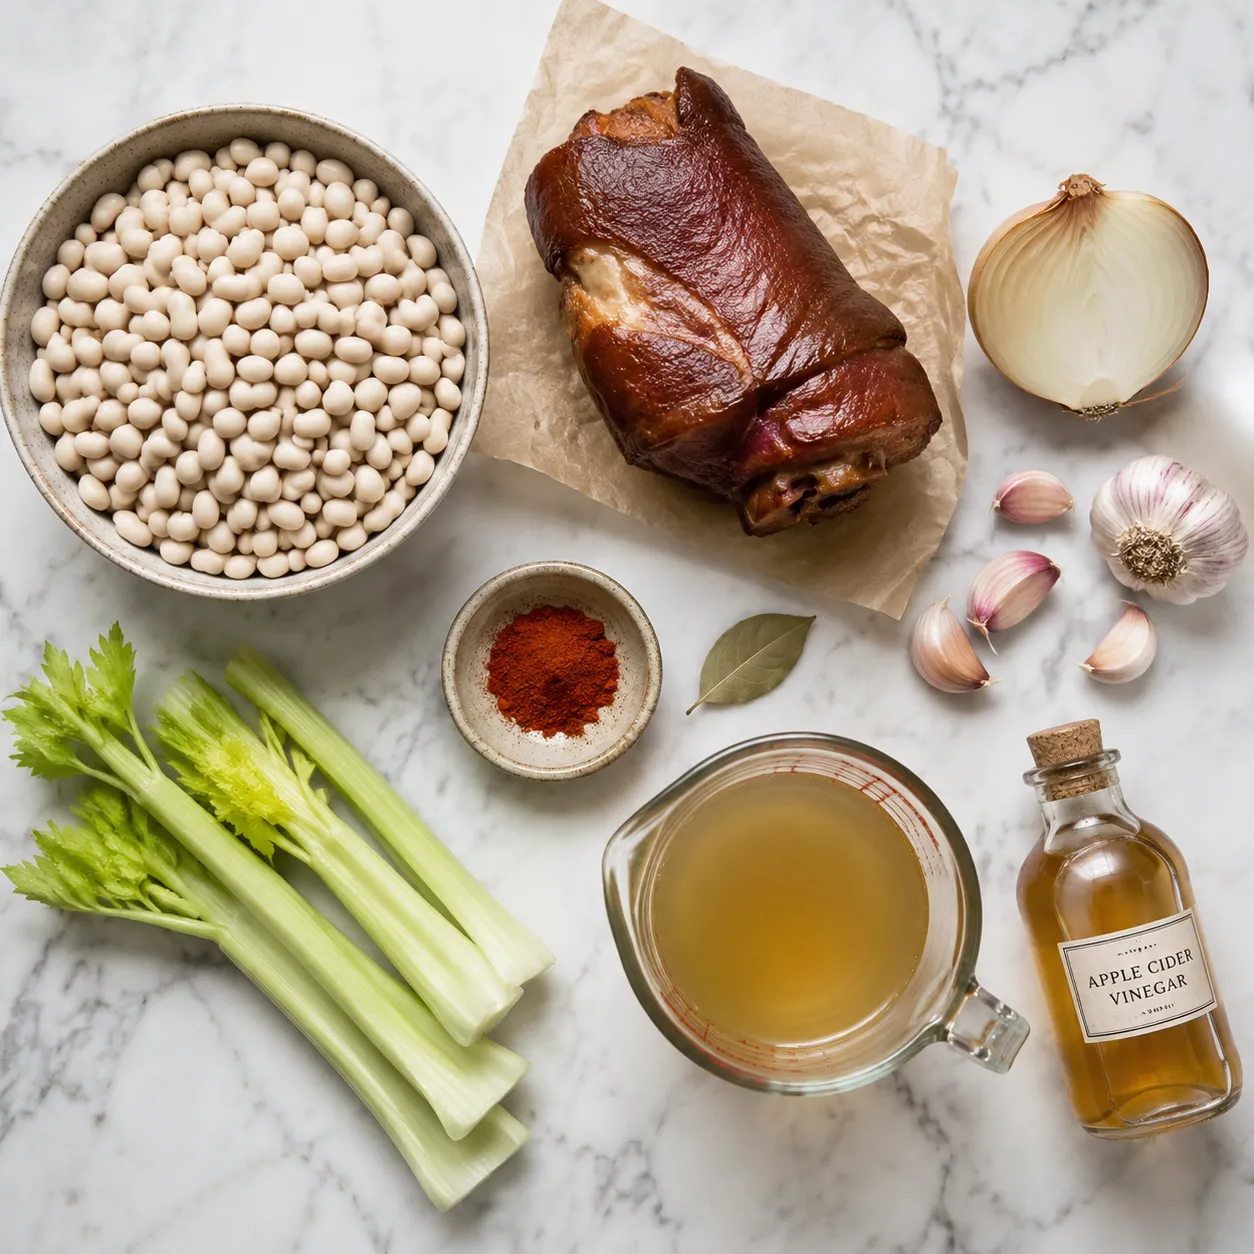
This pot leans on simple, affordable staples, and that is part of why it tastes so good. Each ingredient earns its keep, layering smoke, sweetness, sharpness, and brightness onto the canvas of those mild white beans.
I strongly recommend using dried great northern beans here. Canned beans can work in a pinch (use four 15-ounce cans, drained, and reduce simmer time to 30 minutes), but you'll lose the velvety, starch-rich broth that is the whole reason we go through this. Dried beans release starch slowly as they cook, thickening the liquid into something glossy and almost gravy-like.
A smoked ham hock is traditional and unbeatable here, basically the cornerstone of countless ham hock recipes for a reason, slowly releasing collagen and smoke into the pot. Six ounces of diced thick-cut bacon will get you most of the way there if hocks are tricky to find. For a meat-free version, a Parmesan rind plus a teaspoon of liquid smoke and a glug of olive oil mimic that savory depth surprisingly well.
Onion, celery, garlic, bay leaf, and smoked paprika do the heavy lifting on the seasoning side. Low-sodium chicken broth gives you control over salt, and apple cider vinegar at the end wakes everything up. Hold your salt until the last 30 minutes of cooking, since adding it too early can keep the bean skins tough.
The method is forgiving. You are really just building flavor in three stages, smoky base, slow simmer, and finishing touches, and the beans do most of the work themselves. Here's how it comes together.
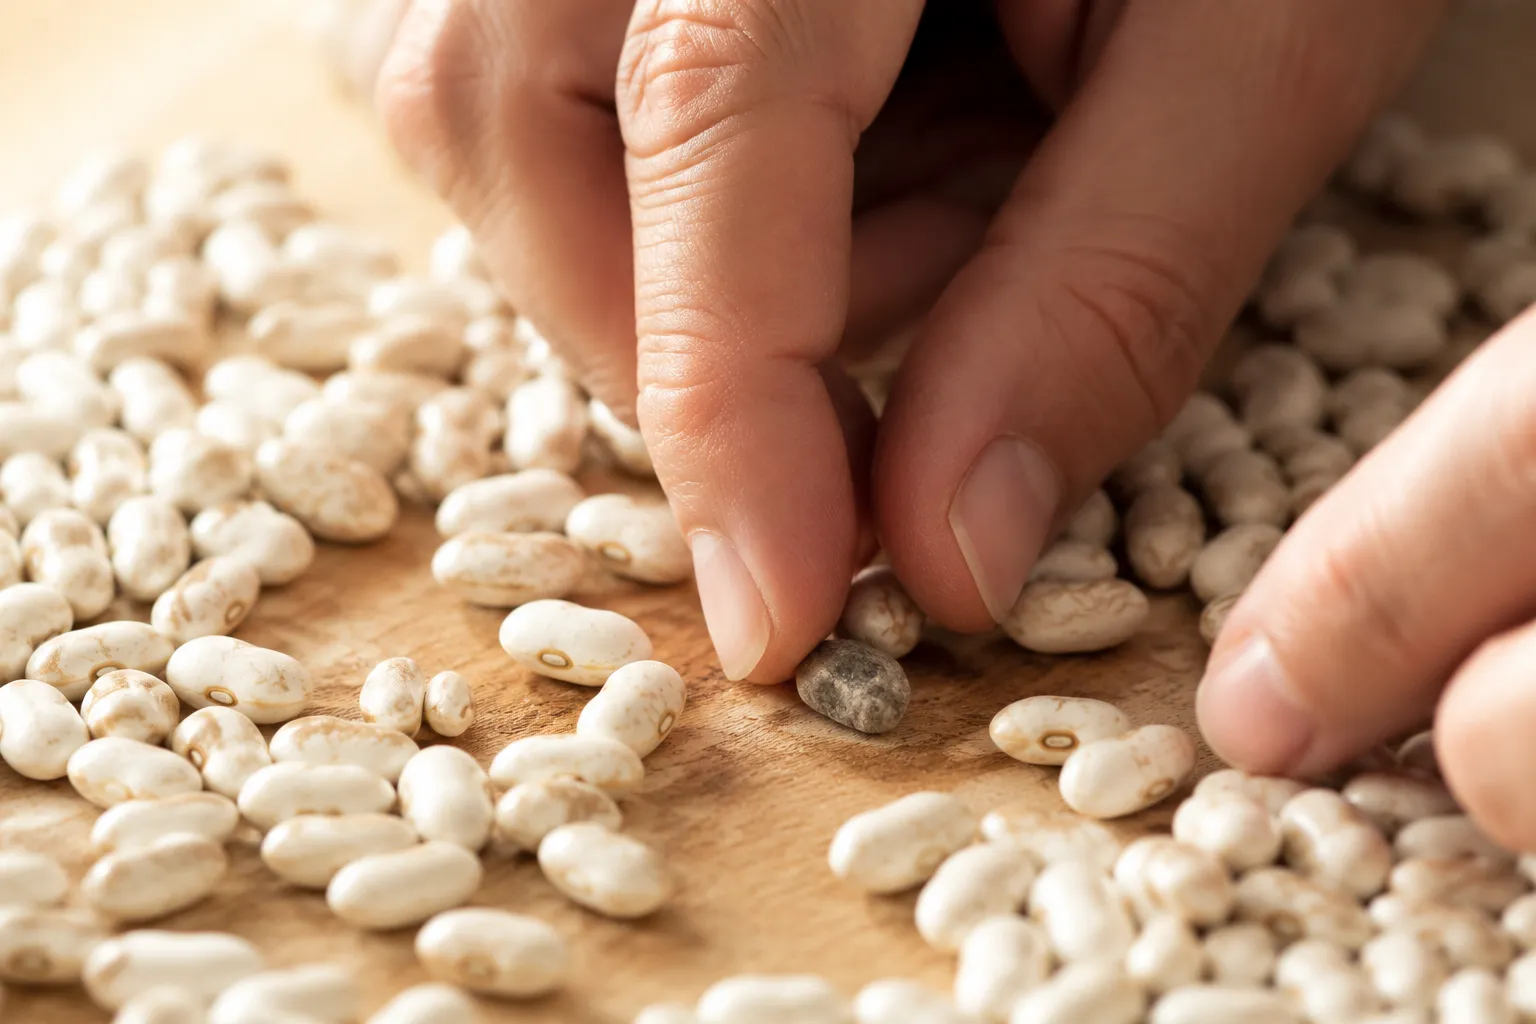
Pour the beans onto a sheet pan or cutting board and pick through them, tossing any pebbles, debris, or shriveled beans. Rinse well in a colander, then transfer to a large bowl and cover with at least two inches of cool water. If you have ever wondered how to soak dried beans the right way, an overnight soak (8 to 12 hours) is the gold standard. It cuts cook time and helps with digestibility. Short on time? Bring the beans to a boil for 2 minutes, then cover and rest off heat for an hour for a quick soak.
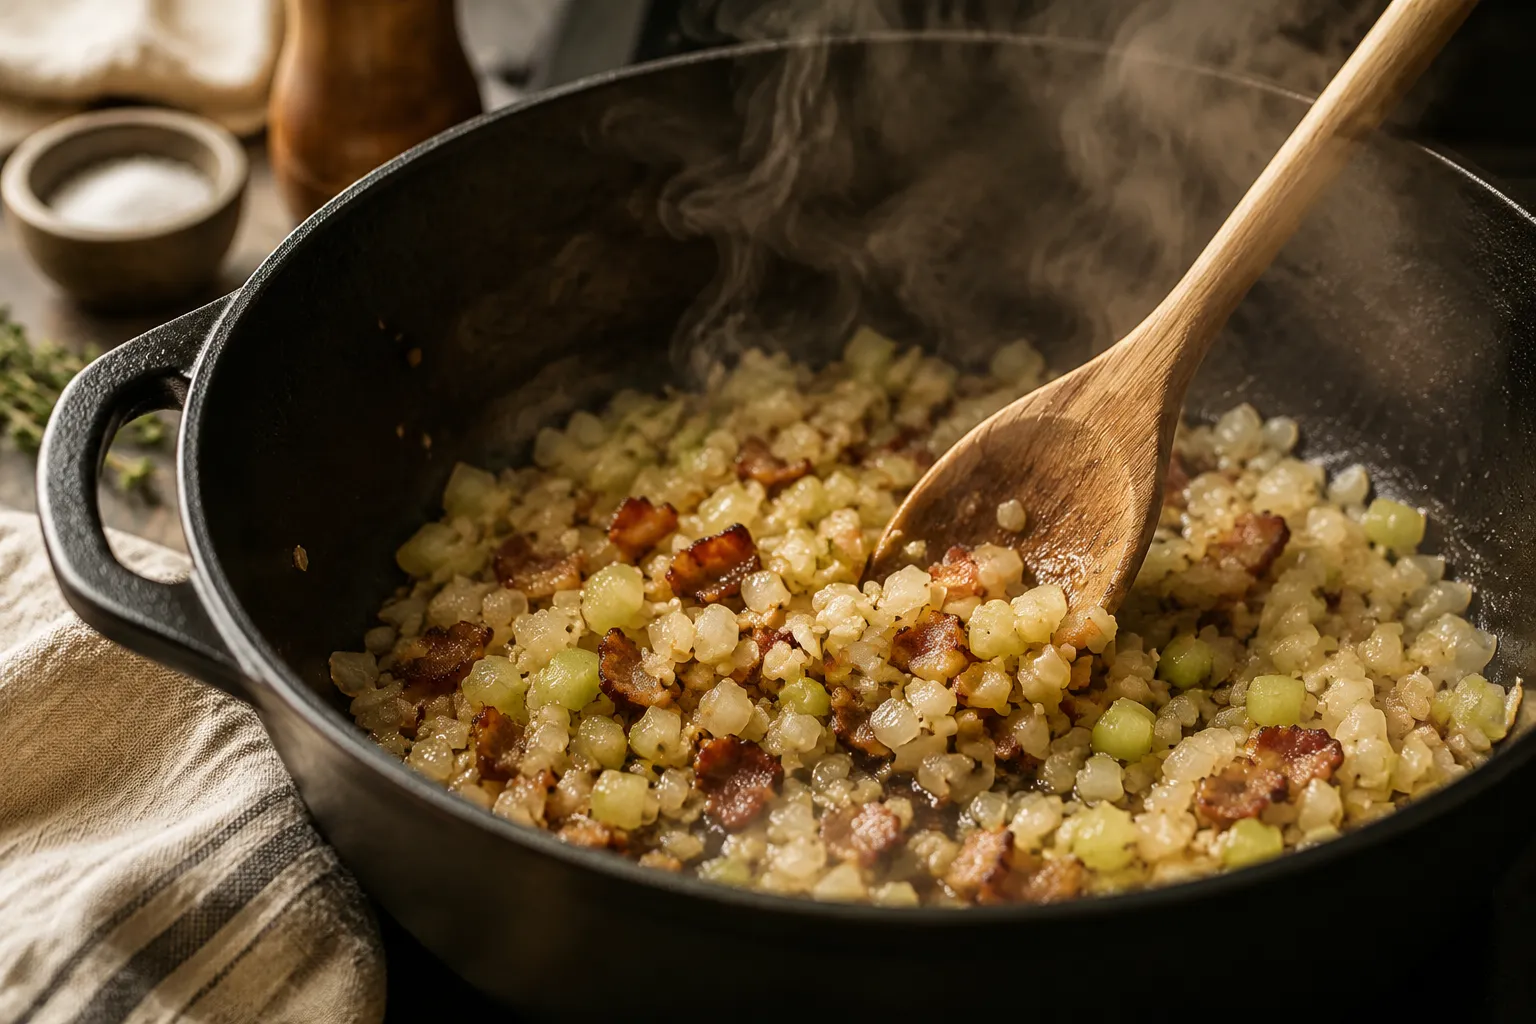
In a large Dutch oven, render the bacon (if using) until crisp, or warm a tablespoon of olive oil if you are going the ham hock route. Add the diced onion and celery with a small pinch of salt, and let them sweat over medium heat until softened, about 6 minutes. Stir in the garlic and smoked paprika and cook just until fragrant, 30 seconds is plenty. This is where the flavor foundation locks in, so don't rush it.
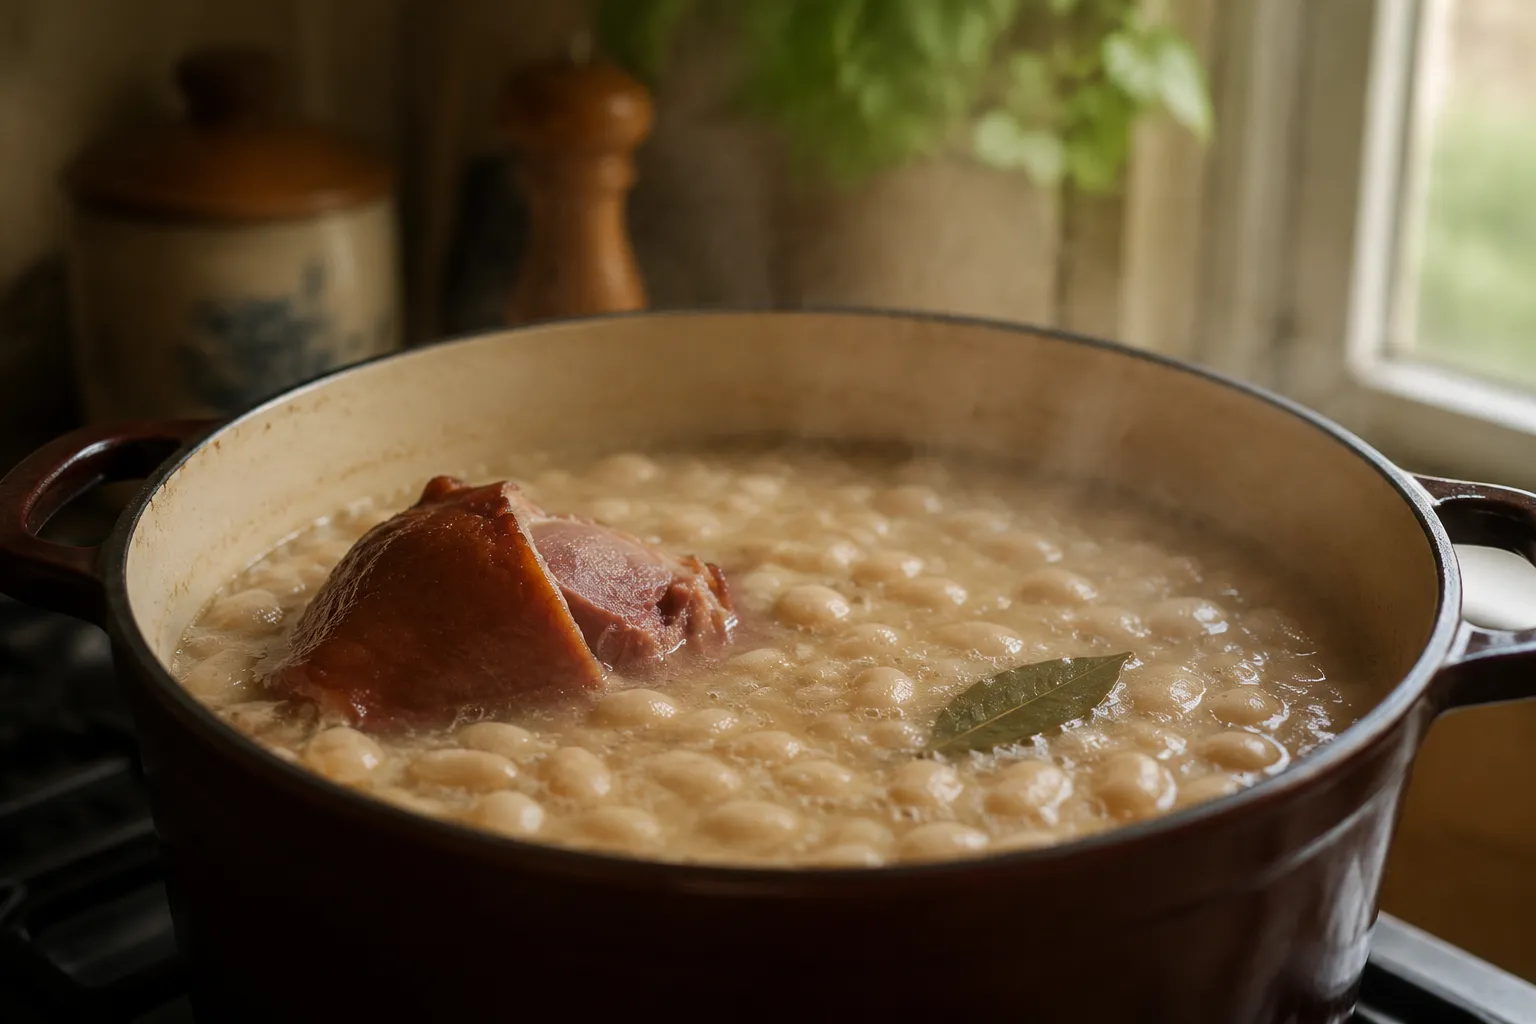
Add the drained beans, the ham hock, a bay leaf, and 6 cups of broth. Bring everything to a gentle boil, then immediately drop the heat to a low, lazy simmer. You want soft bubbles, never a hard rolling boil that can split bean skins. Partially cover and let the pot do its thing for 90 minutes to 2 hours, stirring every now and then and topping up with water if the liquid drops below the level of the beans. The beans are done when one squishes easily between your fingers and the broth has gone from watery to silky.
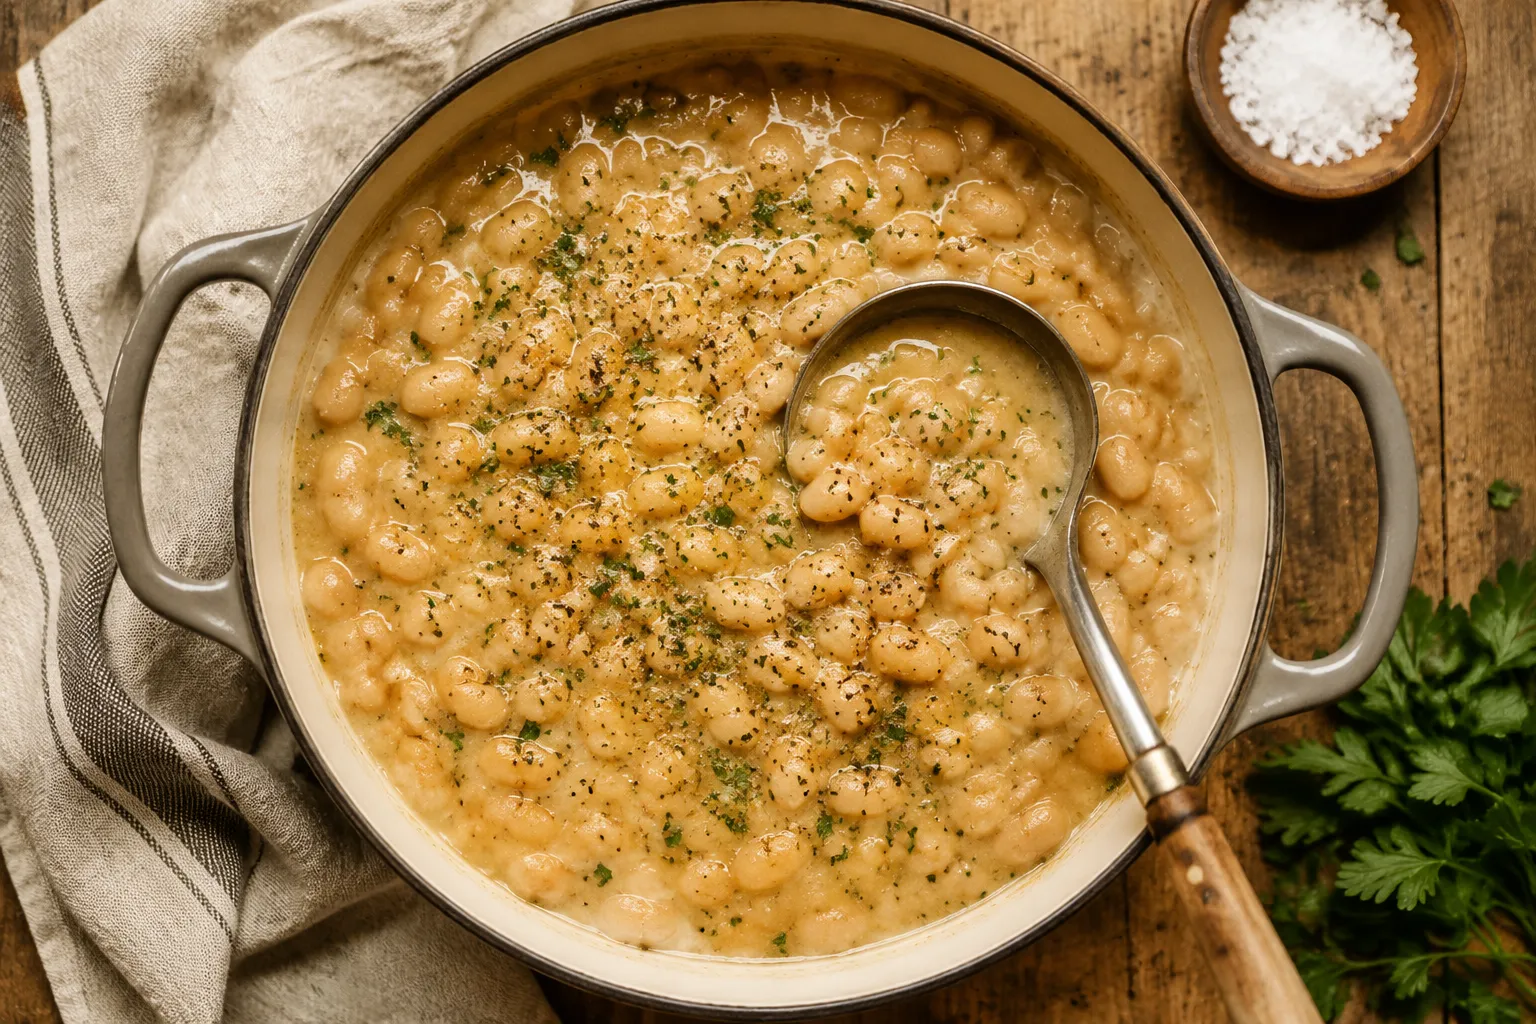
Fish out the ham hock, shred the meat off the bone, and stir it back in. Discard the bay leaf along with any cartilage and skin. Now is the time to taste, add kosher salt, plenty of cracked black pepper, and the apple cider vinegar to brighten the broth. Let everything simmer uncovered for another 5 minutes so the flavors meld. The vinegar is non-negotiable. Even a tiny splash transforms the whole pot from one-note to layered.
This great northern beans recipe is written for a Dutch oven on the stove, but it adapts beautifully to whatever appliance you reach for. Pick your path based on the time you have.
The 2-hour stovetop simmer above is my favorite method. You get the most control over texture, and there is something nostalgic about the way the kitchen smells when a pot of beans is going. This is also the easiest way to nail that perfect creamy-but-not-blown-out finish, since you can taste and adjust as you go.
Sauté the aromatics on the stove first (this step is worth doing, since slow cookers don't brown), then transfer everything to a 6-quart slow cooker with the soaked beans, ham hock, and broth. Cook on LOW for 7 to 8 hours or HIGH for 4 to 5 hours, then finish with vinegar and salt at the end.
For unsoaked beans, sauté the aromatics using the SAUTÉ function, then add the beans, ham hock, and 5 cups of broth. Pressure cook on HIGH for 45 minutes with a 20-minute natural release. If your beans are pre-soaked, drop the cook time to 25 minutes. Don't add the vinegar or salt until after pressure cooking.
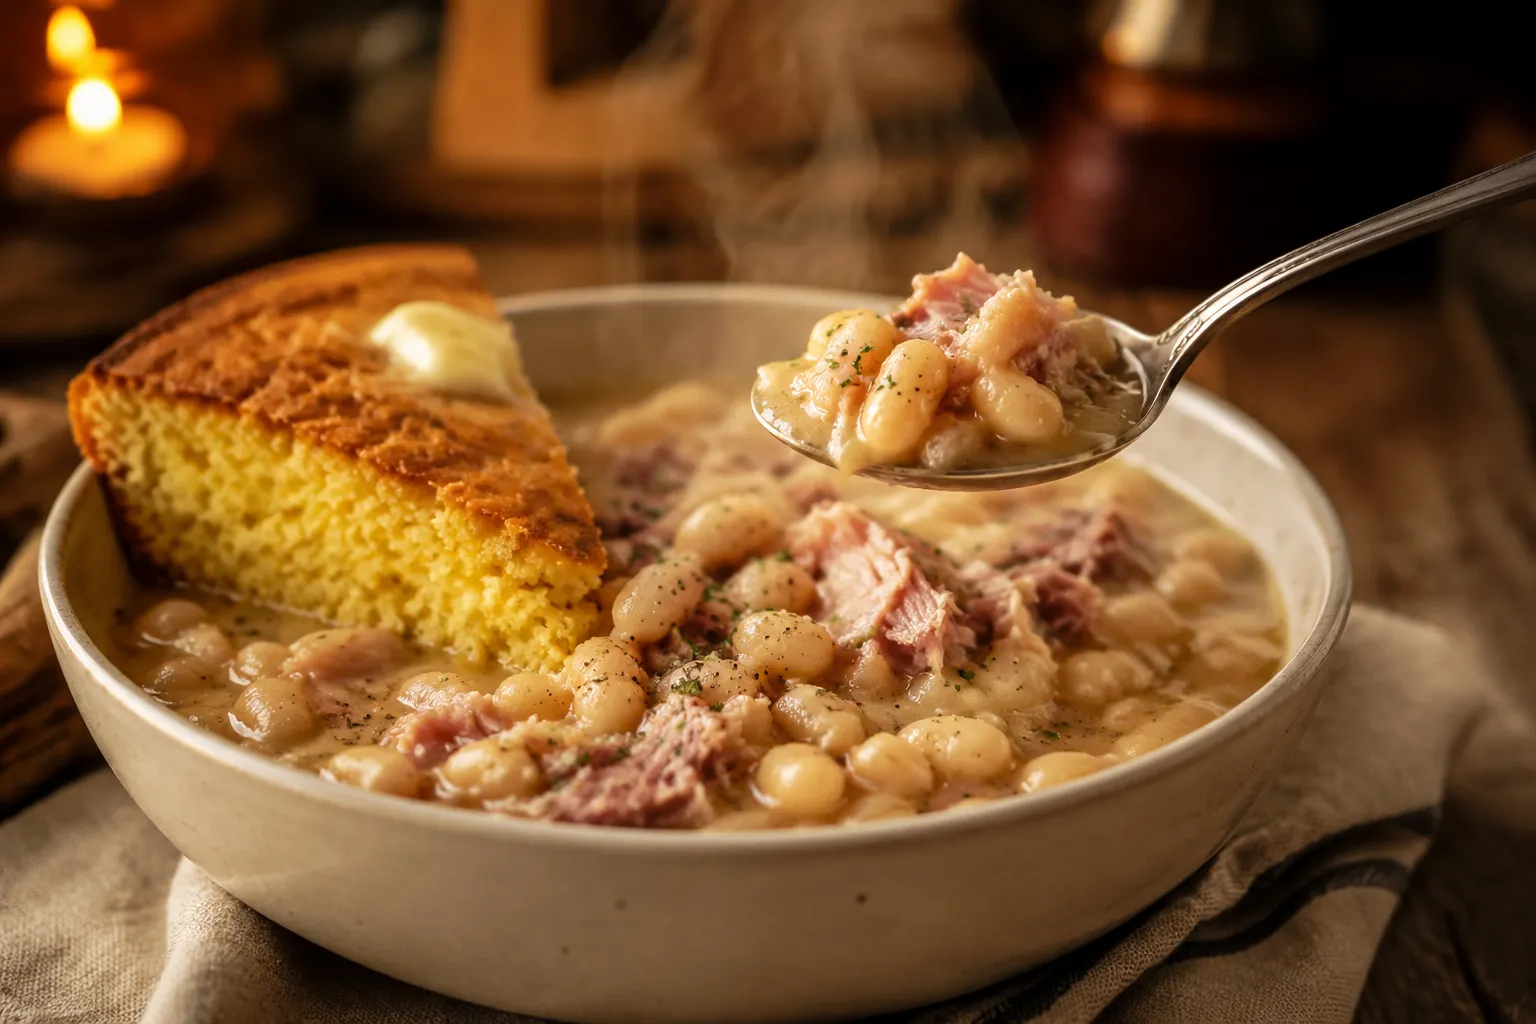
A bowl of these beans is a meal on its own, but it really sings with the right sides. The classic pairing is a buttery, golden wedge of cornbread, and if you don't have a go-to cornbread recipe, a quick skillet version with a touch of honey and buttermilk is exactly the right move. The cornbread soaks up that smoky broth like it was born for it.
A cast-iron skillet of cornbread, baked until the edges are deeply caramelized, is hands-down my favorite partner here. Tear off chunks and dunk them right into the bowl.
For a true Sunday-supper plate, serve the beans alongside braised collards and a scoop of plain white rice. The vinegar in the greens and the neutral rice balance out the richness of the pot beautifully.
If you want something lighter, a bright salad of crisp romaine, thin-sliced red onion, and a sharp red wine vinaigrette cuts through the smoke and adds a fresh contrast. This setup also works if you are serving the beans like a hearty white bean stew on a cold night.
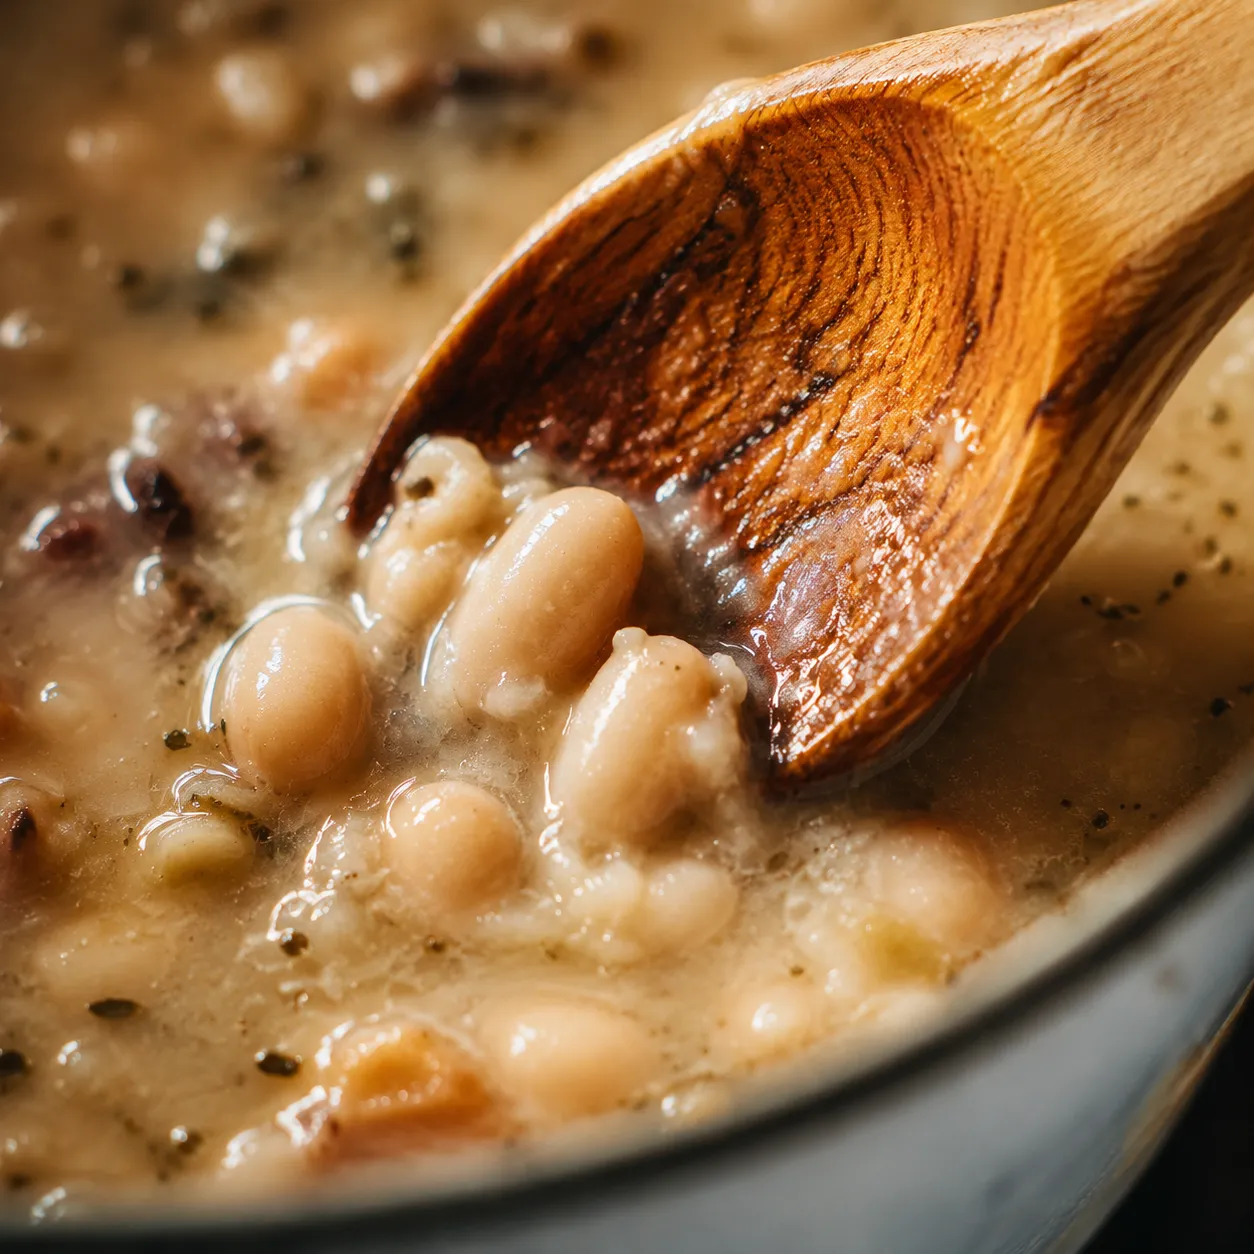
If you want a thicker, more luxurious broth, and trust me, you do, press a wooden spoon against the side of the pot and mash about half a cup of beans into the liquid right before serving. The released starch turns the broth glossy and almost gravy-like without any added cream or thickener. It is the single best texture trick in any northern beans recipe I have made, and it takes 30 seconds.
Beans like these are even better the next day, once the flavors have had a night to mingle in the fridge. A pot stretched across a few lunches with cornbread, or stashed away in the freezer for a cold-weather rescue, is one of those small pleasures that makes a Sunday cooking session more than worth it. This is exactly the great northern beans recipe I'd want waiting in my freezer come a busy weeknight.
This pot is endlessly adaptable. Once you have the basic technique down, you can spin it in a dozen directions depending on what is in your pantry and what you are craving.
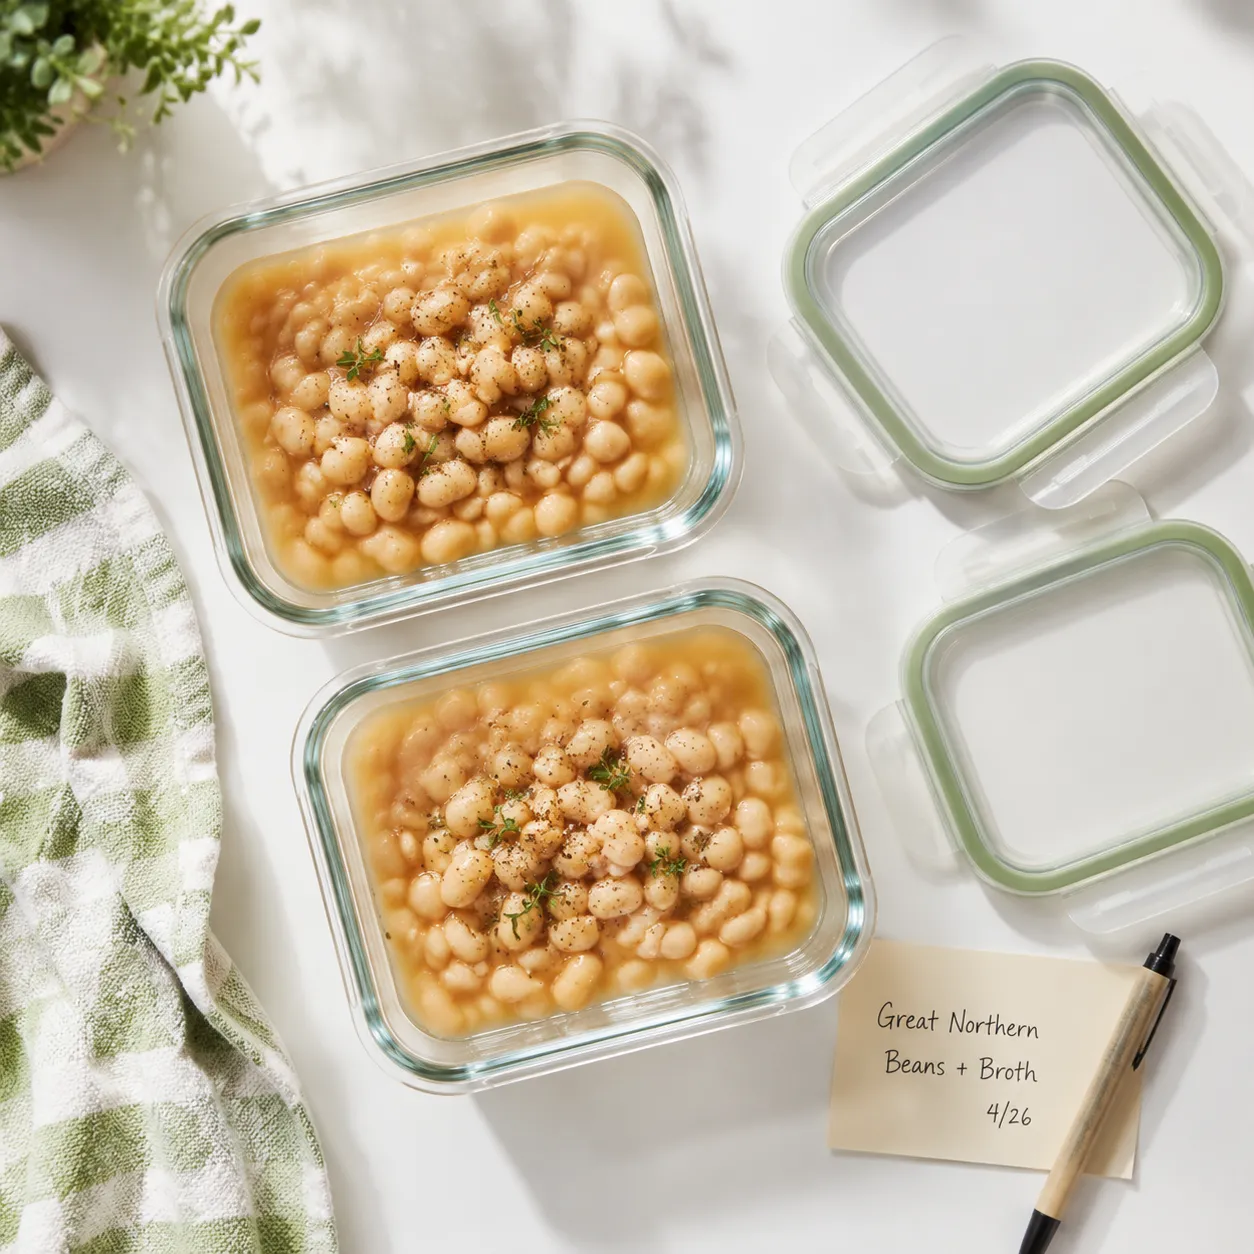
Cooled completely and tucked into an airtight container with their broth, these beans hold up beautifully in the fridge for up to 5 days, and the flavor only deepens overnight. For longer storage, ladle the beans and broth into freezer-safe containers or zip-top bags (lay them flat to save space), leaving about an inch of headspace, and freeze for up to 3 months.
To reheat, warm gently on the stovetop over medium-low heat with a splash of broth or water to loosen the consistency, stirring every minute or two so the bottom does not scorch. From frozen, thaw overnight in the fridge for the cleanest texture, or microwave straight from the freezer in 90-second bursts, stirring between each, until heated through.