Waffle Recipe: Crispy, Fluffy Homemade Waffles
Ingredients
Scale
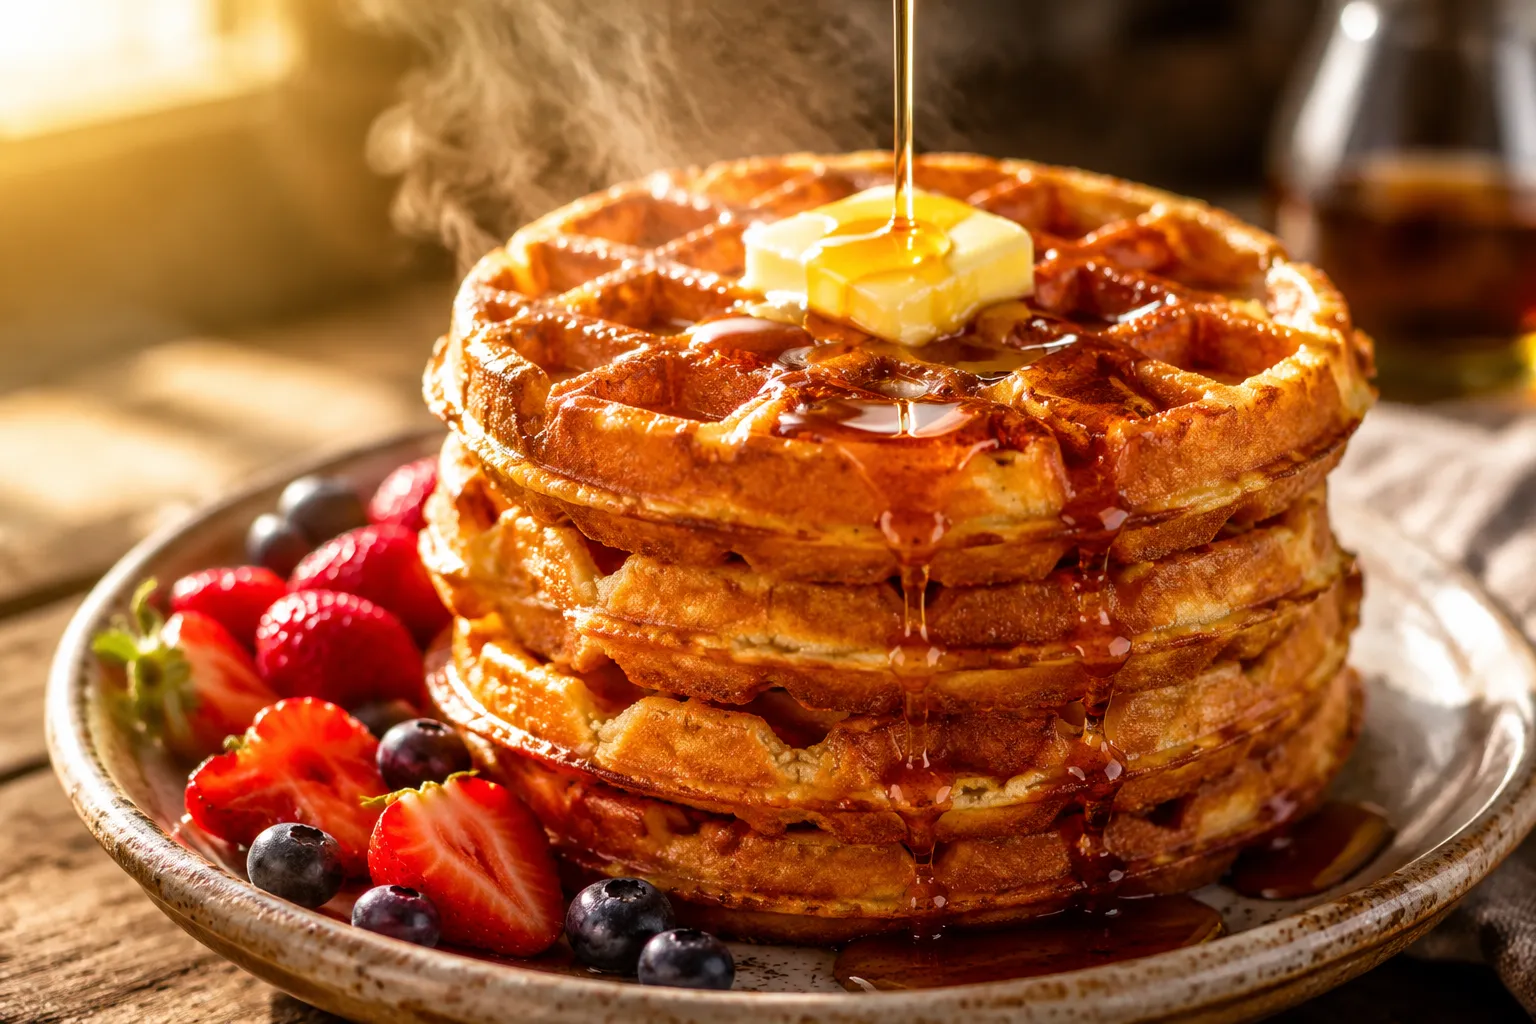
The only waffle recipe you need: golden, crispy edges, a tender fluffy center, and one bowl from start to finish.
This waffle recipe is the only one you'll ever need: deeply golden, shatter-crisp on the edges, and pillowy-tender right through the middle. I've made these on lazy Sundays, on weekday mornings before school drop-off, and for full-blown brunch spreads with friends, and the formula never lets me down. One bowl, pantry staples, thirty minutes from cracking the first egg to syrup hitting the plate.
The trick — and you'll see this come up a lot below — is separating the eggs and folding whipped whites into the batter at the very end. It sounds fussy, but it takes about ninety seconds and it's the single difference between dense, cake-like squares and waffles that genuinely crackle when your fork hits them. If you've been chasing that diner-style crunch with a soft, custardy interior, this is the technique that gets you there. Most boxed mixes can't replicate it because they rely on dehydrated whites, which never whip up the same way.
The other thing this recipe does well is adapt. There's a tangy buttermilk version for that weekend-treat flavor, a vegan waffle recipe swap that's saved me more than once when I've run out of eggs, and notes for a make-ahead homemade waffle mix you can keep in a jar in the pantry. Consider this your master template for crispy waffles, fluffy waffles, and every variation in between.
A great waffle starts with smart ratios, and the good news is everything here probably already lives in your kitchen. Flour, sugar, baking powder, salt, eggs, milk, melted butter, vanilla — that's the whole list. No yeast, no overnight rest, no specialty equipment beyond a waffle iron and a hand mixer (or a whisk and a strong arm).
I always reach for all-purpose flour here because it gives you the best balance of structure and tenderness. Cake flour leaves the interior too soft to hold up under syrup, and bread flour makes the waffles tough and chewy. A full tablespoon of baking powder might look like a lot, but trust it — that's what gives you serious lift and those crisp, lacy edges. Whole milk adds richness and just enough fat for browning; you can absolutely use 2% in a pinch, but skip skim if you want the texture this easy waffle recipe is known for.
Melted unsalted butter is non-negotiable for me. Some recipes call for neutral oil, and oil will get you crispness, but butter is what gives waffles that toasty, almost-caramelized flavor on the outside. Pure vanilla extract is a small move that pays off — it rounds out the sugar and makes the whole thing taste like a bakery rather than a box mix. If you want to take it further, a pinch of cinnamon, a swap to brown sugar, or the zest of half a lemon all play beautifully with the base, and I've left more variations in the section below.
Here's the high-level walkthrough — for the exact step-by-step with measurements and timing, scroll to the recipe card at the bottom. Start by whisking your dry ingredients together in a large bowl. This is the moment to break up any lumps in the baking powder so you don't end up with metallic-tasting pockets in the finished waffle. In a separate bowl or large measuring cup, whisk the egg yolks (save those whites!), milk, melted butter, and vanilla together until smooth and uniformly pale.
Pour the wet into the dry and stir just until combined. A few flour streaks and small lumps are completely fine — overmixing develops gluten, which is exactly what we don't want in a tender waffle. Now beat the egg whites in a clean, dry bowl until they hold soft, glossy peaks. Fold them into the batter in two additions using a rubber spatula and a gentle hand, sweeping down through the middle and up the sides. The finished batter should look airy and a little marshmallowy on top. This is the same instinct that makes a great fluffy pancake recipe, and it works beautifully here too.
Preheat your waffle iron fully — most have a ready light, and you want to wait for it. A cold iron is the number one reason waffles stick and steam instead of crisp. Lightly grease the grids with melted butter or neutral oil even if your iron is technically nonstick. Ladle the batter into the center (the amount depends on your iron; for a standard Belgian-style iron, I use about ⅔ cup), close the lid, and resist the urge to peek for the first four minutes. Lifting too early tears the waffle in half and leaves the inside raw.
Cook until the steam slows dramatically and the waffle is deep golden brown, not just pale tan. Pale waffles are soft waffles. Transfer finished waffles directly to a wire rack set over a sheet pan in a 200°F oven — never stack them on a plate, or the bottoms will steam soft within minutes. The wire rack lets air circulate underneath, which keeps the bottoms as crisp as the tops, even if you're cooking for a crowd and the first waffle has to wait fifteen minutes for the last one to come off the iron.
A buttermilk waffle recipe is what I make when I want that slightly tangy, deeply tender weekend-diner flavor. Swap the whole milk one-for-one with full-fat buttermilk, then reduce the baking powder to 2 teaspoons and add ½ teaspoon of baking soda. The acid in the buttermilk reacts with the soda for extra lift, and it tenderizes the gluten so the interior practically melts on the fork. The flavor is fuller and more complex, with a faint sour-cream tang that plays beautifully against maple syrup.
No buttermilk in the fridge? Stir 1 tablespoon of lemon juice or distilled white vinegar into 1 cup of whole milk and let it sit for 5 minutes — it'll curdle slightly and you're good to go. It's not identical to the real thing, but the difference in the finished waffle is small. I've used this hack more times than I can count, especially on Saturday mornings when running to the store isn't happening.
One note: buttermilk batter browns faster because of the added lactose and the slightly different pH, so check your waffles a minute earlier than usual. You're still going for deep golden, but you don't want to walk away and come back to dark mahogany. The texture trade-off is worth the extra attention — buttermilk waffles are next-level tender, and they hold up to heavier toppings like fried chicken or thick fruit compote without going soggy in the middle.
Maple syrup and a pat of butter is the classic for a reason, but homemade waffles deserve a little range. I like a swirl of softly whipped cream and macerated berries for a brunch-with-friends feel, or a drift of cinnamon sugar and sliced bananas when I want something quick and kid-friendly. For savory, top a waffle with crispy fried chicken, a drizzle of hot honey, and a few pickled jalapeños — Sunday dinner, sorted, with zero leftovers guaranteed.
If you're putting together a proper spread, these slot easily into bigger breakfast brunch ideas: think a sheet-pan of bacon, a big bowl of fruit salad, and a pitcher of cold-brew coffee or mimosas alongside. Waffles are also great for kids' birthday brunches or baby showers because you can set out toppings buffet-style — Nutella, peanut butter, sliced strawberries, lemon curd, sprinkles — and let people build their own. A lazy host's dream, and it photographs beautifully if you're the type to share the spread on social.
For an after-school snack that feels like a treat, I'll pop a frozen leftover waffle in the toaster and spread it with peanut butter and sliced strawberries. The kids think it's dessert. I think it's tomorrow's breakfast prep, already done. Any way you serve them, these waffles disappear quickly, so I always recommend doubling the batch.
Whether you're making this for a quiet Saturday or a full-blown brunch, this is the waffle recipe that earns its place in your regular rotation. Make a double batch, freeze half, and you've basically got your own homemade waffle mix on standby — toaster-ready breakfasts for the rest of the week. Once you nail the technique, it's hard to go back to the box, and you'll find yourself looking for excuses to fire up the iron.
This base recipe is built to flex. Once you're comfortable with the technique, try one of these spins to keep things interesting through the seasons.
Once your waffles have cooled completely on a wire rack, layer them between sheets of parchment paper inside an airtight container or zip-top bag. They'll keep in the fridge for up to 3 days and in the freezer for up to 3 months. Always cool fully before storing — packing waffles warm traps steam and turns crisp crusts soggy within minutes.
To reheat, skip the microwave; it makes them rubbery and pale. Pop refrigerated waffles into a toaster on a medium setting, or arrange frozen ones on a sheet pan and bake at 375°F for 8 to 10 minutes, flipping halfway through. They'll crisp right back up to nearly fresh-from-the-iron quality, which makes this recipe a workhorse for busy weekday breakfasts and last-minute weekend guests.