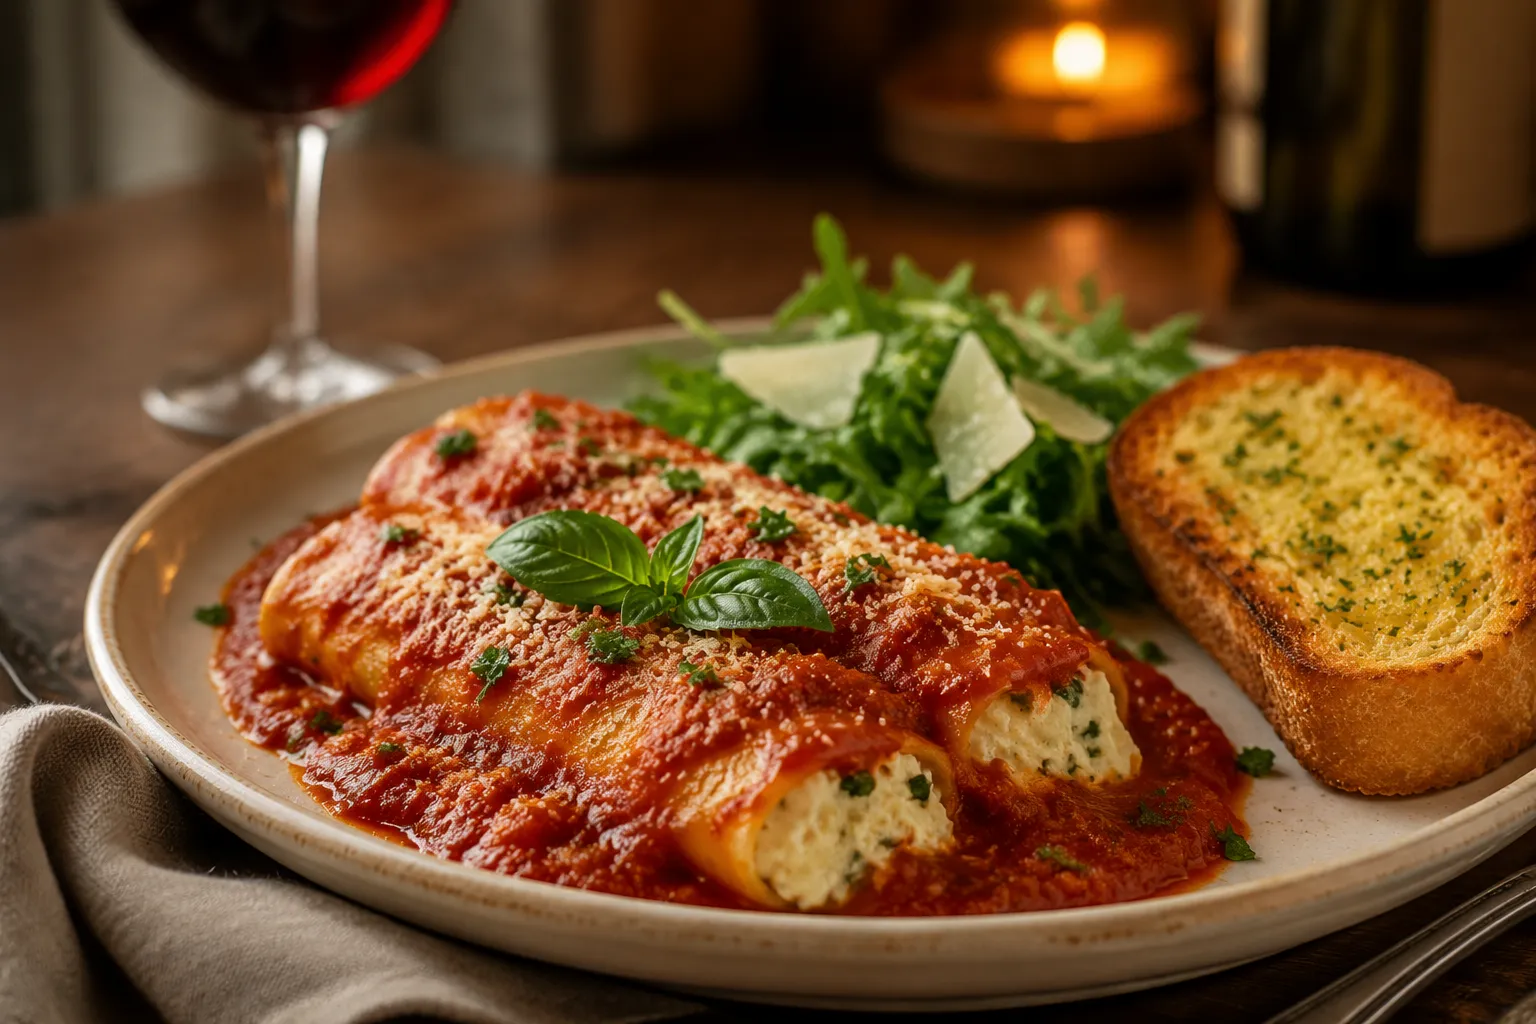
Classic Manicotti Recipe with Three-Cheese Filling
Ingredients
Scale
Tender pasta tubes stuffed with a creamy ricotta-mozzarella-parmesan filling, smothered in marinara, and baked until bubbly. The Sunday-supper classic, made foolproof.
Manicotti is the kind of comforting baked pasta that feels like it belongs at the center of a big family table, with plenty of sauce, melted cheese, and second helpings all around. This version keeps things simple but still tastes like something you’d order at a cozy neighborhood trattoria, thanks to a creamy three-cheese filling and plenty of marinara sauce.
If you’ve ever loved stuffed shells, this manicotti recipe gives you the same cozy satisfaction in elegant pasta tubes that bake up tender and saucy. It’s approachable enough for a weeknight, but special enough for an Italian Sunday dinner or when you want a make-ahead meal that gets everyone excited.
The best part is that the filling is piped in with a zip-top bag, which makes the whole process far less fussy than it sounds. Once assembled, the dish bakes covered so every shell stays pillowy and soft, then finishes uncovered with a bubbly cheese top. If you keep a good homemade marinara sauce in your back pocket, you’re already halfway to dinner.
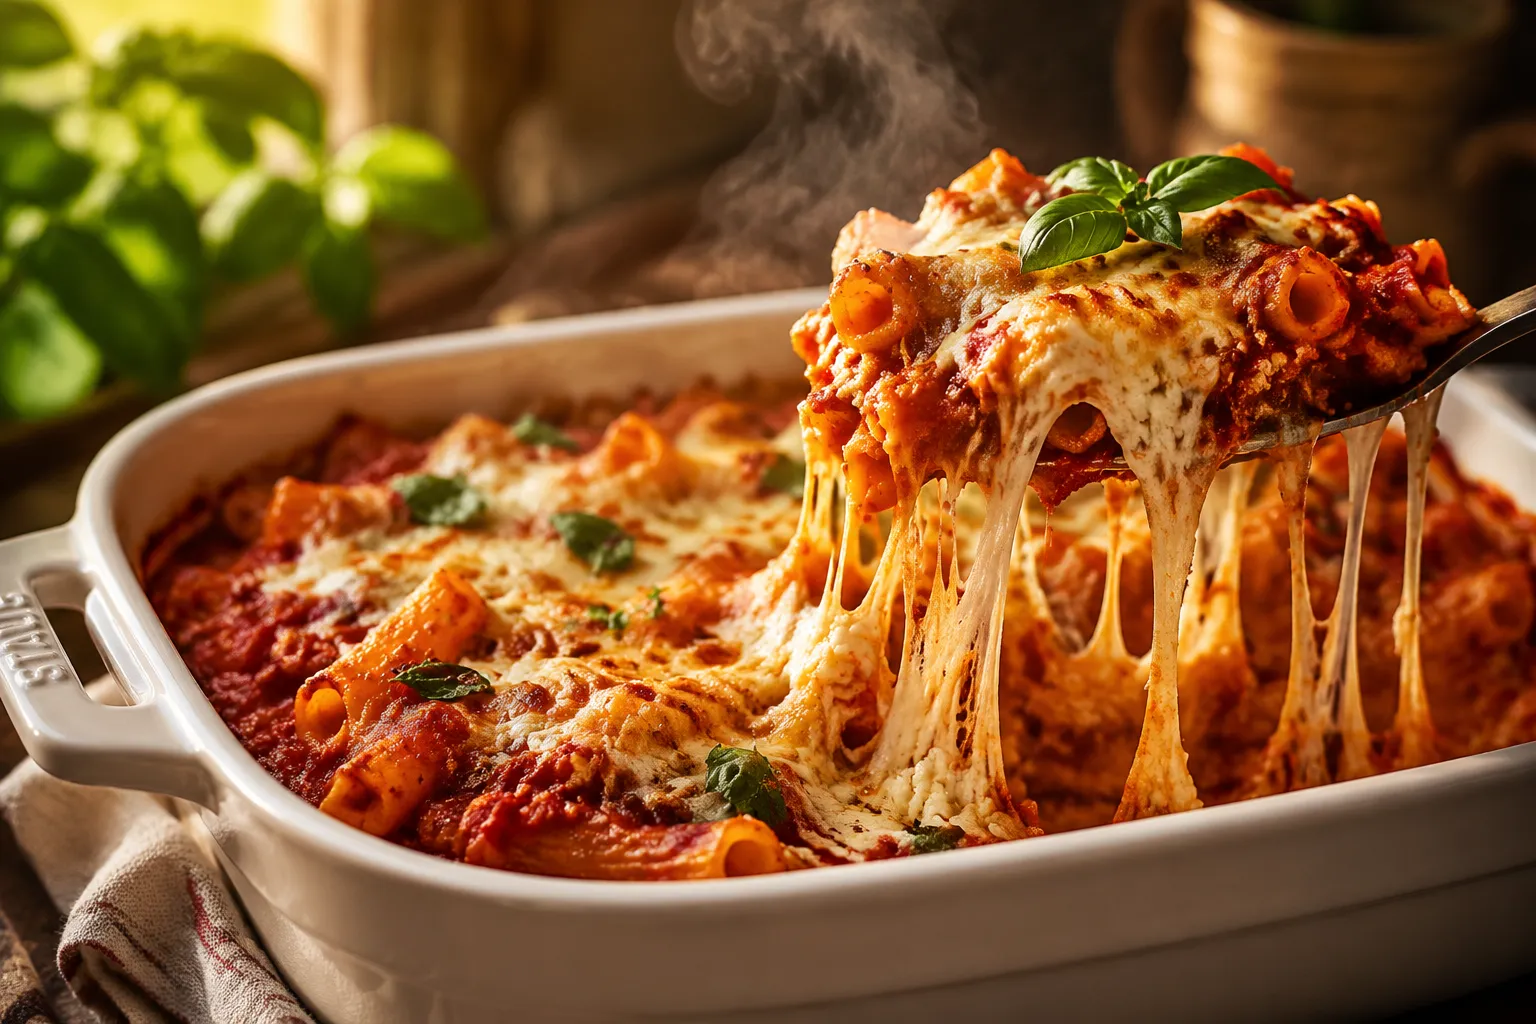
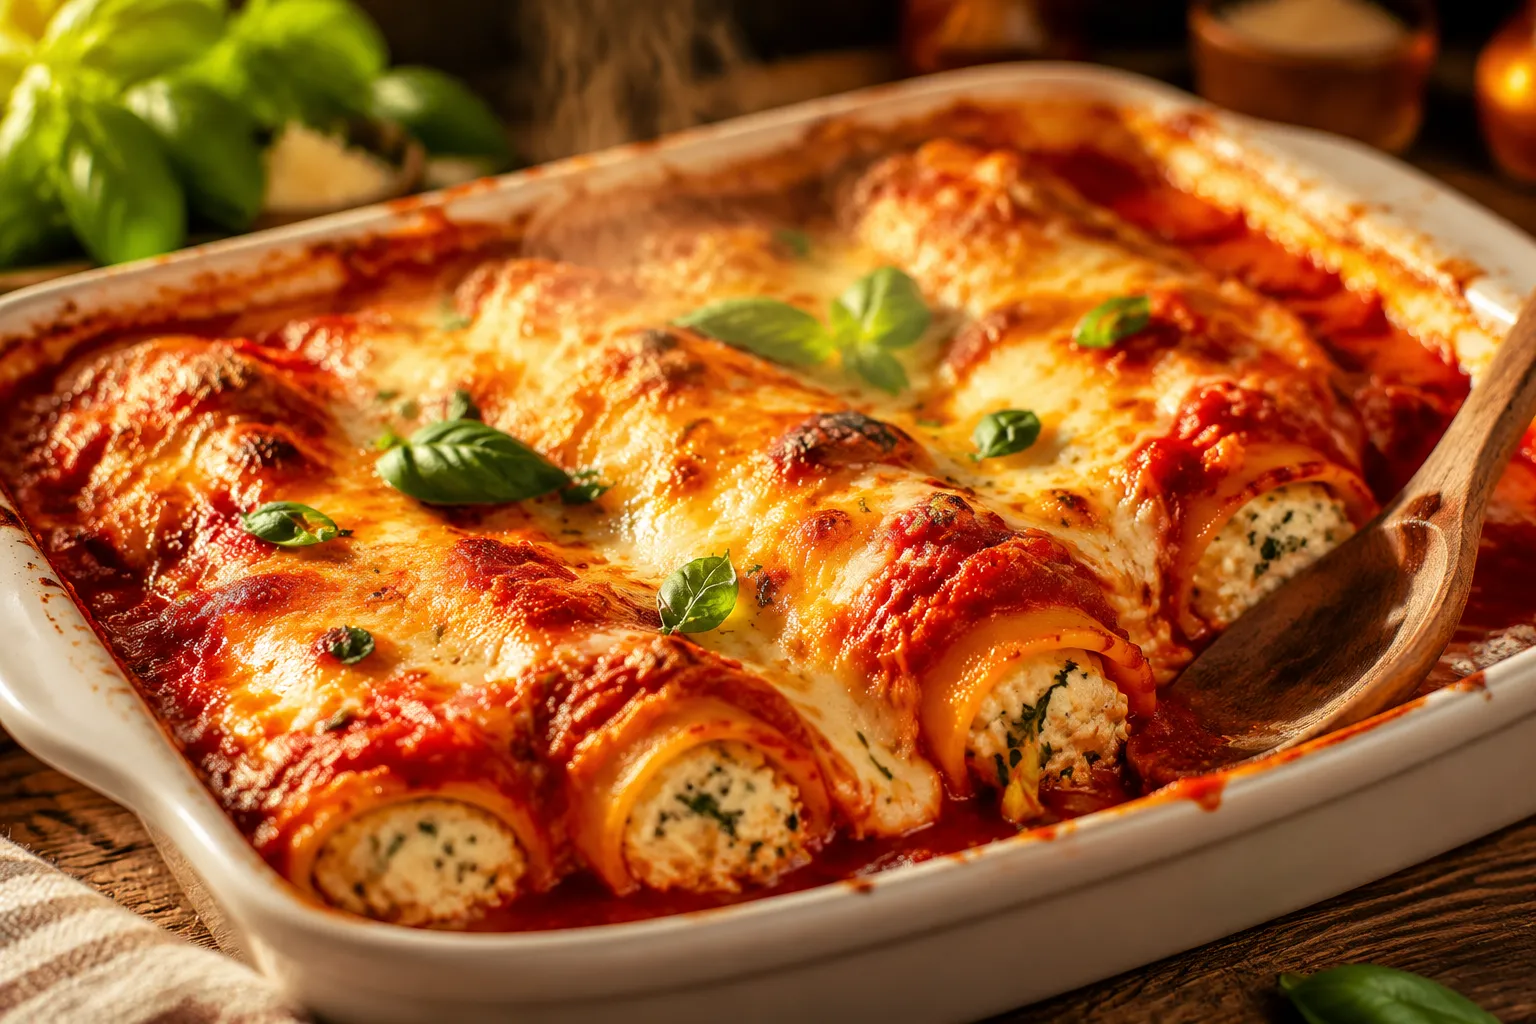
Manicotti is an Italian-American baked pasta made with large tube-shaped pasta stuffed with cheese, meat, or vegetables, then nestled into sauce and baked until hot and tender. In many home kitchens, it’s right there with baked ziti and lasagna recipe favorites as one of the most beloved comfort dishes on the table. This manicotti recipe leans classic: simple cheese filling, tomato sauce, and a generous blanket of mozzarella.
The key difference between manicotti and cannelloni comes down to the pasta itself. Manicotti typically uses dried, ridged pasta tubes, while cannelloni is more often made with smooth fresh pasta sheets that are rolled around the filling. The fillings and sauces are nearly interchangeable, but manicotti has a sturdier, more nostalgic feel that many American cooks know and love.
That’s part of why this dish has stayed so popular for generations. It’s rich without being complicated, and it feels just a little celebratory even when the ingredient list is humble. If you already make stuffed shells or love a good lasagna recipe, this is the same comforting spirit in a different shape.
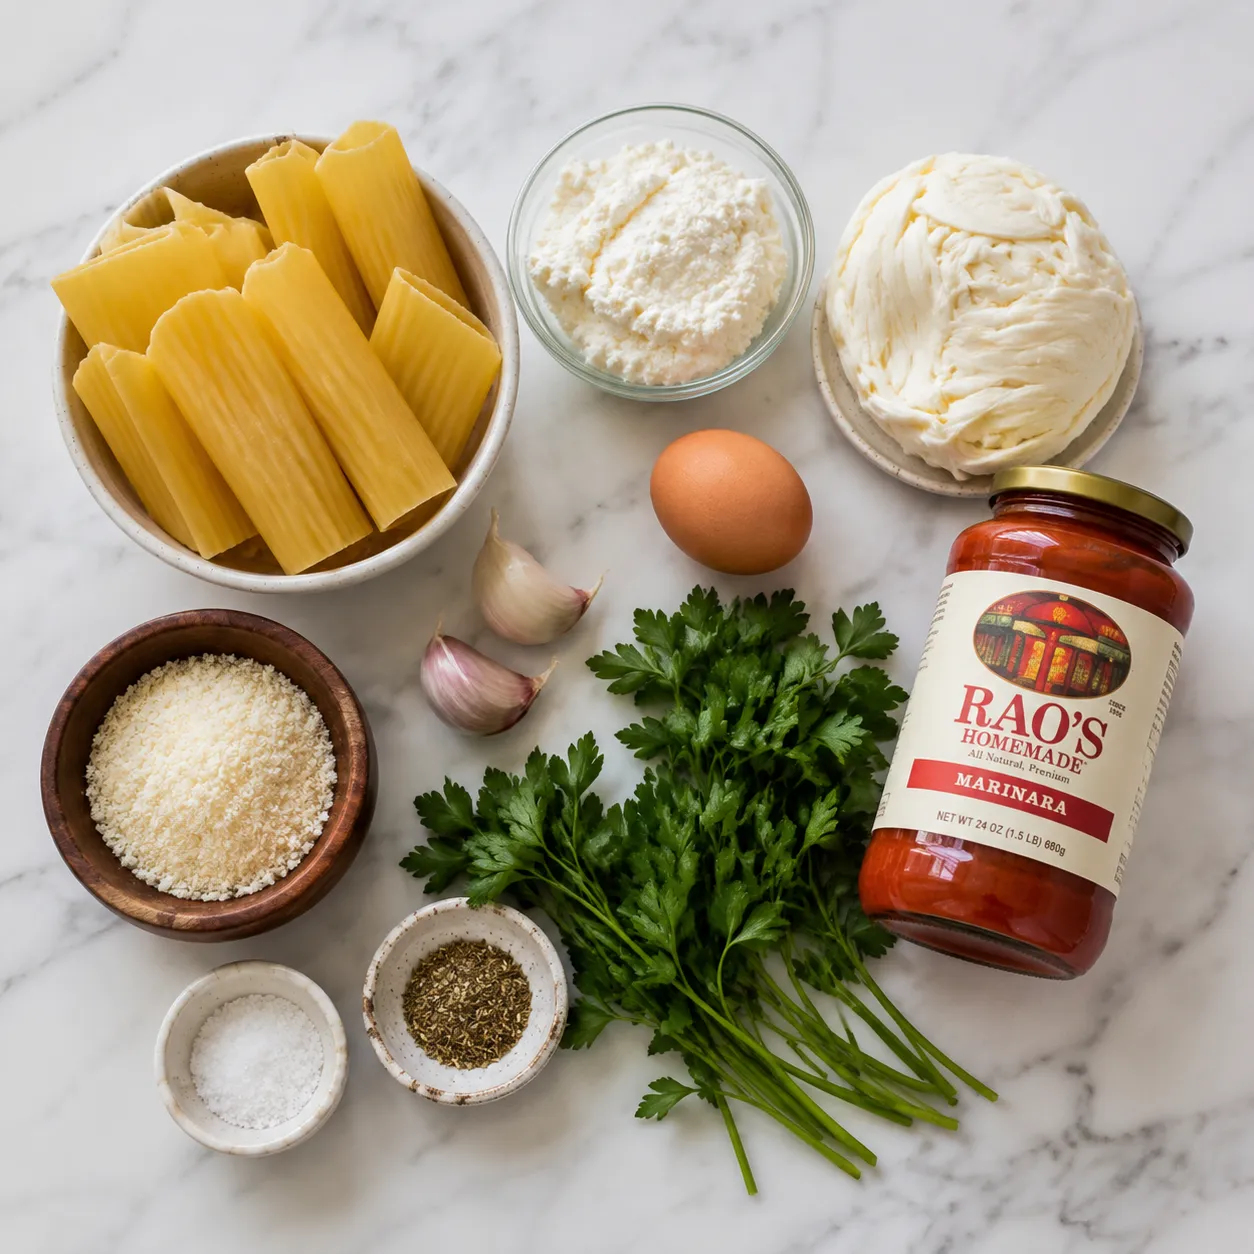
You only need a handful of ingredients to build great flavor here, and each one plays a specific role. The pasta should be sturdy enough to hold its shape, the ricotta filling should be creamy but not watery, and the marinara sauce should be bright enough to balance the richness of the cheese. A little garlic and parsley go a long way toward making the filling taste fresh instead of heavy.
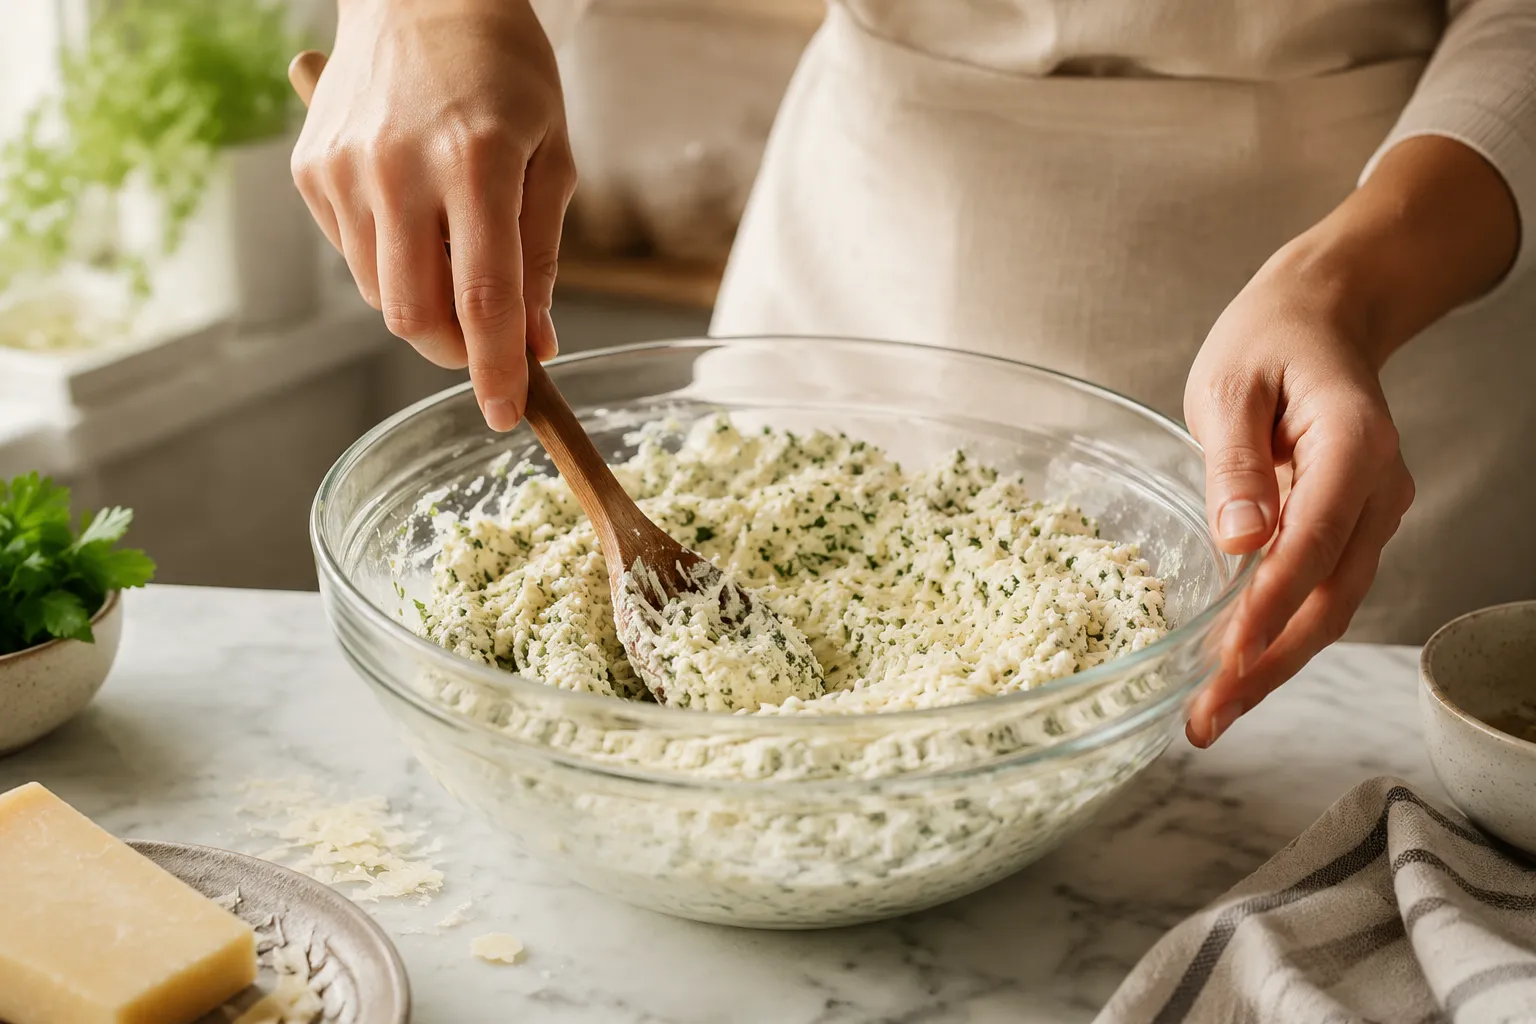
The heart of the dish is the ricotta filling, which combines whole-milk ricotta, shredded mozzarella, grated Parmesan, egg, garlic, parsley, and seasoning. Whole-milk ricotta gives you the lushest texture, while mozzarella adds stretch and Parmesan brings salty depth. If your ricotta looks especially wet, drain it briefly so the filling stays thick and easy to pipe.
A good marinara sauce makes this dish sing. Use your favorite store-bought jar if it tastes bright and balanced, or go with a homemade marinara sauce if you like a deeper, more simmered flavor. Since the sauce does a lot of the heavy lifting, it should be seasoned enough to stand on its own but not so thick that it dries out in the oven.
For this recipe, dried manicotti pasta is the standard choice because it holds up well to baking and gives the dish that classic structure. Fresh pasta can work, but it behaves differently and usually needs a gentler touch. If you’re shopping, look for shells that are uniform in size so they cook evenly and are easier to fill.
Making manicotti is less about fancy technique and more about timing, texture, and a little patience. The biggest goal is to keep the pasta from tearing, the filling from becoming runny, and the whole pan from drying out in the oven. Once you understand the rhythm, this is one of those comforting dishes that becomes almost automatic.
Cook the manicotti just until barely flexible, not fully tender, because they’ll continue softening in the oven. Drain them carefully and spread them out so they don’t stick together. A quick rinse with cool water helps stop the cooking and makes them easier to handle.
Combine the ricotta, mozzarella, Parmesan, egg, garlic, parsley, Italian seasoning, salt, and pepper until smooth and evenly mixed. You want the filling to be thick enough to hold its shape, yet soft enough to pipe without resistance. If it tastes a little bland now, it will taste bland later, so season thoughtfully.
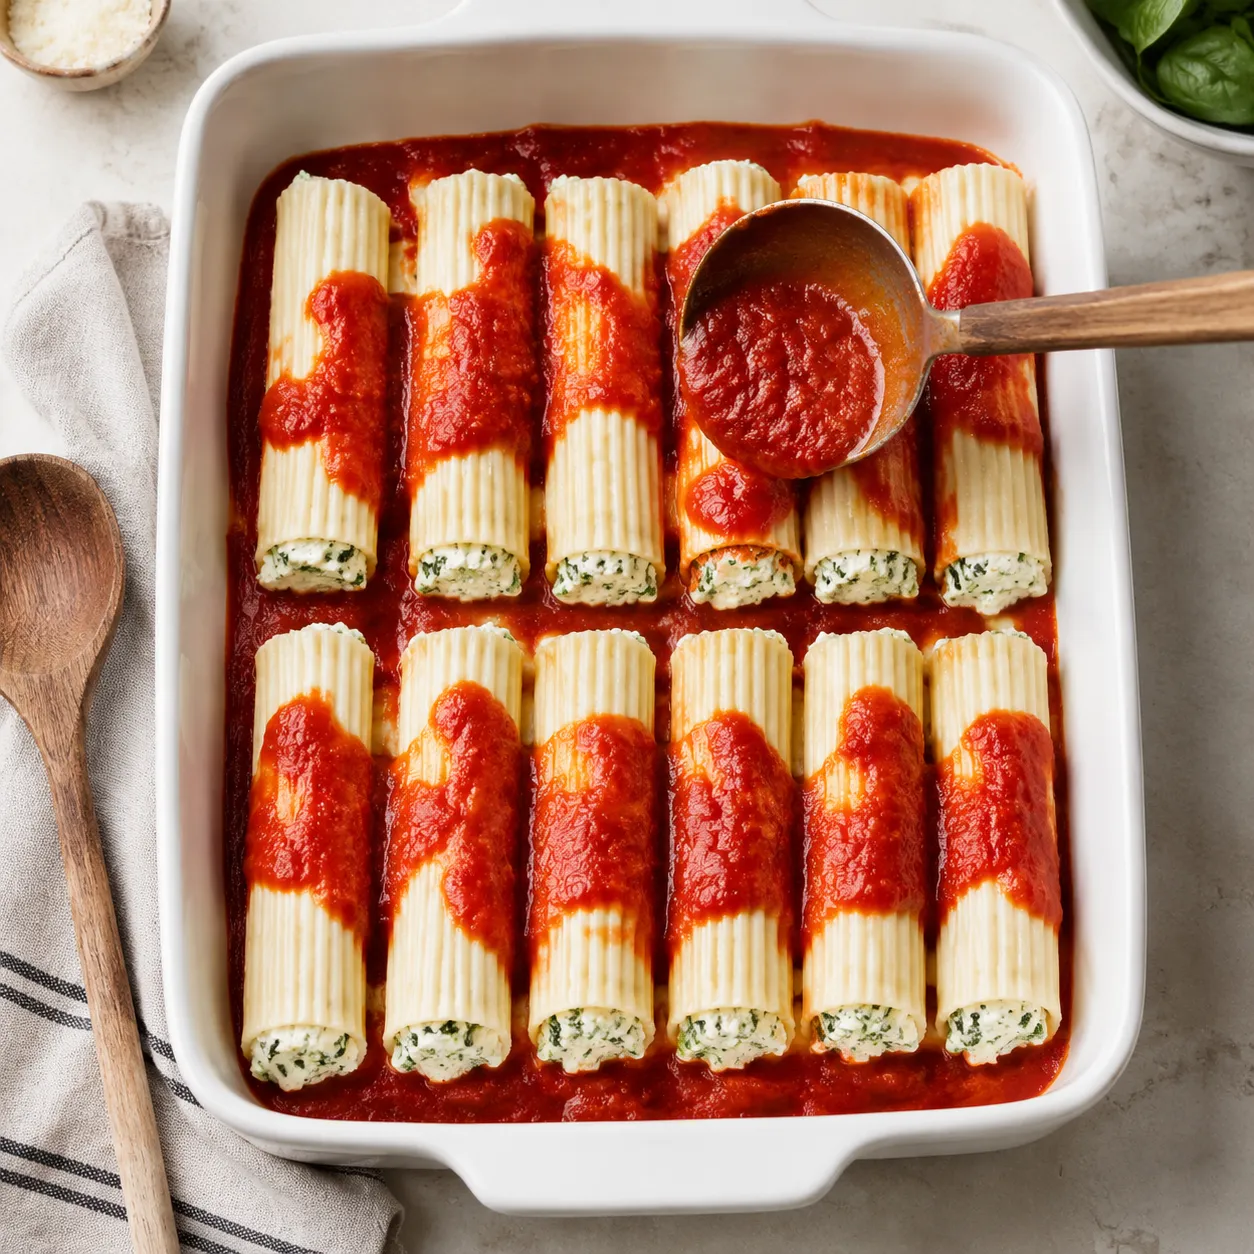
Spoon the filling into a zip-top bag, snip a corner, and pipe it into each tube. This trick is cleaner than using a spoon and much faster than trying to pack the filling in by hand. It also helps you fill the pasta evenly so every bite has that same creamy center. 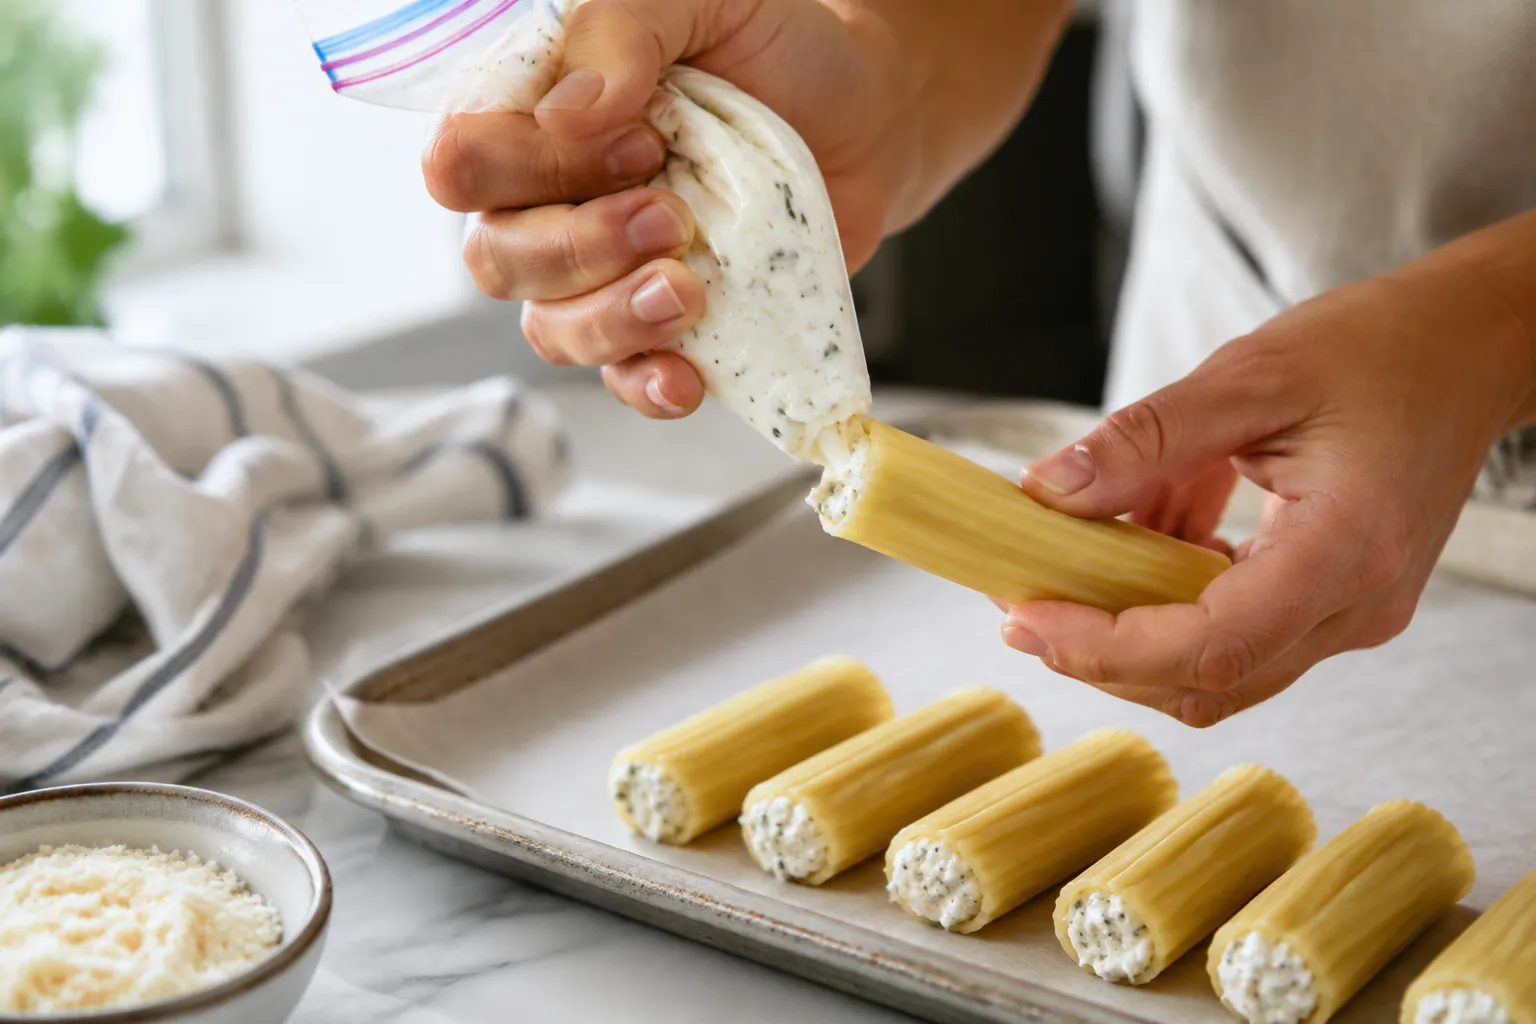
Spread a layer of sauce in the baking dish, arrange the stuffed tubes in a single layer, then cover with more sauce and a final shower of cheese. Baking covered first keeps the pasta tender and the filling moist, then removing the cover at the end gives you that bubbling, golden finish. This is the kind of Italian baked pasta that makes the whole house smell irresistible.
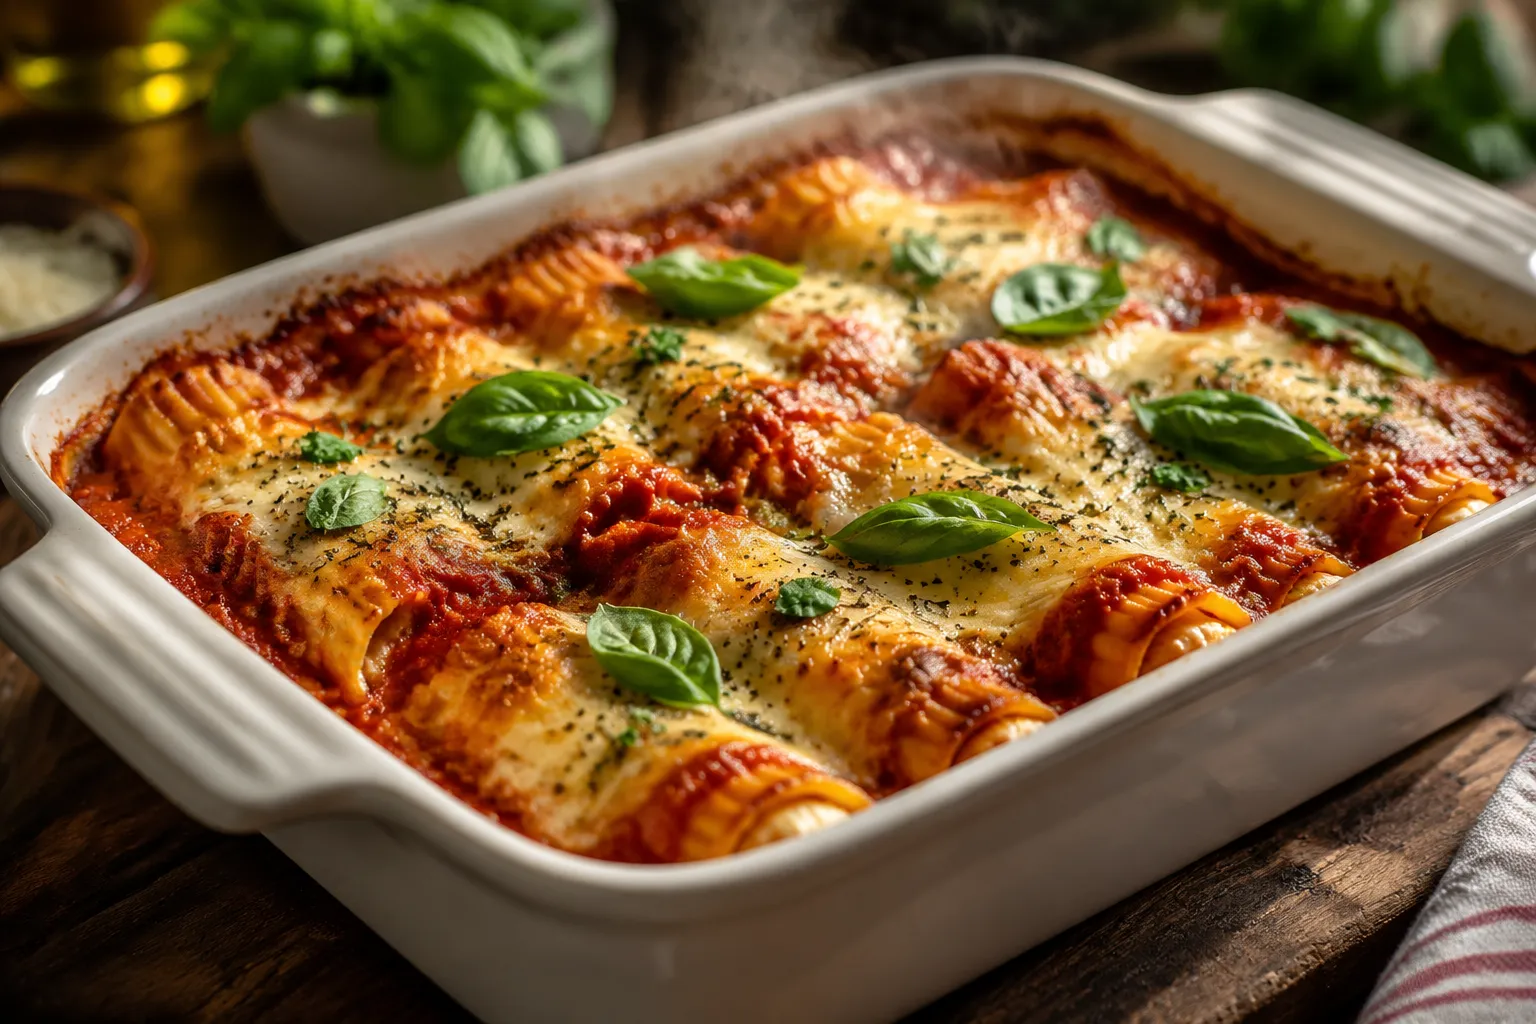
Serve this manicotti hot from the oven with extra Parmesan, torn basil, and a big spoonful of sauce on top. It pairs beautifully with a crisp green salad, roasted vegetables, or warm bread for soaking up every last bit of marinara. For a dinner that feels complete without much effort, I love setting it on the table alongside garlic bread and a simple salad, especially if you’re feeding company.
Because the dish is rich and cozy, you don’t need much else to make the meal feel complete. It works just as well for a relaxed family night as it does for a special occasion, and leftovers reheat nicely for lunch the next day. If you’re building an Italian-style spread, it sits comfortably next to a favorite pasta salad or a lighter starter.
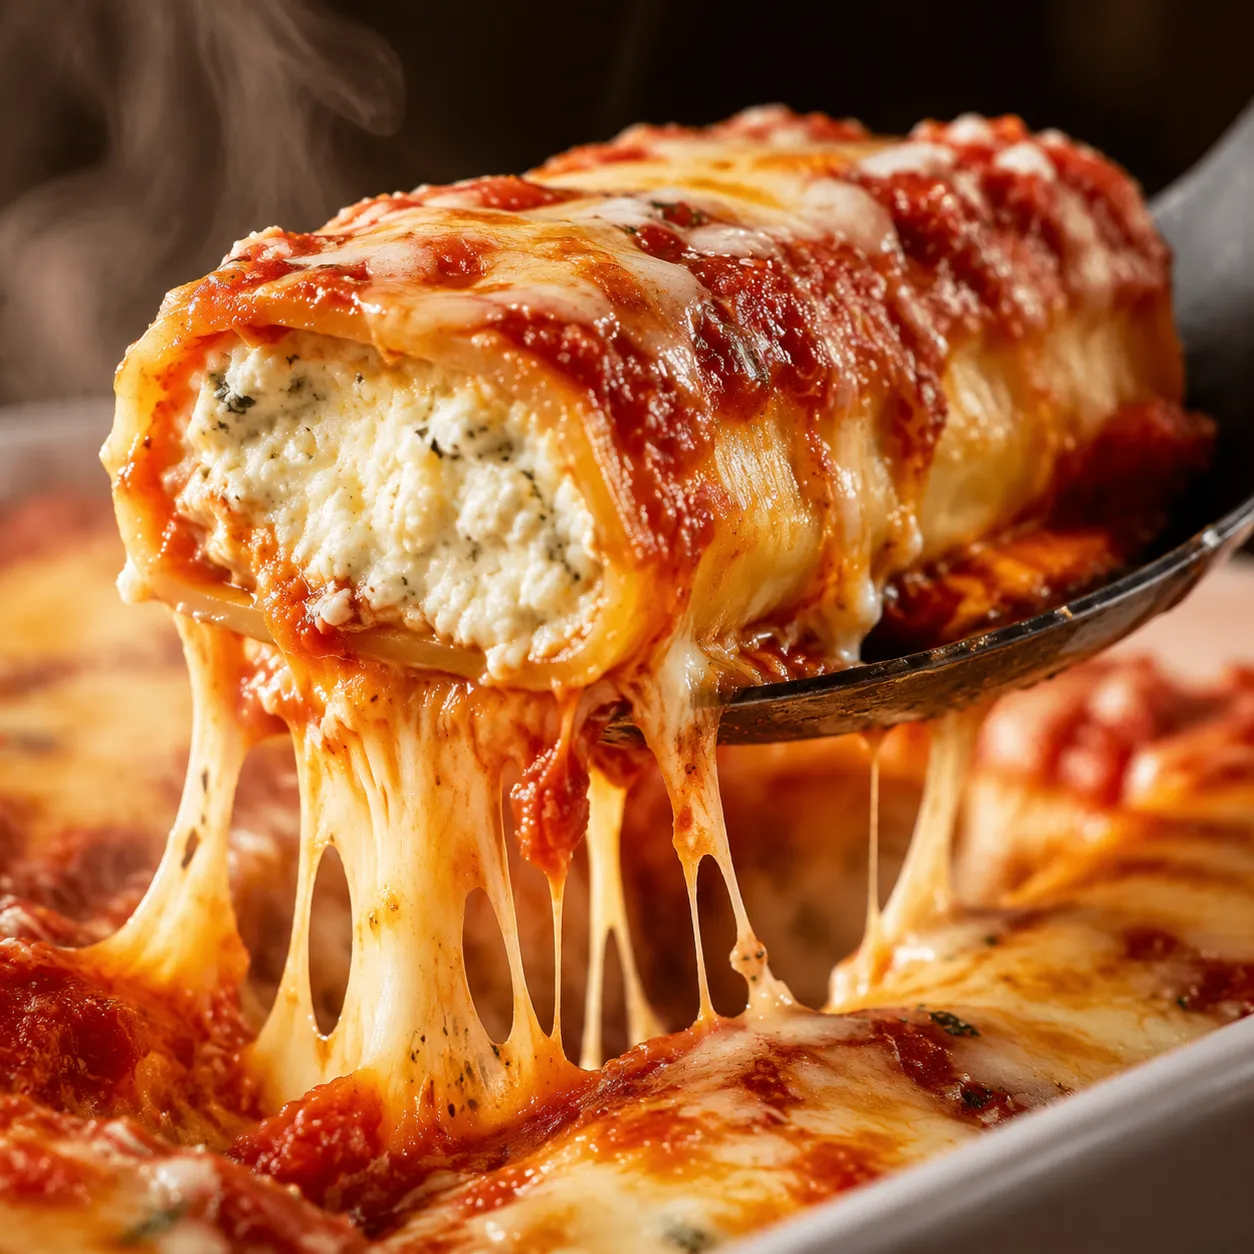
This manicotti recipe is designed to solve the problems that usually make baked pasta feel intimidating: broken shells, watery filling, and messy stuffing. The zip-top bag piping method keeps things neat, while the covered bake ensures the pasta stays tender instead of tough. The result is a classic pan of manicotti that slices, serves, and reheats beautifully.
It also gives you the flexibility home cooks need. You can assemble it ahead, freeze it for later, or adapt the filling to match what you have on hand. That’s the beauty of a great manicotti recipe: it gives you restaurant-style comfort without demanding a complicated process.