Sopapilla Cheesecake: Easy Cinnamon Sugar Dessert Bars
Ingredients
Scale
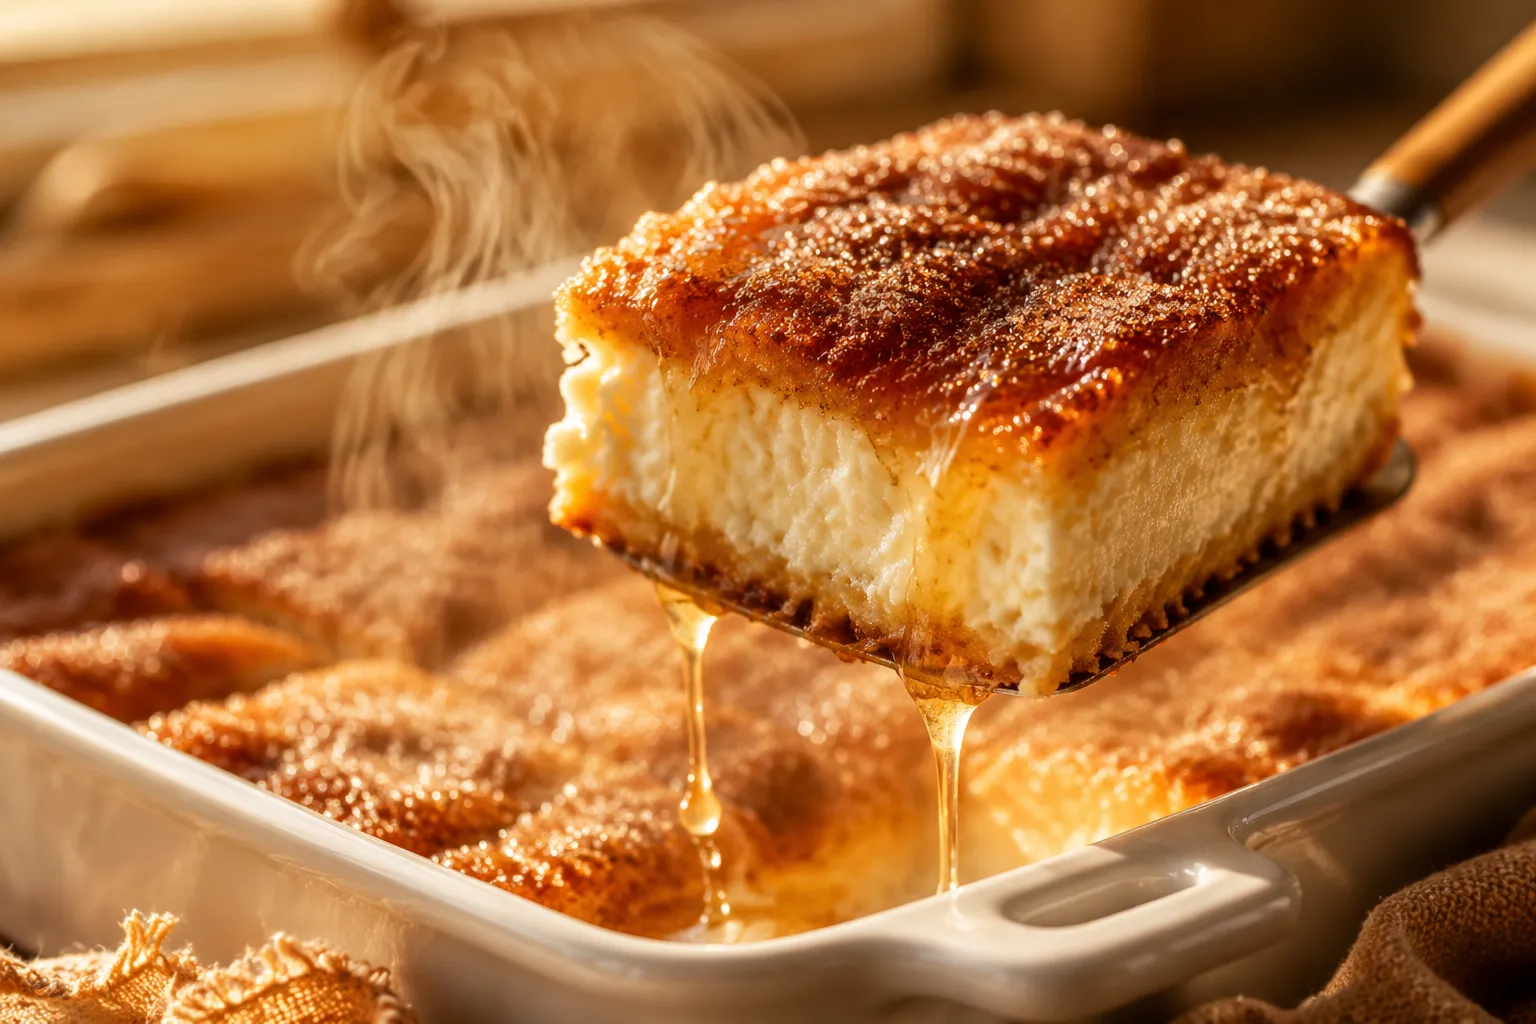
Buttery cinnamon sugar tops a creamy cheesecake center tucked between flaky crescent layers. This sopapilla cheesecake is the easiest crowd-pleasing dessert you'll make all year.
Sopapilla cheesecake is the dessert that vanishes from every potluck table before the casserole has cooled. It's that good. A buttery, crackly cinnamon sugar crust shatters over a cool, creamy cheesecake middle, all sandwiched between two flaky layers of crescent roll dough. If you've ever bitten into a hot Tex-Mex sopapilla drizzled with honey and thought, this needs cheesecake in it, congratulations, somebody beat you to the idea, and the result is one of the most beloved Mexican-inspired desserts in American home kitchens.
What I love most about this recipe is how absurdly simple it is. We're talking pantry staples, no springform pan, no water bath, no fussy graham crust. Just two cans of crescent roll dough, two blocks of cream cheese, sugar, butter, cinnamon, and a 9x13 dish. Fifteen minutes of prep, about half an hour in the oven, and you've got a dessert that tastes like you fussed for hours.
This is the recipe I pull out for Cinco de Mayo dinners, holiday cookie swaps, and lazy Sundays when I want something sweet without the production. It travels well, slices clean once chilled, and somehow tastes even better the next day. Whether you spell it sopapilla or sopopilla cheesecake (more on that quirk in a minute), you're in for a treat.
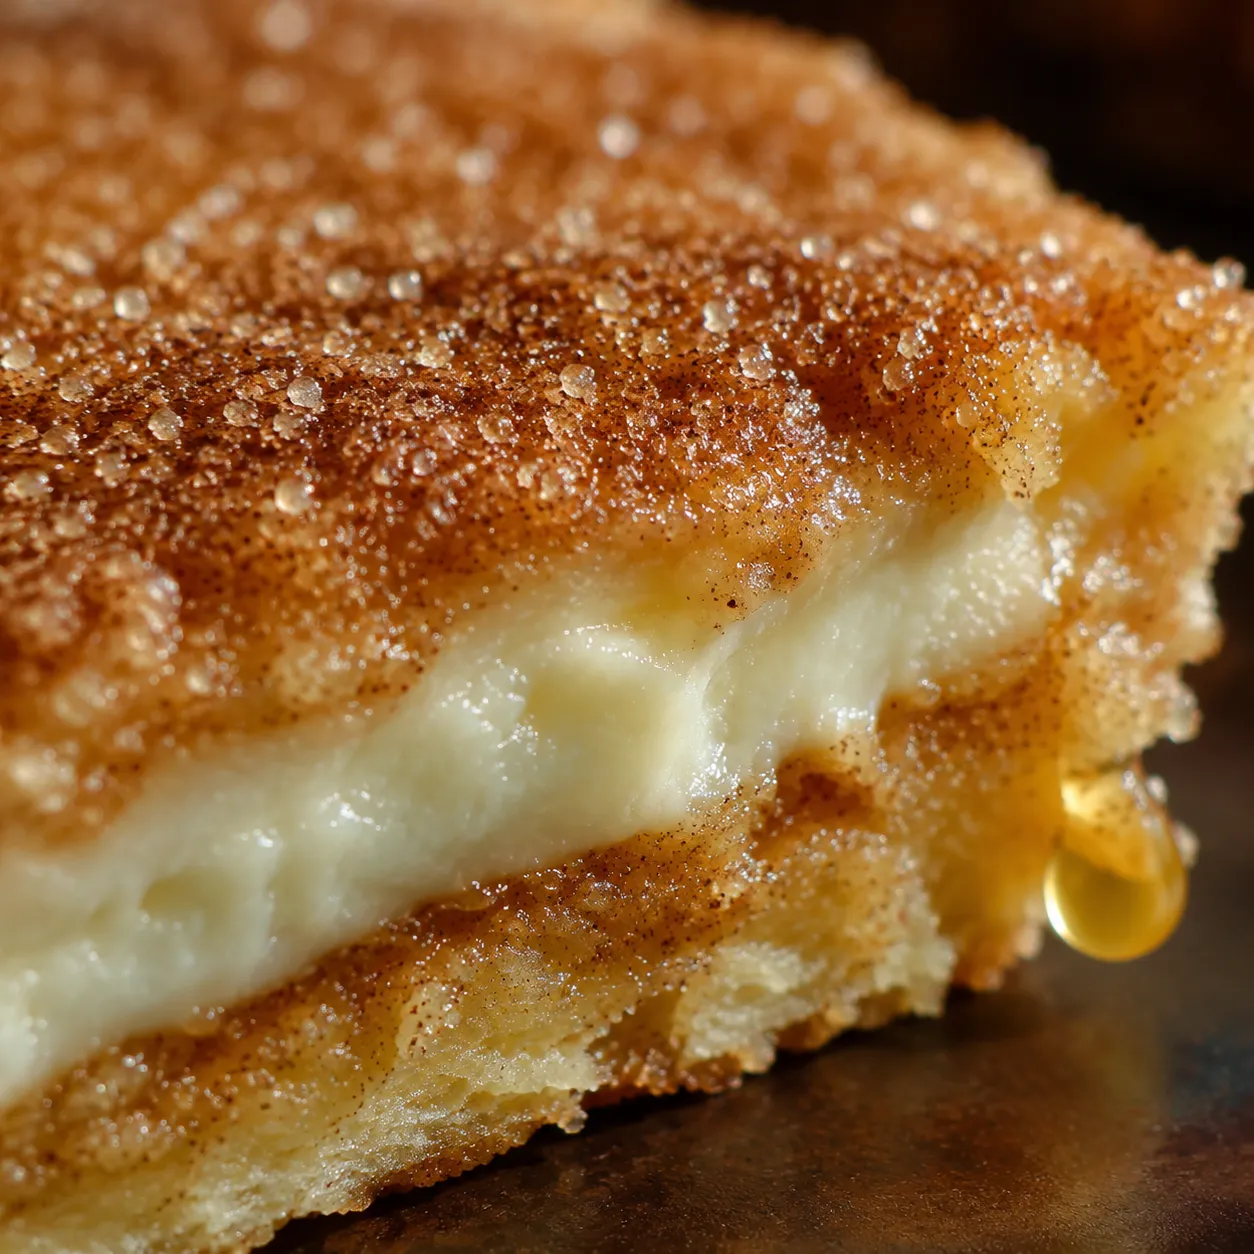
Sopapilla cheesecake is a Tex-Mex dessert bar that takes the soul of a classic Mexican fried sopapilla, that pillowy, honey-drizzled pastry you've had at your favorite enchilada spot, and reimagines it as a layered baked treat. Instead of frying puffed dough, you stack sheets of crescent roll dough above and below a sweetened cream cheese filling, then crown the whole thing with melted butter and cinnamon sugar. The top bakes up shaggy, crackly, and golden, with the exact caramelized cinnamon flavor you'd get from a sopapilla tossed in sugar at the table.
Unlike a traditional New York cheesecake, this version skips the graham crust, the springform pan, and the long bake. The texture sits somewhere between bar and pastry, softer than a dense cheesecake slice, with the cream cheese layer acting as a smooth, sliceable filling rather than the heavy star. If you love cream cheese desserts but don't want to babysit a water bath for an hour, this is your shortcut. It also bakes faster, slices cleaner, and feeds more people from a single pan than a round cheesecake ever could.
About the spelling: you'll see this dessert listed online as both sopapilla cheesecake and sopopilla cheesecake. The correct spelling is sopapilla, from the Spanish word for the fried pastry common across Texas, New Mexico, and northern Mexico. Sopopilla is a phonetic misspelling that's caught on widely enough to have its own search traffic, but rest assured both refer to the same gloriously buttery dessert. Recipe SEO is weird like that.
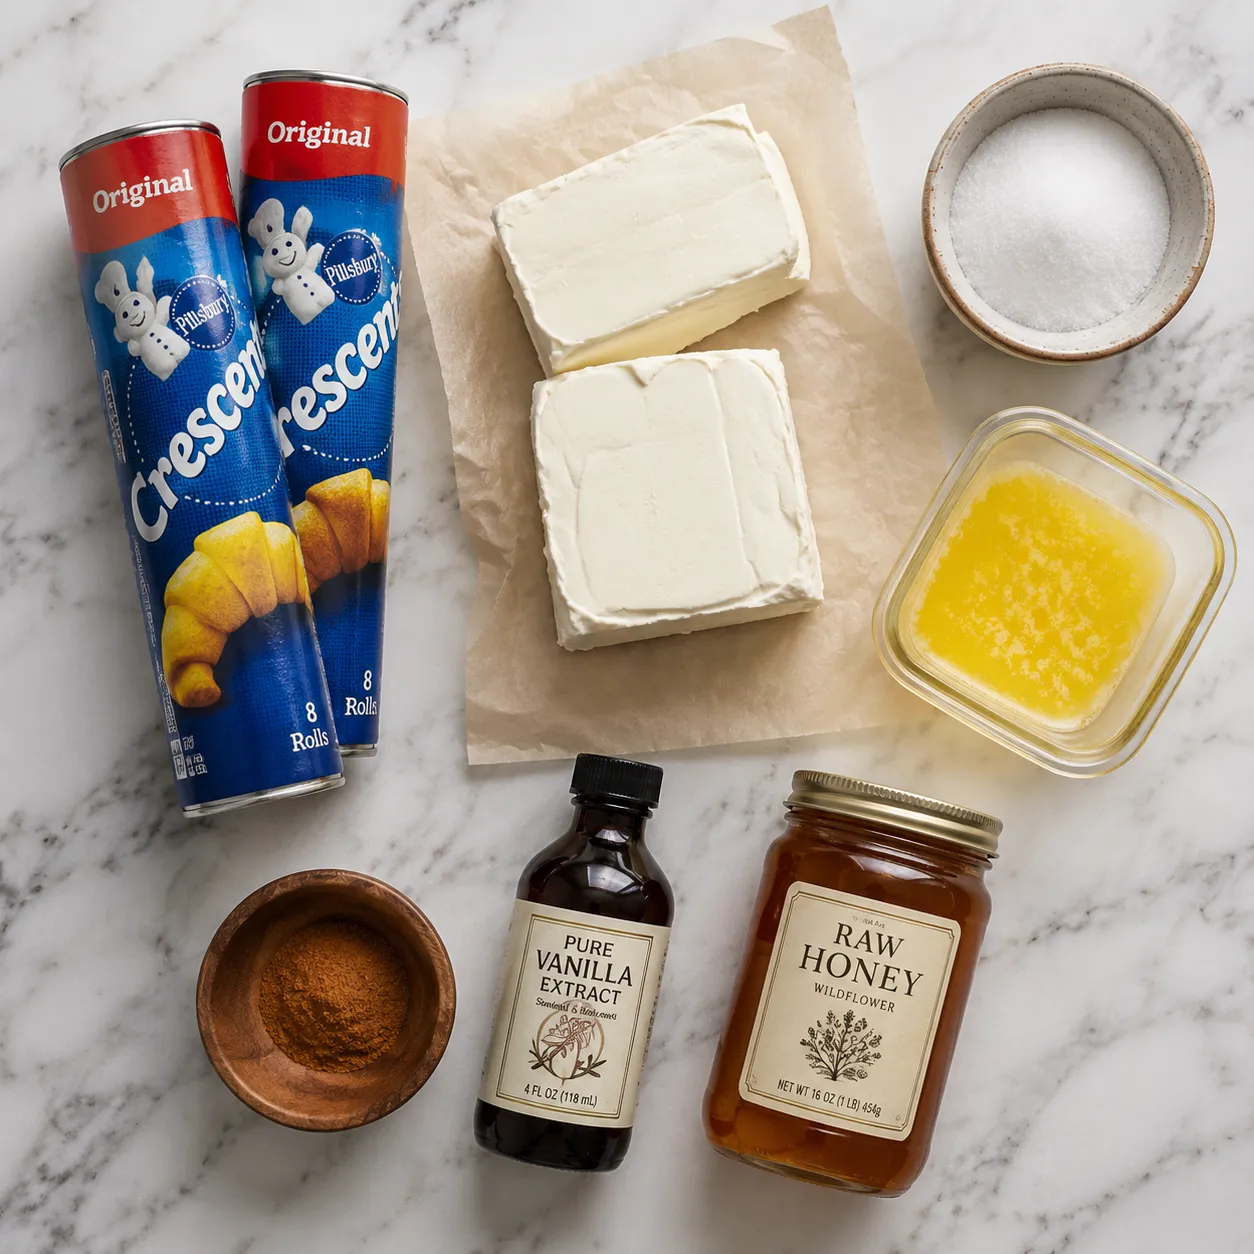
The beauty of this Tex-Mex dessert is the short, supermarket-friendly grocery list. Most of these ingredients already live in your fridge or pantry, which is exactly why this dish has earned a permanent slot in my last-minute baking rotation.
Crescent roll dough. Two 8-ounce cans do the heavy lifting here, forming the top and bottom layers. The pre-perforated triangles get pressed flat into a single sheet, so any brand of refrigerated crescents works. This trick is what makes crescent roll desserts so wildly popular online, the dough delivers the flake of laminated pastry without the hours of folding and chilling.
Cream cheese. Two full bricks (16 ounces total), softened to room temperature. Don't substitute whipped or low-fat cream cheese here; you need full-fat blocks for a thick, sliceable filling that holds its shape between the dough layers. Let them sit on the counter for at least an hour, or longer if your kitchen runs cool.
Sugar, vanilla, butter, and cinnamon. One cup of granulated sugar sweetens the filling, with another half cup whisked with ground cinnamon for the topping. A teaspoon of vanilla rounds out the cream cheese, and a half cup of melted butter glues the cinnamon sugar topping to the dough so it bakes into a crackly, glassy glaze. A drizzle of honey at serving is the optional Tex-Mex flourish that ties the whole thing back to its sopapilla roots.
Full step-by-step measurements and timings live in the recipe card below, but here's the bird's-eye view so you know what you're getting into before you crack open a single can of dough.
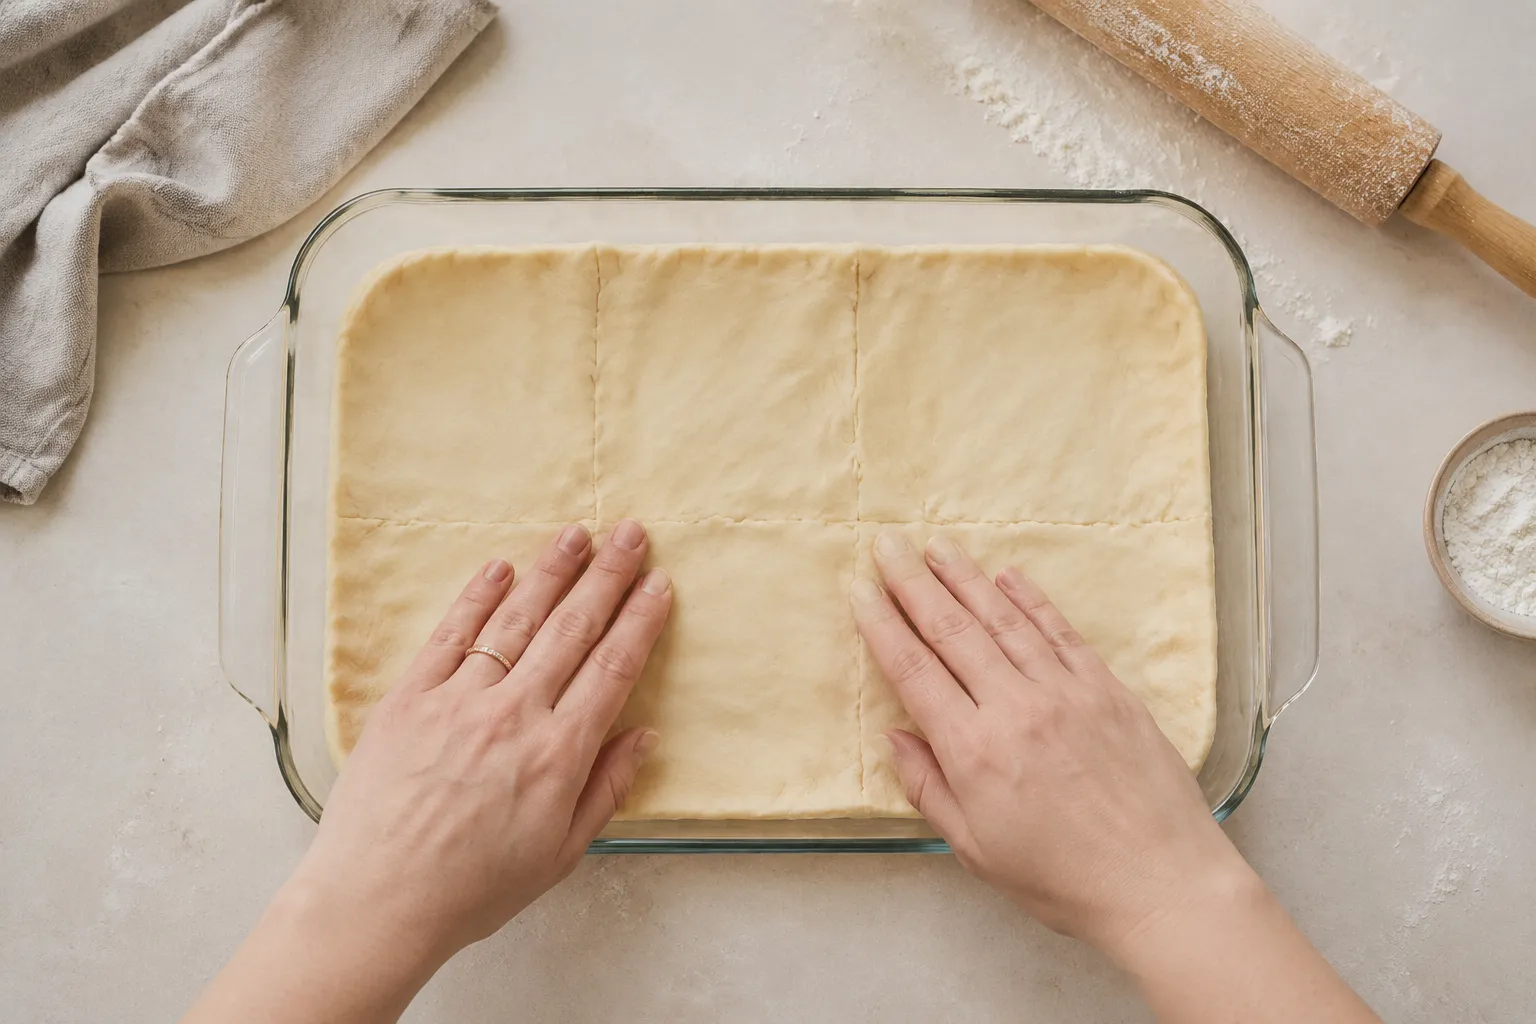
Layer the bottom crescent sheet. Unroll one can of dough straight into a buttered 9x13 pan, pressing the perforated seams together so it forms one continuous sheet. The dough will puff and settle into the corners as it bakes, so don't agonize over getting it perfectly flush. A few minor gaps are fine; the filling won't leak through.
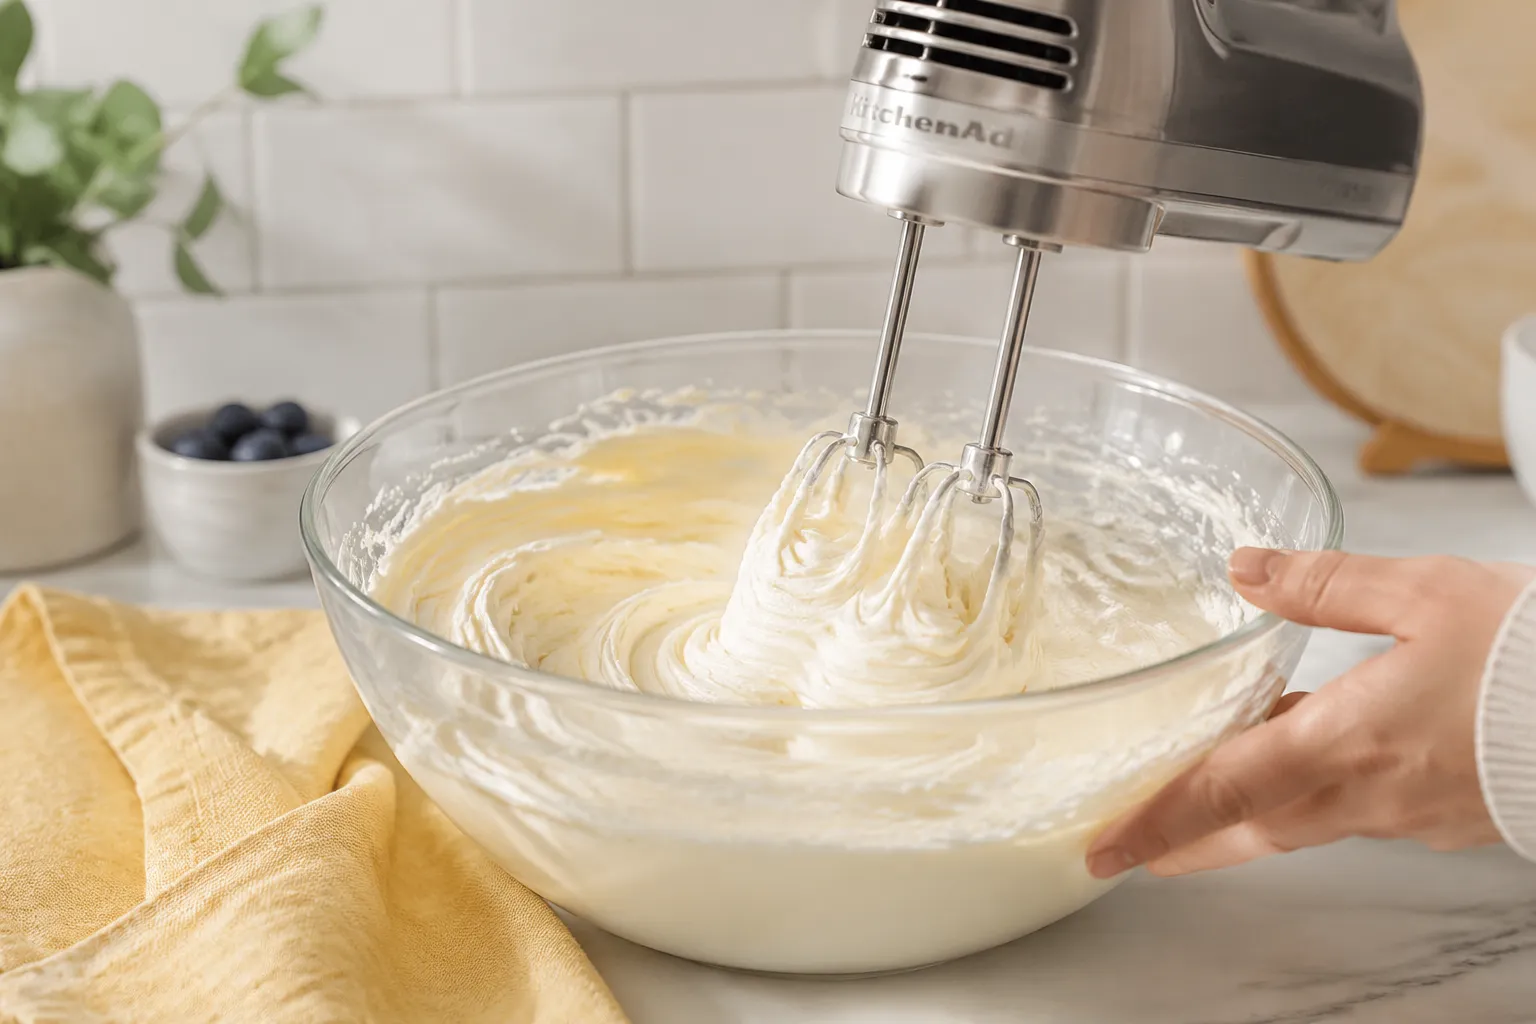
Whip the cheesecake filling. Beat softened cream cheese with sugar and vanilla until silky and completely lump-free. A hand mixer makes this about two minutes of work; if you're going by hand, bring patience and a sturdy spatula. Spread the filling evenly over the bottom dough layer, all the way to the edges of the pan.

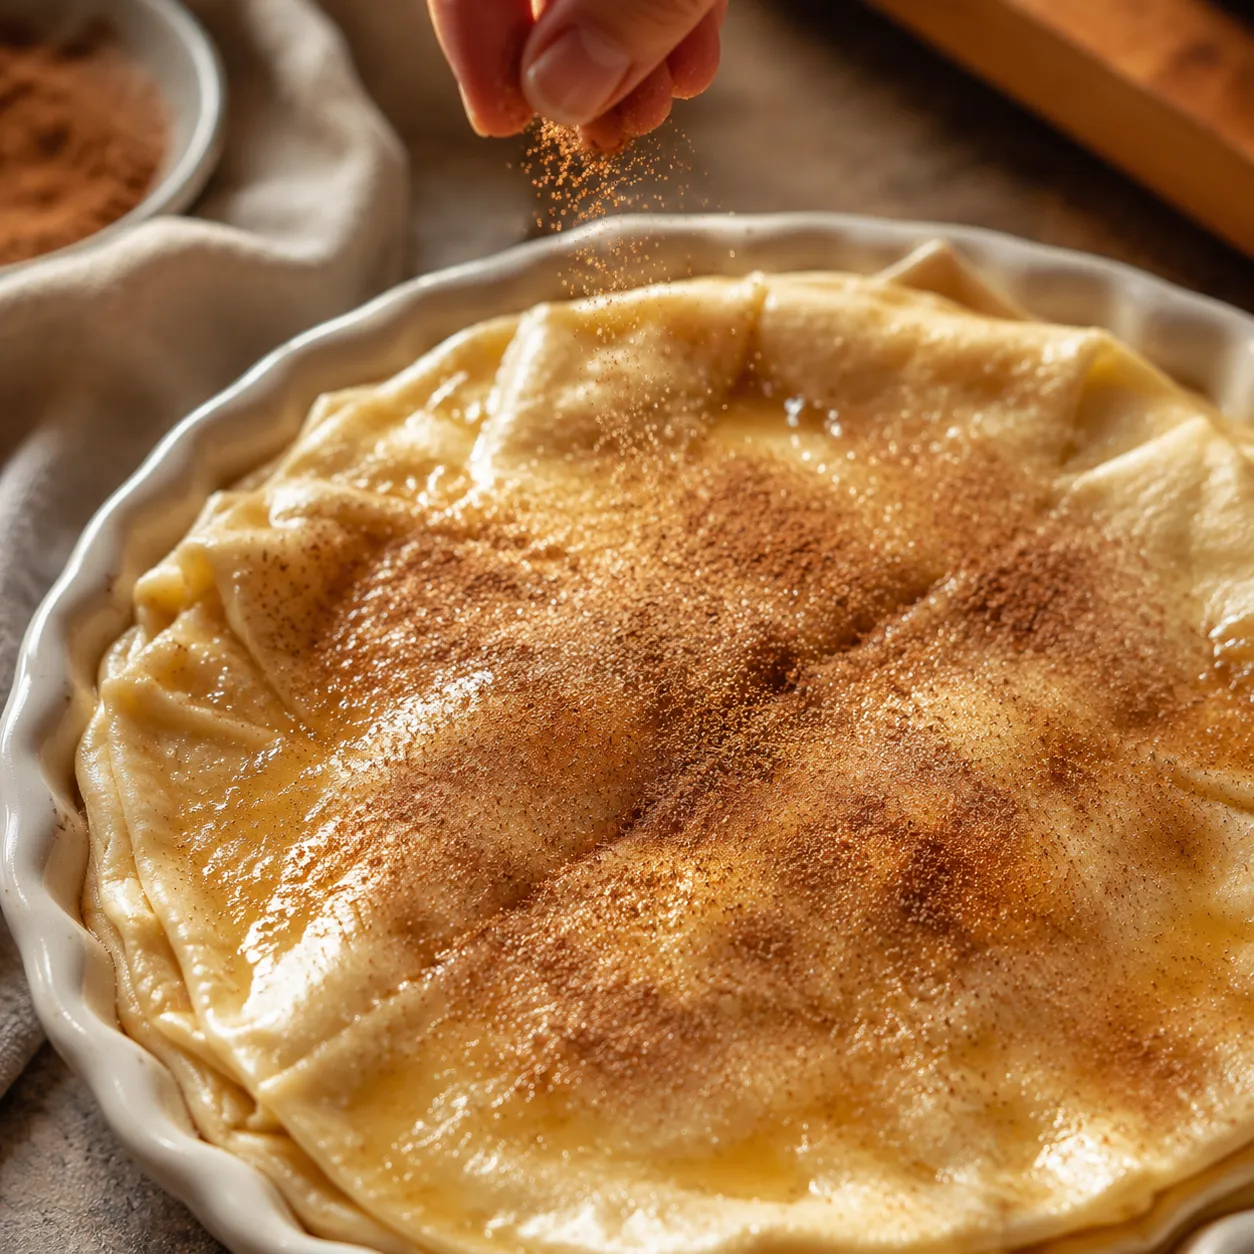
Top, butter, and bake. Carefully unroll the second can of dough over the filling. I find it helpful to stretch it on a sheet of parchment first, then flip it onto the pan in one motion, peeling the parchment off like a sticker. Pour melted butter all over the top and sprinkle generously with the cinnamon sugar mixture. The butter will look like way too much. It is not too much. Trust the process; this is what gives the top its signature shattering crust.
Cool and slice. Bake at 350°F until the top is deep golden brown and the center has just a slight jiggle, about 30 minutes. This next part is the most important: let it cool completely on the counter, then chill in the fridge for at least two hours before slicing. Warm sopapilla cheesecake is delicious but messy. Cold and fully set? Bakery-clean squares every time.
I've made dozens of versions of this dessert over the years, and what keeps me coming back is the contrast. The top crust shatters under your fork like a cinnamon sugar palmier. The bottom layer stays soft and pastry-like, soaking up just enough of the filling to taste rich without going soggy. And the cheesecake middle, sweetened just enough and bright with vanilla, bridges the two with a coolness that makes the whole bar feel balanced rather than cloying or one-note.
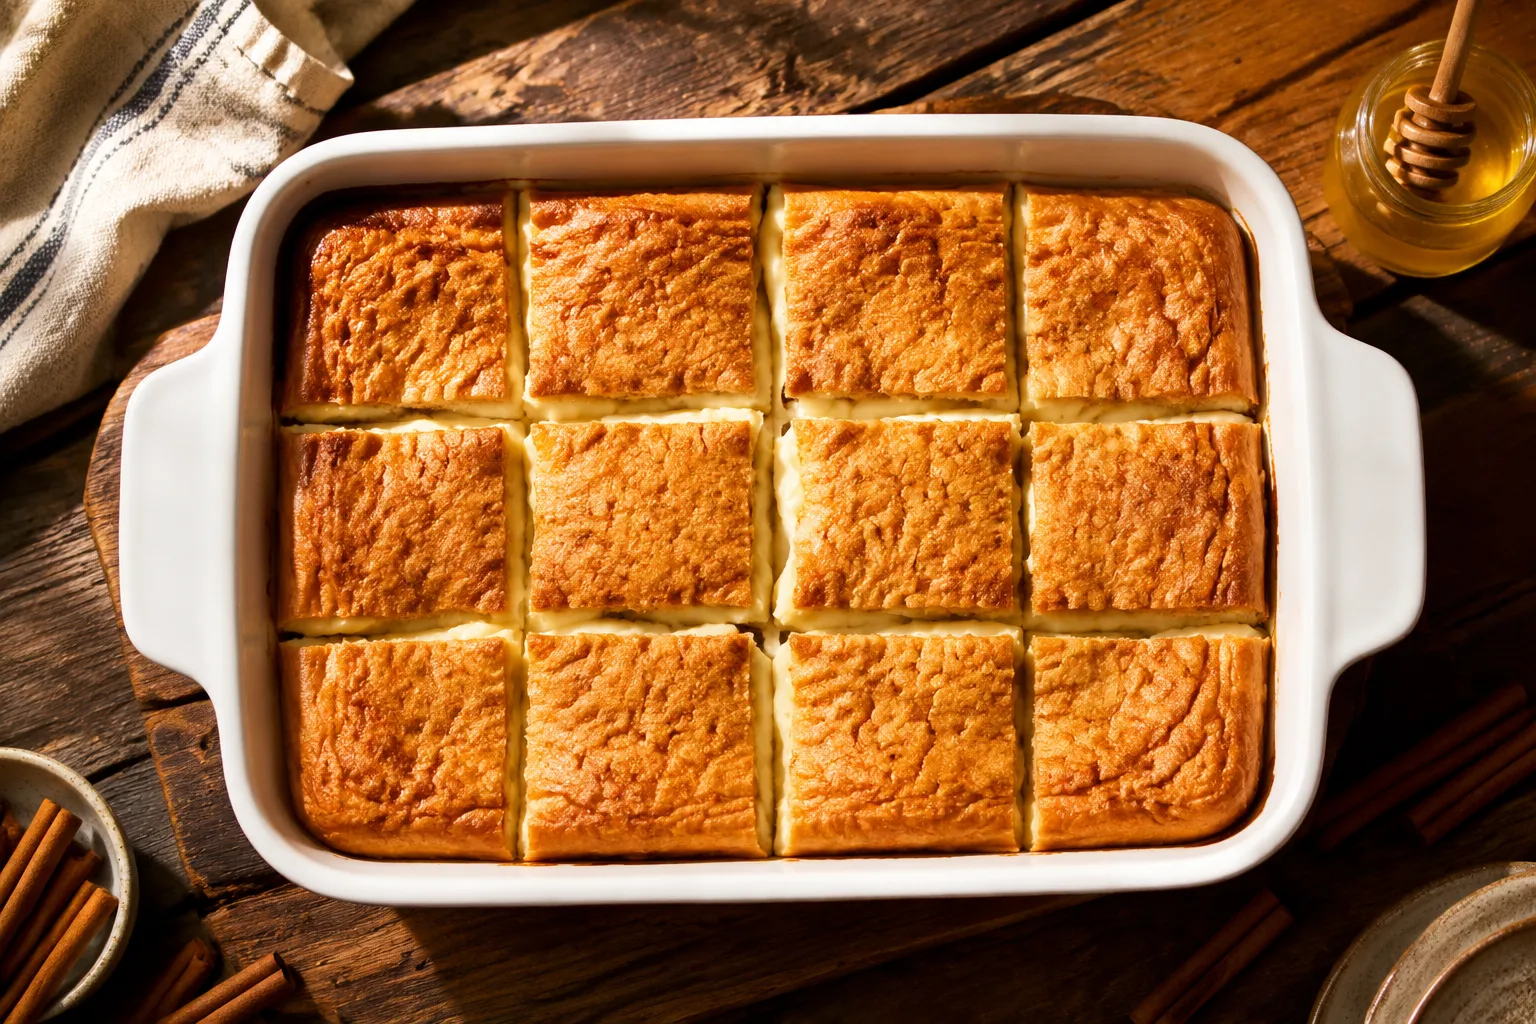
It also happens to be one of the best potluck dessert ideas in my back pocket. Twelve hearty squares come out of a single 9x13, the bars travel beautifully without melting or smashing, and you can make the whole thing a full day ahead. I've shown up with a foil-covered pan to backyard cookouts, church suppers, and friend-group Friendsgivings, and there has never once been a crumb left to bring home. People hover over the pan.
The recipe is also endlessly forgiving, which makes it a favorite for nervous bakers. Beginners pull it off on the first try, and seasoned bakers love it as a low-stress alternative when they want easy cheesecake bars without the time commitment of a full cheesecake. Drizzle warm honey across the top right before serving, and you've replicated the exact experience of a sit-down sopapilla, no fryer required and no cleanup of bubbling oil afterward.
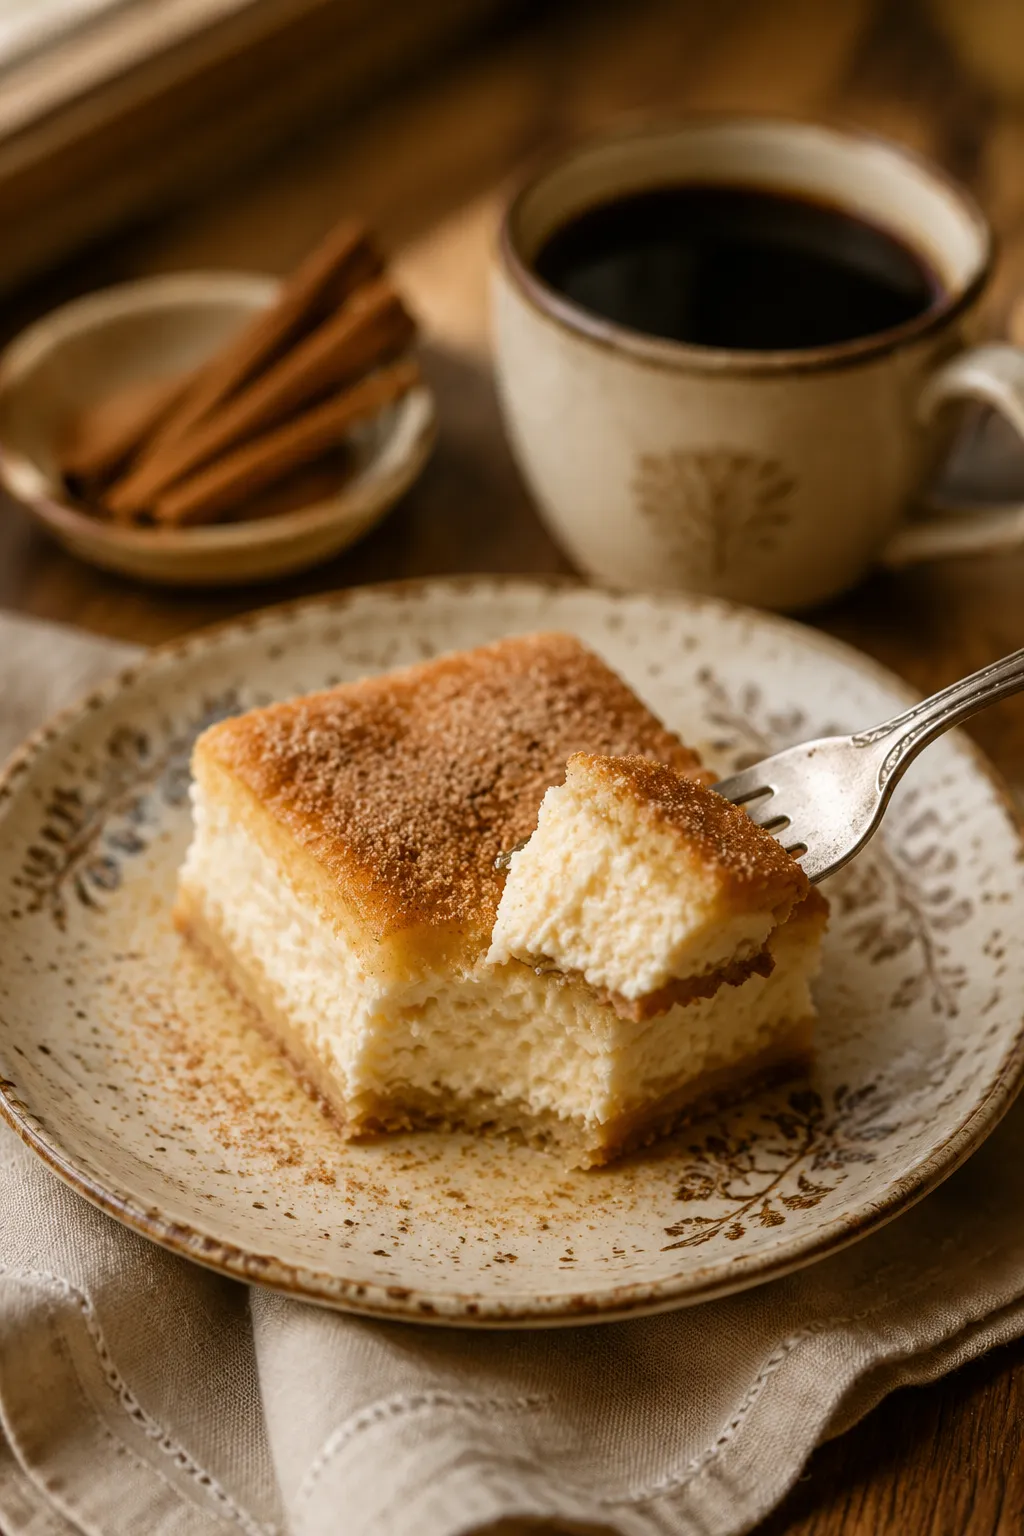
Sopapilla cheesecake was built for a coffee pairing. The buttery cinnamon sugar plays perfectly against a strong cup of black coffee or a cinnamon-laced cafe de olla. For dessert spreads, I love serving it alongside fresh berries (especially raspberries, which cut the richness), a small scoop of vanilla bean ice cream, or a tiny pitcher of warm honey for guests to drizzle themselves at the table. A pinch of flaky sea salt on top right before serving sounds odd but works wonders, sharpening every other flavor.
If you're building a full Mexican-inspired dinner, this is the dessert to end the night on. Serve it after enchiladas verdes, sizzling fajitas, or slow-braised carnitas tacos, and finish each plate with a sprig of fresh mint or a dusting of powdered sugar to make it feel a little restaurant-quality. Whatever you do, don't skip the chilling step. Those clean, cold-set layers are what take this from a homemade slab to something that genuinely looks bakery-made on the plate.
Once you've nailed the basic version, this dessert is a perfect canvas for seasonal twists. The crescent-cream cheese-cinnamon sugar trio plays well with almost any flavor you'd want to fold in or layer on top, so don't be afraid to riff.
Store leftover bars in an airtight container in the refrigerator for up to 4 days. The texture actually improves on day two as the layers set together and the cinnamon sugar topping fully crystallizes. Slice cold for the cleanest squares, then let individual portions sit at room temperature for 10 to 15 minutes before serving so the cheesecake softens to its silkiest texture.
To freeze, cool the baked dessert completely, slice into squares, and arrange in a single layer on a parchment-lined sheet pan. Freeze until solid (about 2 hours), then transfer to a freezer-safe airtight container or zip-top bag with parchment between layers. Frozen bars keep beautifully for up to 2 months. Thaw overnight in the fridge before serving, and skip the microwave reheat, which makes the dough rubbery.