Homemade Chocolate Syrup: Rich, Glossy & 5 Minutes
Ingredients
Scale

Skip the bottled stuff. This homemade chocolate syrup is glossy, deeply chocolatey, and ready in 5 minutes with pantry staples you already have.
This homemade chocolate syrup chocolate lovers will keep on rotation in the fridge door comes together in 5 minutes flat, with five pantry staples and one small saucepan. No corn syrup, no preservatives, no mystery ingredients you can't pronounce — just rich cocoa, sugar, water, salt, and a splash of vanilla simmered into a glossy, pourable ribbon that beats anything in a brown plastic bottle.
I make this every couple of weeks. It lives in a swing-top glass bottle on the fridge door and gets used for after-school chocolate milk, weekend pancakes, late-night sundaes, and the occasional spoonful straight out of the jar (no judgment). Once you have a working chocolate syrup chocolate emergencies of every kind become much easier to handle, and you'll wonder why you ever paid grocery-store prices for the bottled stuff in the first place.
The texture is what hooks people. This chocolate sauce pours like silk, holds a thick, glossy ribbon when drizzled, and stays pourable straight out of a cold fridge. No graininess, no separation, no waxy aftertaste — just clean, full-bodied cocoa flavor with a soft hum of vanilla and salt holding everything in balance.
The beauty of this chocolate syrup recipe is how minimal the ingredient list runs — five staples, all of them likely already in your pantry. Each one earns its keep, so don't skip anything (especially not the salt or vanilla, which round out the cocoa and keep the syrup from tasting one-note flat).
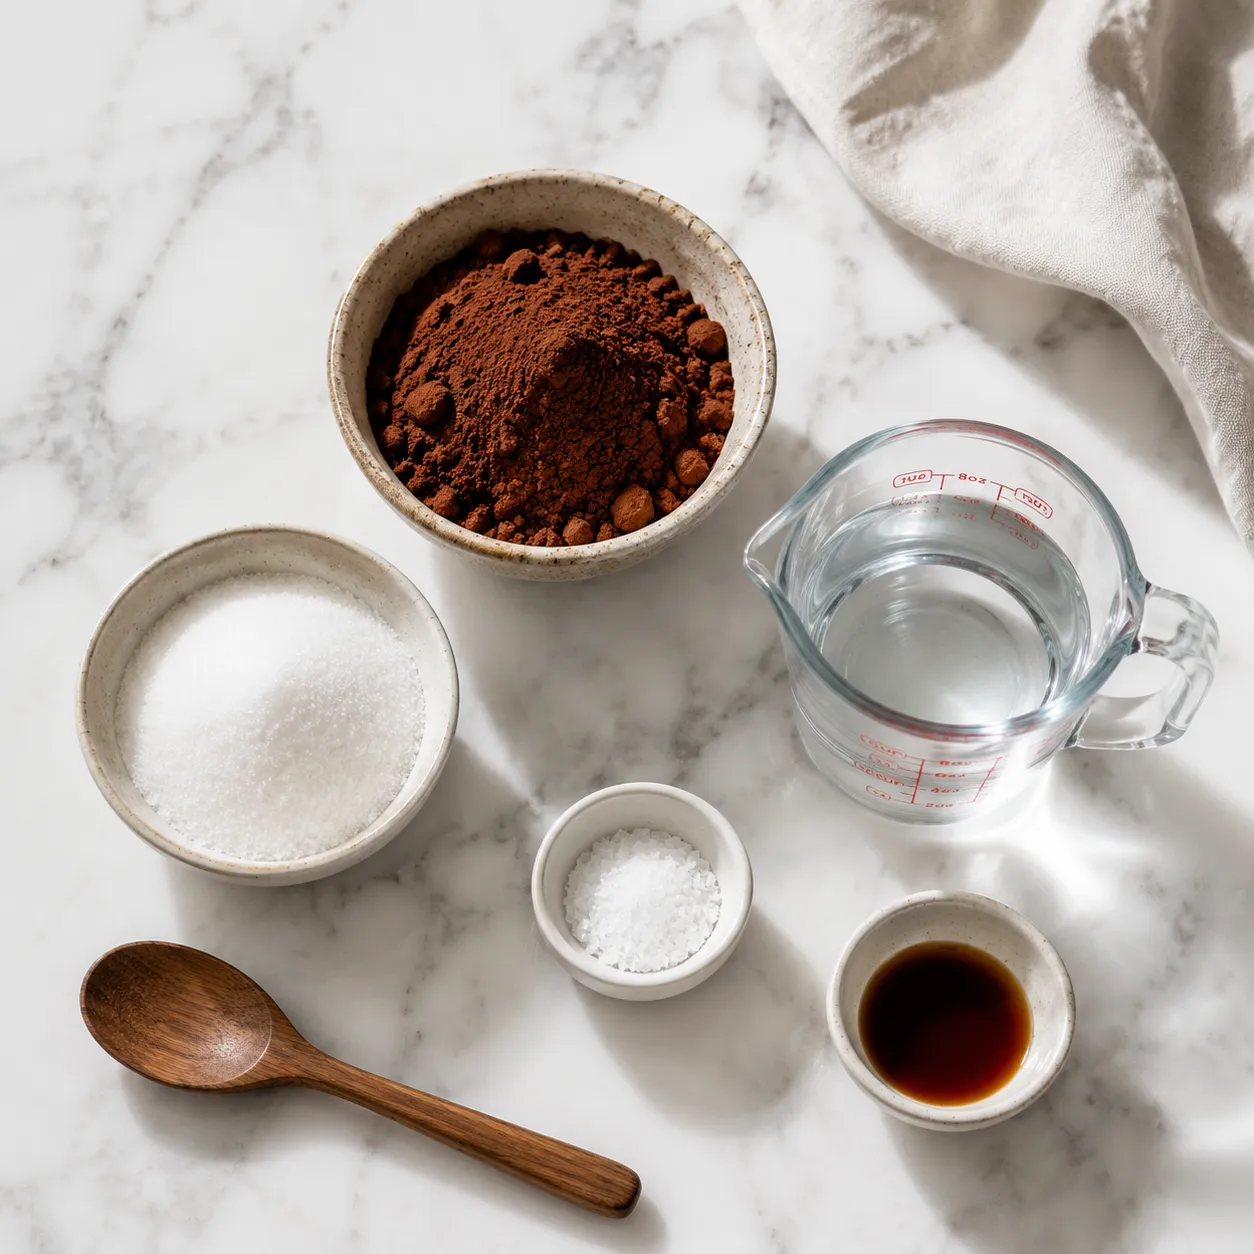
Unsweetened cocoa powder is the soul of the syrup, so use a brand you actually like the taste of — it's the dominant flavor and there's nowhere for it to hide. Either Dutch-process or natural cocoa works (more on that comparison further down), and if you ever find yourself bare-cupboard-curious about cocoa powder substitutes, I'll talk through what does and doesn't translate later in the post.
Granulated sugar dissolves cleanly and lets the cocoa shine through. Brown sugar can muddy the flavor with molasses, and powdered sugar contains cornstarch that leaves a faintly chalky texture in a thin syrup. Plain white sugar gives the cleanest, most professional result.
Water keeps the syrup pourable and dairy-free, which is exactly what allows it to keep for weeks in the fridge without spoiling. If you want a richer, thicker chocolate sauce that behaves more like a classic dessert topping, you'll find a milk-and-cream version down in the variations section.
Fine sea salt sharpens the chocolate and tames sweetness. A quarter teaspoon disappears into the finished syrup but makes a real, noticeable difference — without it, the syrup tastes flatter and more cloying. Pure vanilla extract added off-heat at the very end gives the syrup a warm, finished, almost bakery-like aroma. Don't add it while simmering or you'll cook off the volatile compounds that make vanilla taste like vanilla.
The full numbered method lives in the recipe card at the bottom of the post, but here's the short narrative version: you whisk, you simmer, you cool. The whole appeal of this chocolate syrup recipe is that it asks almost nothing of you in terms of technique or attention.
Start by whisking the dry ingredients — cocoa powder, sugar, and salt — together in your saucepan before adding any liquid. This is the single most important step for a smooth, glossy result. If your cocoa looks clumpy or compacted in the bag, sift it first through a fine-mesh strainer; cocoa lumps don't dissolve well later, and you'll end up chasing them around the pan with a whisk. Once the dry mixture is uniform, slowly pour in the water while whisking constantly, then set the pan over medium heat.
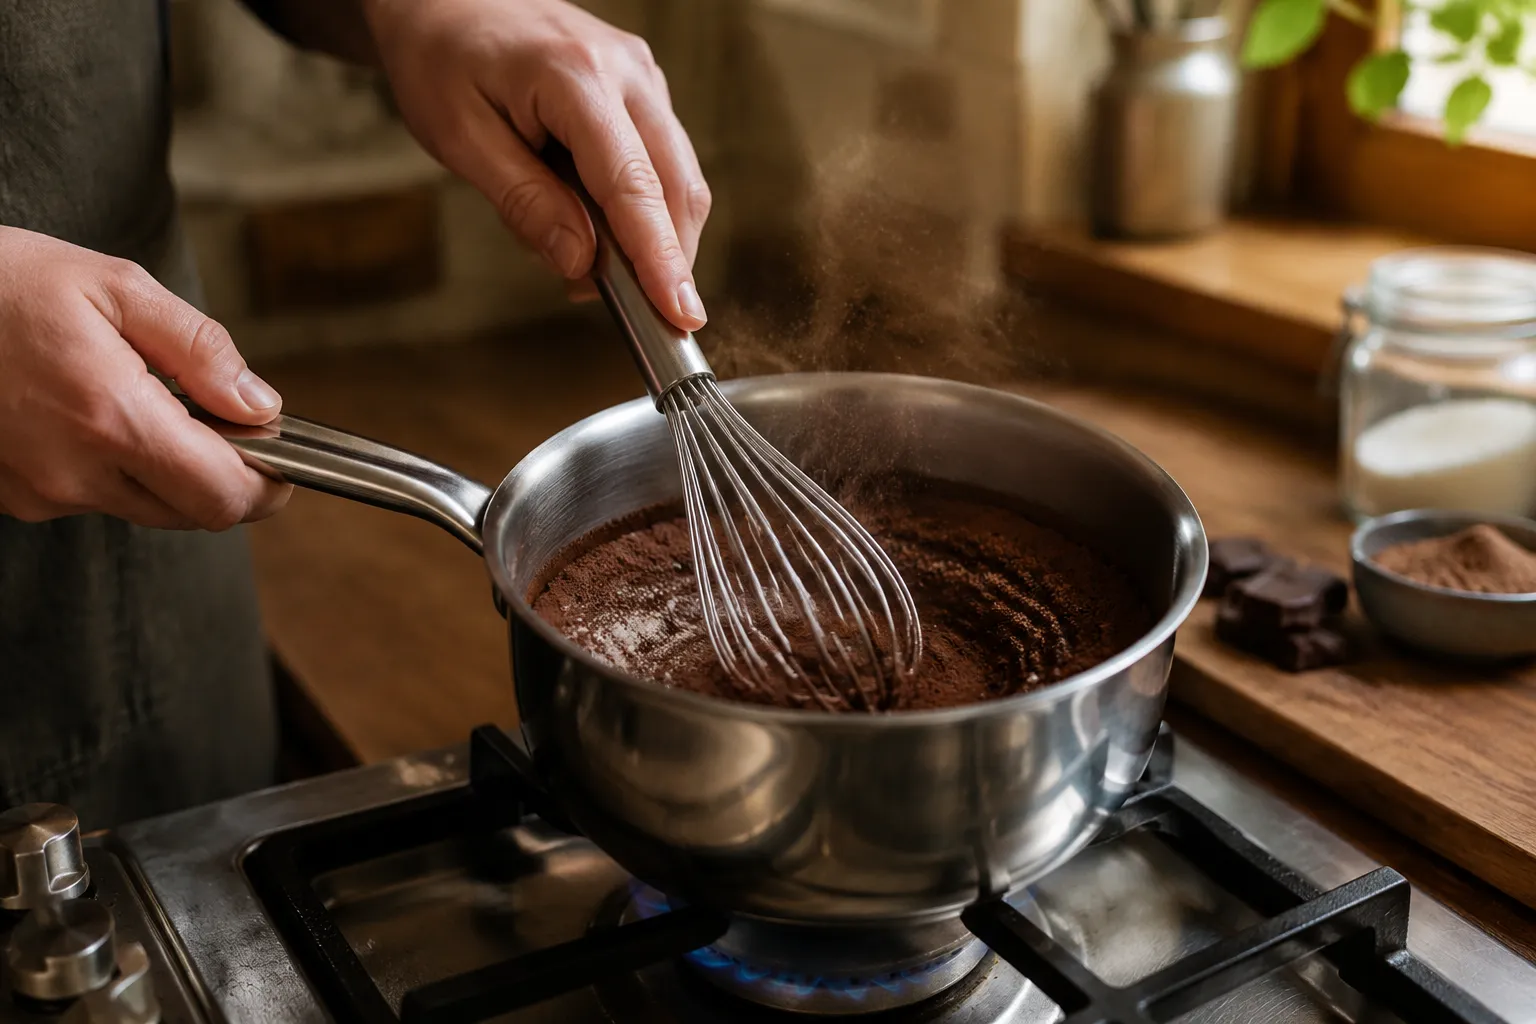
Bring the mixture up to a gentle bubble. You want an active simmer, not a hard rolling boil — big violent bubbles can scorch the cocoa on the bottom of the pan and turn it bitter. Whisk continuously for the first minute or two as it heats up; once the syrup starts to gloss and thicken, you can switch to occasional stirring. The mixture will look thin and watery at first, almost like flavored coffee, and then suddenly turn rich and shiny like wet patent leather. That's your sign.
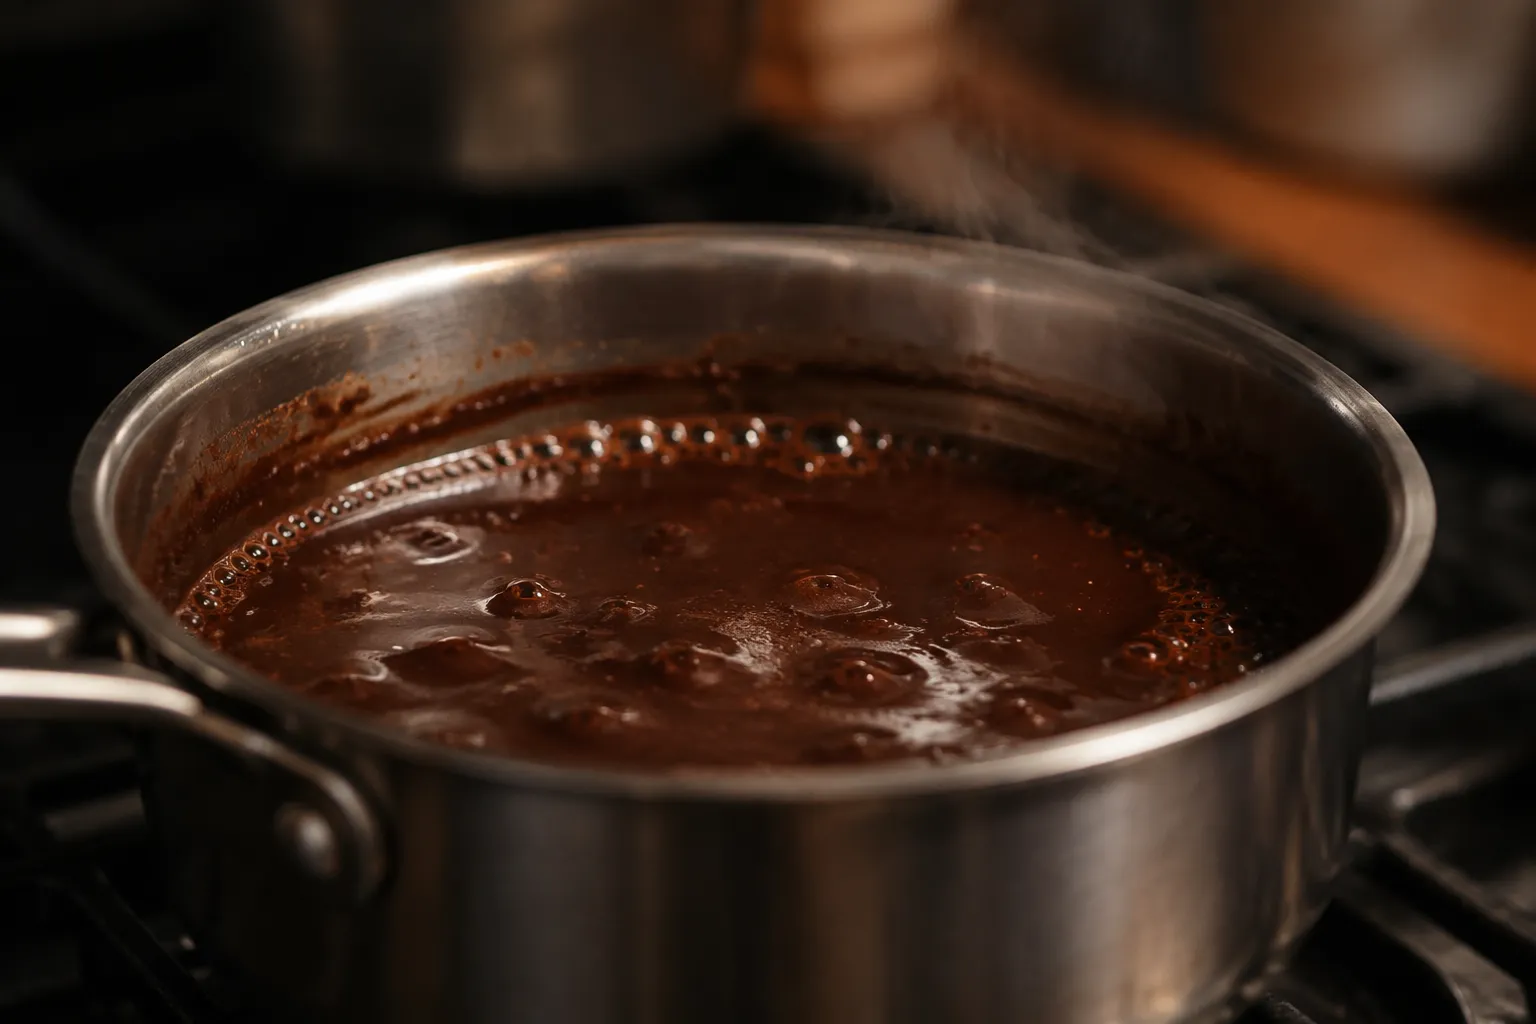
Simmer for about 3 to 5 minutes total. The syrup should coat the back of a wooden spoon in a thin, even film and ribbon when you lift it slowly out of the pan. Resist the urge to keep reducing — it'll thicken significantly more as it cools, and over-reducing now means a stiff, fudge-like consistency tomorrow morning when you go to pour it cold. If anything, err on the side of slightly thinner than you think you want.
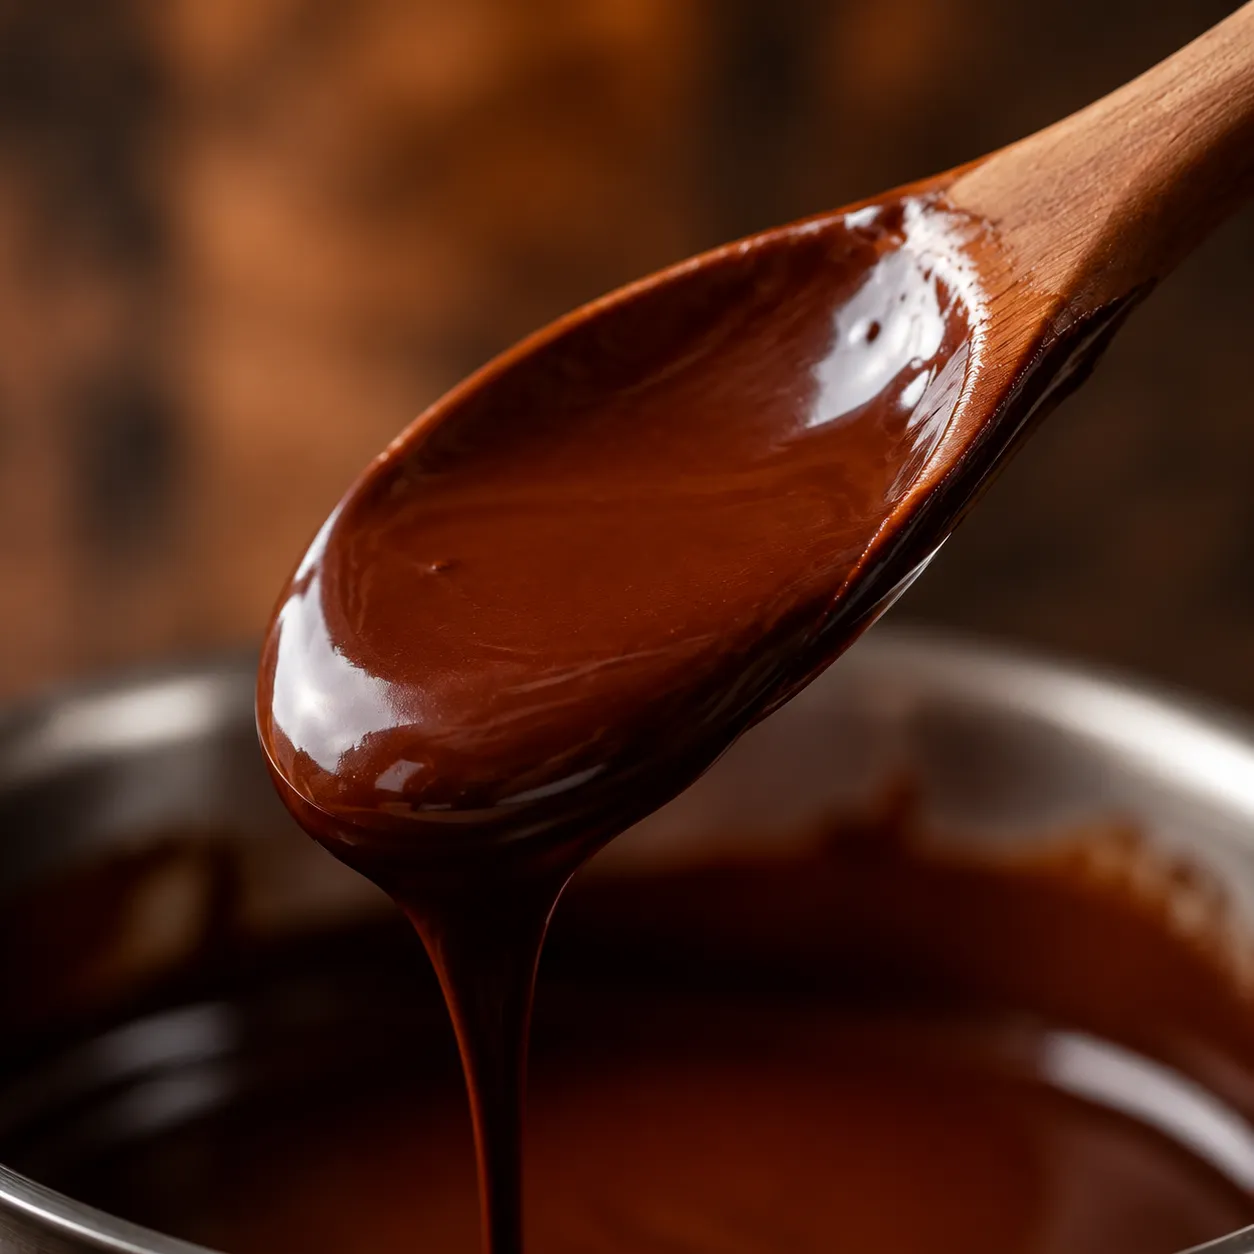
Pull the pan off the heat and stir in the vanilla. Let the syrup rest in the pan for about 10 minutes (it'll keep thickening as it sits) before transferring it to a jar or bottle. Don't seal the container while the syrup is still hot — condensation will pool inside the cap and dilute the top layer.
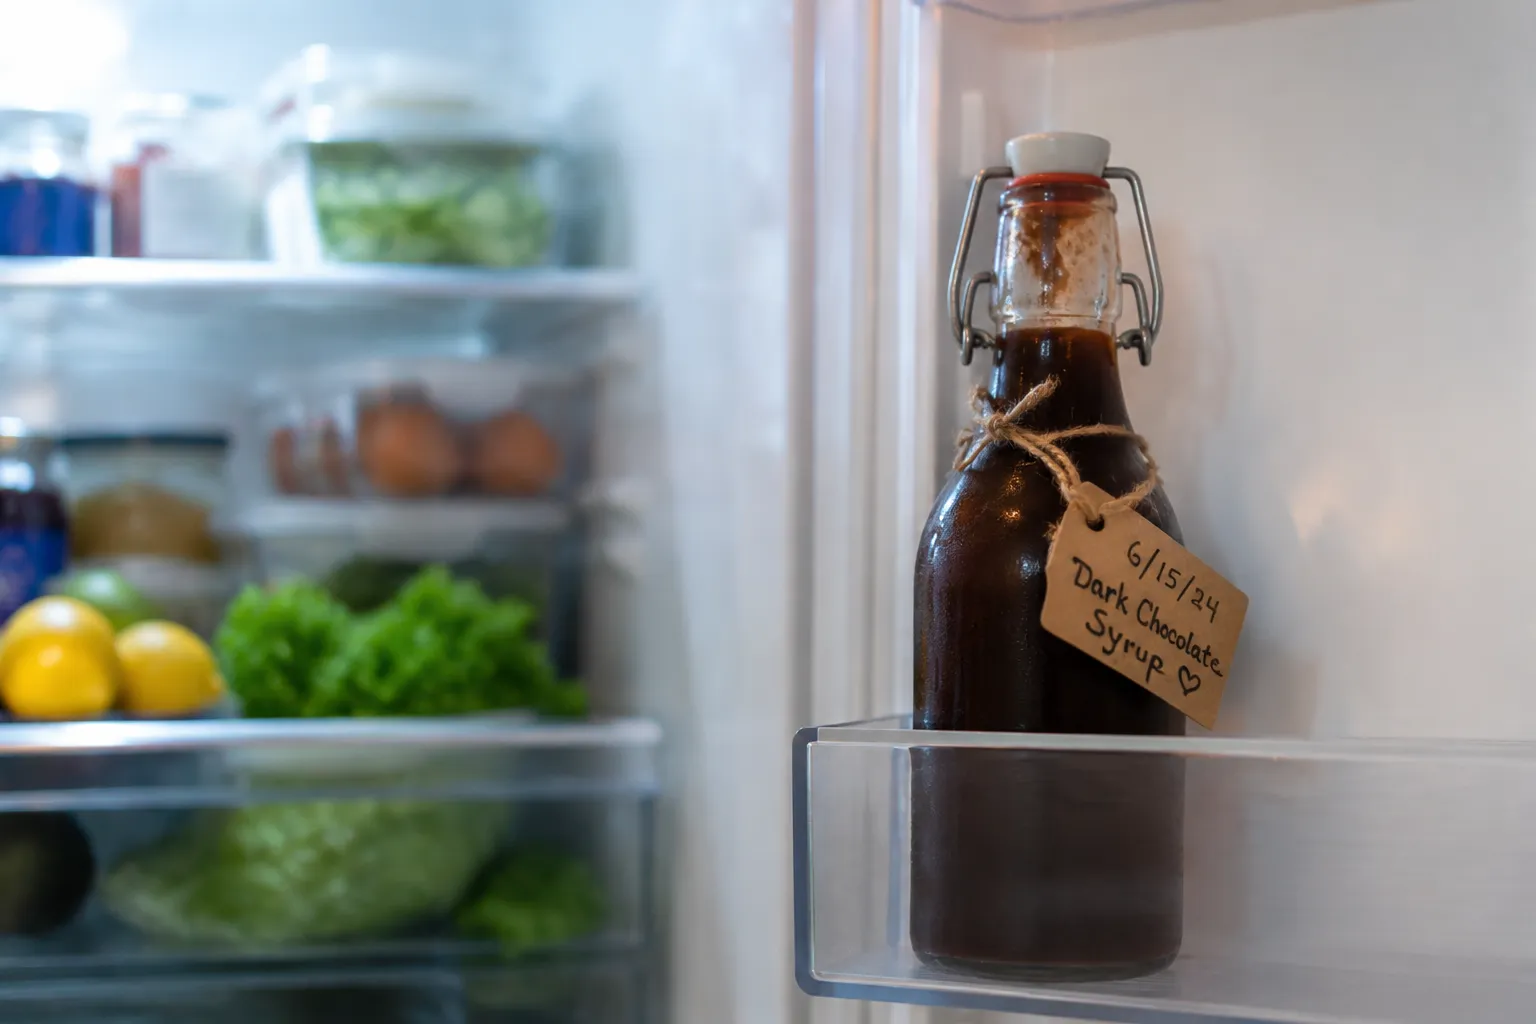
A swing-top glass bottle is my favorite vessel for this homemade chocolate syrup chocolate fans always want refilled. The wide-mouth opening makes pouring effortless, the rubber gasket seals airtight, and you can see exactly how much you have left at a glance. A clean mason jar works just as well — pour through a fine-mesh strainer first if you want to catch any stray cocoa specks for a flawlessly smooth pour.
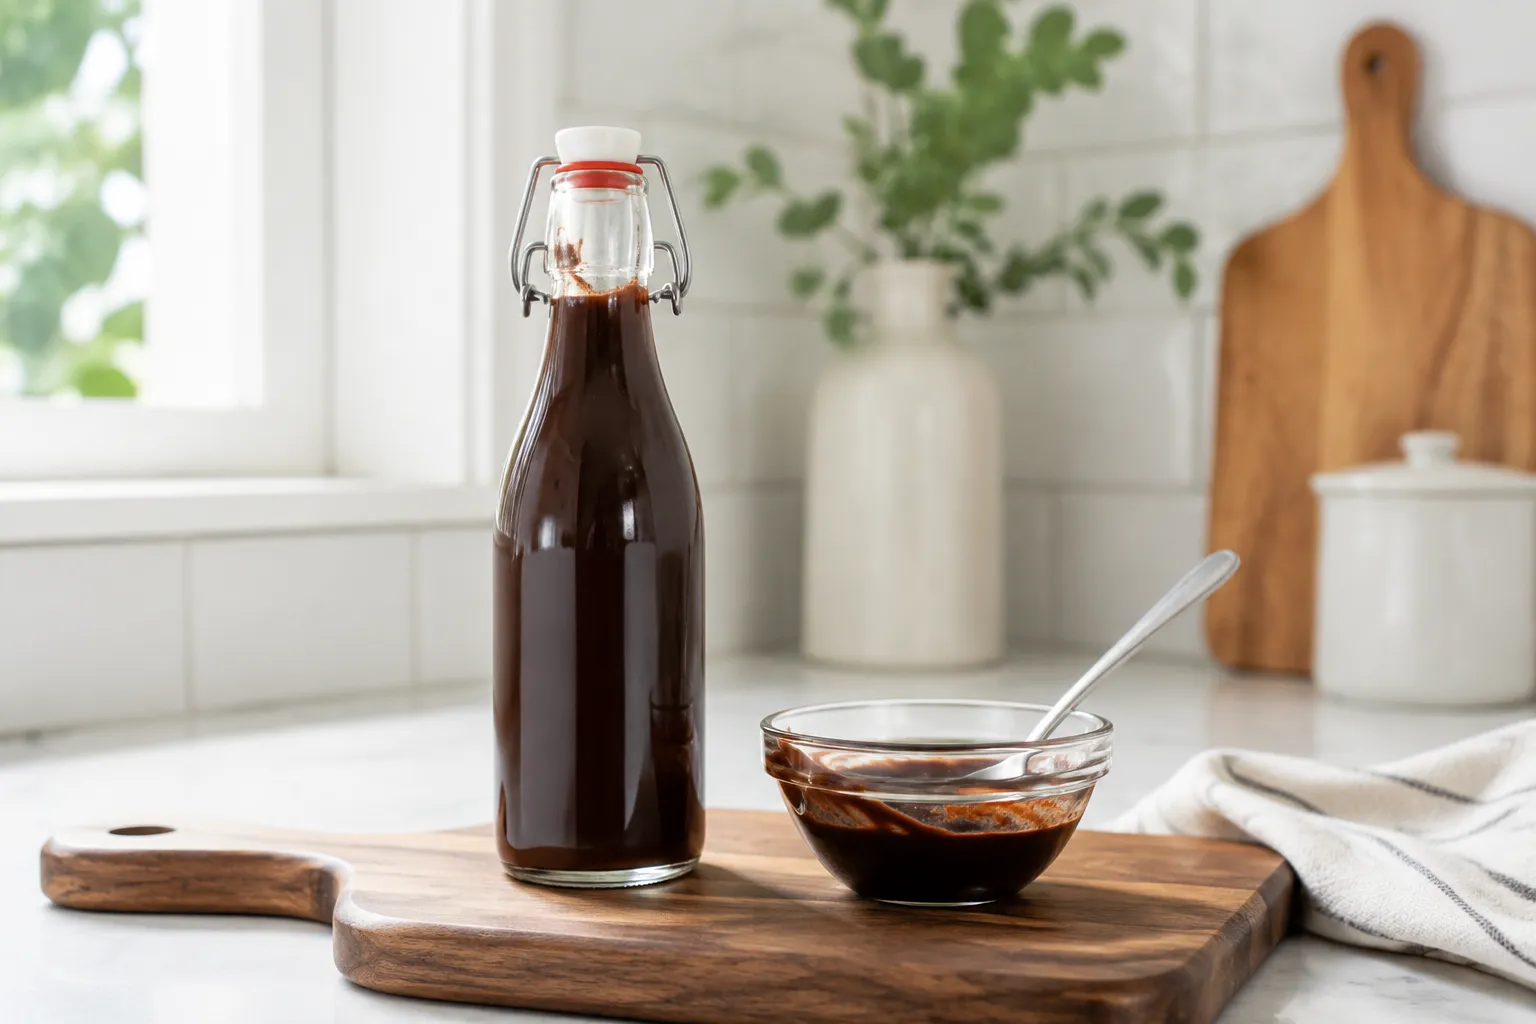
Label the bottle with the date you made it. Trust me on this one. Past-me has stared into the fridge wondering exactly how old that beautiful brown bottle is more times than I'd like to admit, and the answer is almost always longer than you'd think.
The most obvious use for a great syrup is — well, ice cream. Drizzle it over a generous scoop of vanilla ice cream and you have an instant sundae. Add toasted nuts, a swirl of whipped cream, and a maraschino cherry if you're committing to the diner aesthetic. This chocolate syrup for ice cream is thinner and more pourable than my homemade hot fudge sauce, which sets up thick, chewy, and almost taffy-like the second it hits a cold scoop. They serve different moods, and there's room in any freezer for both.
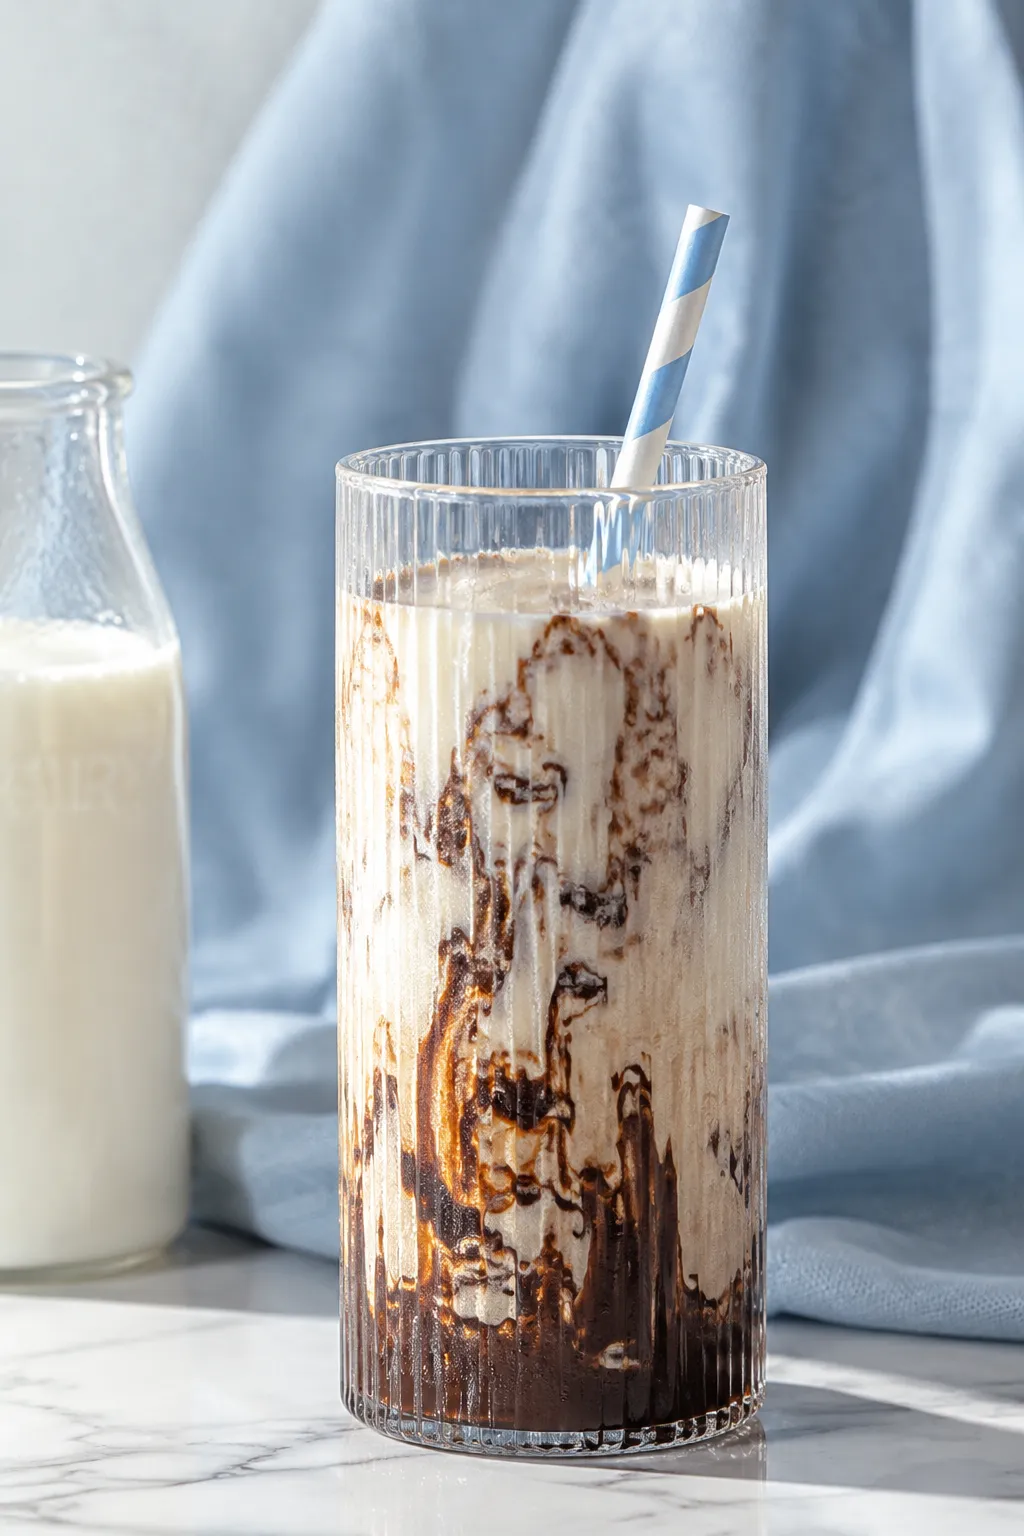
Stir 1 to 2 tablespoons into a tall glass of cold milk for the chocolate milk recipe of your childhood, only better. The syrup blends in cleanly without leaving that gritty residue at the bottom of the glass, and you control exactly how sweet it ends up. For hot chocolate, warm the milk first and whisk in 2 tablespoons of syrup plus a pinch of cinnamon and a tiny pour of cream.
This chocolate syrup chocolate coffee drinkers also reach for first thing in the morning. Stir a spoonful into a mocha iced coffee, blend it into a milkshake with another scoop of ice cream and a splash of milk, or shake it with vodka and cold espresso for a grown-up after-dinner martini. Because it's water-based, it dissolves into both hot and cold liquids without seizing or clumping, which is what sets it apart from a melted chocolate ganache (ganache is built on cream and behaves very differently when it hits anything cold).
For breakfast, drizzle it over pancakes and waffles instead of maple syrup, swirl it into Greek yogurt with banana slices and granola, or paint a thin line across the rim of a cappuccino cup before pouring. It's also excellent layered into overnight oats, stirred into chia pudding, or spooned over fresh strawberries with a generous dollop of mascarpone.
The single biggest flavor decision in this chocolate syrup recipe is which cocoa powder you reach for. Both Dutch-process and natural unsweetened cocoa work beautifully here, but they taste, look, and behave noticeably differently in the finished syrup.
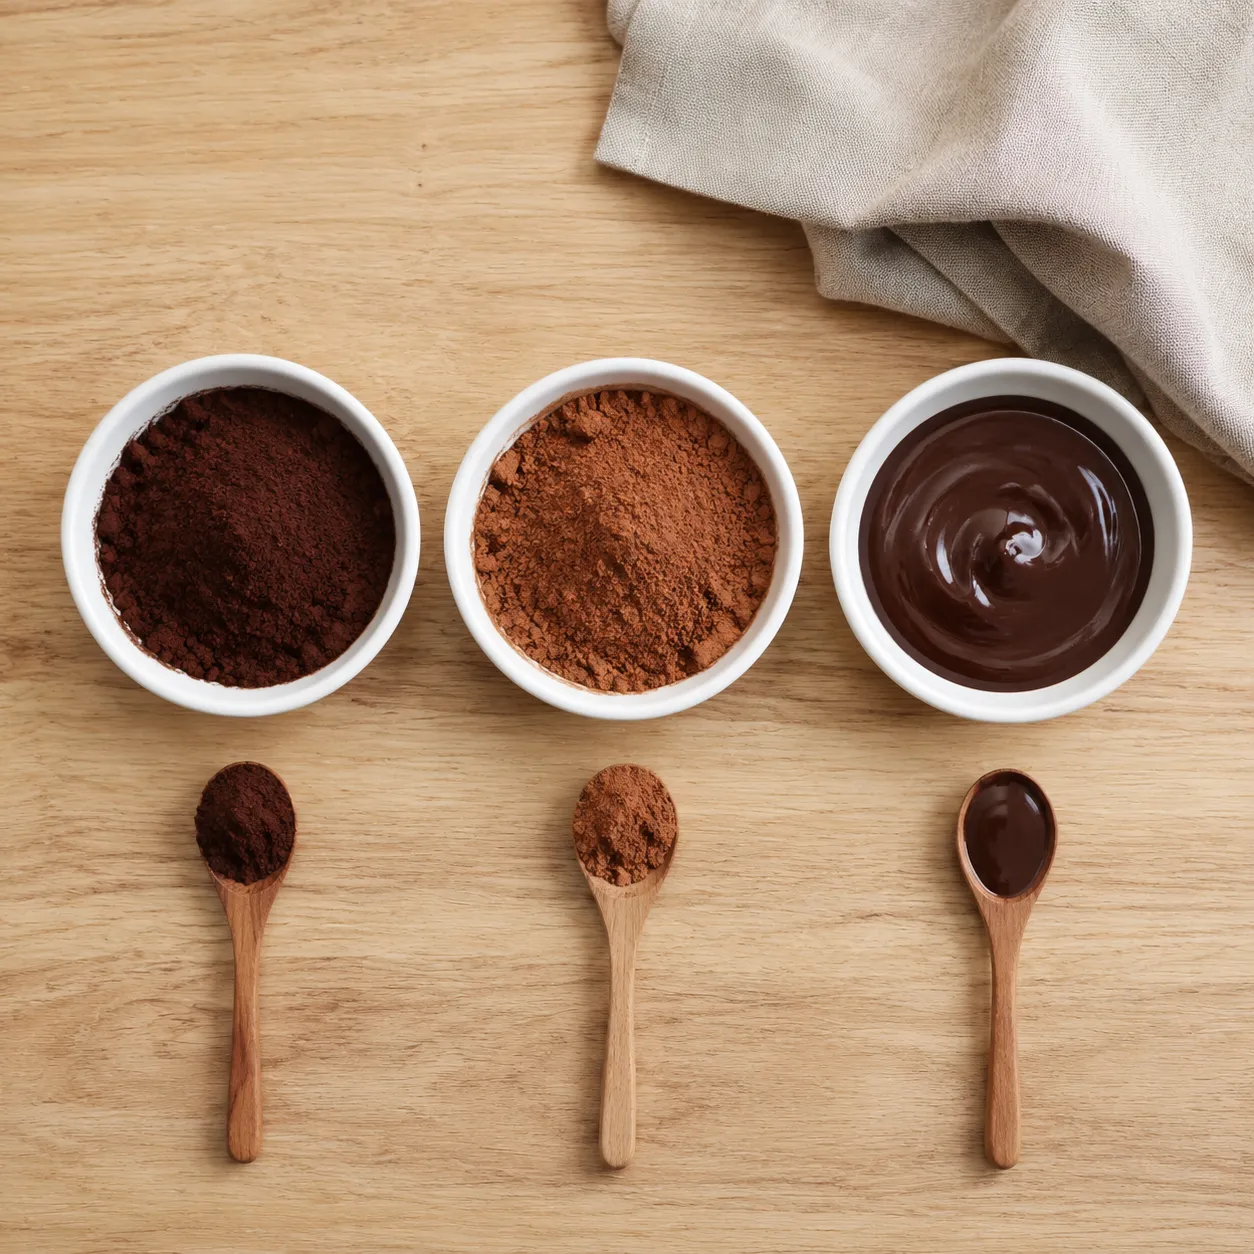
Dutch-process cocoa (sometimes labeled "alkalized" or "European-style") has been treated with an alkaline solution to neutralize its natural acidity. It produces a darker, smoother, almost Oreo-cookie-like flavor and a deep mahogany color in the finished syrup. This is what most commercial chocolate syrups taste like, so if your goal is a Hershey-style ribbon for nostalgic sundaes and chocolate milk, reach for Dutch.
Natural cocoa powder is lighter in color and brighter in flavor, with subtle fruity and tangy notes from its natural acidity. The finished syrup will have a more old-fashioned, slightly redder hue and a livelier, more complex chocolate flavor that I personally love stirred into cold milk and iced coffee. Many cooks blend the two — half Dutch, half natural — for a syrup that has both the depth of one and the brightness of the other.
If you're out of cocoa entirely, the only real cocoa powder substitutes that work in this recipe are unsweetened baking chocolate (melted gently, then whisked in with reduced sugar) or carob powder, which will taste distinctly earthier. Hot chocolate mix and cocoa-based protein powders will not give you the right texture or flavor and aren't worth the experiment.
Keep a labeled bottle of this chocolate syrup chocolate cravings demand and you'll find yourself reaching for it constantly. It's the kind of pantry staple that quietly upgrades everything around it — a glass of milk, a scoop of ice cream, a stack of Sunday pancakes — into something that tastes deliberately, lovingly homemade.
The base recipe is intentionally a blank canvas — once you have the technique down, you can riff in countless directions to match the moment.
Pour the cooled syrup into a clean glass jar or swing-top bottle and refrigerate. It keeps beautifully for up to 3 weeks chilled, though it rarely lasts that long in my house. Always use a clean spoon when scooping (no double-dipping), and give the bottle a quick shake or stir before each use, since the syrup can separate slightly as it sits. If you ever spot mold, fizz, or an off smell, toss it and start fresh.
You can freeze chocolate syrup for up to 3 months — pour it into ice cube trays, freeze solid, then transfer the cubes to a zip-top bag for individual portions. Drop a frozen cube into hot milk for instant hot chocolate, or thaw a few in the fridge overnight before using as drizzle. Glass swing-top bottles are my favorite container because they pour cleanly and seal airtight, but a wide-mouth pint mason jar works equally well if that's what you have.