Pop Tart Ice Cream Sandwich: Easy 5-Ingredient Treat
Ingredients
Scale
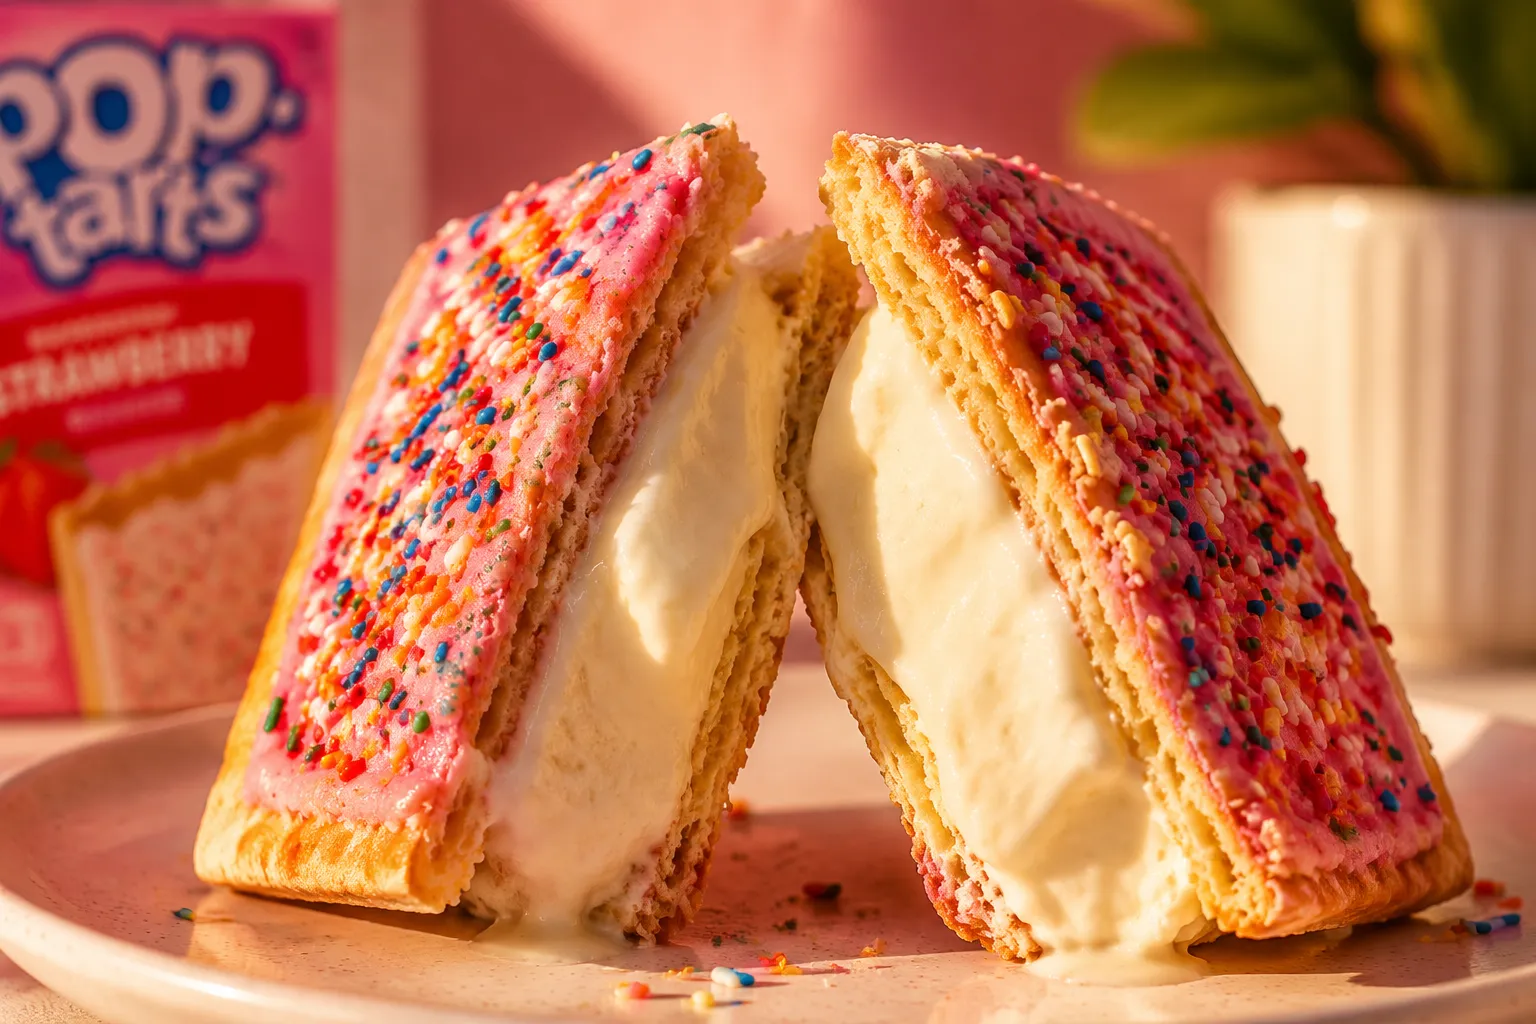
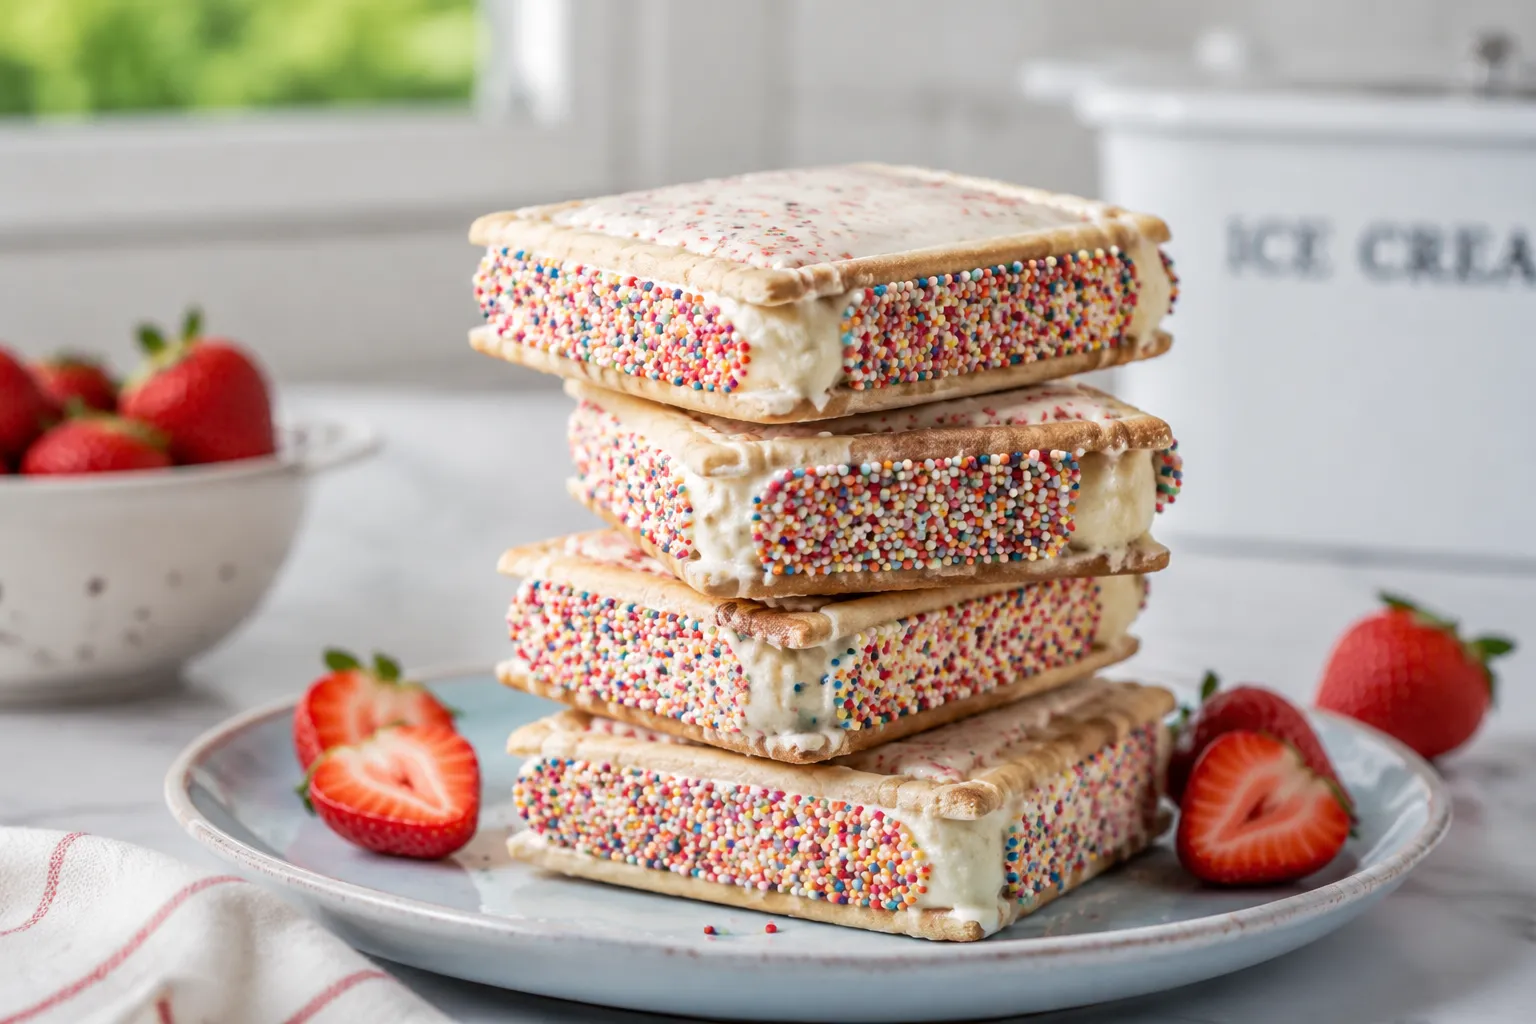
This pop tart ice cream sandwich layers toasted strawberry Pop-Tarts around creamy vanilla ice cream for a 5-minute, no-bake nostalgic dessert kids and adults love.
This pop tart ice cream sandwich is the kind of joyfully over-the-top frozen treat that tastes like summer vacation, after-school snacks, and birthday party sprinkles all at once. Toasted strawberry Pop-Tarts turn crisp and golden at the edges, vanilla ice cream melts into the flaky pastry, and rainbow sprinkles make every bite feel a little celebratory. It is nostalgic, playful, and honestly a little bit genius.
The beauty of this no-bake dessert is that it asks almost nothing of you: five ingredients, a few minutes of hands-on time, and a quick trip to the freezer so everything firms up into that perfect sandwich bite. If you love homemade ice cream sandwiches but do not want to bake cookies or wait for brownies to cool, this is your shortcut. It is also one of those kid-friendly desserts that adults will hover around just as eagerly.
Think of this as a blueprint more than a strict recipe. Start with the classic frosted strawberry version, then branch into chocolate fudge, brown sugar cinnamon, s’mores, or whatever box is already tucked in the pantry. With a pint of good ice cream and a bowl of sprinkles, you are about five minutes away from the easiest little party trick in the freezer.
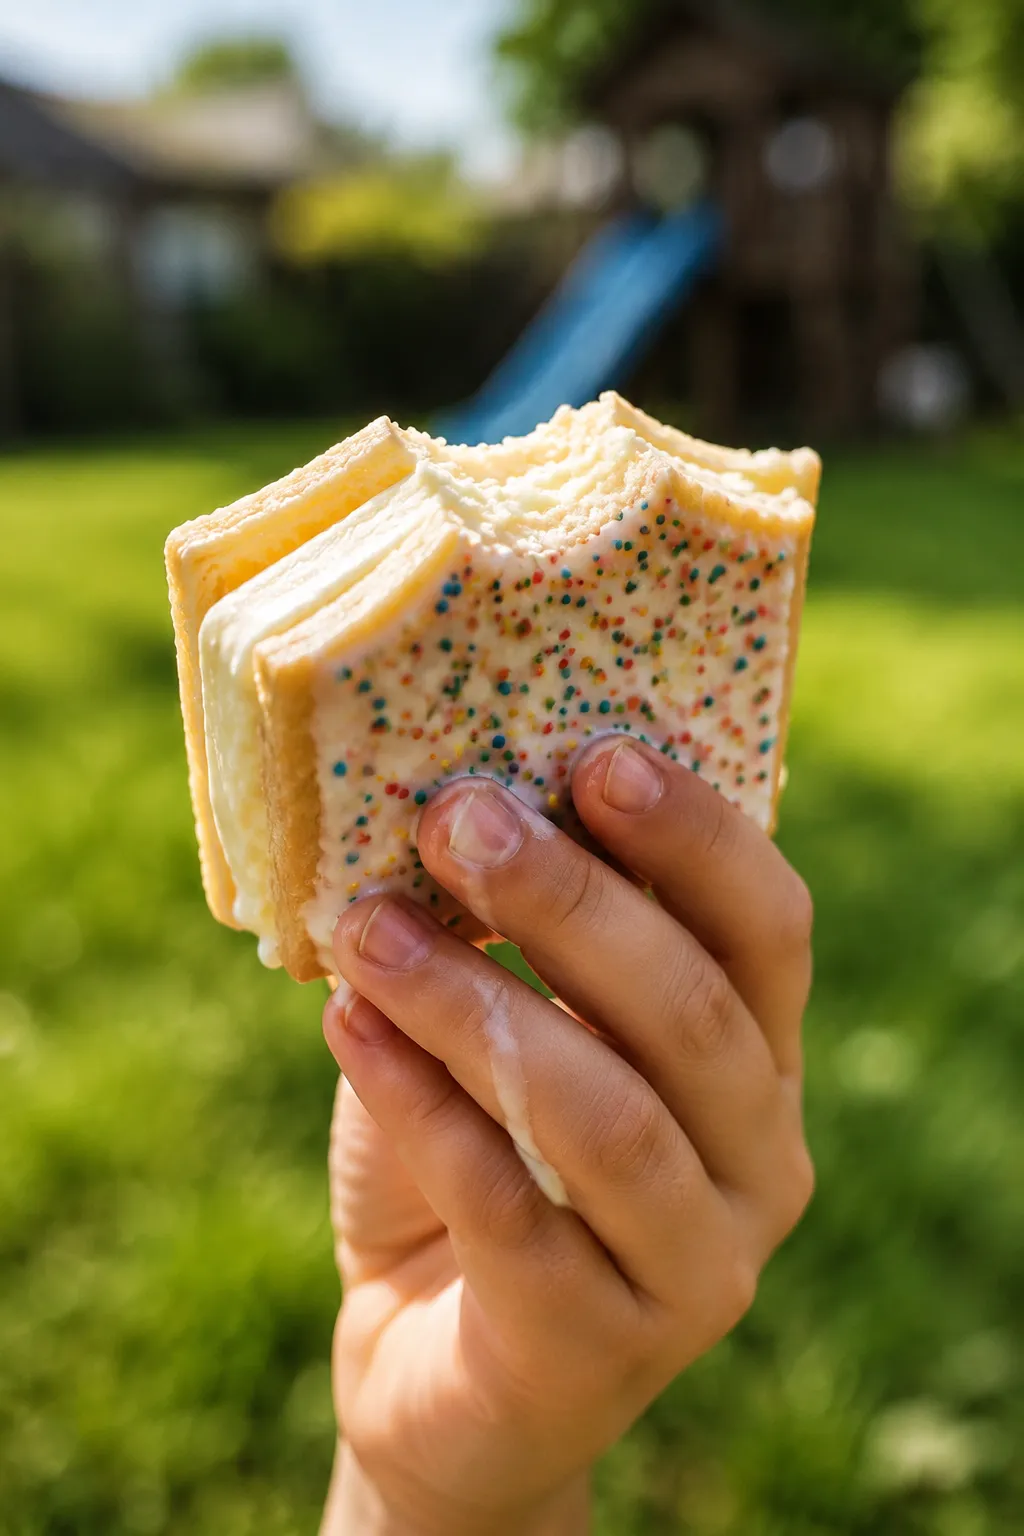
A pop tart ice cream sandwich works because it leans hard into contrast. The pastry is lightly toasted so it has a crisp, almost cookie-like edge, while the inside stays tender enough to bite through once frozen. The vanilla ice cream brings that creamy, familiar sweetness that balances the fruity frosting and jammy center of the Pop-Tarts. Then the sprinkles add crunch, color, and a tiny bit of magic along the sides.
Unlike many no-bake summer desserts, this one does not require a mixer, a crust, gelatin, whipped topping, or any sort of special pan. You can assemble a tray while dinner is finishing, tuck it into the freezer, and pull out a full dessert that feels much more intentional than the effort involved. It is the kind of recipe that makes people grin before they even take a bite.
There is also a very practical reason this treat works so well: Pop-Tarts are sturdy. They can handle a generous scoop of ice cream without crumbling in your hands, especially if you let them cool after toasting. That structure makes them a smart base for easy frozen treats, school break snacks, backyard cookouts, and casual birthday parties.
The ingredient list is short, which means each piece matters. You need eight strawberry Pop-Tarts, one pint of slightly softened vanilla ice cream, a half cup of rainbow sprinkles, and optional chocolate sauce or whipped cream if you want to make them sundae-style. That is it: pantry pastry, freezer staple, colorful crunch, and a couple of finishing touches if the mood strikes.
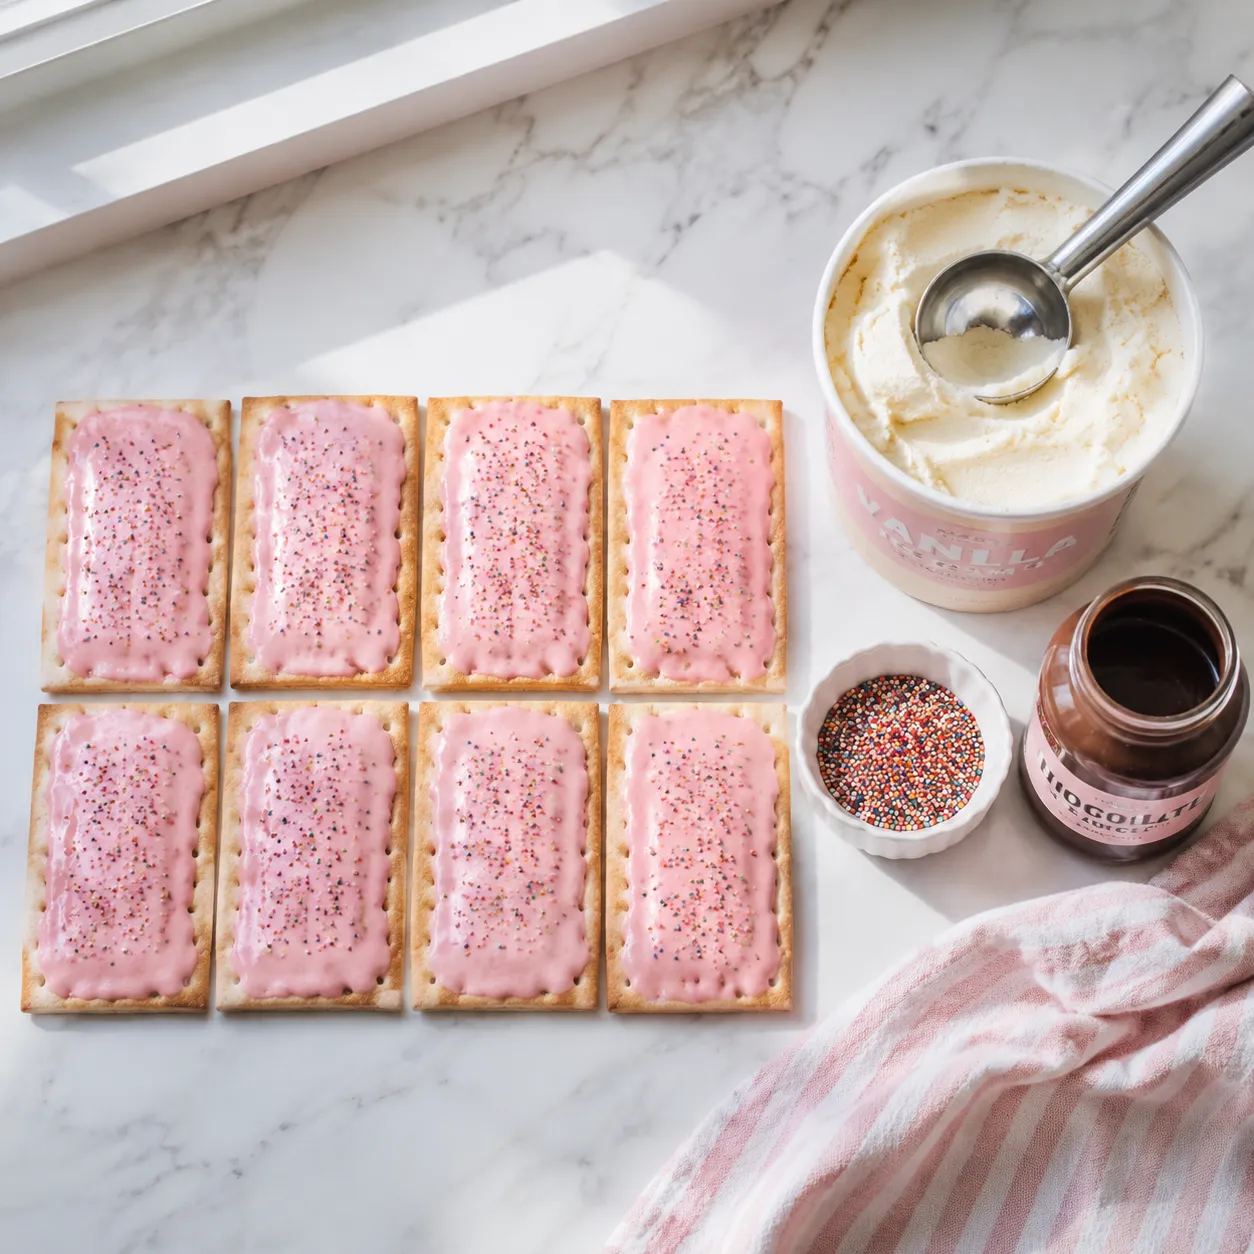
Frosted Strawberry is the classic choice and the one I reach for first because the pink icing, fruity filling, and creamy ice cream give true strawberry shortcake energy. If you are browsing for strawberry pop tart recipes that go beyond simply eating them from the foil sleeve, this is the one to bookmark. The frosting also helps create a pretty outer layer that looks fantastic once the sandwiches are stacked on a plate.
For the ice cream, use a flavor you love eating on its own. Vanilla ice cream is the most versatile because it lets the pastry flavor shine, but vanilla bean, sweet cream, or strawberry swirl all work beautifully. Let the pint sit at room temperature just until scoopable; you want it soft enough to spread slightly but not so melted that it runs off the pastry before you can sandwich it.
Sprinkles are more than decoration here. They cling to the exposed ice cream edge and create a fun texture contrast, almost like the classic sprinkle-coated sides of ice cream truck sandwiches. Use rainbow jimmies for a softer bite, nonpareils for more crunch, or a themed sprinkle mix for holidays and parties.
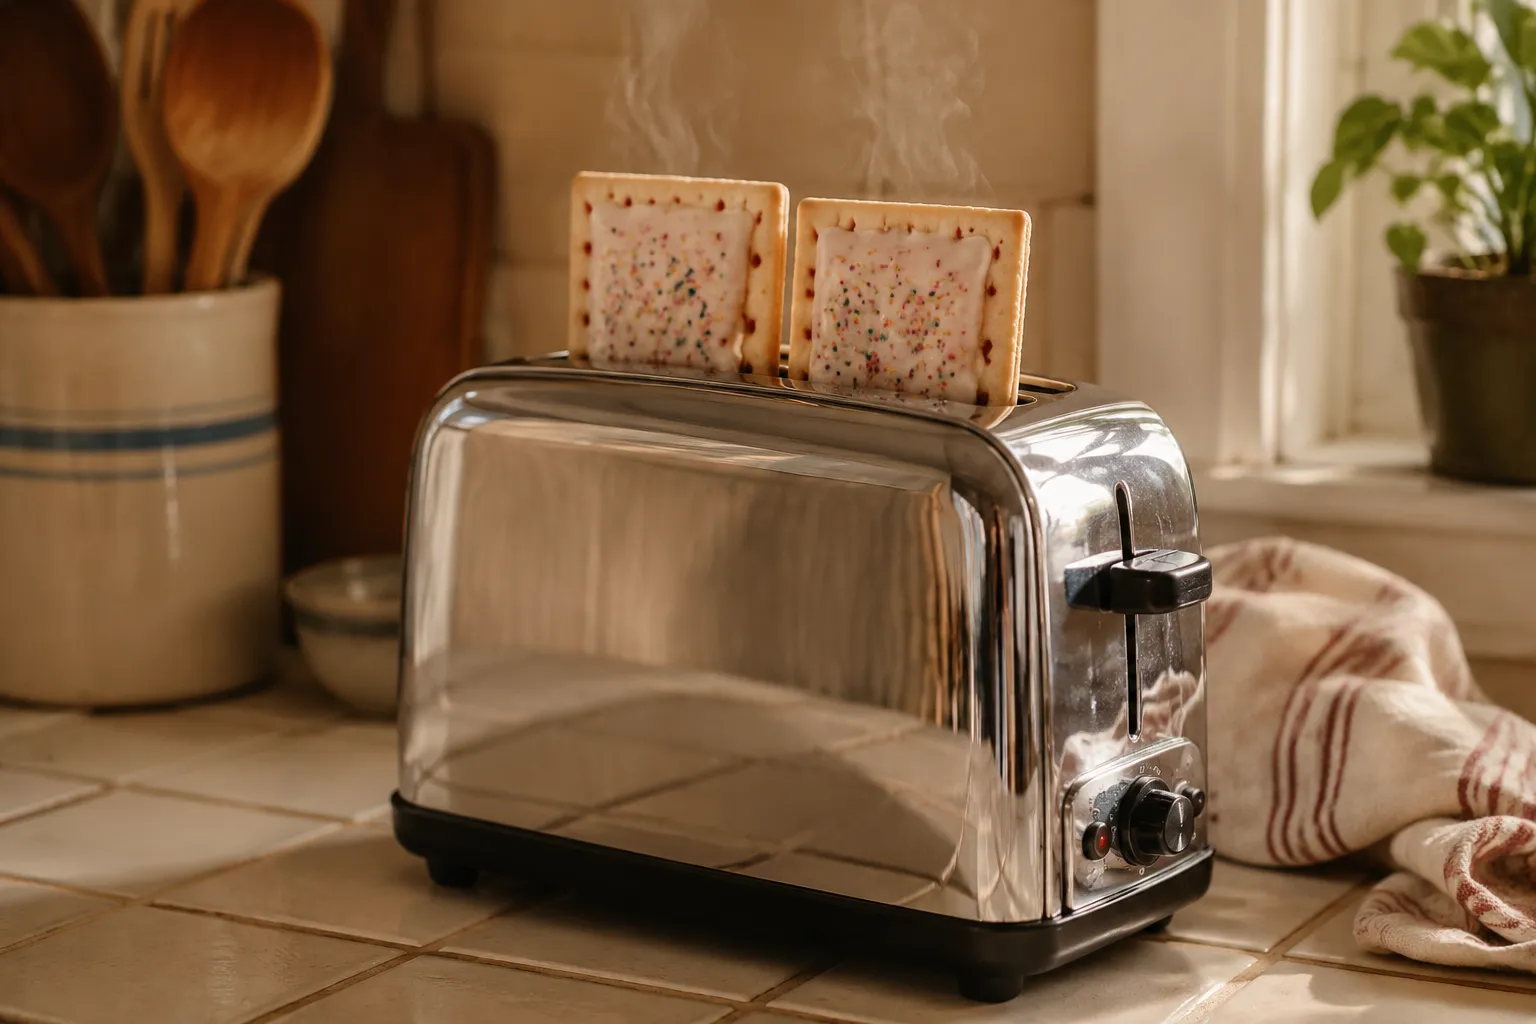
The first little move that makes this recipe shine is to toast the Pop-Tarts lightly. You are not looking for deep browning or scorching; just enough heat to crisp the pastry and wake up the frosting. Once they pop up, let them cool for a few minutes on parchment so the ice cream does not instantly melt on contact. That brief rest is the difference between a tidy sandwich and a delicious puddle.
When the pastries are cool to the touch, place half of them frosting-side down on a parchment-lined tray. Add a scoop of softened ice cream to each base, keeping it centered so you have room to press and spread. A standard ice cream scoop makes the portions even, but a large spoon works just fine if that is what you have.
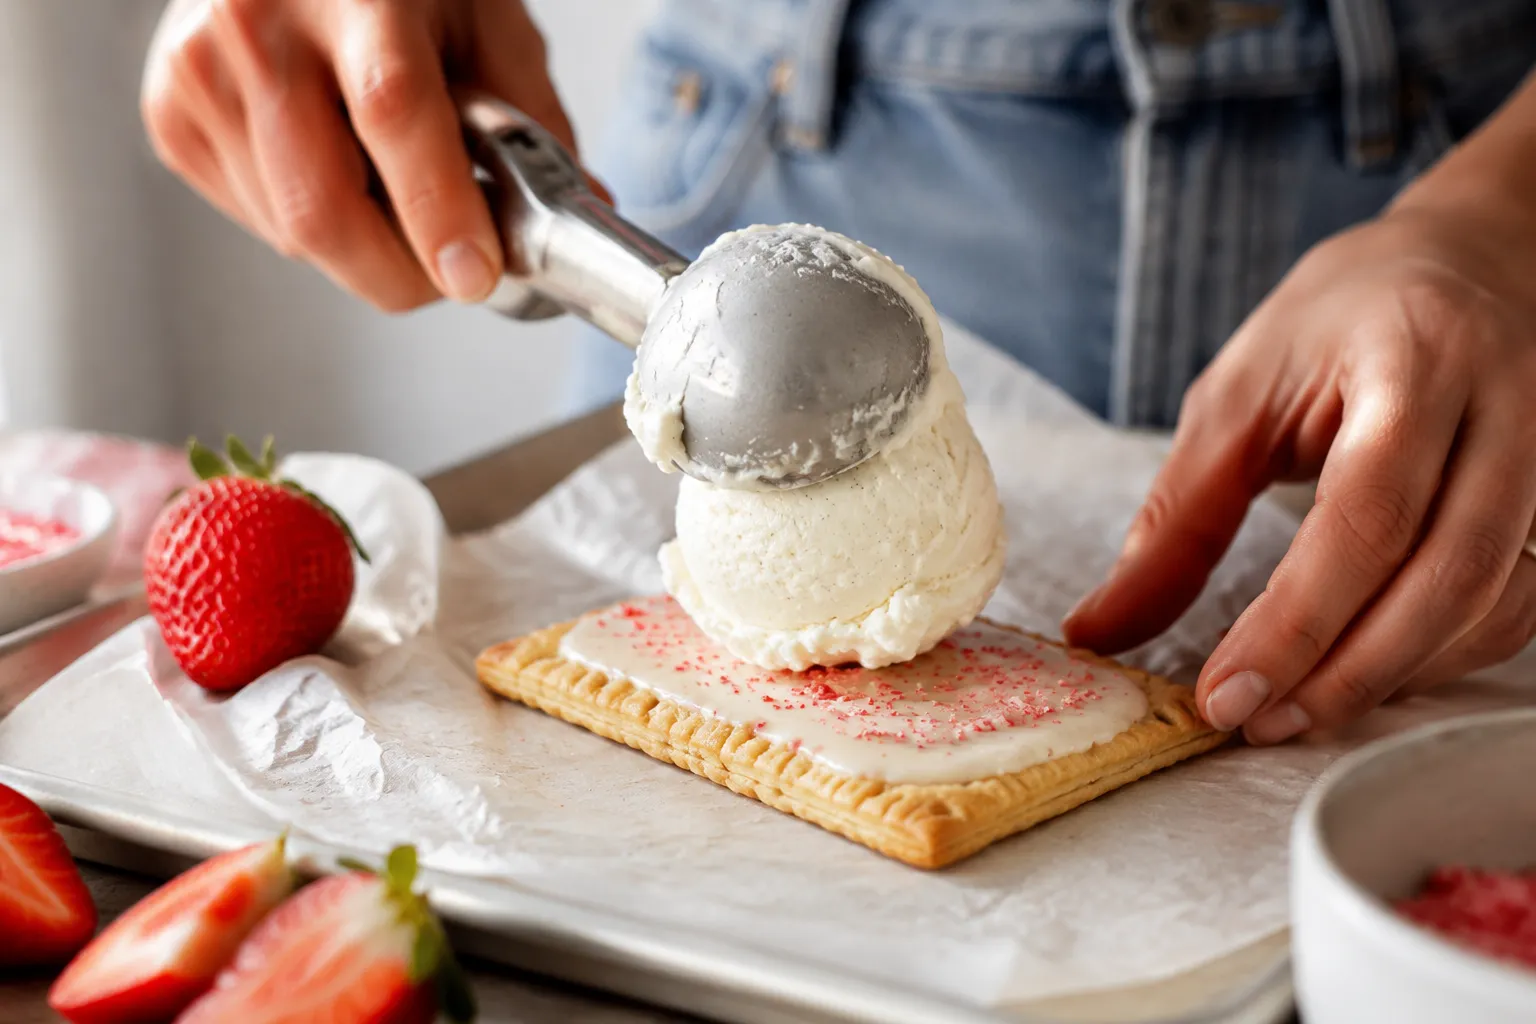
Top each scoop with another Pop-Tart, frosting-side up, then press gently until the ice cream reaches the edges. The goal is an even layer, not a smashed one, so use a light hand and let the softened ice cream do the work. If the sides look uneven, you can smooth them with an offset spatula, butter knife, or the back of a spoon.
Now comes the part everyone wants to help with: rolling the edges in sprinkles. Pour the sprinkles into a shallow dish, turn the sandwich on its side, and gently press the exposed ice cream edge into the colors. This gives the pop tart ice cream sandwich that bakery-case finish without any decorating skill whatsoever.
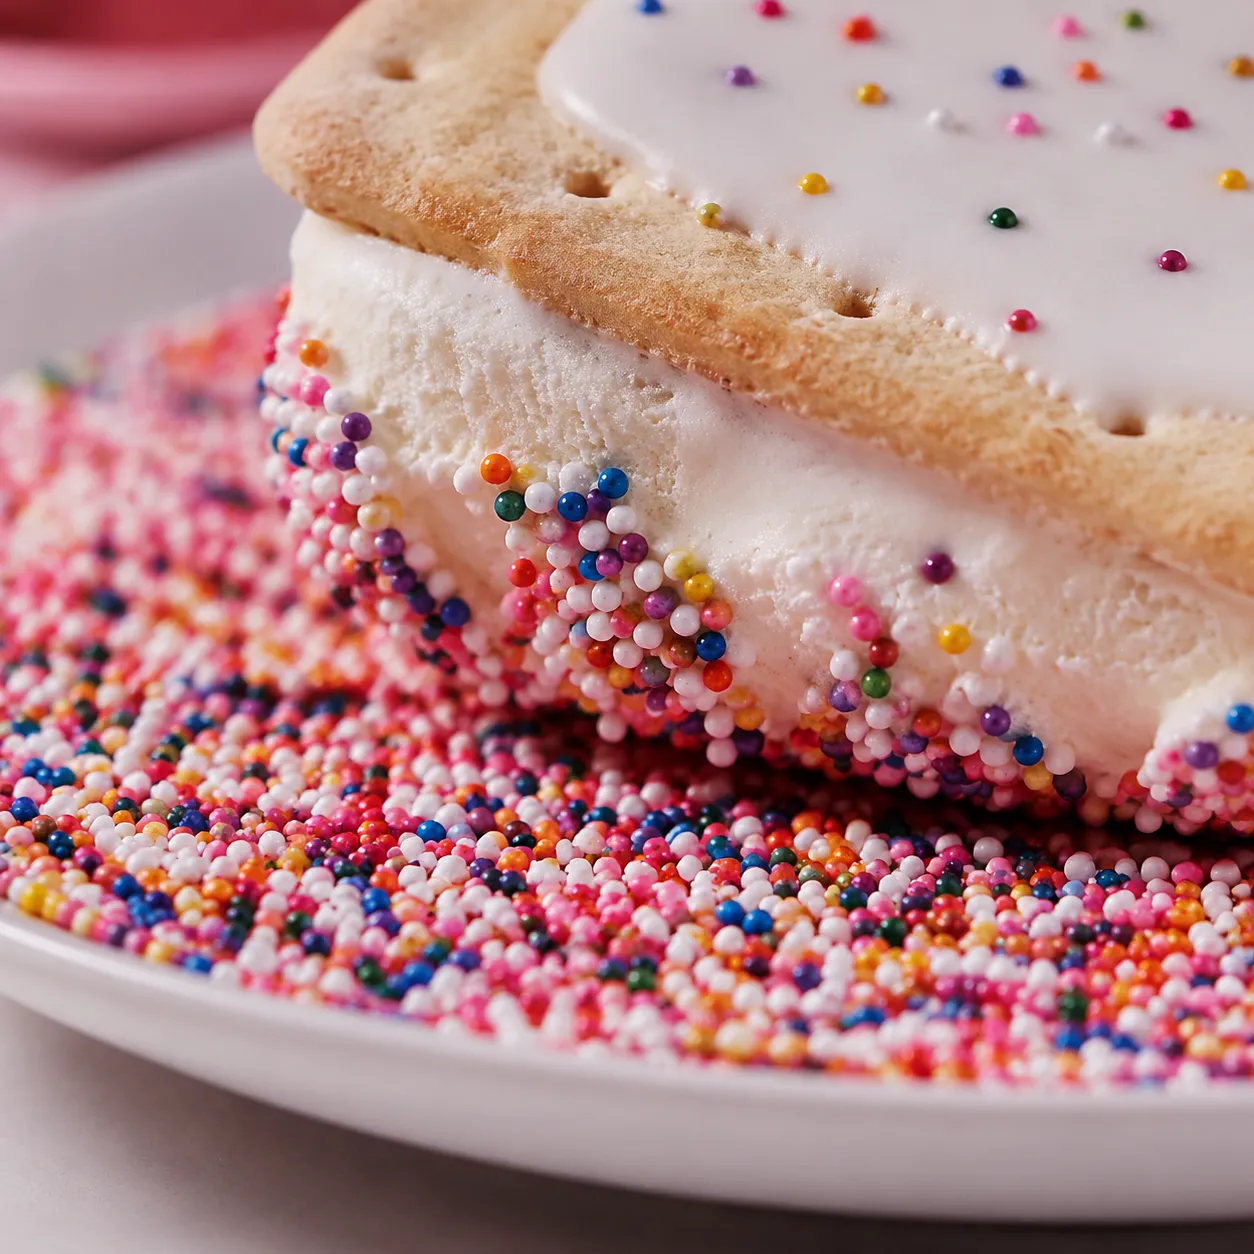
After assembly, the sandwiches need time in the freezer to firm up. They are technically edible right away in a gloriously messy way, but a freeze makes them cleaner to slice, stack, and serve. Plan on about an hour if you want a sturdy handheld dessert, or longer if you are prepping them for a party later in the week.
The strawberry-and-vanilla version is the house favorite because it tastes like childhood in the best possible way. Frosted Strawberry Pop-Tarts bring fruitiness and bright color, while vanilla bean ice cream adds those tiny flecks and a richer dairy note. Add rainbow sprinkles and you have a frozen treat that looks as cheerful as it tastes.
Brown Sugar Cinnamon with butter pecan ice cream is the cozy option. The warm spice, caramel-like filling, and nutty ice cream make it taste almost like a frozen pecan sticky bun. A pinch of flaky salt on the ice cream before sandwiching is lovely here if you want to make the sweetness feel more grown-up.
Chocolate Fudge Pop-Tarts with mint chip ice cream are for the person who always chooses the chocolate-dipped cone. The fudgy pastry and cool mint center create a candy-shop flavor that feels instantly refreshing. Roll the edges in chocolate sprinkles or mini chocolate chips instead of rainbow sprinkles for a more dramatic look.
S’mores Pop-Tarts with cookies and cream ice cream are pure campfire nostalgia, minus the smoke and skewers. The marshmallow notes in the pastry pair with cookie-studded ice cream for a dessert that lands somewhere between an ice cream sandwich and a freezer s’more. It is a fun choice for sleepovers, movie nights, and anyone who cannot resist vanilla ice cream desserts with a crunchy cookie twist.
Serve these sandwiches straight from the freezer, especially if you are outdoors. The pastries soften slightly as they sit, and the ice cream becomes perfectly creamy after a minute or two at room temperature. For younger kids, you can cut each sandwich in half to make smaller portions that are easier to hold. A stack on a chilled plate with fresh strawberries scattered around looks cute with almost no styling effort.
For a sundae-inspired plate, drizzle the finished sandwiches with chocolate sauce and add a small cloud of whipped cream right before serving. You can also set out bowls of extra sprinkles, crushed freeze-dried strawberries, mini chocolate chips, and chopped toasted nuts so everyone can customize their own. It is an easy way to turn one simple homemade ice cream sandwich into a DIY dessert bar.
If you are making these for a backyard cookout, keep them in the freezer until the very last minute. Bring them out on a tray lined with parchment, pass around napkins, and let people grab one as they go. They are casual enough for weeknights but fun enough for birthdays, pool parties, and late-night porch snacks.
This recipe is especially handy when you need dessert handled before guests arrive. Assemble the sandwiches earlier in the day, freeze them until firm, and keep them wrapped so they stay fresh and do not pick up freezer aromas. If you are transporting them, pack the wrapped sandwiches in a cooler with ice packs and transfer them back to the freezer as soon as you arrive.
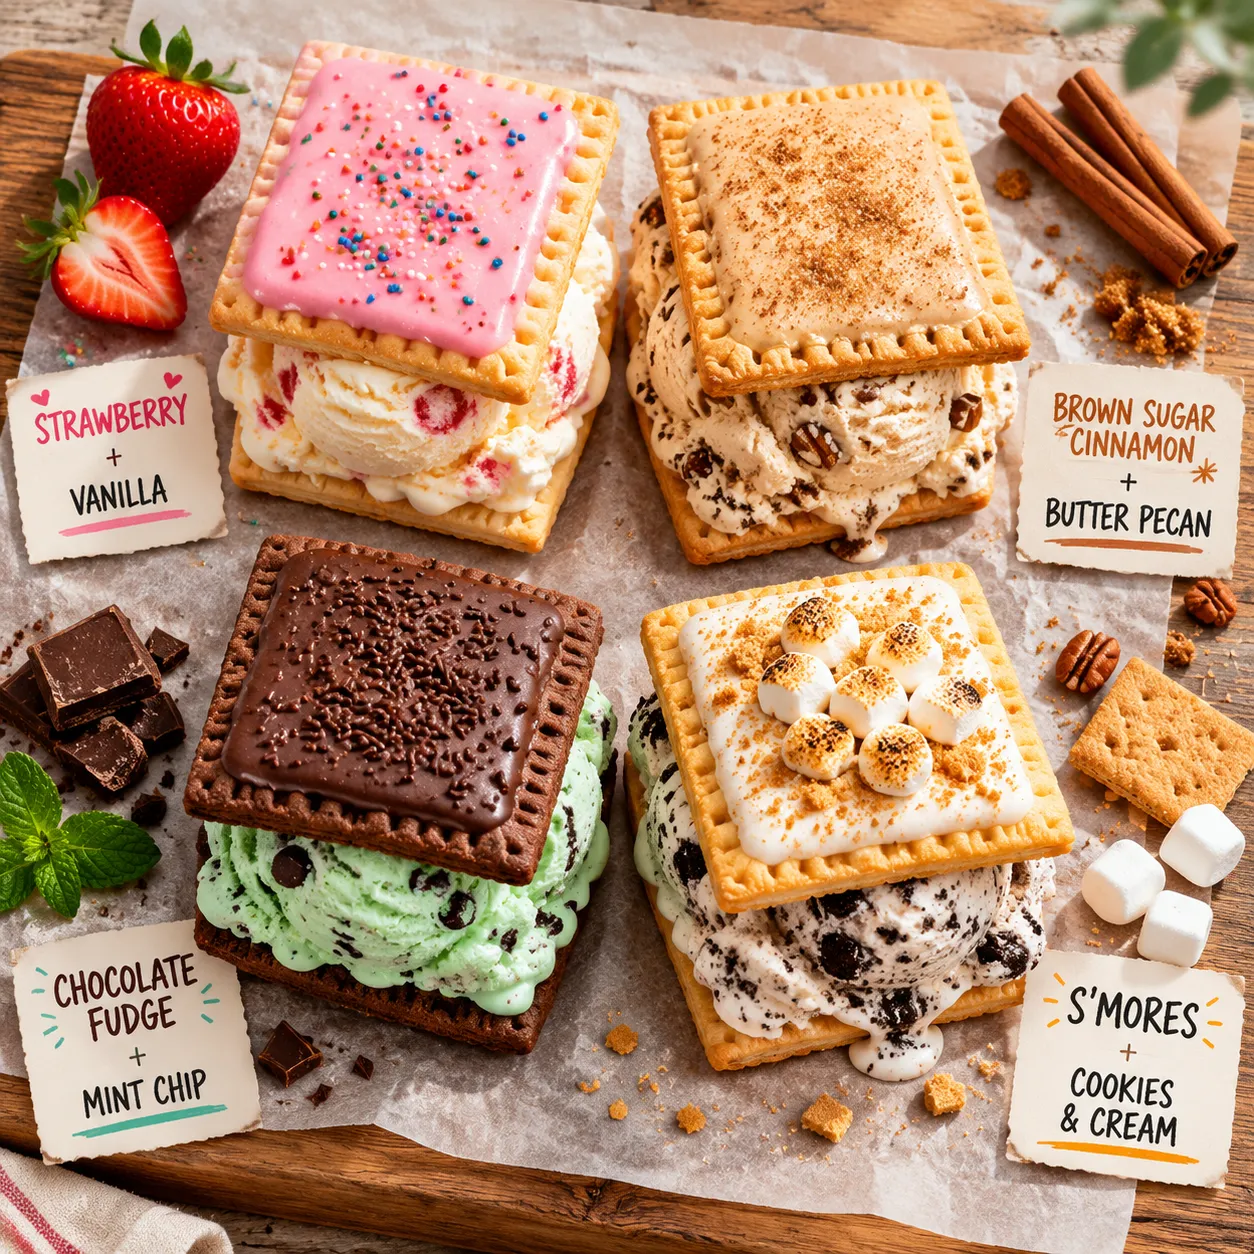
For parties, I like to make one classic tray and one playful tray. The classic tray might be strawberry Pop-Tarts with vanilla ice cream and rainbow sprinkles, while the playful tray can mix chocolate, cinnamon, or s’mores flavors with different ice cream centers. Labeling the flavors on little cards makes the spread feel special and helps guests choose their favorite.
Because the sandwiches are individually portioned, they are wonderfully low-fuss. There is no scooping ice cream while everyone waits, no slicing a frozen cake with a too-small knife, and no pile of sticky bowls at the end. That is exactly why they belong in your rotation of no-bake summer desserts.
The biggest thing to remember is that temperature is everything. Warm pastries will melt the ice cream too fast, but rock-hard ice cream can crack the pastry when you press the sandwich together. Aim for cooled pastries and slightly softened ice cream, and you will have the smoothest assembly experience.
You can also scale this recipe up or down without any math headaches. One pint of ice cream makes about four generous sandwiches, but you can use more or less depending on how thick you like the center. If serving small children, cut the finished sandwiches into halves or quarters after they firm up in the freezer.
Whether you make the classic strawberry version or raid the pantry for your own flavor mash-up, this pop tart ice cream sandwich is proof that dessert does not need to be complicated to be memorable. It is bright, creamy, crunchy, and just silly enough to make an ordinary afternoon feel like a treat. Keep a box of Pop-Tarts and a pint of ice cream on standby, and you are never more than a few minutes away from something fun.
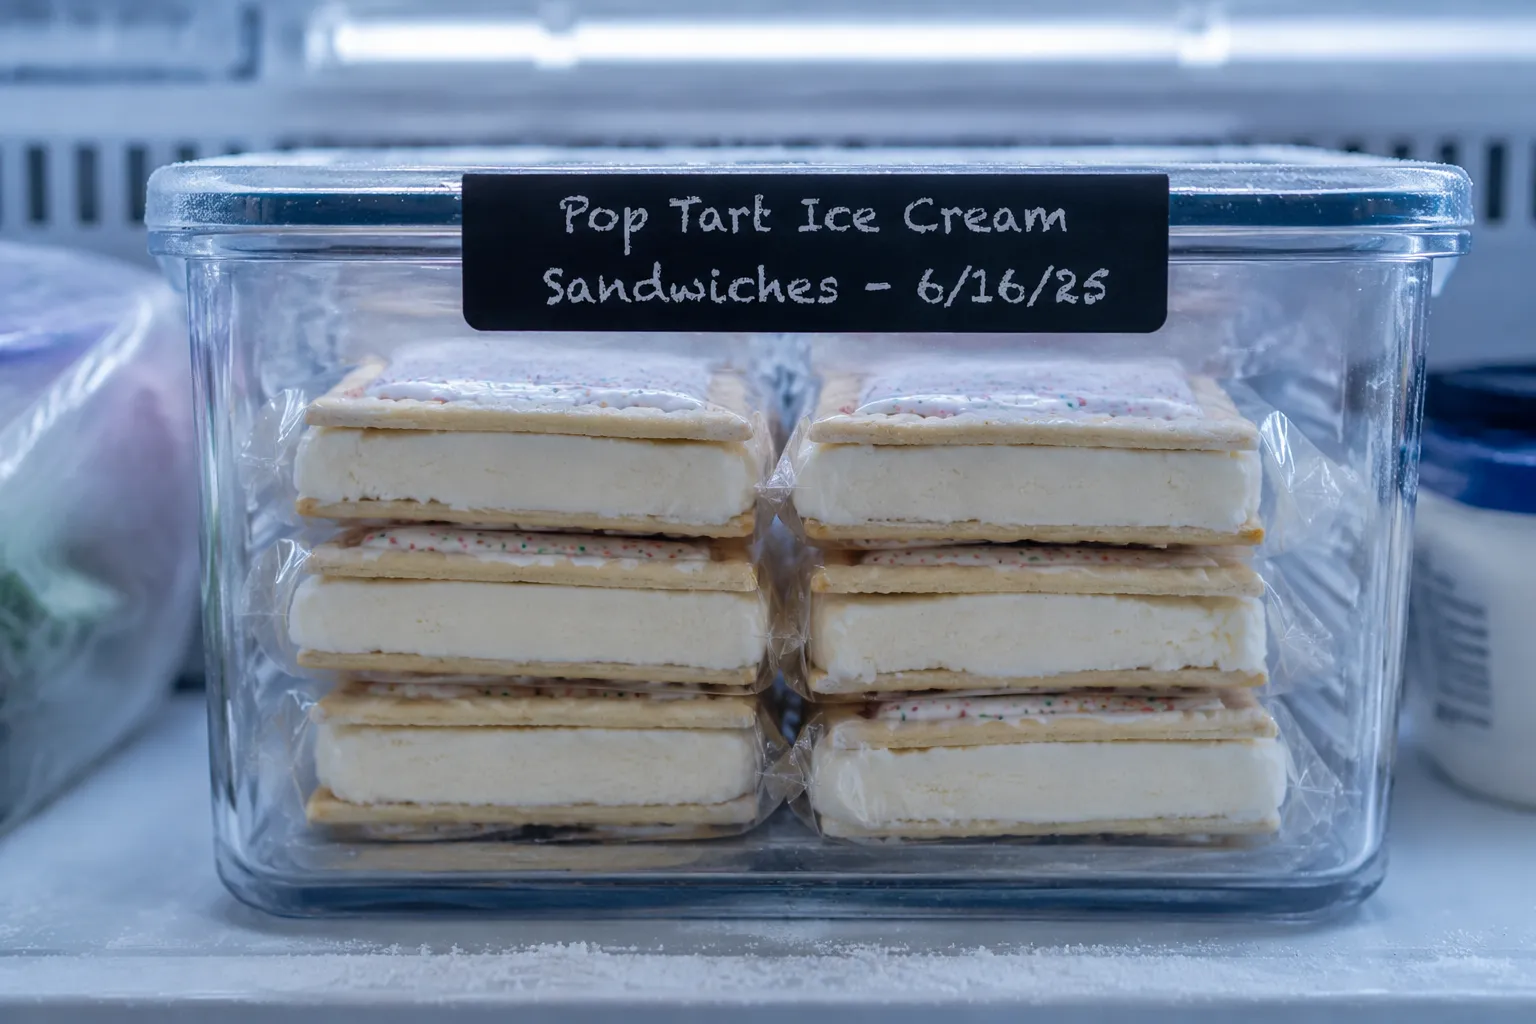
Wrap each assembled sandwich tightly in plastic wrap or parchment followed by foil, then place them in an airtight freezer-safe container. They keep their best texture for up to 2 weeks, though they are safe to eat beyond that if well wrapped.
For the cleanest bite, let a frozen sandwich sit at room temperature for 1 to 2 minutes before serving. If you are making them for a party, label the container with the date and flavor so you can easily organize multiple batches.