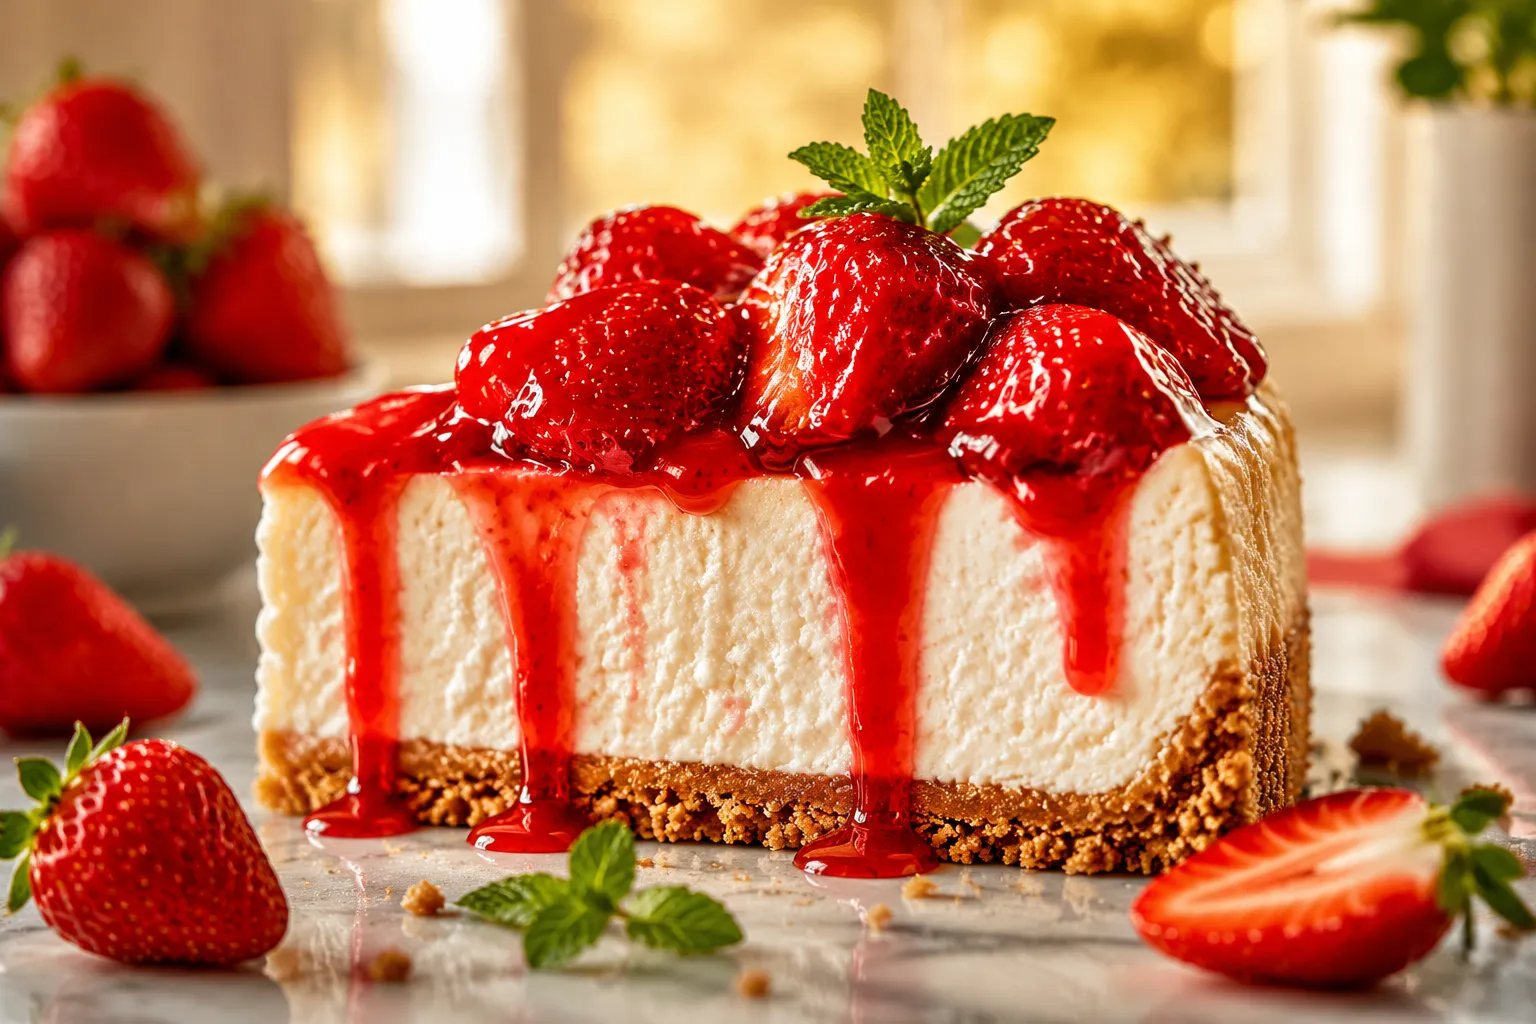
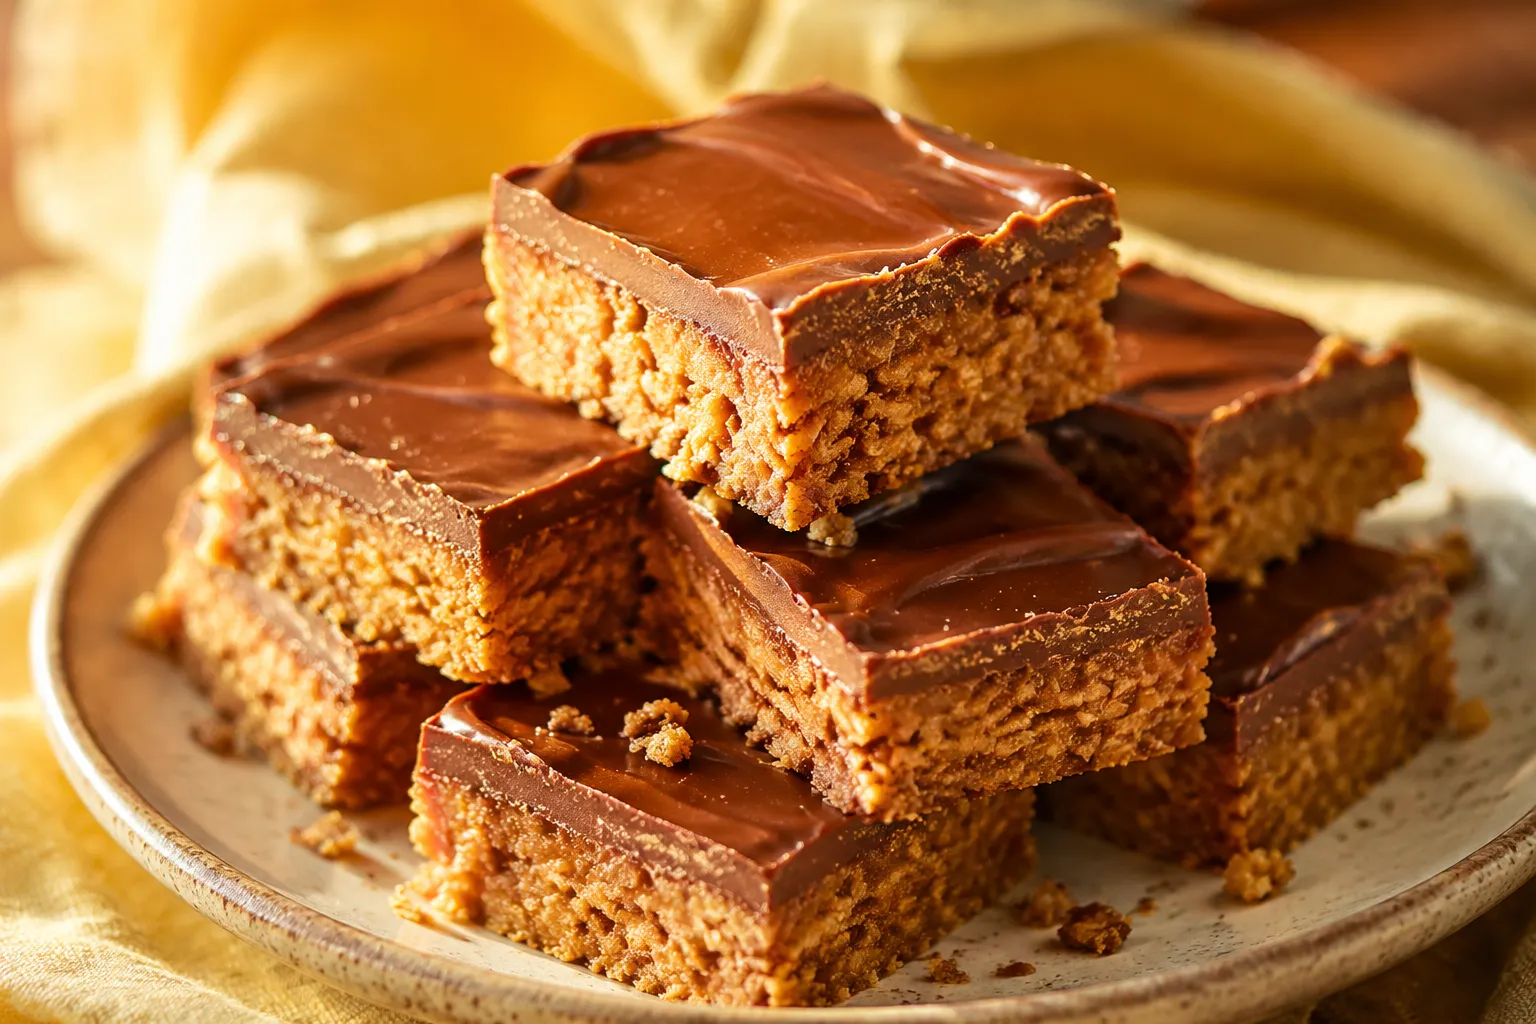
Fudge Recipe: Foolproof Classic Chocolate Fudge
Ingredients
Scale
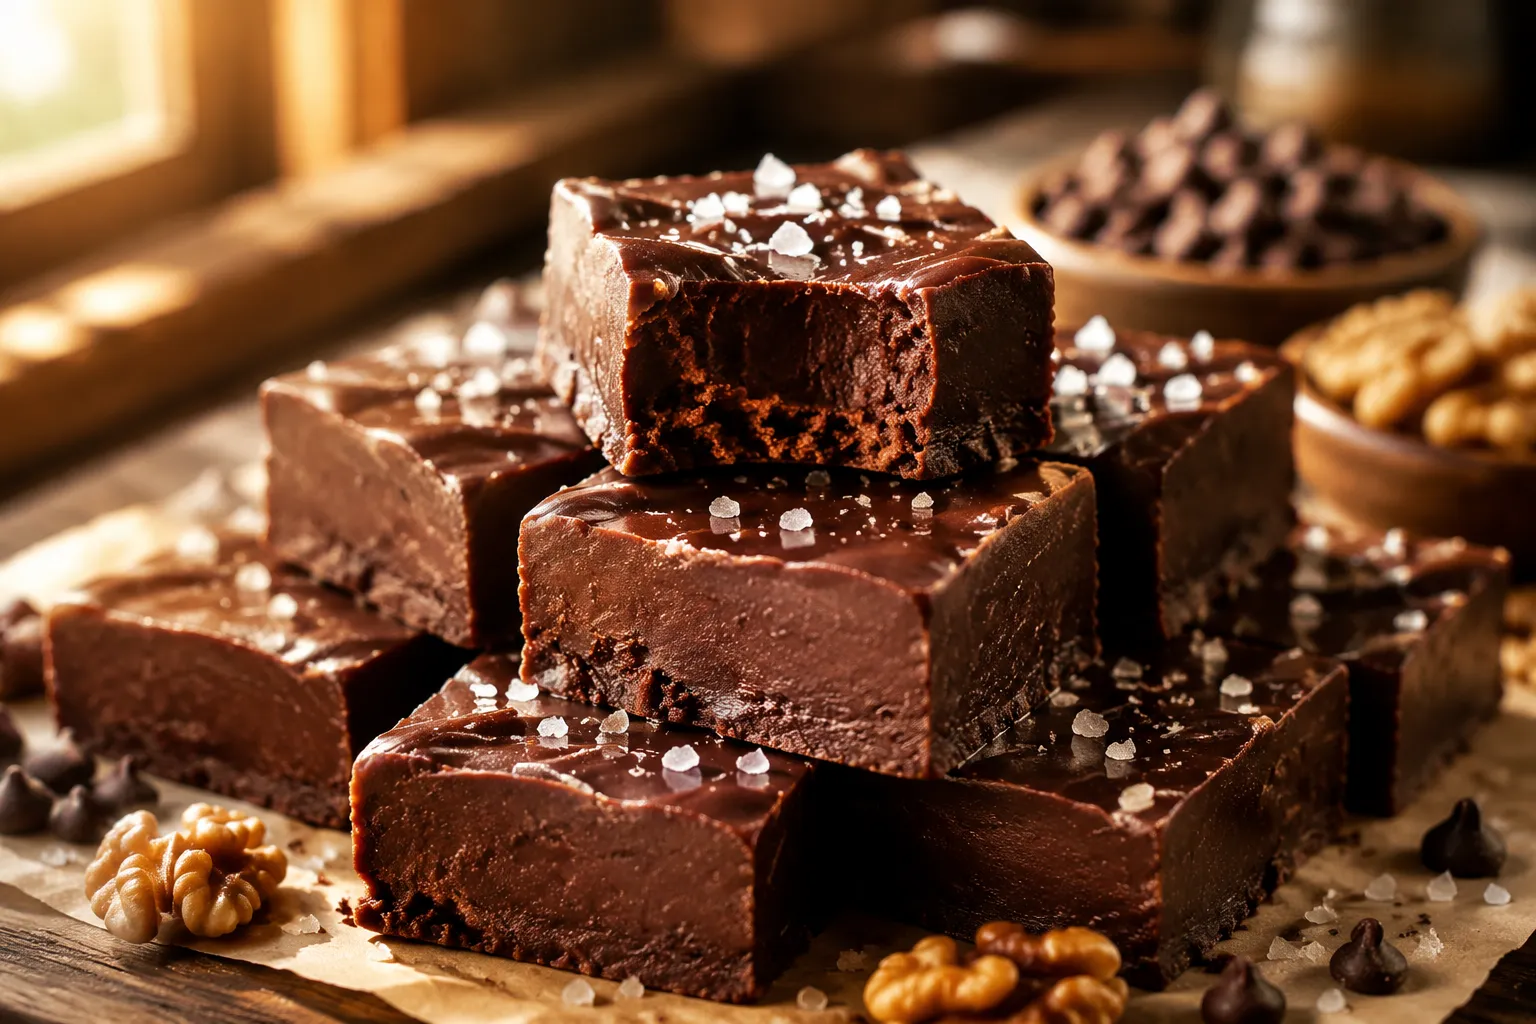
This classic fudge recipe delivers ultra-creamy, glossy chocolate squares every time, with the marshmallow cream secret that beats every fantasy fudge version.
This fudge recipe is the one I pull out every December — the foolproof, never-grainy, marshmallow-cream classic that turns a few pantry staples into glossy chocolate squares everyone fights over at the cookie table. If you've ever ended up with a pan of crumbly, sandy disappointment after following some cousin-of-a-cousin recipe card, this is your fix. We boil sugar, butter, and evaporated milk to a true soft-ball stage, then fold in chocolate chips and marshmallow cream for the silkiest, most reliable chocolate fudge you'll ever cut into.
I learned this method from a battered church cookbook my grandmother kept on the top shelf, and it's the same fantasy fudge approach that's been winning bake sales since the 1970s — for good reason. Marshmallow cream is the secret weapon: it stabilizes the sugar so the texture stays melt-in-your-mouth smooth instead of crystallizing into grit. You don't need fancy equipment, just a heavy saucepan and a candy thermometer that reads accurately around 234°F.
Whether you're stockpiling for a holiday cookie tray, packaging up homemade candy recipes for neighbors, or just craving something rich on a Tuesday night, this is the kind of homemade fudge that delivers every time — and it's the best fudge recipe to keep on permanent rotation if you bake gifts for a crowd.
Great chocolate fudge starts with simple, honest pantry ingredients — nothing exotic, nothing fussy. The magic isn't in any one item; it's in the ratios and the technique. Here's what makes this fantasy fudge recipe sing, and what to grab before you turn on the stove.
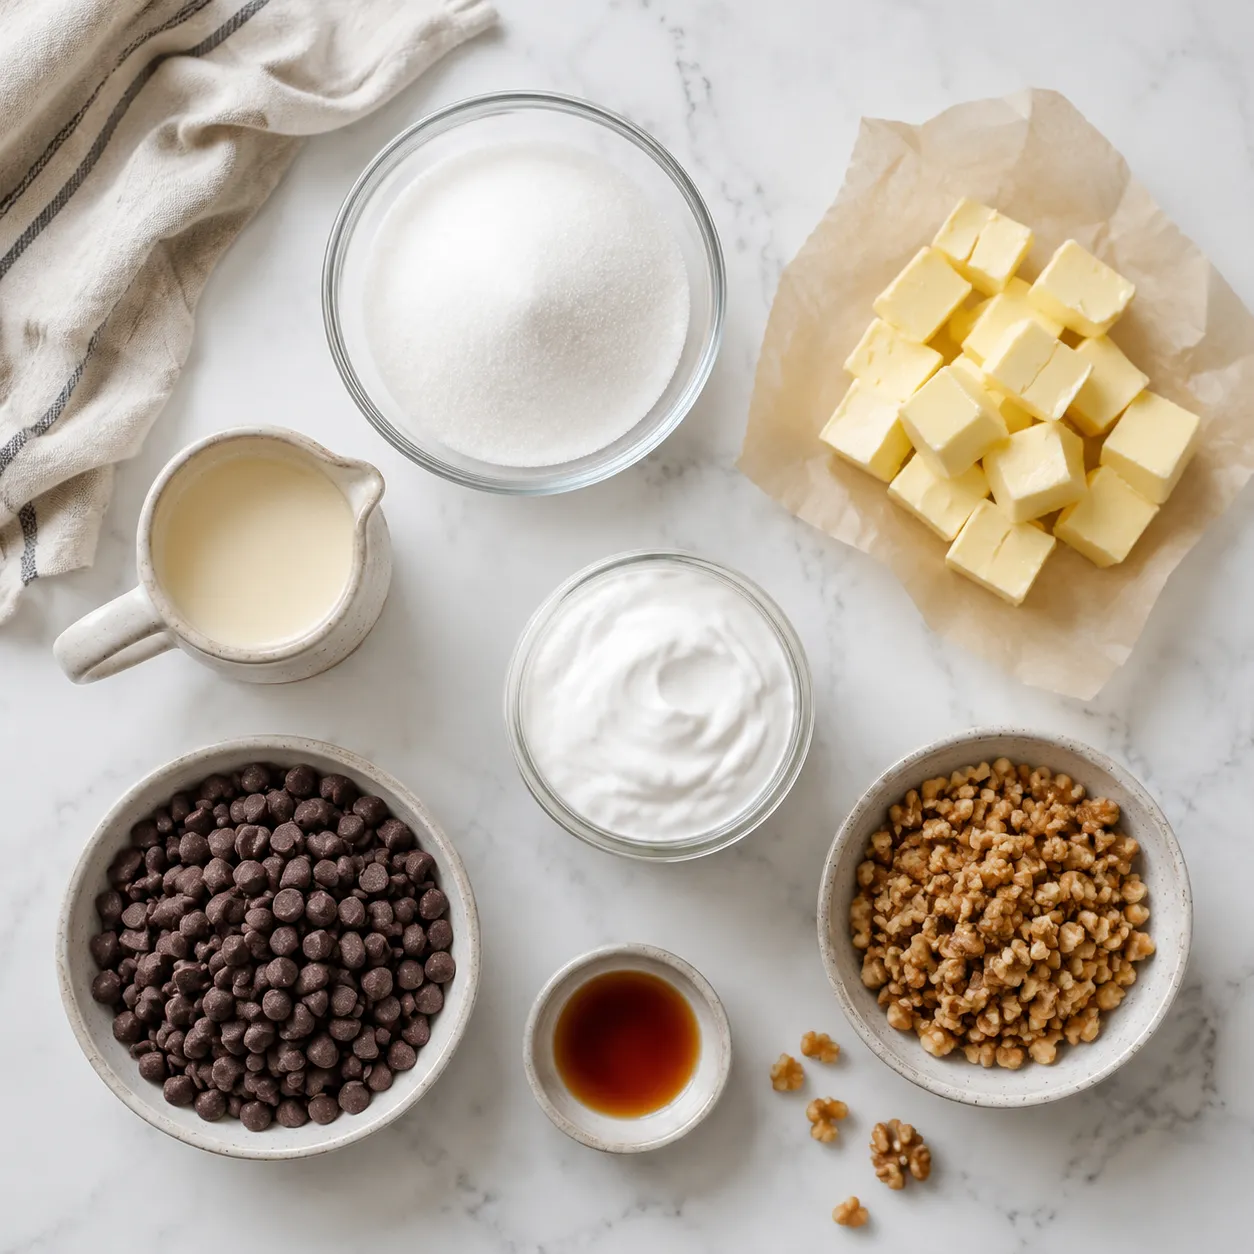
The base is a trio of granulated sugar, unsalted butter, and evaporated milk. Sugar gives you that classic crystalline structure that sets up firm but yielding to the bite. Butter brings richness and the signature glossy sheen on top. Evaporated milk — not sweetened condensed, never substitute one for the other — gives the fudge body and a soft tang without making it cloying.
Chocolate chips and marshmallow cream do the heavy lifting on flavor and texture. Semi-sweet chips melt into a deep, balanced cocoa flavor that isn't too bitter or too sweet for kids, and the marshmallow cream (also sold under the brand name Fluff) keeps everything velvety. Pure vanilla extract rounds out the warmth and makes the chocolate taste rounder, almost bourbon-y, after it sets.
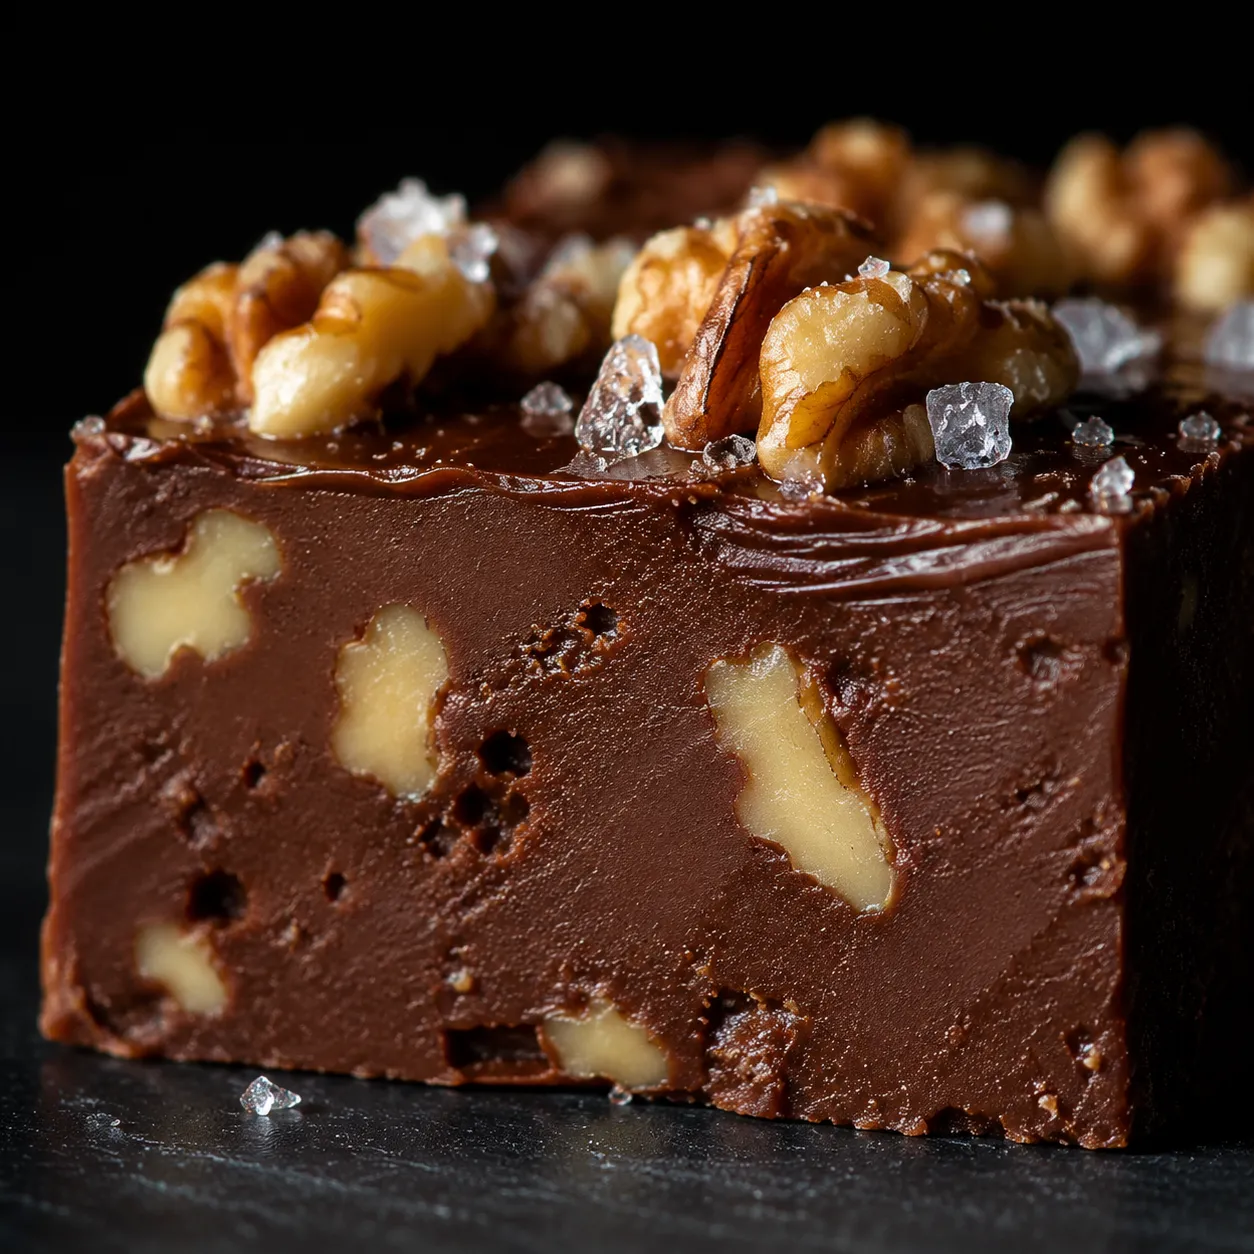
Mix-ins are where you can play. Toasted walnuts are the traditional choice — buttery and slightly bitter against the sweet — but pecans work beautifully if you prefer a softer, sweeter nut. A scatter of flaky sea salt on top right after pouring elevates everything from candy-shop sweet to grown-up dinner-party dessert.
The whole process takes about 25 minutes of active work, plus a couple of hours for the fudge to set firm. Read the steps through once before you start, set out everything you'll need, and clip your thermometer to the pan before you turn the burner on. Once that sugar starts boiling, you do not want to be hunting through drawers for a wooden spoon.
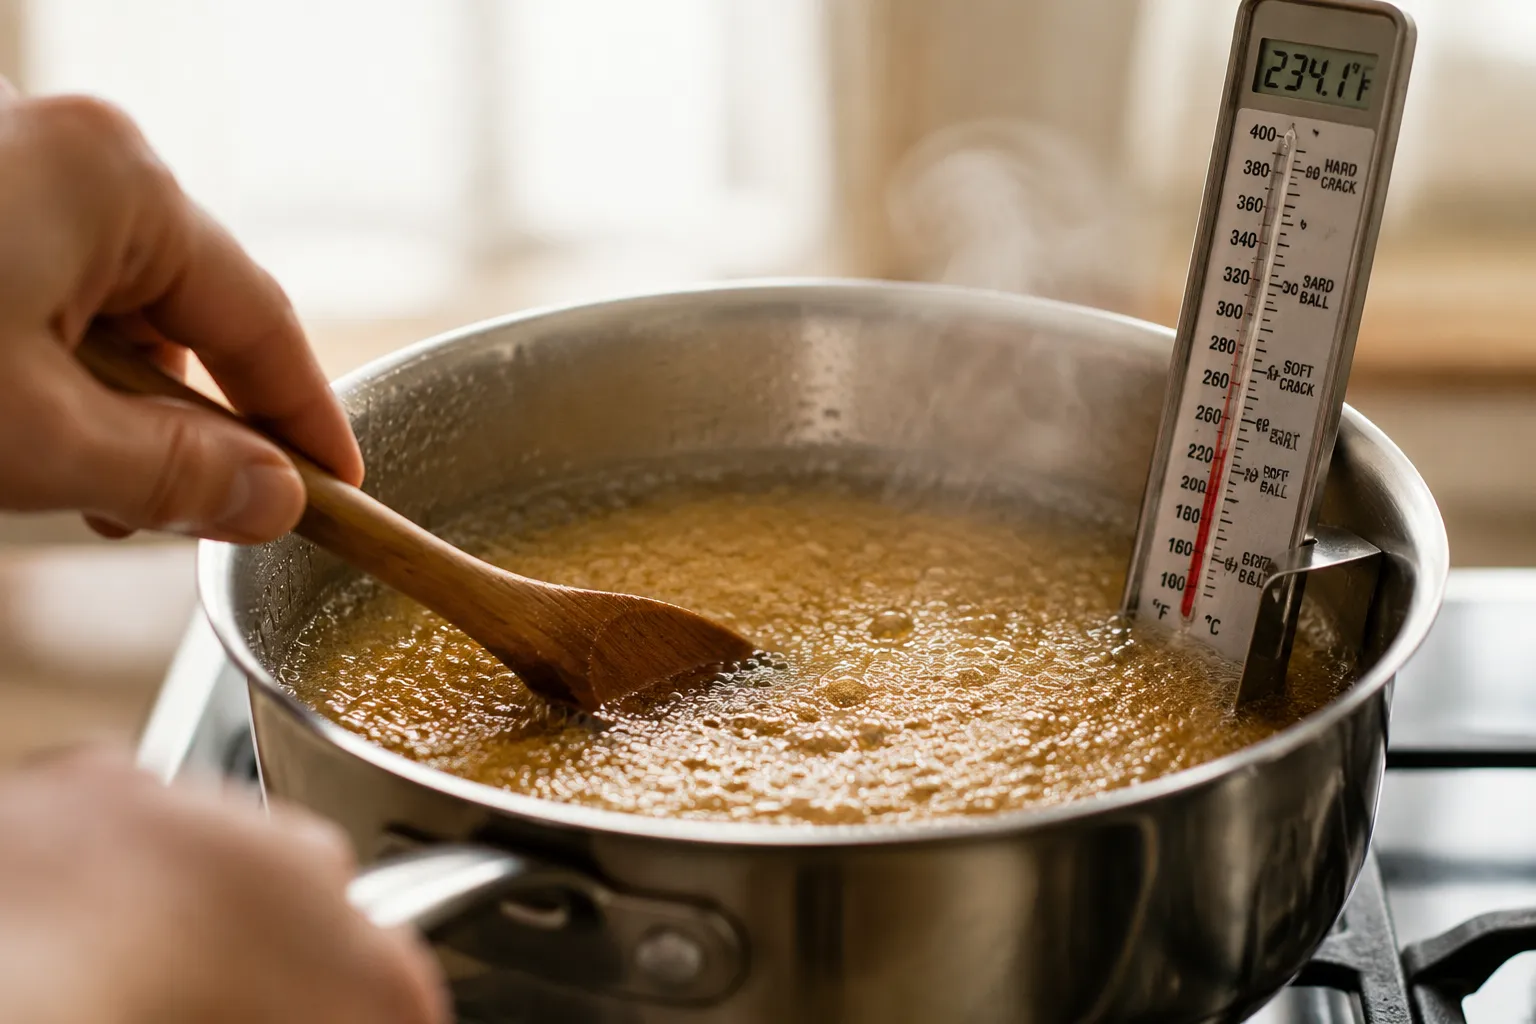
Step 1: Boil the sugar base. Combine the sugar, butter, and evaporated milk in a heavy-bottomed 3-quart saucepan over medium heat. Stir constantly with a wooden spoon until the butter melts and the sugar dissolves, then bring it to a rolling boil. Clip on your candy thermometer and let it bubble — without stopping the stir — until the mixture hits 234°F, the soft-ball stage. This usually takes 4 to 5 minutes of true rolling boil.
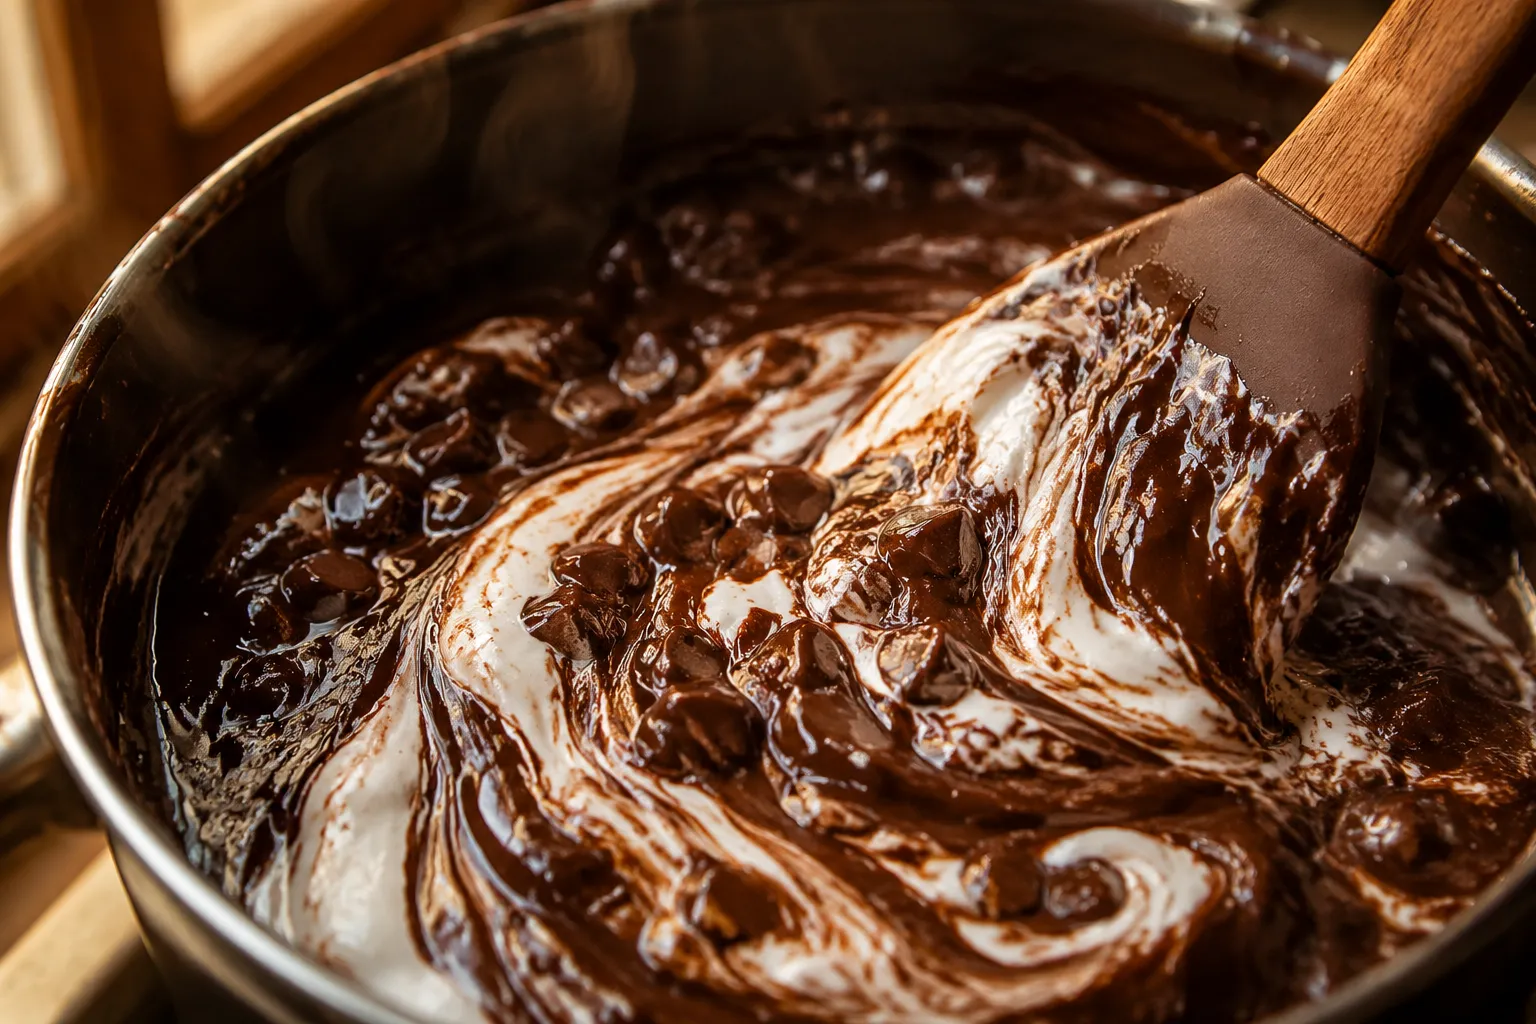
Step 2: Add the chocolate and marshmallow cream. Pull the pan off the heat the moment you hit temperature. Dump in the chocolate chips and the entire jar of marshmallow cream, then stir vigorously until the mixture is completely smooth and glossy — about 60 seconds of focused arm work. Add the vanilla and walnuts (if using) and fold them through evenly.
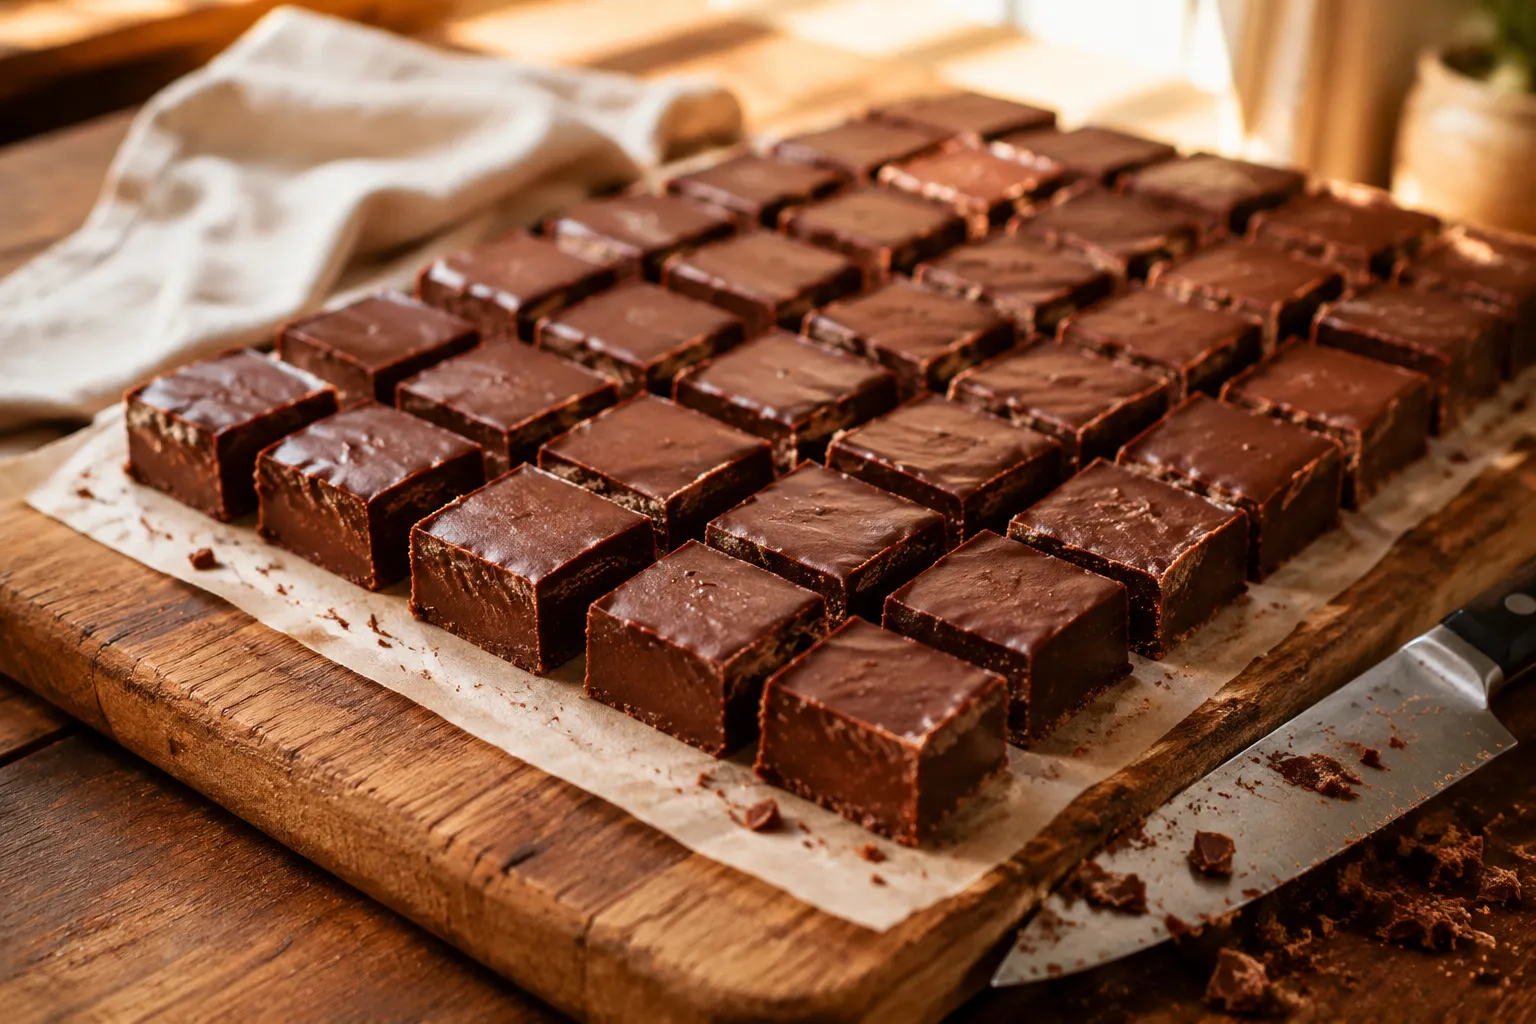
Step 3: Pour, set, and slice. Pour the hot fudge into a 9x13 pan lined with parchment, leaving an inch of overhang on two sides so you can lift the slab out cleanly later. Smooth the top with an offset spatula and add flaky sea salt now if you want it. Let the pan sit at room temperature for at least 2 hours, or in the fridge for 1 hour, until completely firm, then lift out and cut into 36 even squares with a sharp knife wiped between cuts.

Here's why this method works when so many old-school fudge attempts fail: it's all about controlling sugar crystallization. When sugar dissolves into hot liquid and then cools, it wants to recrystallize — and if those crystals form too fast or too large, you get the gritty, sandy mouthfeel that nobody wants. Hitting exactly 234°F means the sugar concentration is dialed in for soft, fine crystals that taste creamy on the tongue.
The marshmallow cream contains corn syrup and other stabilizers that physically interrupt large crystal formation as the candy cools, which is why a fantasy fudge approach is so reliably smooth compared to old-fashioned recipes that depend purely on careful beating. Stirring matters too — but only at the right moments. Stir constantly during the boil to prevent scorching, but once you add the chocolate and marshmallow cream off the heat, mix just until smooth and stop. Over-beating after the boil can knock the texture out of balance and dull that signature glossy finish.
The candy thermometer is non-negotiable here. It removes the guesswork that makes candy-making feel intimidating for beginners and gives you a repeatable benchmark every single batch. If your thermometer is more than a few years old, test it in boiling water — it should read 212°F at sea level. Adjust your target accordingly if it runs hot or cold.
Once the squares are cut, the question becomes: how do you actually serve them? At home, I pile them on a vintage milk-glass plate next to a pot of strong coffee or after-dinner tea. They're genuinely rich, so one or two squares per person is plenty — anything more and your guests will be reaching for water.
For the holidays, this fudge slots perfectly into a mixed cookie box alongside your favorite holiday cookie recipes — think gingerbread cutouts, peppermint bark, snickerdoodles, and shortbread. The deep chocolate flavor balances buttery, spiced cookies beautifully, and the squares hold their shape at room temperature for hours, which makes them ideal for office parties, potlucks, and last-minute gift assembly the morning of.
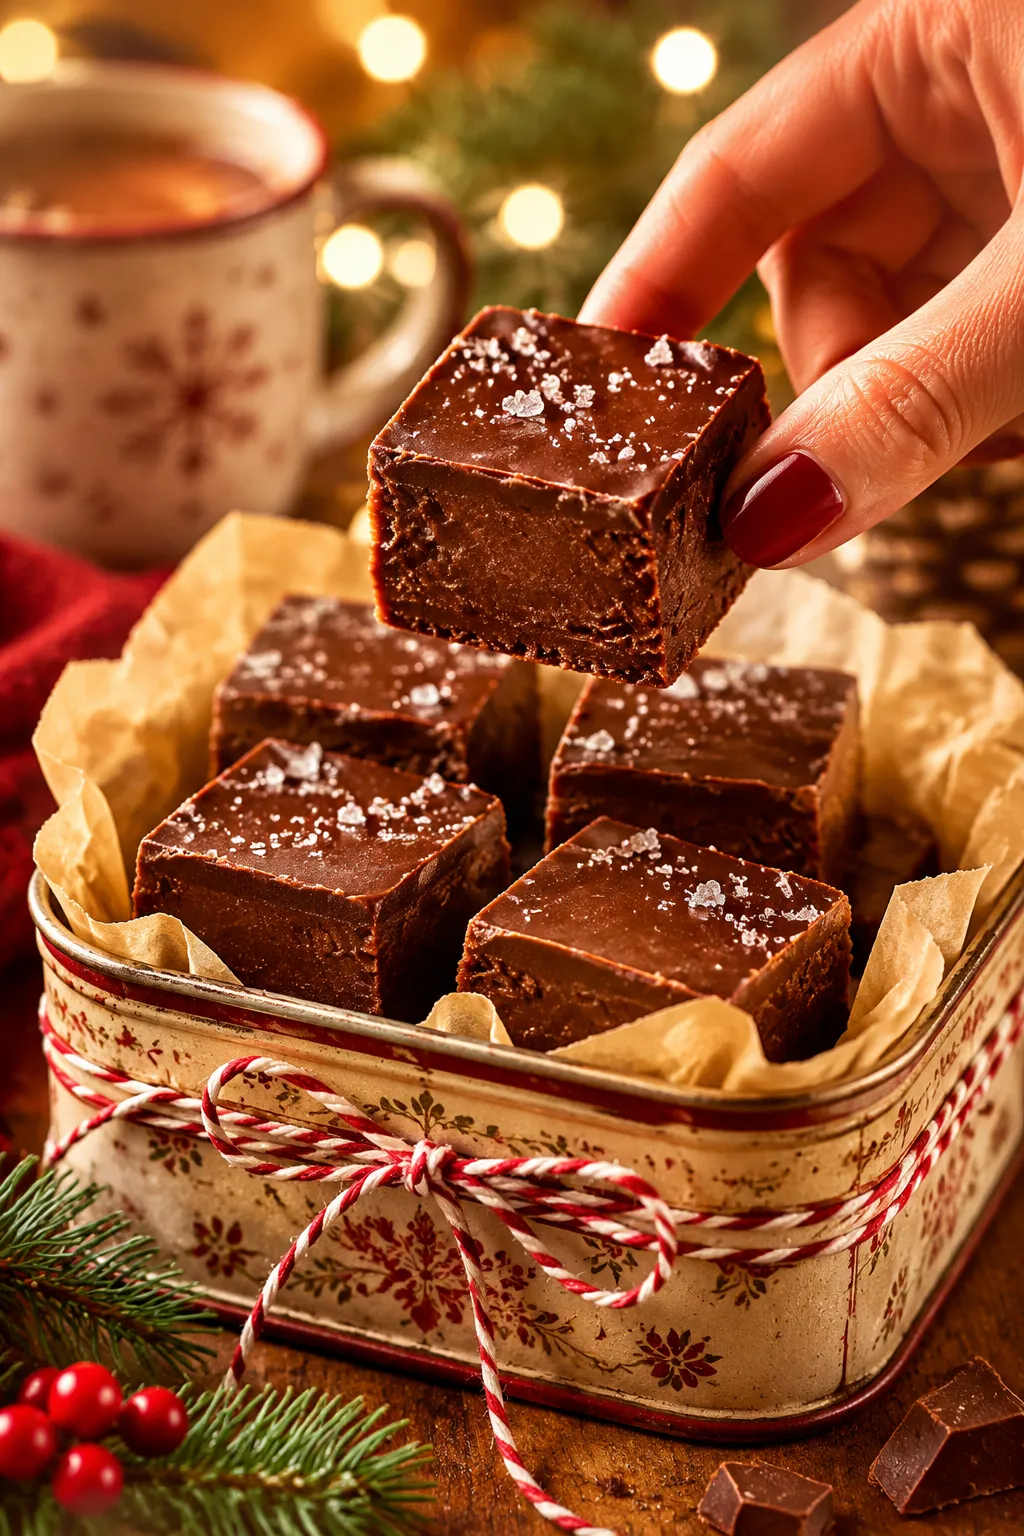
To gift a tin, line it with parchment paper, layer the squares with more parchment between rows so the tops don't scuff, and finish with baker's twine and a handwritten tag. Because there's no oven involved on the back end, this marshmallow cream fudge also fits right alongside other no-bake desserts you might be assembling for a crowd — pair it with chocolate truffles, peanut butter balls, or a tray of haystacks for an all-stovetop holiday spread that frees up your oven for the main event.
Even with a thermometer, things occasionally go sideways. Fudge is forgiving — most batches can be diagnosed and rescued from the same pan. Here's how to read what happened and fix it before you write the batch off.
If your fudge turned out grainy, the boil temperature was either too low or the mixture was stirred too aggressively as it cooled. Next batch, watch the thermometer like a hawk and resist over-stirring once the marshmallow cream goes in. You can sometimes save a grainy batch by rewarming it gently with a splash of cream and re-pouring.
If your fudge didn't set after 4 hours, you didn't quite reach soft-ball stage. Scrape the soft mixture back into the saucepan, add a tablespoon or two of evaporated milk to loosen it, and re-boil over medium heat while stirring constantly until you hit a verified 234°F. Pour into a fresh parchment-lined pan and you'll save the batch nine times out of ten.
If the texture came out hard and crumbly, you boiled past 234°F into the firm-ball range. Fix it by gently rewarming the cubes in a double boiler with a splash of cream until smooth, then re-pour onto fresh parchment. This kind of troubleshooting is exactly why I keep a digital candy thermometer in my drawer year-round — it's the same tool that saves caramels, brittle, and other homemade candy recipes from disaster.
Once you've made this fudge recipe a couple of times, it stops feeling like a project and starts feeling like a 25-minute weeknight indulgence. Crumble a square over vanilla ice cream, layer pieces between butter cookies for a sandwich, or — my personal favorite — sneak a square cold from the fridge with a cup of black coffee at 10 p.m. However you serve it, this is the homemade chocolate fudge that earns a permanent spot in your holiday baking rotation.
This base recipe is endlessly riffable — once you nail the technique, treat the chocolate-and-mix-in combo as a blank canvas for whatever flavors fit the occasion or the giftee.
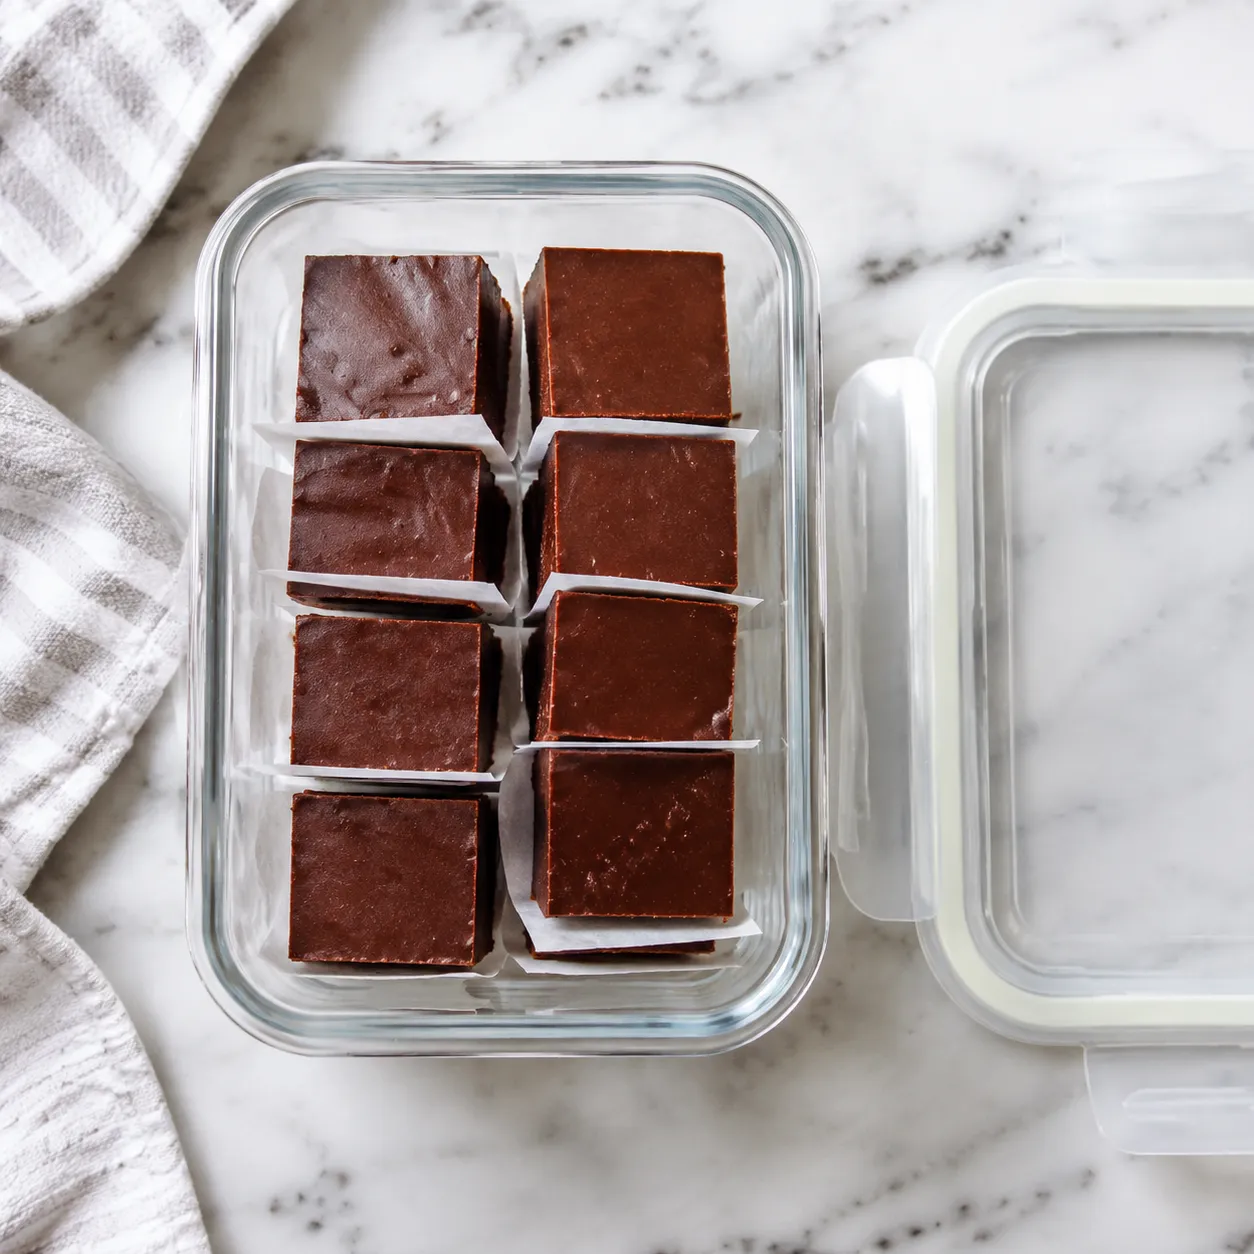
Stored airtight at room temperature, fudge keeps beautifully for up to 2 weeks — line your container with parchment and tuck more parchment between layers so the tops don't stick. In the refrigerator, it stays fresh for about 3 weeks; just bring squares to room temperature for 10 minutes before serving so the texture softens back to that signature melt.
For longer storage, fudge freezes exceptionally well for up to 3 months. Wrap the entire un-cut slab tightly in plastic wrap and then in foil, or freeze pre-cut squares in a single layer on a parchment-lined sheet pan before transferring to a freezer-safe container with parchment between layers. Thaw overnight in the fridge before serving for the best texture.