Classic Tarte Tatin Recipe (French Upside-Down Apple Tart)
4.8 from 12 reviews
0SHARES
Now Playing
Classic Tarte Tatin Recipe (French Upside-Down Apple Tart)
0:00
0:00
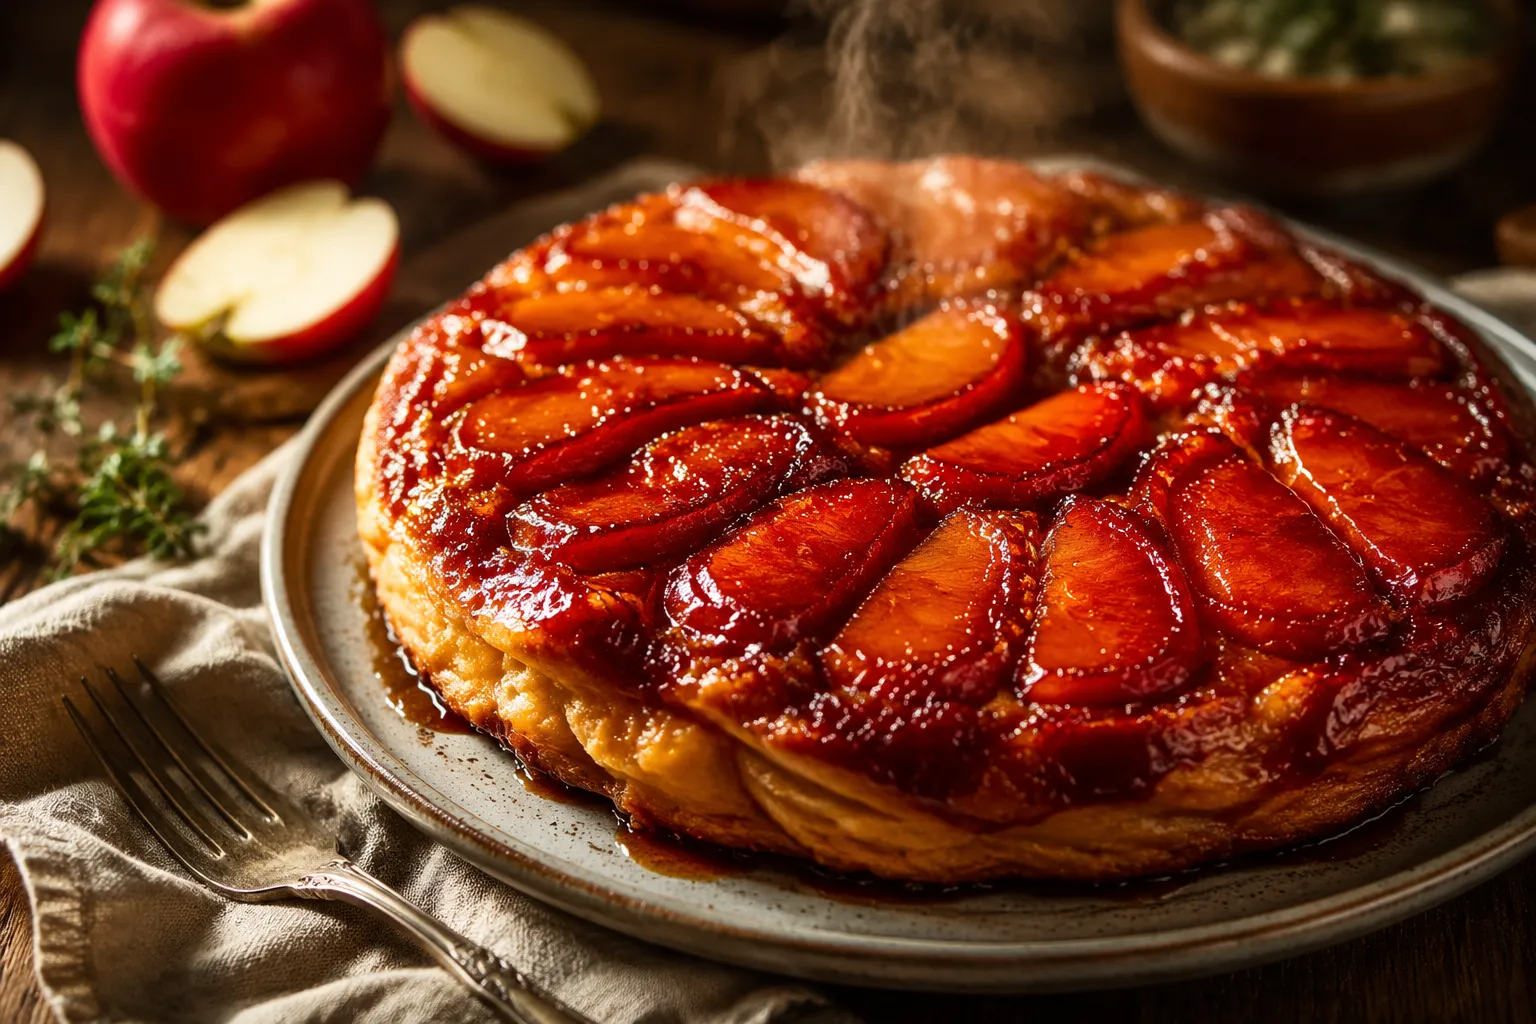
A foolproof tarte tatin recipe with deeply caramelized apples and buttery puff pastry, finished with a confident flip that never fails.
Why You'll Love This Recipe
- **French bakery drama, home-kitchen effort:** It looks like a showpiece dessert, but the ingredient list is short and the technique is very learnable.
- **Deep caramel flavor:** The apples cook directly in amber caramel, so every bite is buttery, glossy, and rich.
- **Store-bought pastry friendly:** All-butter puff pastry makes the recipe approachable without sacrificing flake or flavor.
- **Perfect for entertaining:** The dramatic flip and shiny apple top make it feel special enough for a dinner party.
- **A true apple-season classic:** It is cozy, elegant, and just different enough from the usual pie or crumble.
tarte tatin is the kind of dessert that feels like a magic trick: a skillet full of apples, butter, and sugar goes into the oven, and out comes a glossy, golden French apple tart with caramel dripping down the sides. It looks like something you would order at a candlelit bistro, but the method is wonderfully direct once you understand the timing. The whole point is to build flavor in the pan first, let the apples slump into the caramel, then tuck puff pastry over the top like a buttery blanket.
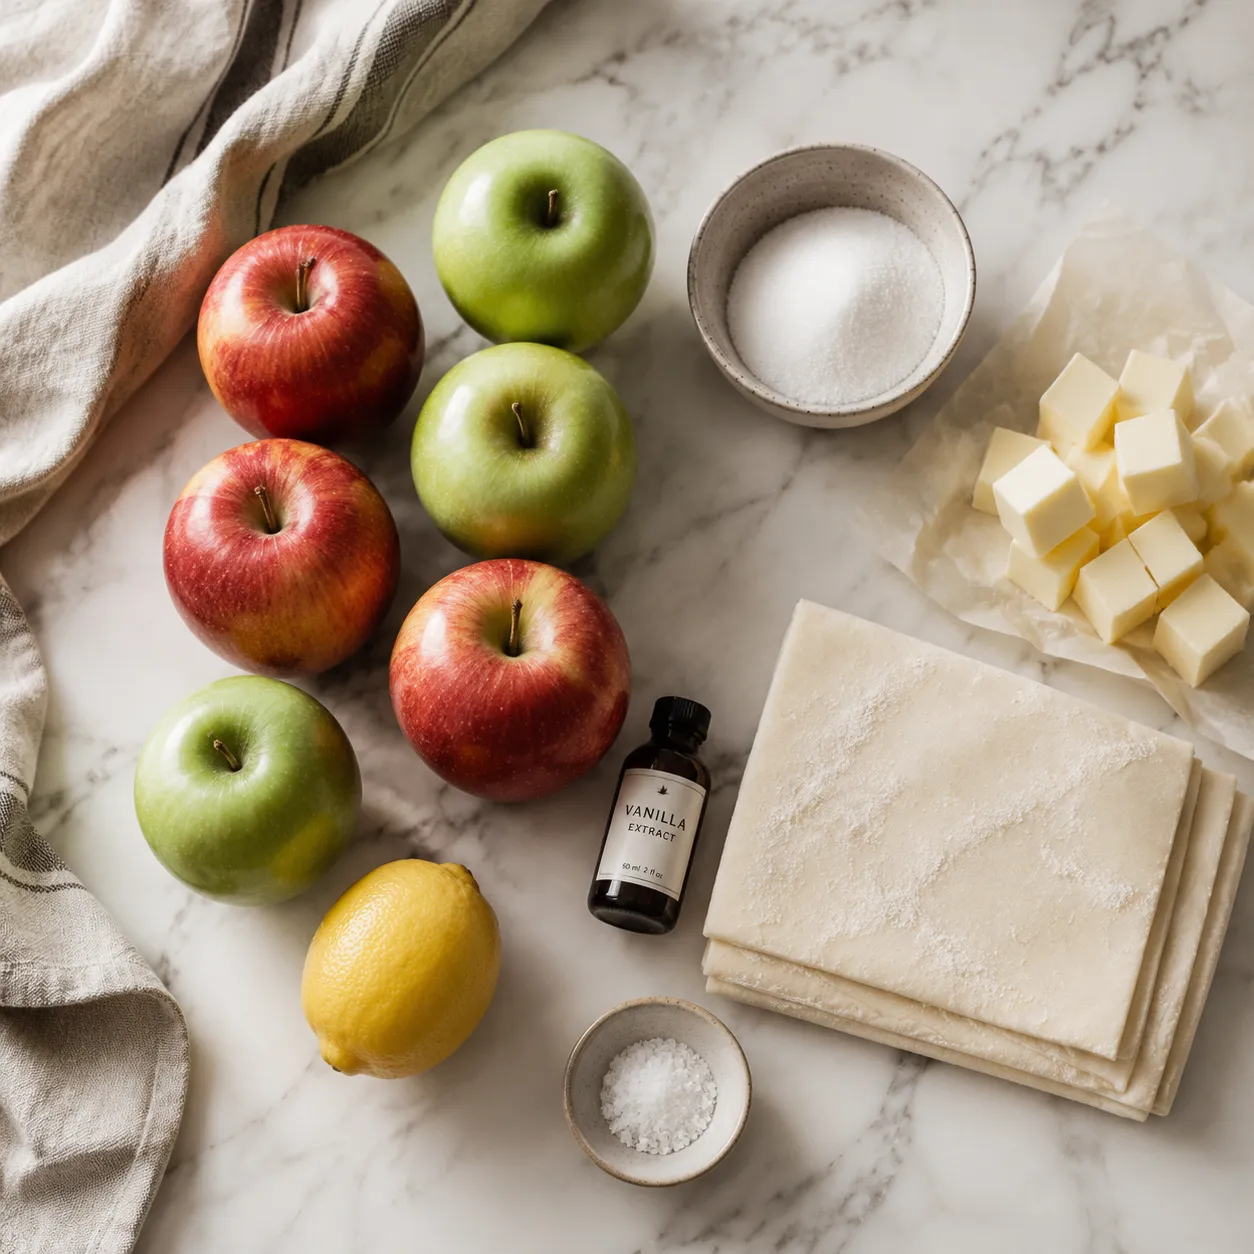
This recipe is designed for home bakers who want restaurant-worthy results without feeling like they need a pastry school diploma. If you love French apple desserts, this one gives you that dramatic finish with very everyday ingredients: apples, sugar, butter, salt, vanilla, lemon, and one sheet of pastry. The flip gets all the attention, but the real secret is letting the caramel reach a deep amber color and packing the apples tightly enough that they hold their shape when inverted.
It is also one of my favorite fall baking ideas because it sits in that cozy space between rustic and elegant. Serve it warm with crème fraîche, softly whipped cream, or a melting scoop of vanilla ice cream, and you have a dessert that feels celebratory without being fussy. Think of it as one of the most memorable apple pie alternatives, only with fewer ingredients and a more dramatic reveal.
What Is Tarte à Tatin?
A tarte à tatin is a French upside-down apple tart made by caramelizing apples in butter and sugar, covering them with pastry, baking the whole thing, and flipping it so the fruit becomes the glossy top. Unlike a traditional American apple pie, the apples are not tucked inside a double crust; they are cooked directly in caramel until tender, concentrated, and deeply flavored. The result is a dessert with jammy fruit on top and crisp, buttery pastry underneath, which makes every slice a little bit saucy and a little bit flaky.
The story usually traces back to the Tatin sisters, Stéphanie and Caroline, who ran a hotel in the Loire Valley in the late 1800s. Legend says the dessert began as a happy accident: apples cooked a little too long in butter and sugar, then were saved by laying pastry over the pan and baking everything together. Whether the story is perfectly true or not, the dish became one of the most beloved classic French pastries because it captures so much with so little.
What makes this dessert special is the way the fruit and caramel behave together. The apples release juice, the sugar darkens, the butter rounds everything out, and the pastry bakes above the steam instead of sitting under wet fruit. That is why the finished tart has such a distinct texture: plush caramelized apples on one side, crisp pastry on the other. It is simple, but it rewards attention.
Choosing Ingredients for a French Upside-Down Apple Tart
For the best apple tarte tatin, choose firm baking apples that can handle heat without collapsing into applesauce. Honeycrisp is sweet-tart and juicy, Pink Lady holds its shape beautifully, and Granny Smith gives a sharper, classic balance to the rich caramel. You can use one variety or mix two together for a more layered flavor. The apples should be peeled, cored, and halved or quartered depending on their size; large, tidy pieces make a more striking spiral after the flip.
The pastry is intentionally simple here: all-butter puff pastry gives height, flake, and a luxurious finish with very little effort. If you enjoy exploring puff pastry recipes, this dessert is a perfect example of how store-bought pastry can still feel completely homemade when the filling is well executed. Keep the pastry cold until you are ready to use it, and roll it just wide enough to cover the skillet with a slight overhang. That overhang gets tucked down around the apples, creating a neat edge that bakes into the tart.
The caramel is made from granulated sugar, butter, and a pinch of kosher salt, with vanilla added for warmth. It is not the same as a pourable homemade caramel sauce, because here the caramel continues cooking with the apples and thickens into a glossy glaze. You want a deep amber color before adding the fruit; pale caramel tastes mostly sweet, while amber caramel brings a nutty, slightly bitter edge that keeps the dessert balanced. Lemon juice helps brighten the apples and keeps the sweetness from feeling flat.
The Best Pan and Tools for the Job
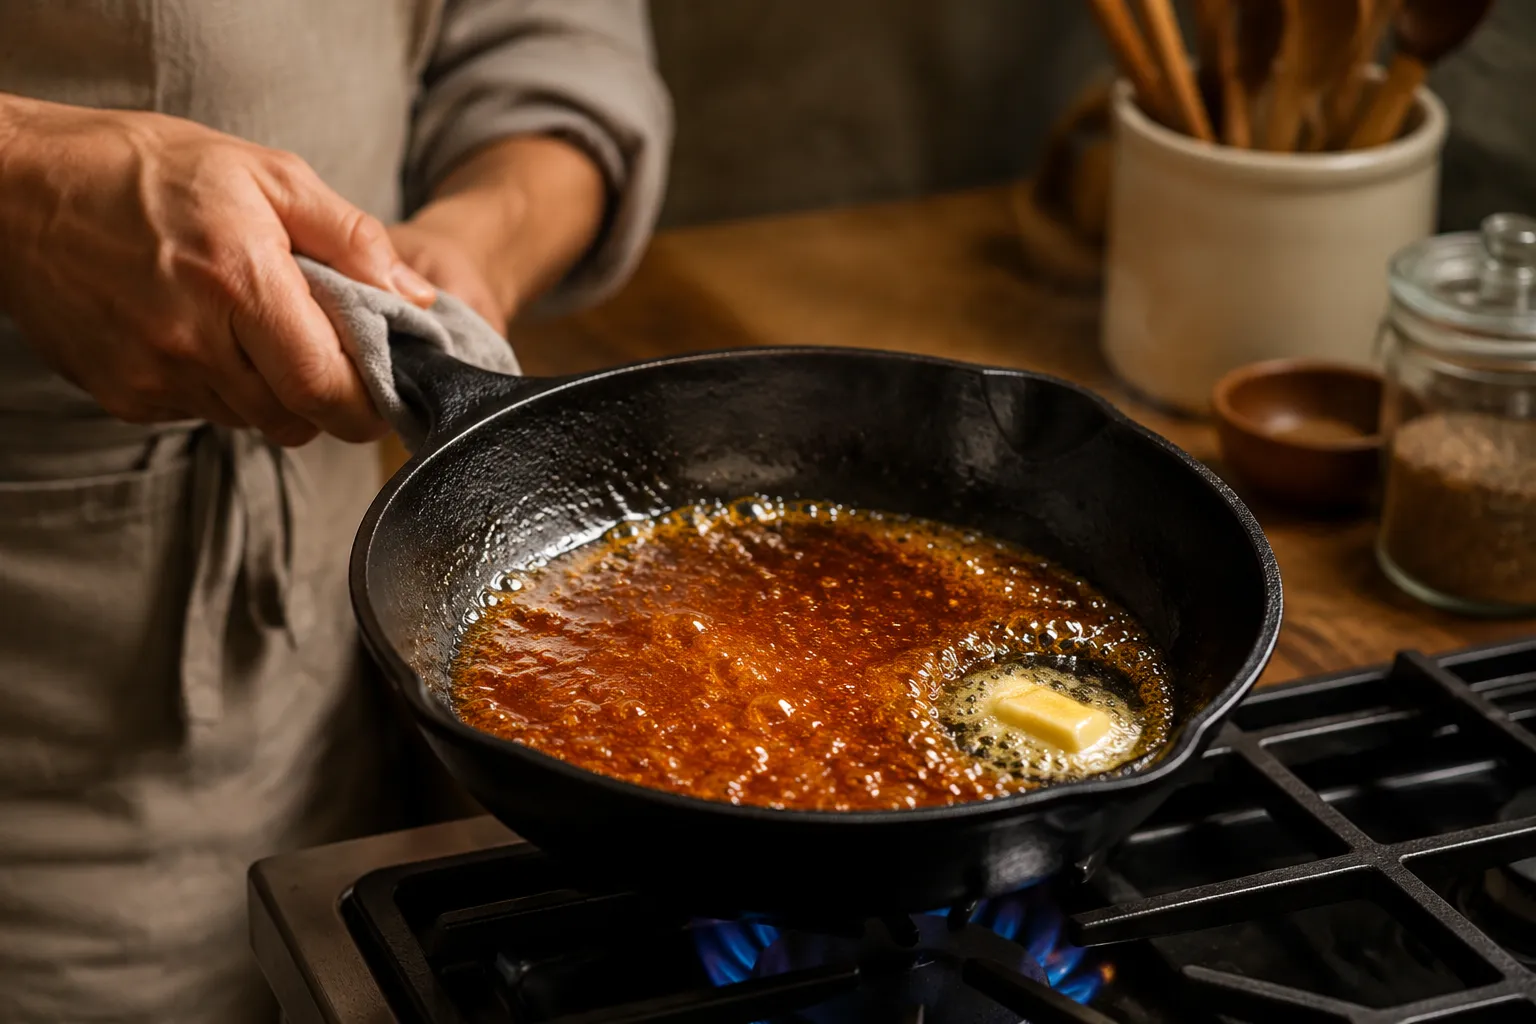
A 9- or 10-inch cast-iron skillet is the gold standard for this kind of upside-down apple tart. It conducts heat evenly, moves easily from stovetop to oven, and has enough weight to help the caramel cook steadily without scorching in hot spots. Cast iron also retains heat, which helps the apples soften and absorb the caramel before the pastry is added. Just be sure your skillet is well seasoned and fully oven-safe.
If you do not have cast iron, use a heavy stainless steel oven-safe skillet or a stovetop-safe tarte tatin pan. Avoid nonstick pans unless the manufacturer clearly states they are safe at the oven temperature used in the recipe, and be cautious with plastic or silicone-coated handles. A heavy pan matters more than a fancy one, because thin pans tend to heat unevenly and can take caramel from perfect to burnt in seconds.
You will also need a rolling pin, a sharp knife or apple corer, a heatproof spatula, and a serving plate that is wider than the skillet. The plate should have a slight rim if possible, because a little caramel may run when the tart is turned out. Oven mitts are not optional here; the pan is hot, the caramel is hotter, and the flip needs calm confidence rather than hesitation.
Caramel, Apples, Pastry: The Method That Works
The method begins on the stovetop, where sugar melts and darkens into amber caramel. The most important habit is to swirl the pan instead of stirring aggressively once the sugar begins to liquefy. Stirring can encourage crystallization, while swirling helps the sugar melt evenly and gives you visual control over the color. When the caramel is dark honey to coppery amber, the butter goes in, followed by salt and vanilla.
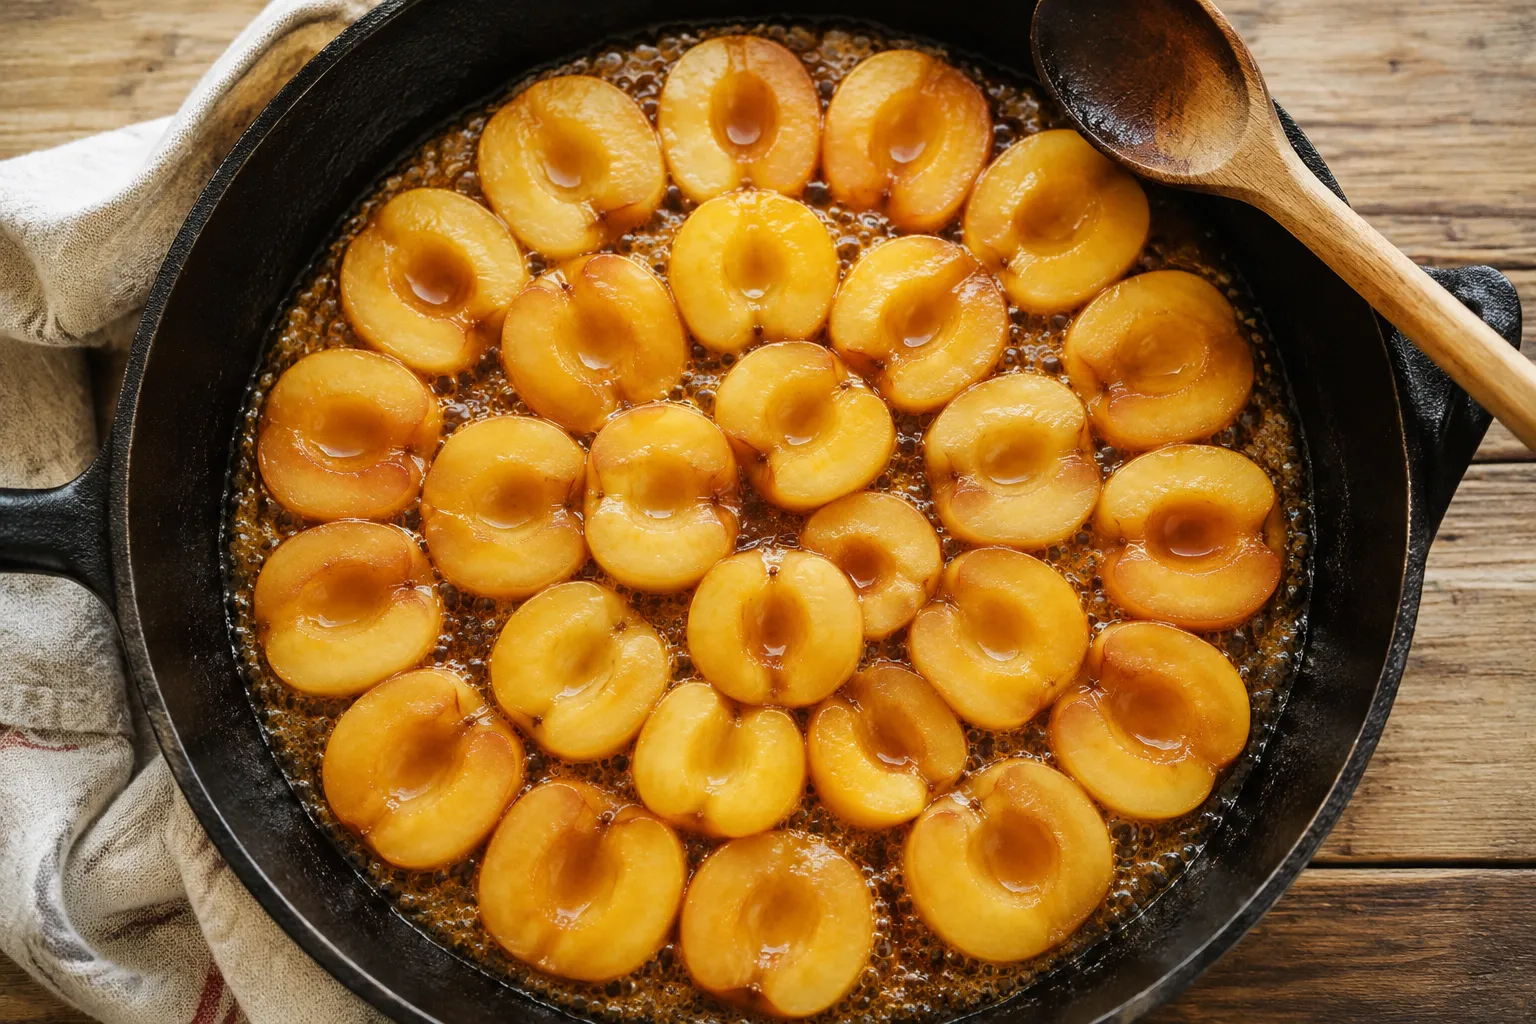
Once the caramel is ready, the apples are arranged tightly in the skillet. At first, it may look like too much fruit, but the apples shrink as they cook, so crowding is exactly what you want. Place the rounded sides down if you want the curved side to show after flipping, or follow the visual arrangement that best fits your pan. Letting the apples cook briefly in the caramel before baking gives them a head start and helps them become tender all the way through.
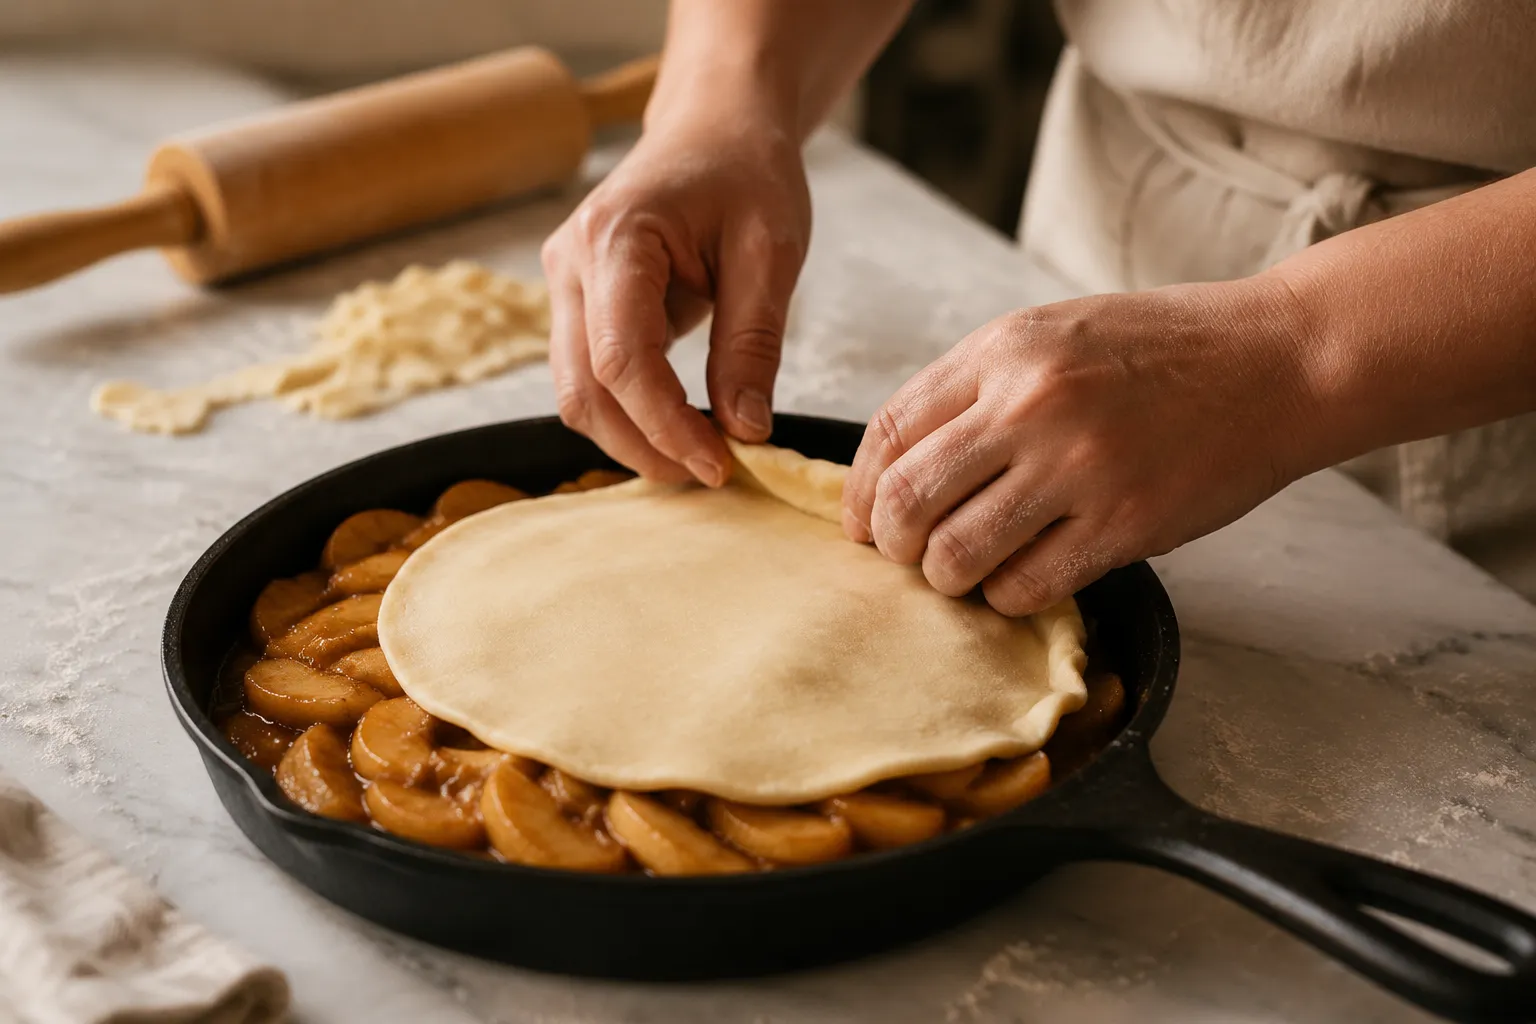
The pastry goes on after the apples have softened slightly and the caramel has thickened around them. Roll the puff pastry into a rough circle about an inch larger than the skillet, lay it over the apples, and tuck the edges down inside the pan. A few small vents in the pastry allow steam to escape, which helps the crust bake crisp instead of soggy. From there, the skillet moves to the oven until the pastry is puffed, deeply golden, and firm to the touch.
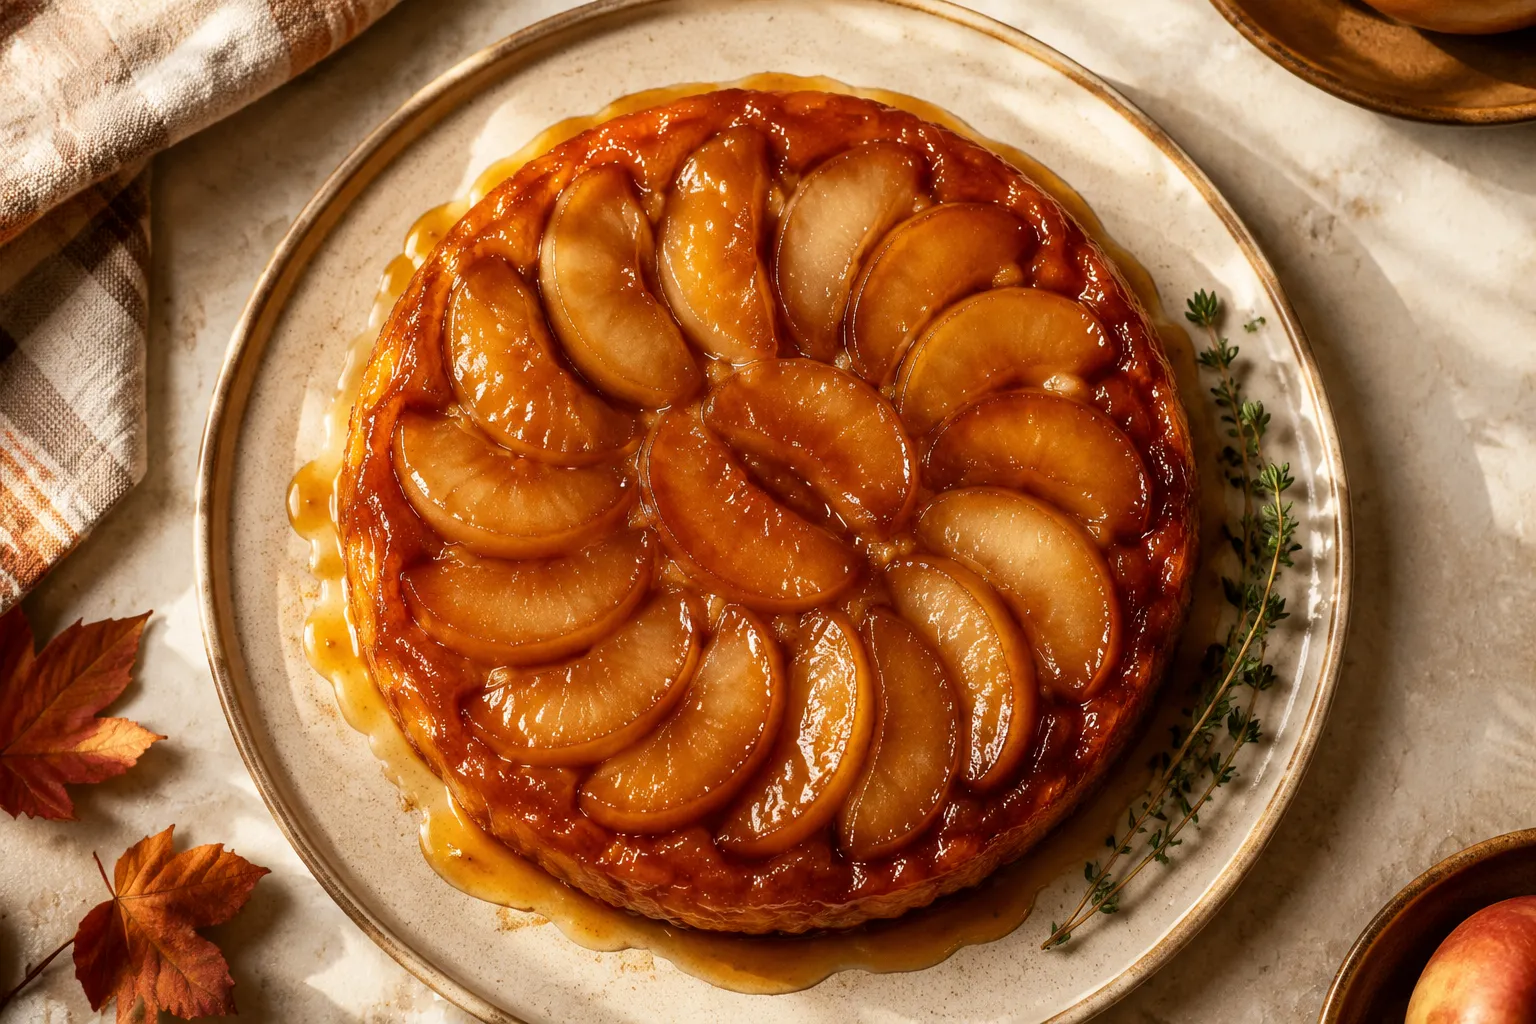
The final turn-out is simple but decisive. Let the tart rest briefly, place the serving plate over the skillet, hold both together with oven mitts, and invert in one smooth motion. If an apple piece stays behind, do not panic; lift it out with a spatula and nestle it back into place. A spoonful of warm caramel from the pan can gloss over any tiny imperfection.
What Makes the Caramelized Apples So Good
The heart of this dessert is the transformation of firm apples into glossy caramelized apples that taste buttery, tangy, and almost candied. As the apples heat, they release juices into the caramel, which loosens it at first and then reduces into a syrupy glaze. That is why the stovetop stage and oven stage both matter: one develops the caramel, the other concentrates the fruit. When done well, the apples keep their shape but soften enough to cut with the side of a fork.
Salt is a small but essential ingredient because it sharpens the caramel and makes the apples taste more apple-like. Vanilla adds a rounded bakery aroma, but it should not overwhelm the fruit. If you want to keep the flavor very traditional, stop there. Cinnamon, nutmeg, or cardamom can be lovely, but the classic version is surprisingly restrained, letting butter, sugar, pastry, and apples carry the dessert.
Texture is just as important as flavor. The best slice has tender fruit, a sticky amber top, and pastry that shatters gently at the edge. This is why all-butter pastry is worth seeking out: it bakes up crisp, rich, and fragrant, and it stands up to the caramel without turning heavy. When you cut into the tart, the knife should slide through the apples and meet a little resistance from the flaky base.
Serving Ideas for a Bistro-Style Dessert
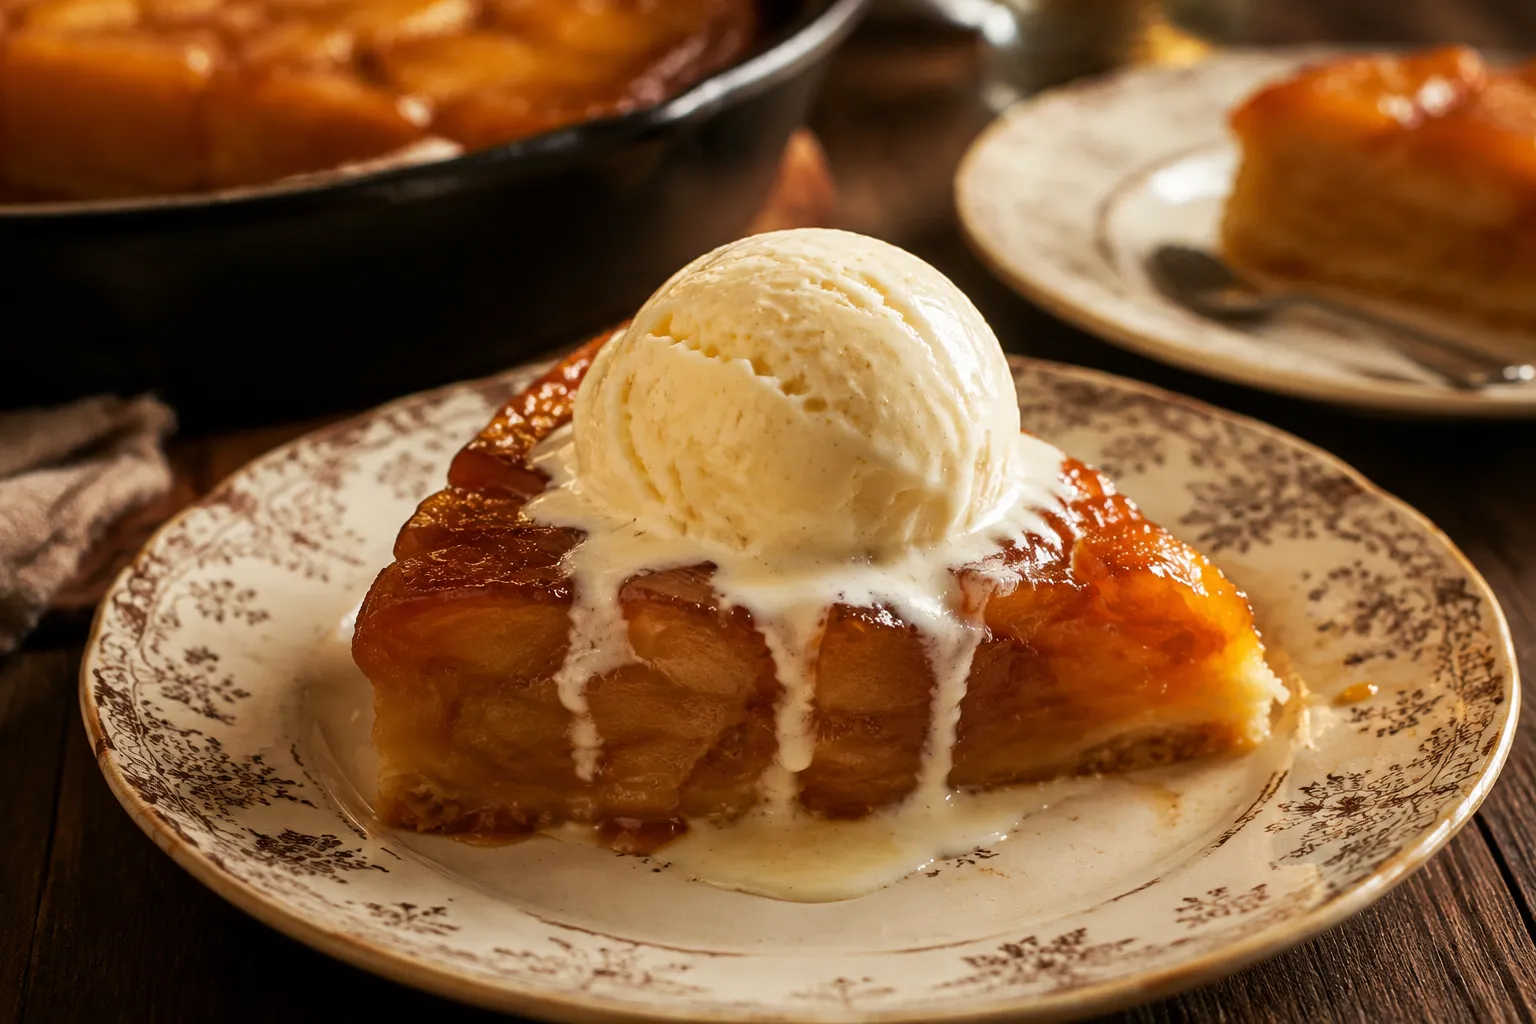
Serve this French apple tart warm, not scorching hot, so the caramel has a chance to settle and the pastry stays defined. Crème fraîche is the classic partner because its tang balances the sweetness, but vanilla ice cream is never the wrong answer. The cold cream melting into the warm caramel is exactly the kind of contrast that makes this dessert feel special. A spoonful of lightly whipped cream or a dollop of Greek yogurt also works if you prefer something less sweet.
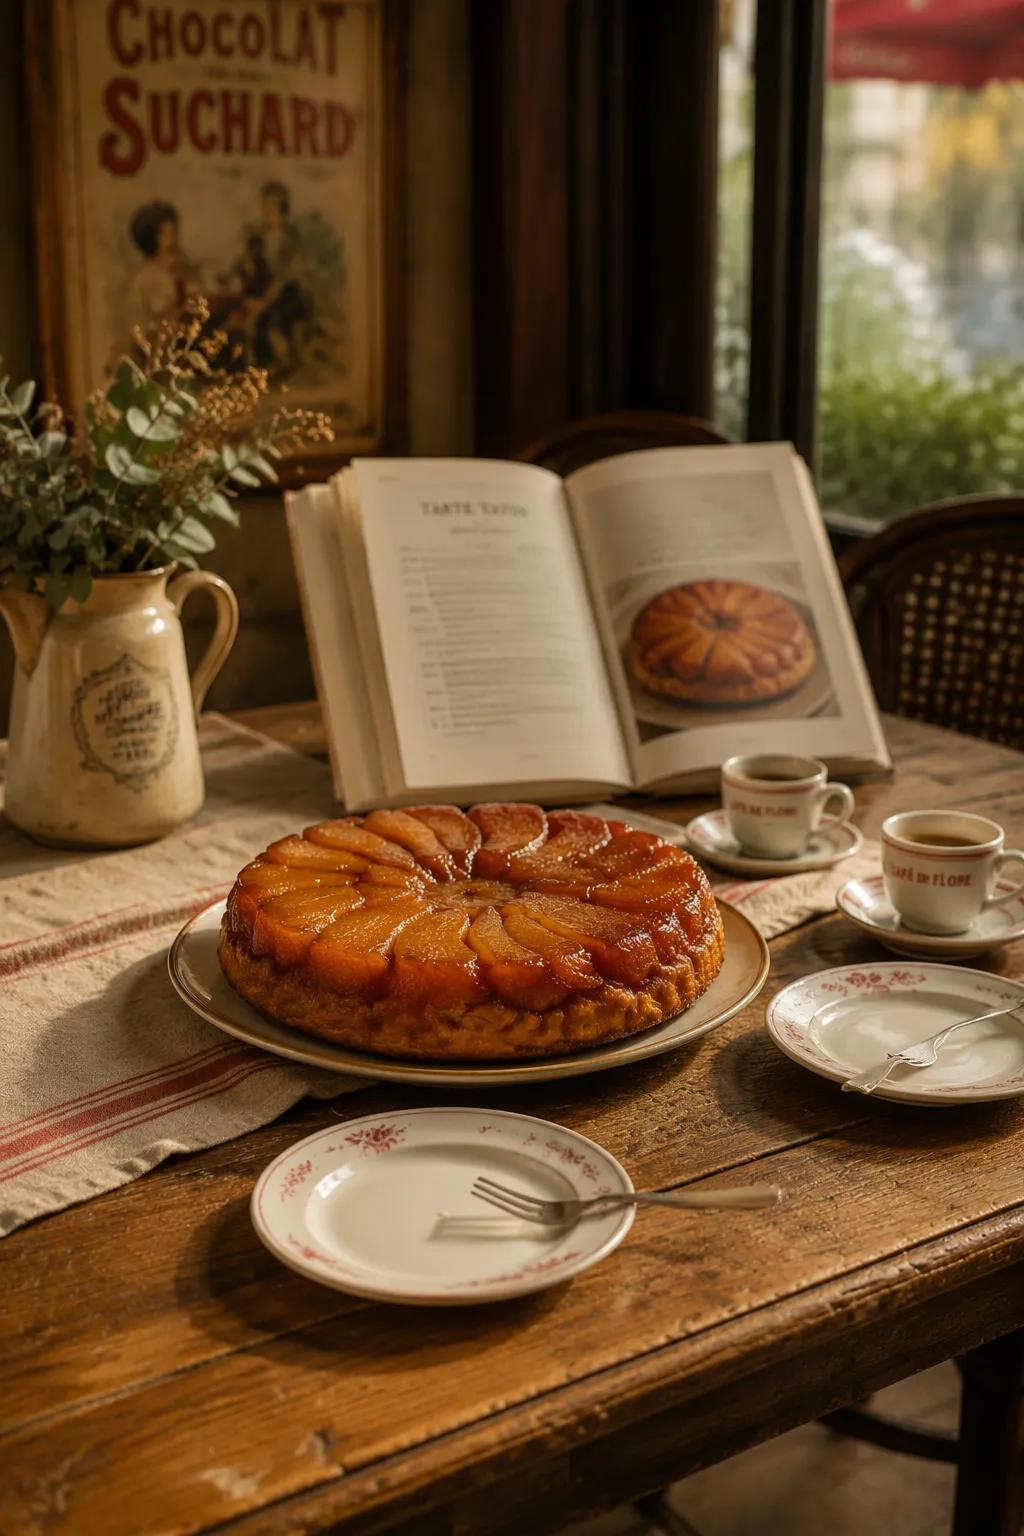
For a dinner party, bring the whole tart to the table before slicing. The glossy spiral of fruit is part of the experience, and the reveal makes a beautiful centerpiece without extra decoration. Pair it with espresso, black tea, or a small glass of dessert wine. It belongs naturally among classic French pastries, but it also feels right after a casual roast chicken dinner or a cozy autumn soup night.
If you are planning a menu around it, keep the meal simple and not too sweet. A crisp salad, savory main dish, and this warm tart at the end is a lovely balance. Because the dessert already has buttery pastry and caramel, you do not need elaborate garnishes. A tiny pinch of flaky salt just before serving can make the caramel taste even deeper.
A Reliable French Tart for Home Bakers
The beauty of this recipe is that it teaches you a technique, not just a dessert. Once you understand how dark to take the caramel, how tightly to pack the apples, and when to flip, the process becomes much less intimidating. The ingredients are humble, but the result is glossy, dramatic, and full of old-world charm. It is the sort of bake that makes the kitchen smell like butter and warm fruit long before it reaches the table.
Make it once for the thrill of the flip, then make it again because the flavor is genuinely unforgettable. The edges are sticky, the apples shine like stained glass, and the pastry underneath catches every bit of caramel. For home bakers who want a dependable French classic that still feels exciting, this is a keeper.
💡 Expert Tips
- **Take the caramel to deep amber.** Pale caramel will taste flat and sugary; deep amber caramel gives the tart its signature bittersweet richness.
- **Pack the apples tightly.** They shrink as they cook, so a crowded skillet now means a full, beautiful tart later.
- **Keep the pastry cold.** Warm puff pastry can slump and lose definition, so chill it while the apples cook if your kitchen is warm.
- **Rest before flipping.** Five minutes lets the bubbling caramel calm down, but do not wait too long or the apples may stick.
- **Use serious oven mitts.** The skillet and caramel are very hot, so protect both hands and flip in one confident motion.
🔄 Variations & Substitutions
The classic version is beautifully simple, but small flavor additions can nudge it in a seasonal direction without changing the core method.
- Add 1/2 teaspoon cinnamon or cardamom to the caramel for warm spice.
- Tuck a few thyme leaves into the apples for a subtle herbal note.
- Use pears instead of apples for a softer, more delicate variation.
- Add a splash of Calvados or brandy after the butter melts, letting it bubble briefly before adding the apples.
- Sprinkle flaky sea salt over the finished tart for a salted caramel finish.
🧊 Storage & Leftovers
This tart is best served warm the day it is baked, when the pastry is crisp and the apples are glossy. If you have leftovers, cover them loosely and refrigerate for up to 3 days.
To reheat, place slices on a parchment-lined baking sheet in a 300°F oven until warmed through, about 8 to 12 minutes. The microwave works in a pinch, but it will soften the pastry more quickly.
Frequently Asked Questions
What are the best apples for tarte tatin?
The best apples are firm, slightly tart baking varieties that hold their shape during cooking. Honeycrisp, Pink Lady, and Granny Smith are all excellent choices because they balance the sweetness of the caramel and do not collapse into mush. You can use one variety or mix two together for more complex flavor. Avoid very soft apples like McIntosh, which tend to break down too quickly in the skillet.
Can I use store-bought puff pastry?
Yes, store-bought puff pastry works beautifully here, especially if you choose an all-butter brand. It saves time and still gives you that crisp, flaky, golden finish that makes the tart feel special. Thaw the pastry according to the package directions, keep it cold until you are ready to use it, and roll it just large enough to cover the skillet with a little overhang for tucking.
Why did my caramel turn out grainy or burnt?
Grainy caramel usually happens when the sugar crystallizes, often from too much stirring once it begins to melt. Swirl the pan gently instead of stirring constantly, and make sure your skillet is clean before you start. Burnt caramel happens fast, especially after it reaches amber, so watch closely and remove the pan from the heat when it is deep golden-brown. Remember that it will continue to darken slightly from residual heat.
Can I make tarte tatin ahead of time?
It is best served warm on the day it is made, but you can bake it a few hours ahead if needed. For the cleanest release, rewarm the skillet in a 300°F oven for about 10 minutes before flipping, which loosens the caramel again. If it has already been flipped, reheat slices gently in the oven. The flavor stays wonderful, though the pastry is crispiest shortly after baking.
How do I flip tarte tatin without burning myself?
Let the tart rest for about 5 minutes so the caramel stops bubbling violently, then place a serving plate wider than the skillet over the top. Wearing oven mitts on both hands, grip the skillet and plate firmly together and flip in one smooth, confident motion away from your body. Set the plate down, lift the skillet carefully, and reposition any apples that may have stuck. Never attempt the flip without heat protection.
Classic Tarte Tatin Recipe (French Upside-Down Apple Tart)