Coconut Yogurt Recipe: Creamy 2-Ingredient Method
Ingredients
Scale

Thick, tangy, and luxuriously creamy, this homemade coconut yogurt needs just two ingredients and zero special equipment. Dairy-free never tasted this good.
This homemade coconut yogurt recipe takes two pantry ingredients and turns them into something genuinely transformative — thick, tangy, spoon-coating dairy-free yogurt that puts almost every store-bought tub to shame. There's a quiet magic in peeling back the cheesecloth on day two and finding that a couple of cans of coconut milk have set into a creamy, custard-soft ferment overnight. No yogurt maker, no special cultures shipped from a fermentation supplier, no thermometer juggling. Just whisk, cover, wait.
I started making my own batches years ago after one too many disappointing supermarket containers — chalky, watery, weirdly sweet, and shockingly expensive for what amounts to a few cups of coconut milk and a pinch of live cultures. The homemade version costs a fraction of the price, tastes infinitely better, and gives you complete control over tang, thickness, and add-ins. Once you've done it once, you'll wonder why you ever paid eight dollars for a tiny container of dairy-free yogurt.
If you've been curious about fermentation but felt intimidated by sourdough starters or kombucha SCOBYs, this is the gentlest possible introduction. The technique is forgiving, the timeline is flexible, and the payoff is enormous. Even better, it scales — one jar feeds breakfast for a week, and a double batch keeps a household happily stocked.
Most quick online tutorials stop at "whisk probiotics into coconut milk and hope for the best." This guide goes deeper. We'll walk through exactly how to pick the right can of coconut milk (it matters more than you'd think), how to coax a properly tangy ferment in a regular kitchen with no special equipment, how to strain the finished batch into a Greek-style yogurt thick enough to hold a swirl, and what to do when something goes sideways. I've made this recipe at least a hundred times, in summer kitchens in the high 80s and freezing apartments in February, and the method below has been refined to handle both extremes. The result is consistently the texture and tang you'd find in a $9 jar at a specialty grocer, made for roughly a quarter of the cost. Think of this as the version a friend who's been fermenting for years would actually teach you over the counter — not just a printable card with the bare minimum.
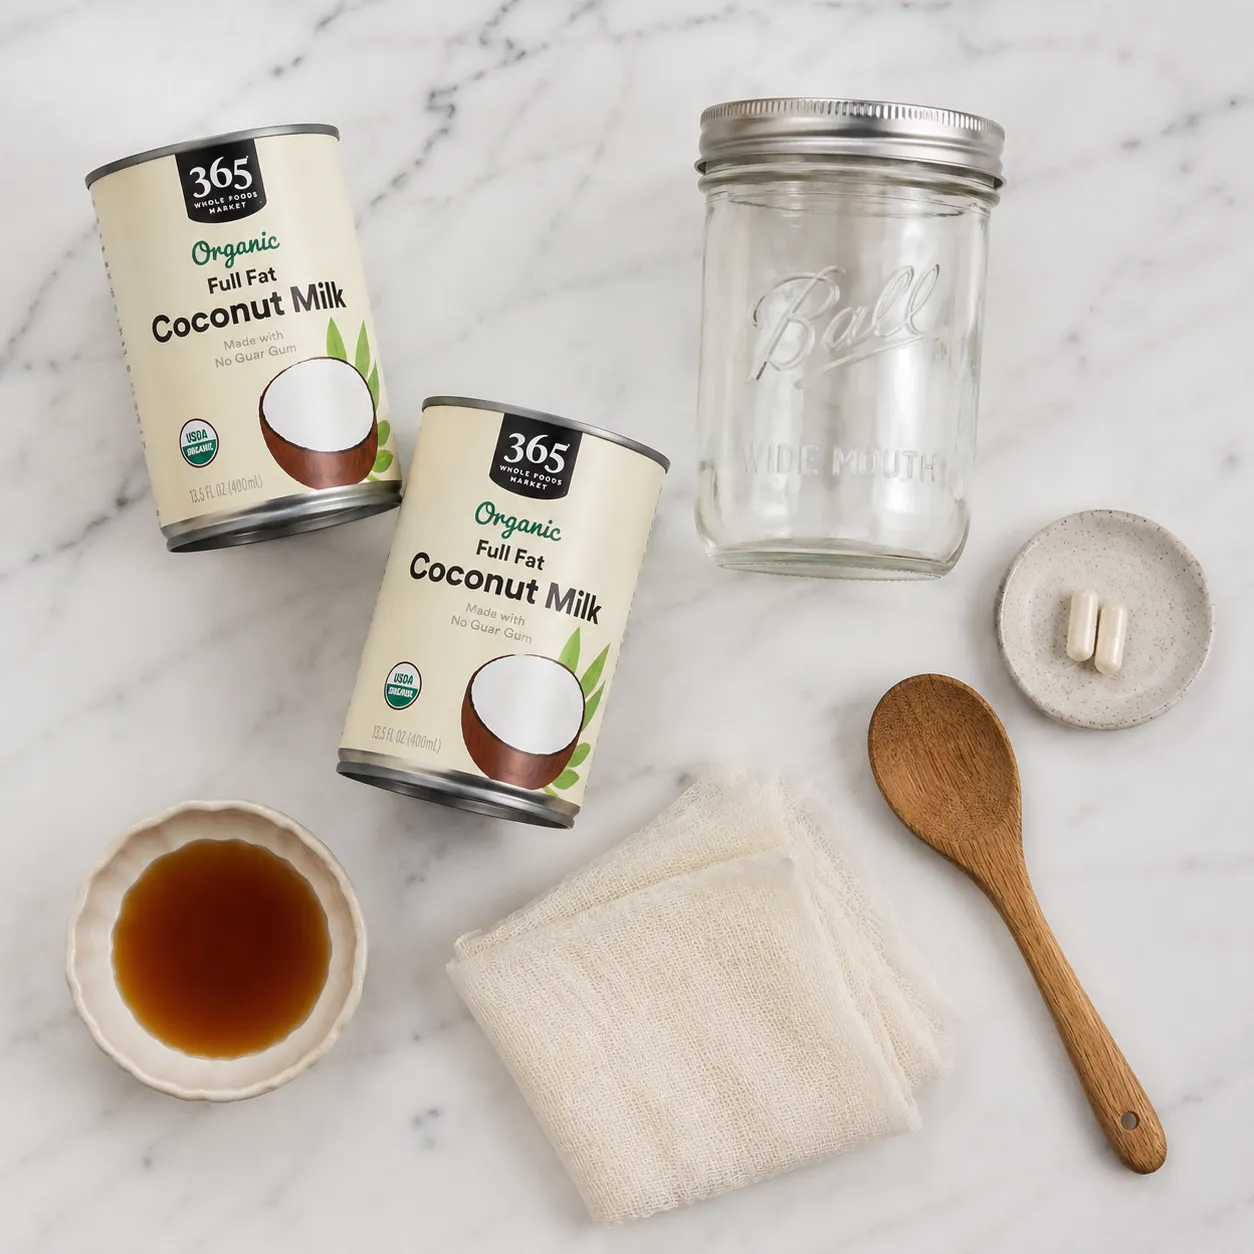
The shorter the ingredient list, the more each ingredient matters. For coconut milk yogurt, this is doubly true — there's nowhere to hide. The single most important variable is the can itself. Look for full-fat coconut milk that's organic and free of guar gum, xanthan gum, carrageenan, or any other stabilizers; the only ingredients on the label should be coconut and water. Native Forest Simple, Aroy-D, and Thai Kitchen Organic are all reliable choices that deliver a high cream content and ferment cleanly. Lite or reduced-fat cans simply don't have enough fat to set into yogurt — save those for curry.
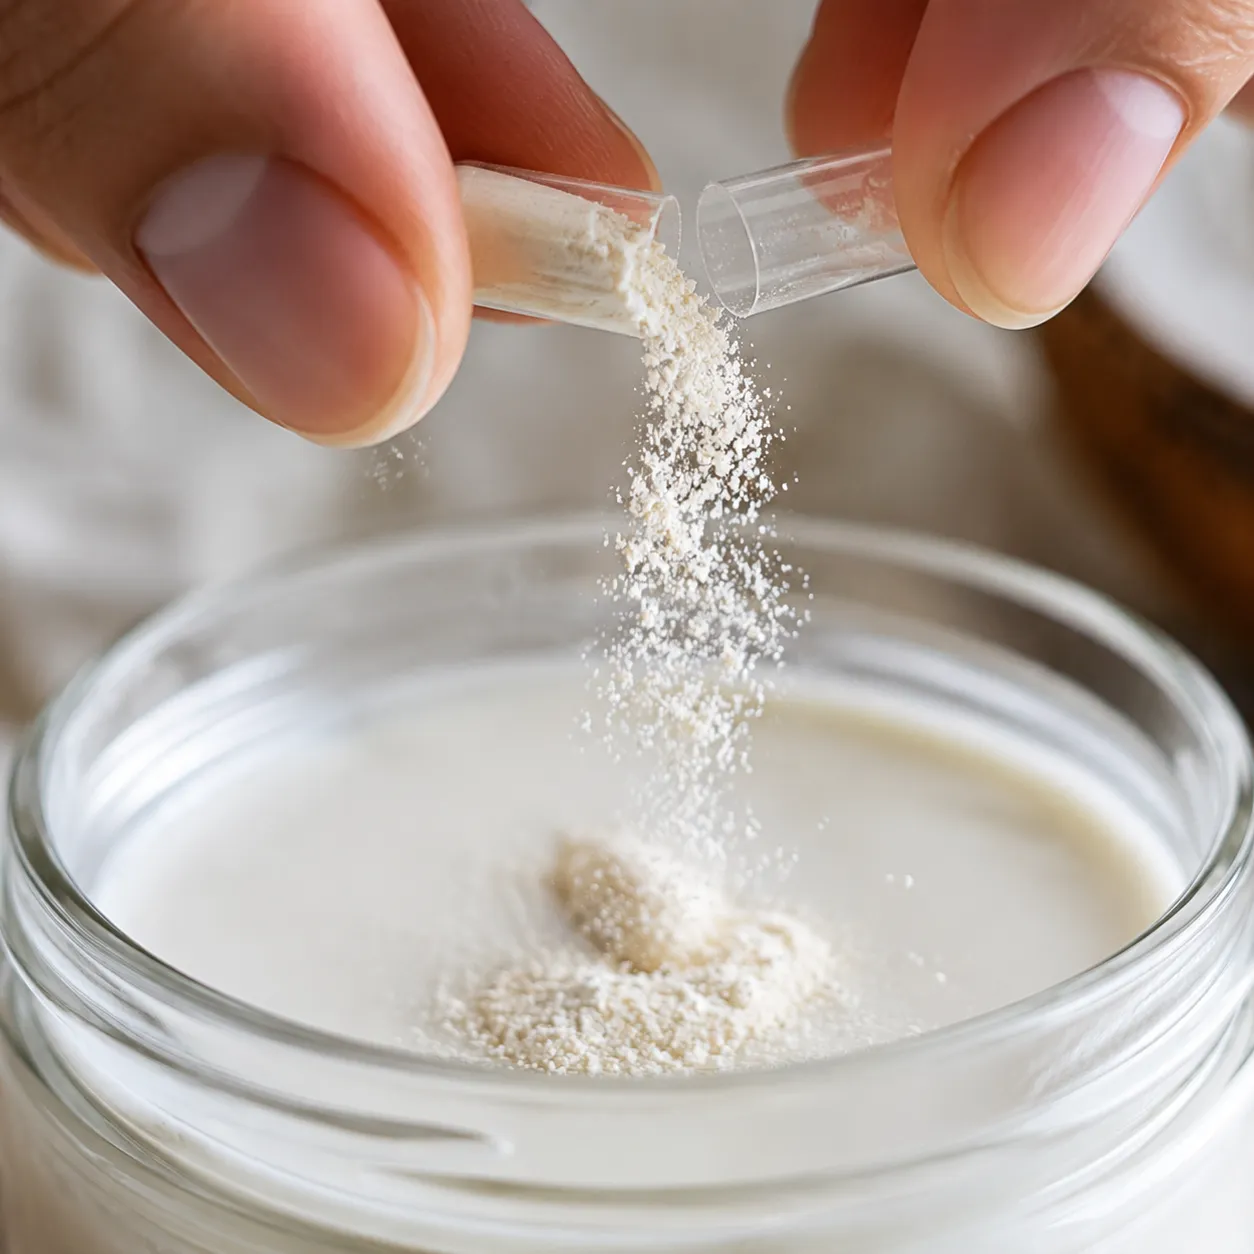
The second ingredient is your starter, and the easiest path is high-potency vegan probiotic capsules with at least 50 billion CFU per capsule. Two capsules per two cans is my standard ratio. You can also use a few tablespoons of an existing live-culture coconut yogurt as a starter once you have a batch going. A teaspoon of maple syrup is technically optional, but it gives the cultures a little snack to feed on and consistently produces a tangier, livelier ferment. Beyond that, the world is wide open — vanilla bean, lemon zest, citrus oil, or a pinch of sea salt can all be stirred in after fermentation finishes. This recipe also pairs beautifully with my other coconut milk recipes if you've ended up with extra cans in the pantry — try leftover cream in a curry, a chia pudding, or a Thai-inspired soup.
The full numbered method lives in the recipe card below, but here's the broader picture so you actually understand what's happening inside the jar. Fermentation is just controlled microbial activity — the live cultures from your probiotic capsules eat the natural sugars in the coconut milk, multiply, and produce lactic acid as a byproduct. That acid is what gives yogurt its signature tang and what causes the proteins and fats to set into a thicker, custard-like texture.
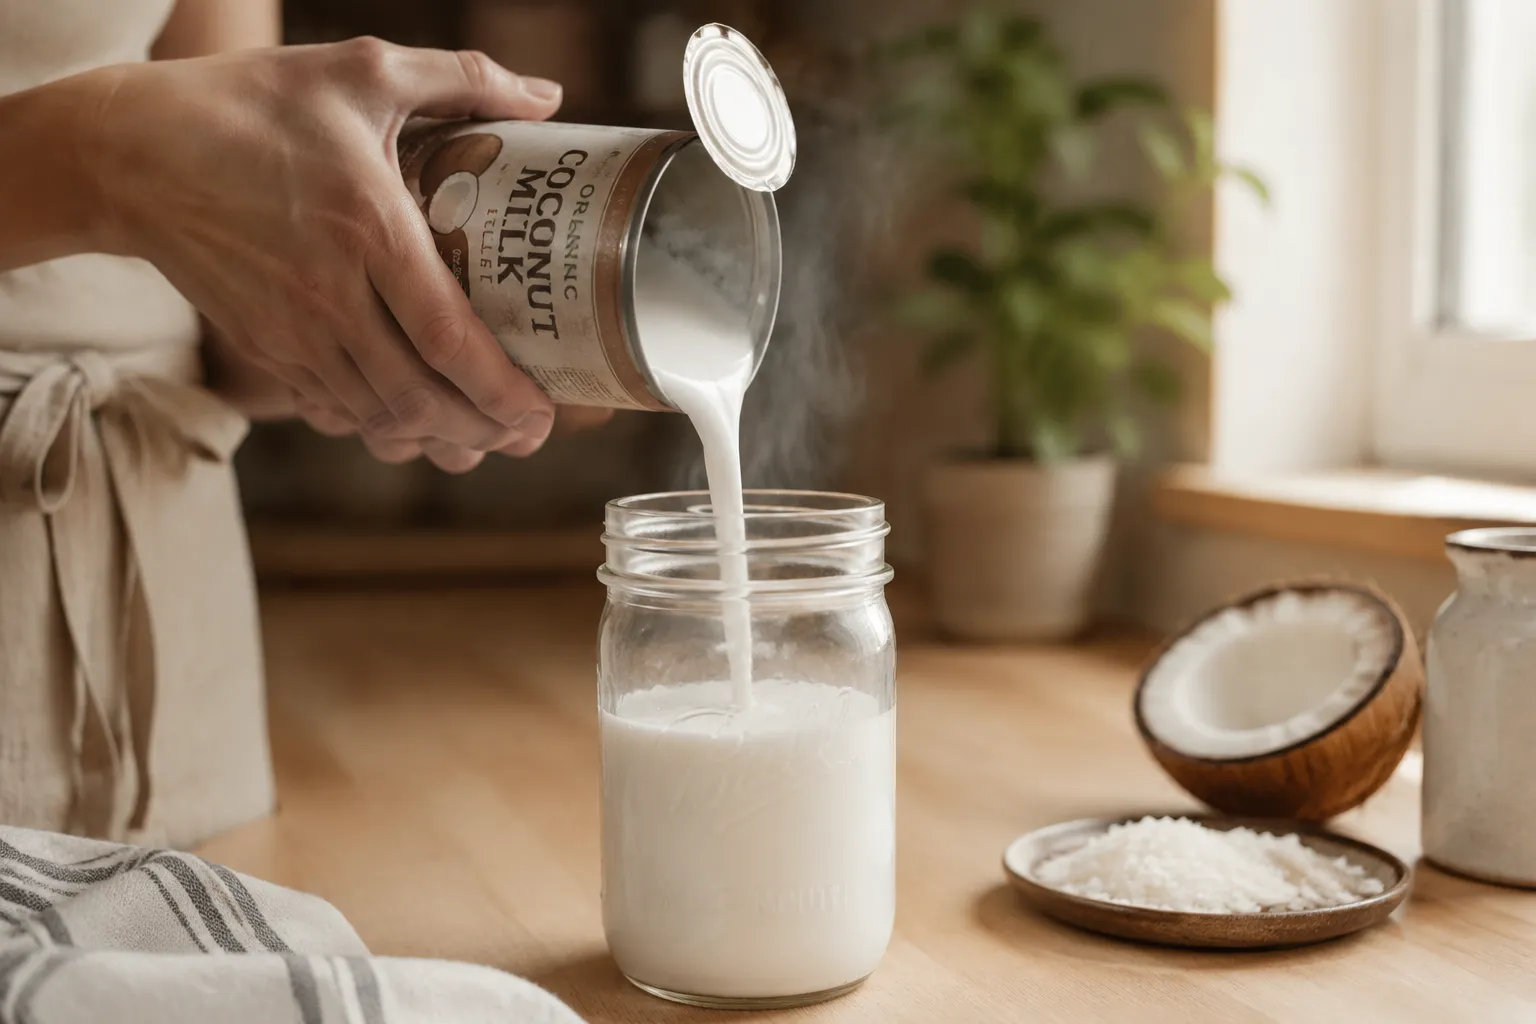
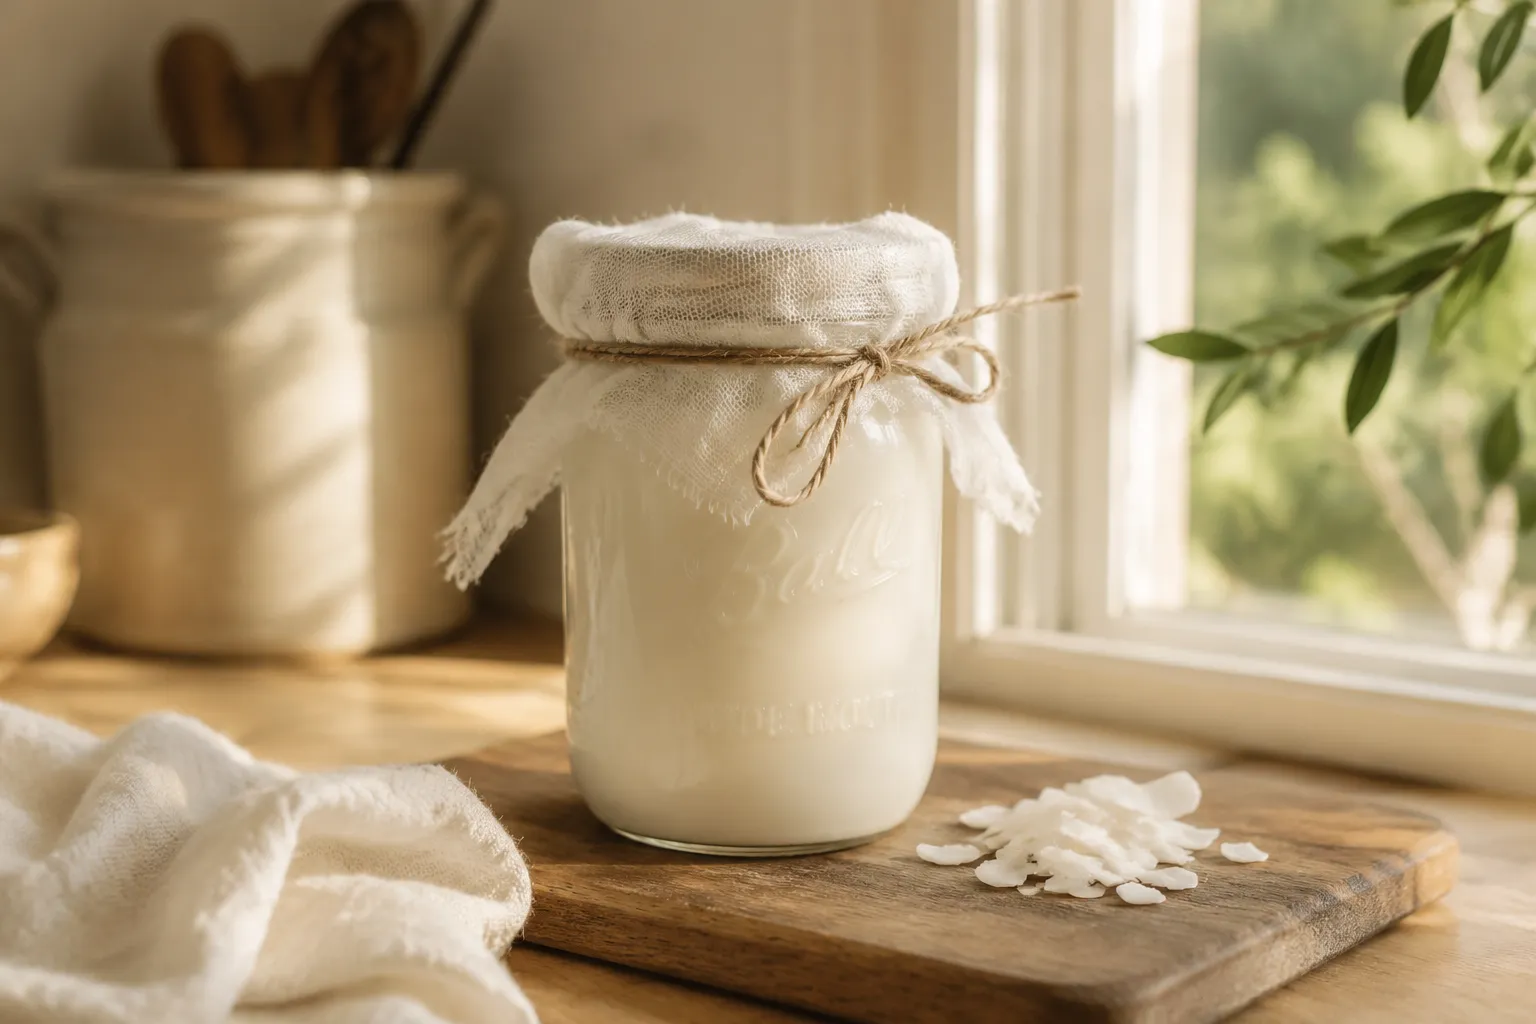
Sterility matters more here than in everyday cooking because you're inviting one specific population of microbes to colonize a warm jar of food. Run your jar and whisk through the dishwasher on its hottest cycle, or pour boiling water over them and let them air-dry on a clean towel. Once you twist open your capsules and whisk the powder into room-temperature coconut milk, cover the jar with breathable cheesecloth secured with a rubber band — never a tight lid, since gases need to escape during active fermentation.
The fermenting jar wants to live somewhere consistently warm, ideally between 75 and 110 degrees Fahrenheit. A turned-off oven with the light on, the top of the refrigerator, or a sunny windowsill in summer all work beautifully. After 24 hours, peek under the cloth and taste a spoonful — if you want it tangier, give it another 12 to 24 hours. The longer it sits, the more pronounced the bite. Once the flavor is where you want it, transfer the jar to the fridge for at least four hours; the yogurt firms up dramatically as it chills.
If your kitchen runs cool in winter, an Instant Pot on the yogurt setting, a dehydrator at 100°F, or even a heating pad wrapped loosely around the jar will keep things at the right temperature. Like other probiotic foods, your yogurt is genuinely alive — treat it gently, give it warmth and time, and it rewards you with a result no shelf-stable product can match.
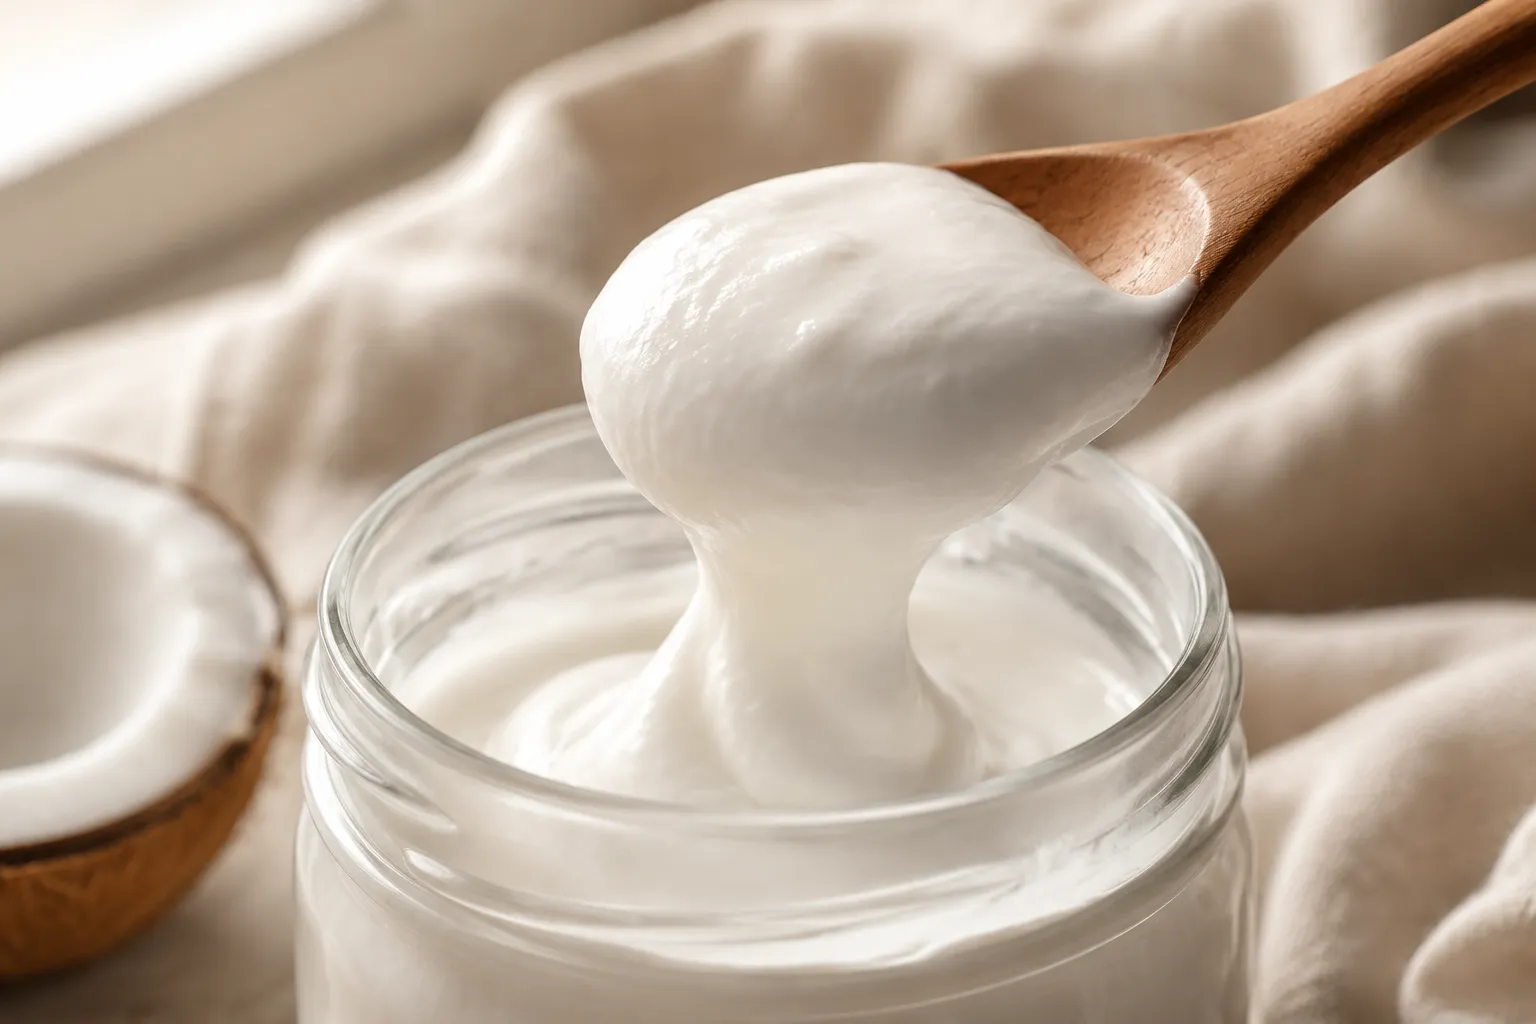
If you love the dense, sliceable consistency of Greek yogurt, you're one extra step away. After your jar finishes its fridge chill, line a fine-mesh sieve with two layers of cheesecloth, set it over a deep bowl, and scrape the yogurt into the cloth. Cover loosely with plastic wrap and let it drain in the refrigerator for two to six hours, depending on how thick you want it. The pale liquid that collects in the bowl is whey — discard it or save it to thin smoothies — and what remains in the cheesecloth is a coconut greek yogurt so dense it can stand in for sour cream, cream cheese, or labneh in any recipe.
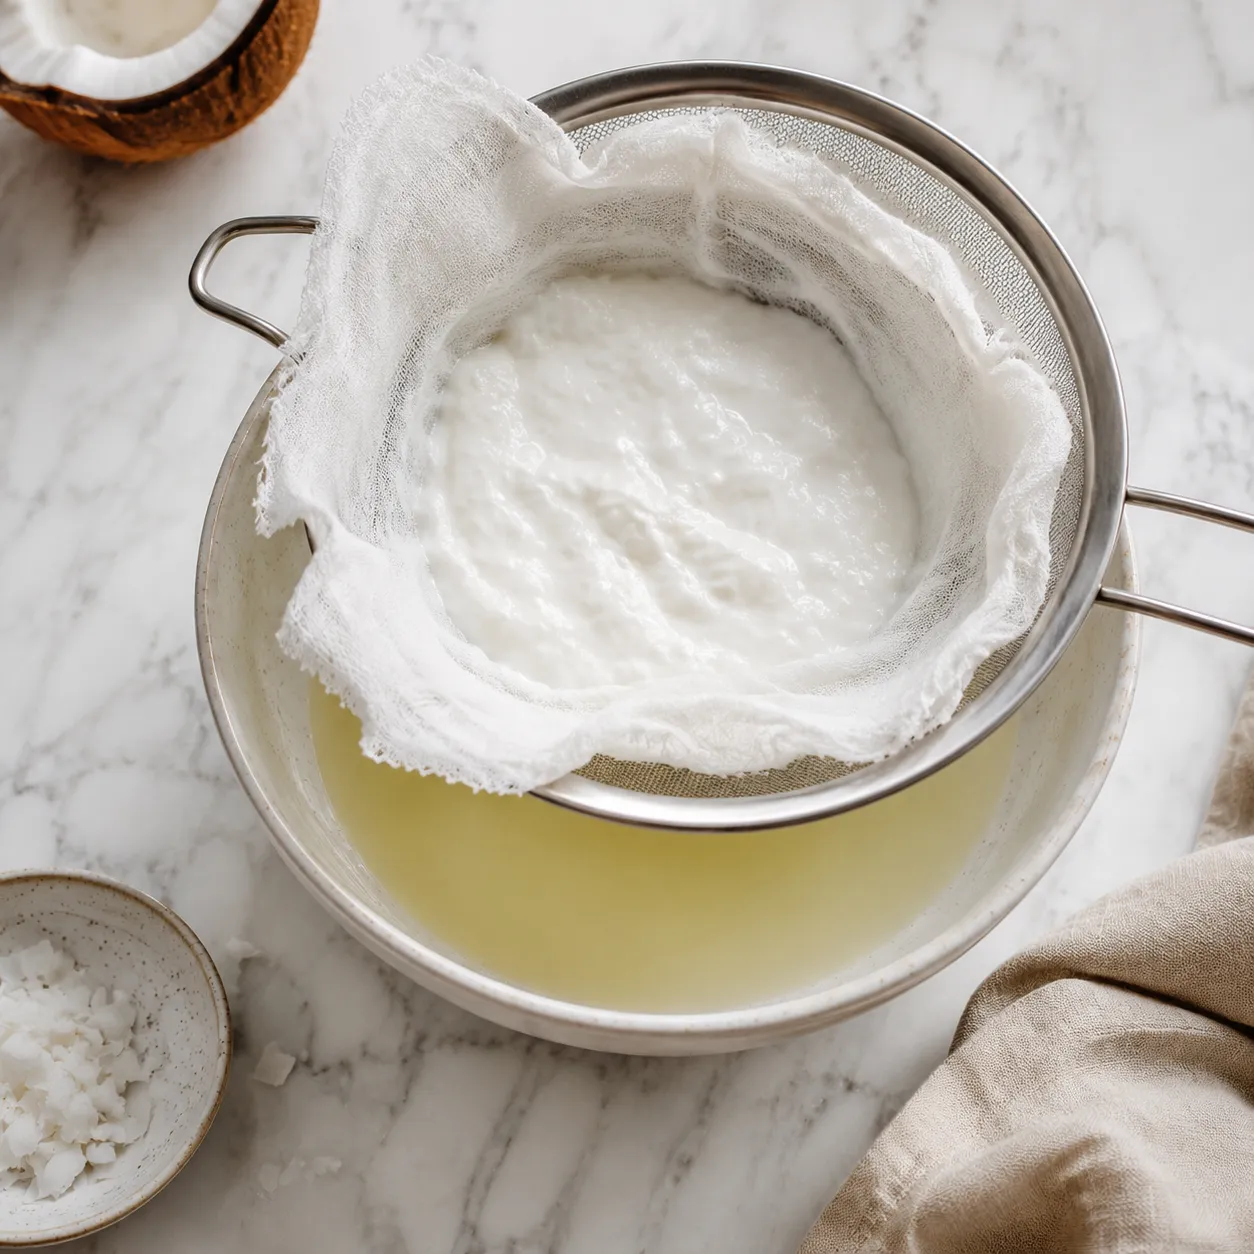
For an even firmer result, gather the corners of the cheesecloth, tie them, and hang the bundle over the sink or a tall pitcher overnight. The texture transformation is dramatic — what goes in pourable comes out spreadable enough to smear on toast or pipe onto crackers. It's the same trick used by every premium organic coconut milk yogurt brand on the shelf; they're not doing anything you can't do at home with a yard of cheesecloth and a few hours of patience. Save the strained whey too — it adds tang to smoothies and works as a wonderful soaking liquid for grains.
This is where the fun starts. Layer it into vegan breakfast bowls with granola, fresh berries, toasted coconut flakes, and a drizzle of maple syrup for a parfait that genuinely feels like dessert. Stir in cucumber, mint, and lemon, and use it as the base for a herby tzatziki served with grilled vegetables. Whisk it with garlic, dill, and olive oil for a creamy salad dressing. Dollop it onto curries, chili, or sweet potato tacos in place of sour cream.
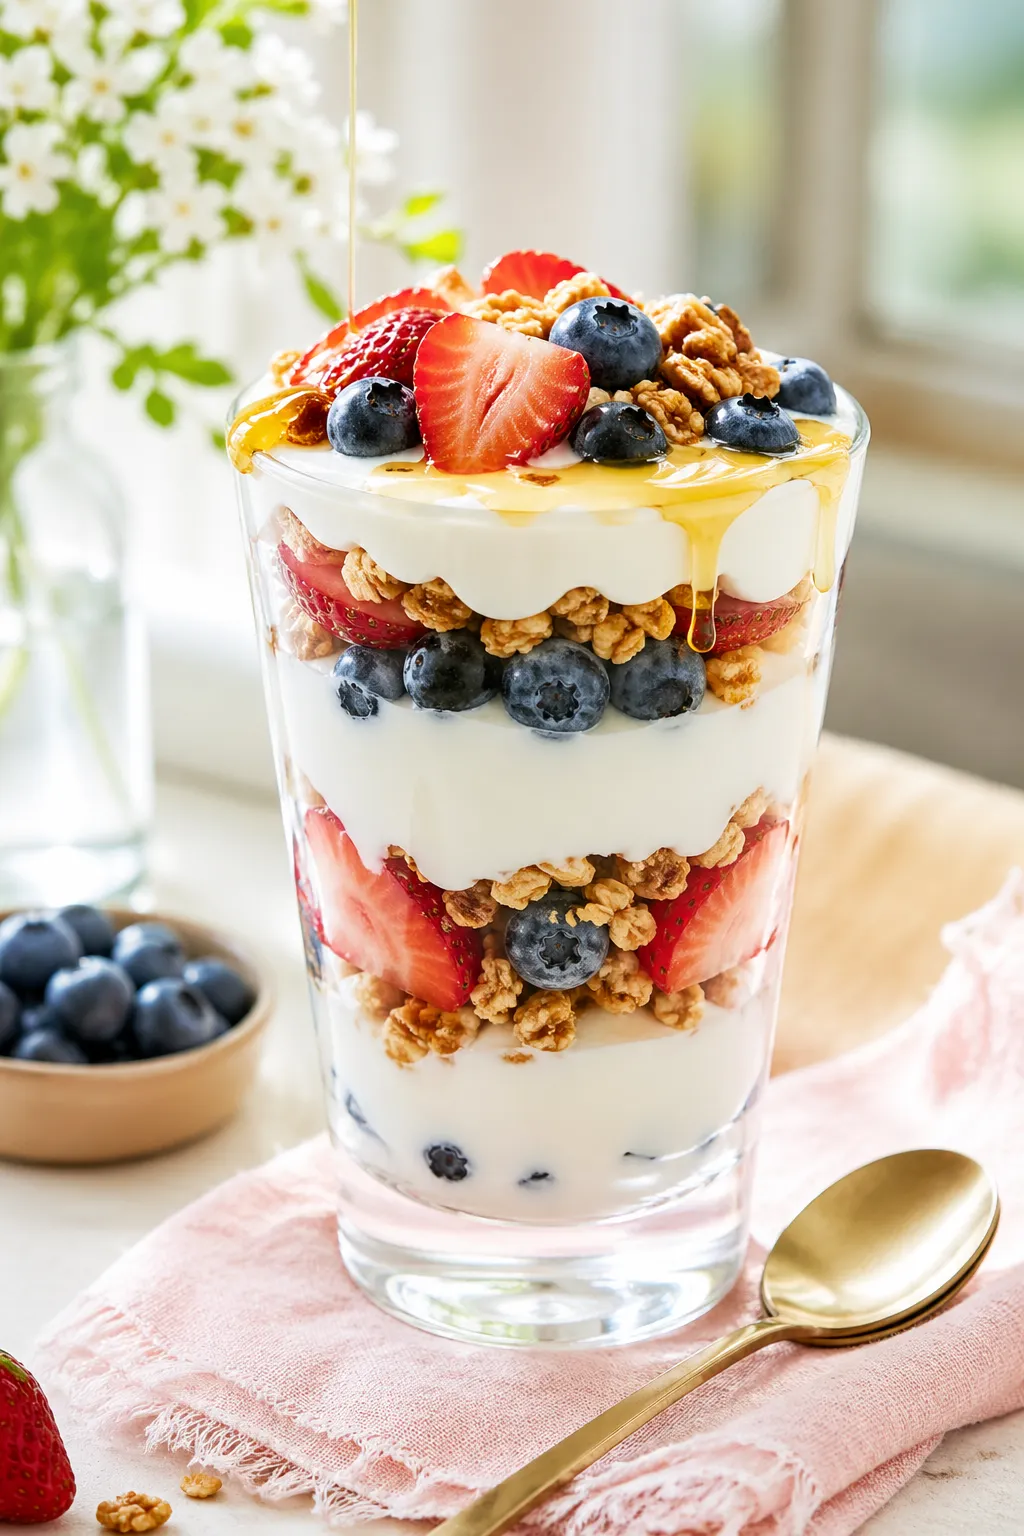
For brunch, swirl it into pancake batter or smear it under fresh fruit topped with a snowfall of coconut whipped cream for a layered dessert almost too pretty to eat. Whisk a generous spoonful into smoothies for instant body and tang, blend it into salad dressings with garlic and herbs, or use it as the binder in chicken or chickpea salad. Spread it on toast under sliced peaches and a drizzle of honey for the easiest summer breakfast on earth. Add a swoosh on top of warm soups in place of crème fraîche. It's the kind of staple that quietly reshapes a week of cooking once it lives in your fridge — versatile enough to pull off both a Sunday parfait and a Tuesday-night taco bowl.
Once you've nailed the basic technique, this becomes a weekly rhythm rather than a project. I usually start a new jar on Sunday afternoon, let it ferment Monday through Tuesday, strain it Wednesday morning, and have thick coconut yogurt ready for the rest of the week. If you've already made the leap into homemade almond milk or other DIY pantry staples, this fits right alongside them — same low effort, same enormous payoff in flavor and cost. The first batch always feels a little like a science experiment, but by the third you'll be tweaking ferment times, dialing in your favorite tang level, and stocking the fridge two jars at a time. Two cans, two capsules, a clean jar, and a little patience is all that stands between you and a steady supply of creamy, tangy, gut-friendly yogurt better than anything you can buy.
Once you've mastered the plain base, the flavor possibilities are wide open. Always stir add-ins after fermentation finishes so the live cultures stay happy and the texture stays intact.
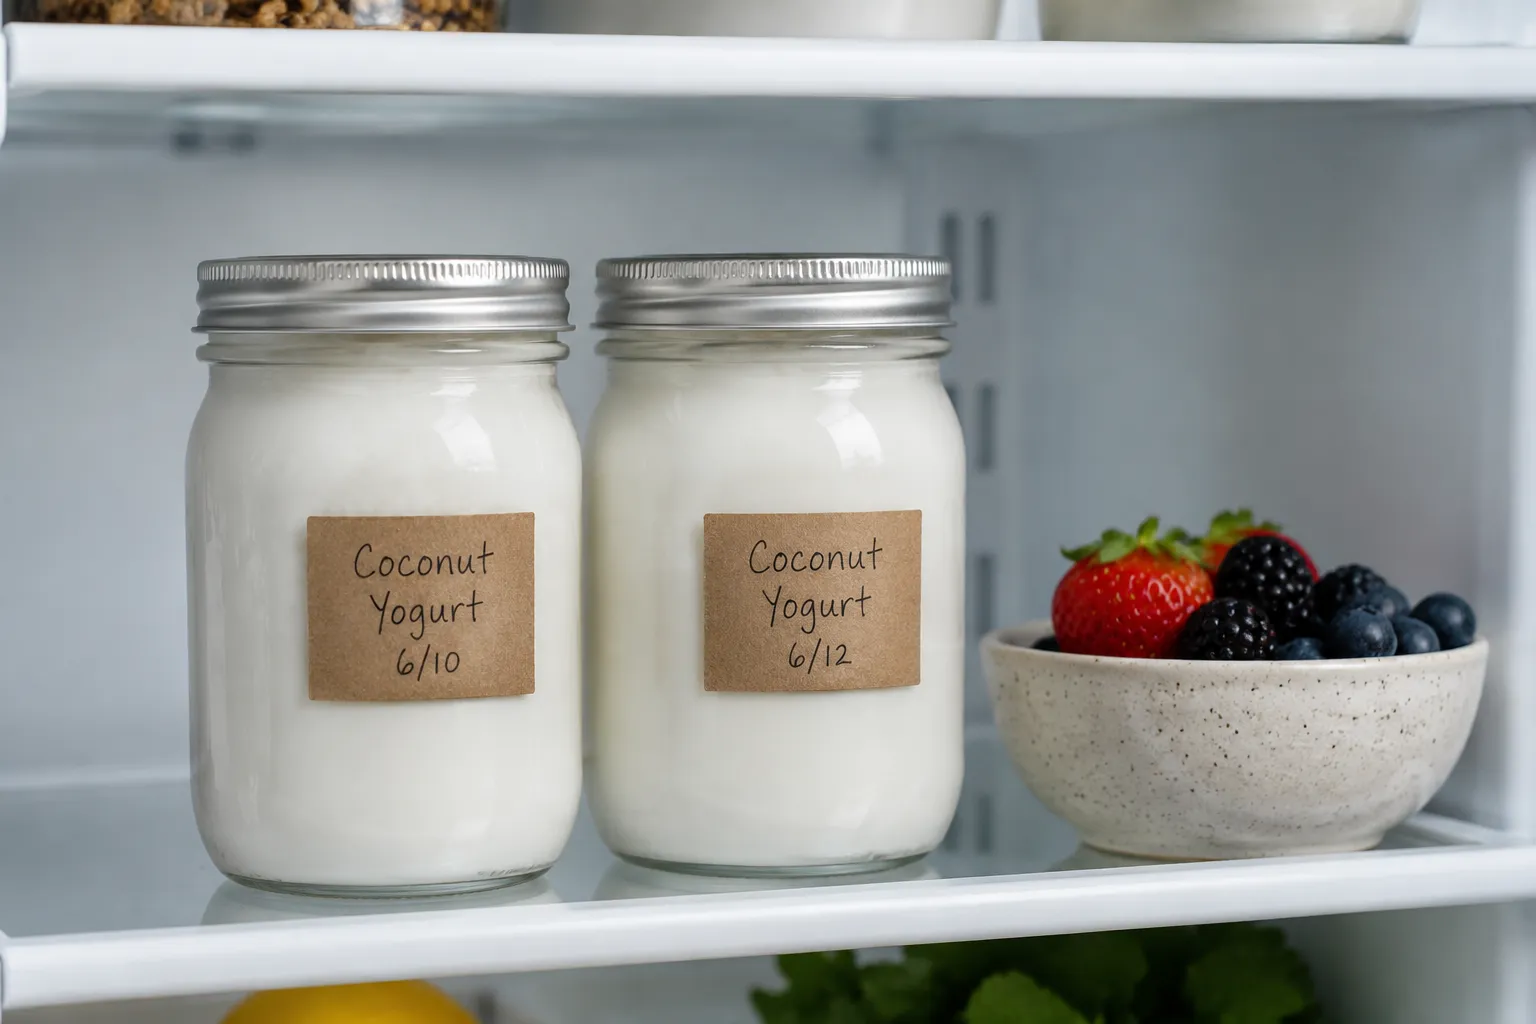
Transfer finished yogurt to a clean glass jar with a tight lid and refrigerate. It will keep beautifully for 7 to 10 days, gradually growing tangier as the cultures continue working in the cold. The texture may separate slightly toward the end of that window — just stir it back together before serving and it's perfect again.
To keep your fermentation chain going indefinitely, save 2 to 3 tablespoons of each batch in a small sealed jar before you finish it. That live starter can replace the probiotic capsules in your next batch and will work for several rotations before you'll want fresh capsules again. Freezing is technically possible but breaks the texture, so the thawed yogurt is best used in smoothies, baking, or pancake batter rather than spooned straight from the jar.