Aglio e Olio: Authentic 20-Minute Italian Pasta
Ingredients
Scale
Aglio e olio is the ultimate Italian pantry pasta: silky spaghetti tossed with golden garlic, peppery chili flakes, and the best olive oil you own.
There's a reason aglio e olio shows up on the menu of nearly every late-night trattoria in Rome and Naples: it's the dish Italians make when there's nothing in the fridge but everything in the pantry. With just spaghetti, garlic, extra virgin olive oil, chili, and parsley, you get a pasta that tastes far more elegant than its parts have any right to be. This is comfort food at its most disciplined, a recipe where technique does all the heavy lifting.
I learned to take this dish seriously after watching a Roman cook scold me gently for adding cream to fix what I thought was a thin sauce. The fix wasn't dairy. It was starchy pasta water and a little wrist work, whisking the oil and water together into a glossy, clinging emulsion. Once you understand that one move, garlic and oil pasta becomes one of the fastest, most satisfying things you can cook.
This authentic aglio e olio recipe gets you there in 20 minutes, with six pantry staples and zero shortcuts. Whether you want to add it to your rotation of easy weeknight pasta or simply nail the version you've been ordering for years, this is the technique that separates restaurant-quality from greasy and disappointing.
The dish, whose name translates literally to garlic and oil, was born in Naples, where cooks turned a few cents' worth of pantry ingredients into a meal that could feed a family without flinching. It's poverty cuisine in the best sense, the same lineage that gave us pasta puttanesca and cacio e pepe. The whole point is restraint: a clean Italian pasta that lets the olive oil and garlic taste like themselves, not like a backdrop for cream or cheese.
You'll see the dish written two ways on menus, either spaghetti aglio e olio (the full Italian phrase) or simply aglio olio. Both refer to the same thing. The Neapolitan tradition adds parsley and a hit of peperoncino; the Roman version is sometimes plainer; American chefs often slip in anchovies or lemon. Those tweaks are easy to fold in, but the bones of the dish never change.
It's worth knowing how this dish sits next to its famous cousins. Cacio e pepe is built on Pecorino Romano and black pepper, emulsified with pasta water, no oil and no garlic. Carbonara adds eggs and guanciale to that pepper-and-cheese base. Garlic and oil pasta is the simplest of the three: no cheese in the sauce, no egg, no cured pork. Just oil, garlic, chili, parsley, and the salty pasta water that ties it all together. Among the classic Italian pasta recipes you should know by heart, this is the one you can make with what's already in your kitchen, any night of the week.
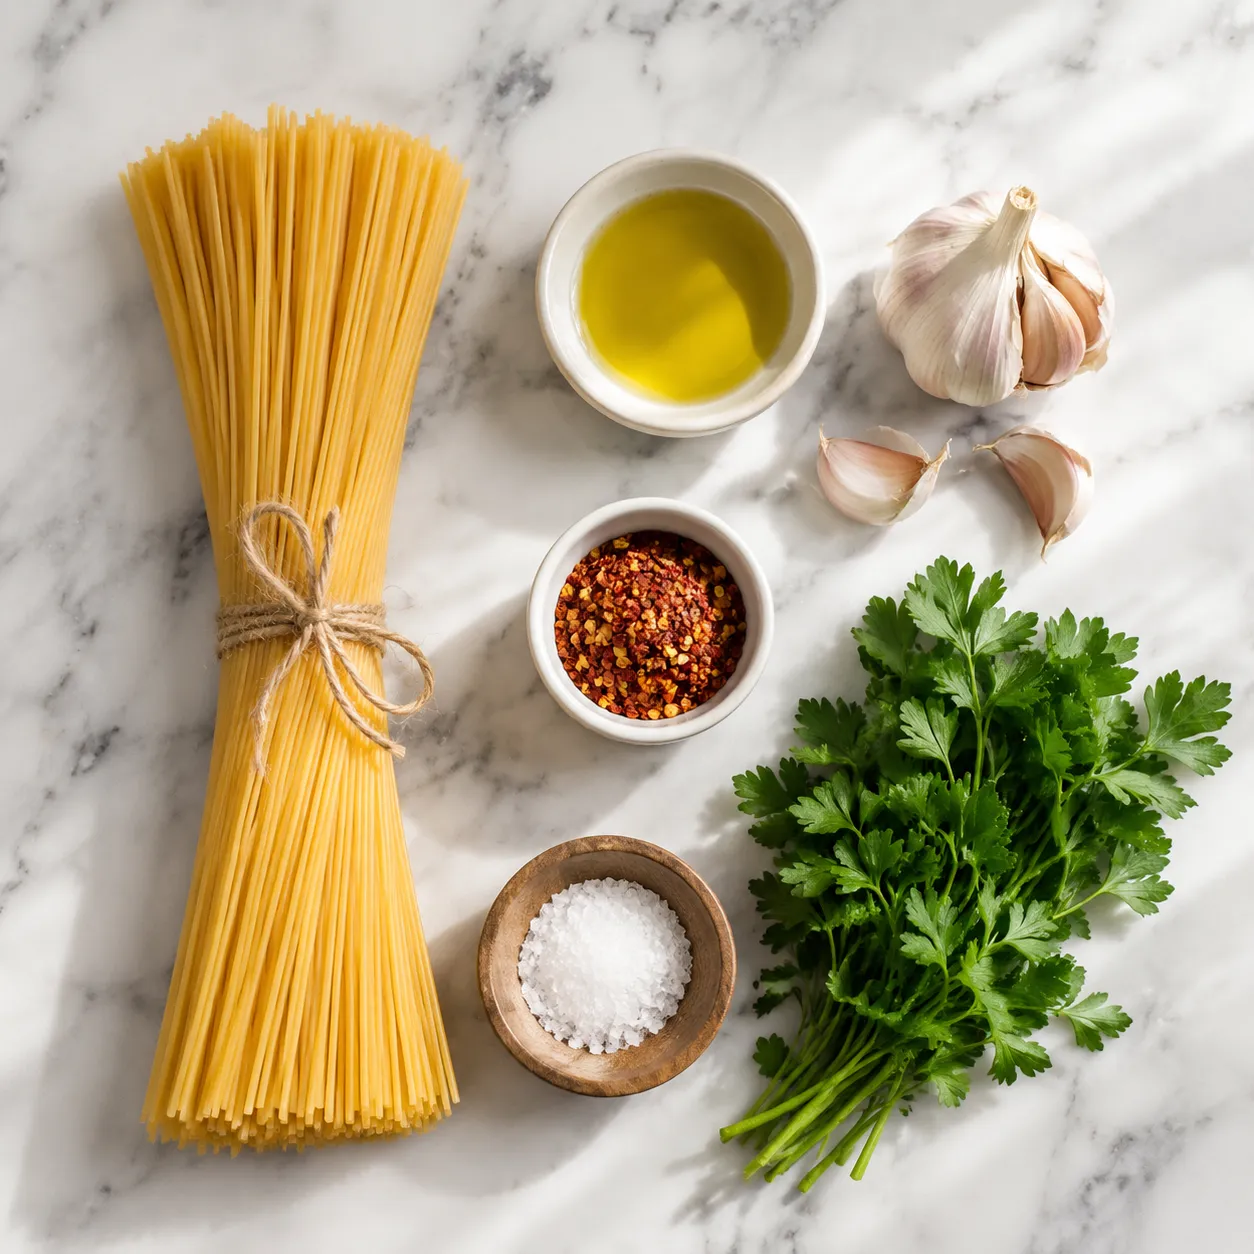
With only six ingredients, every one of them counts. You can't hide behind butter, stock, or cream. The bottle of olive oil you reach for and the freshness of your garlic are the entire personality of the dish, so it's worth taking five minutes at the store to choose well.
Use a good extra virgin olive oil. Not the most expensive bottle on the shelf, but not the watery cooking blend either. Look for something peppery and grassy from a reliable producer (Italian, Spanish, or Californian all work) bottled in dark glass with a recent harvest date printed on the label. Because the oil isn't being cooked into oblivion here, you'll taste it directly in every bite, so a tired bottle from the back of your cupboard will absolutely show.
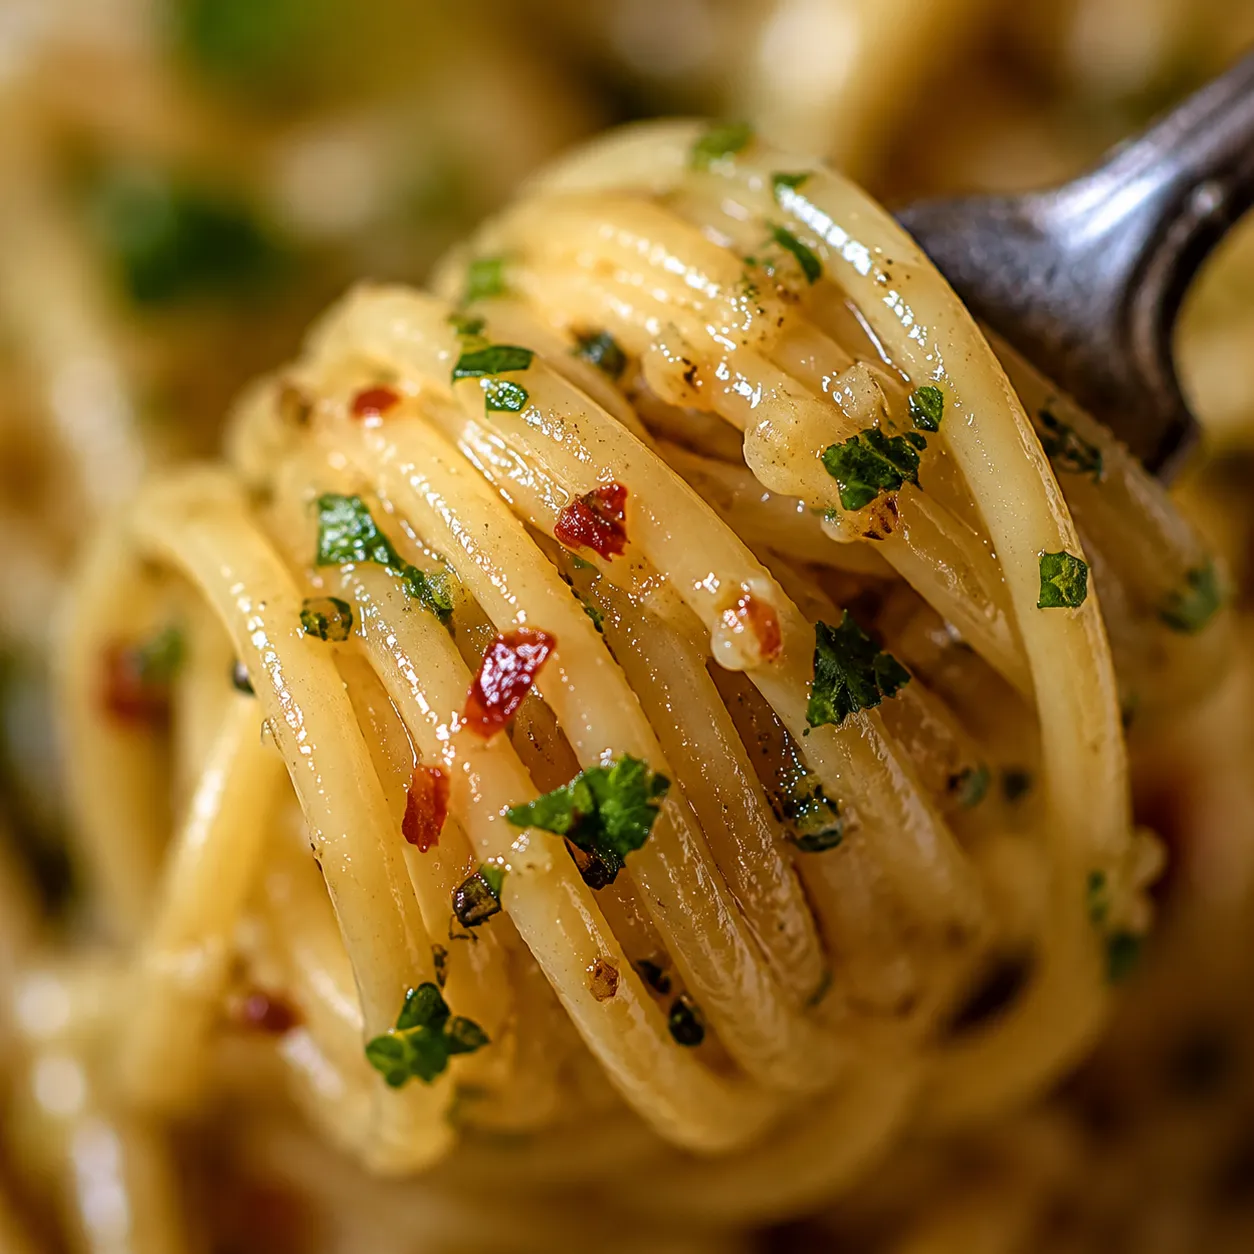
Skip the jarred minced stuff and the pre-peeled cloves that have started to sprout. You want firm, fresh heads with tight, papery skin and ivory cloves underneath. The garlic gets sliced paper-thin so it can melt into the oil and turn pale gold without burning, the kind of mellow sweetness that bottled or pre-peeled garlic simply can't deliver.
Flat-leaf Italian parsley is traditional and adds a green, peppery lift at the end. A grating of Parmigiano-Reggiano at the table is common in American kitchens, though Roman purists go without. One or two minced anchovy fillets melted into the warm oil add a quiet, savory depth, and you won't taste fish, just umami. None of these are required to make a proper garlic and oil pasta, so add them in the order you actually like them.
Here's where most home versions go sideways. The aglio e olio recipe everyone has tried looks foolproof on paper, but it asks for two precise moves: golden (not brown) garlic, and a real emulsion between oil and starchy pasta water. Get those two right and the rest is timing.
Bring a large pot of water to a rolling boil and salt it like the sea, about two tablespoons of kosher salt per gallon. This water becomes the base of your sauce, so under-salting here means a flat finished dish, no matter how good your oil is. While the water heats, slice eight cloves of garlic as thin as you can manage them.
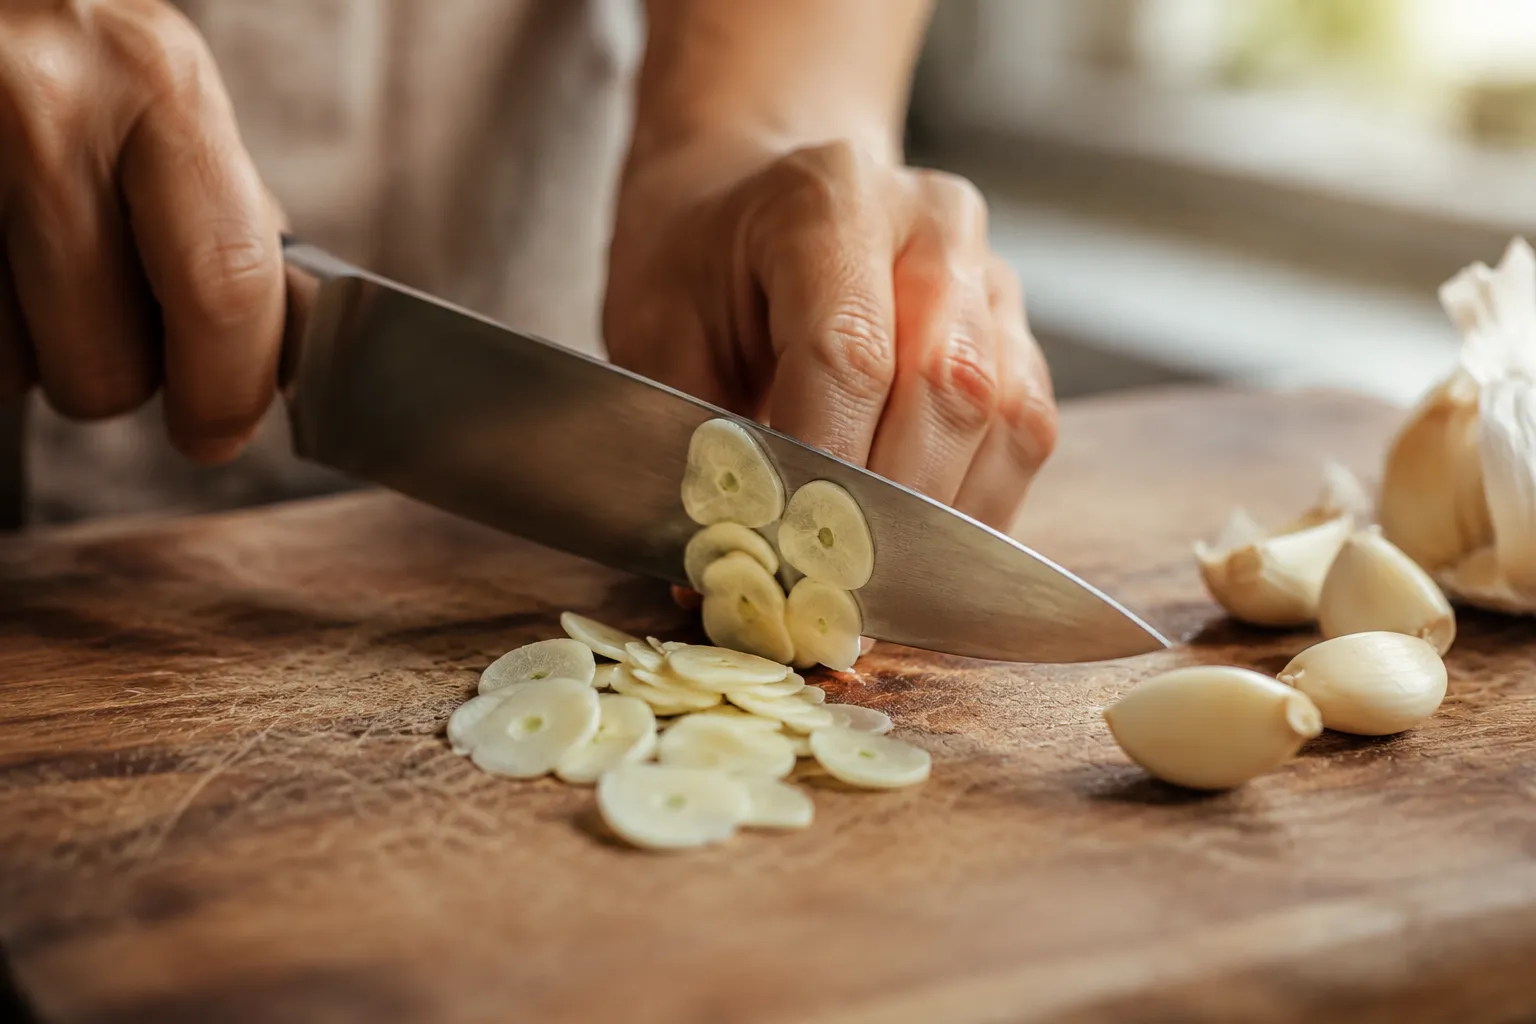
There's a famous scene in Goodfellas where a prison cook shaves garlic with a razor blade until it nearly liquefies in the pan. You don't need the razor, but the spirit is right: thin, even slices melt into the oil rather than scorching in chunks. A sharp chef's knife or a mandoline gets you there in two minutes flat.
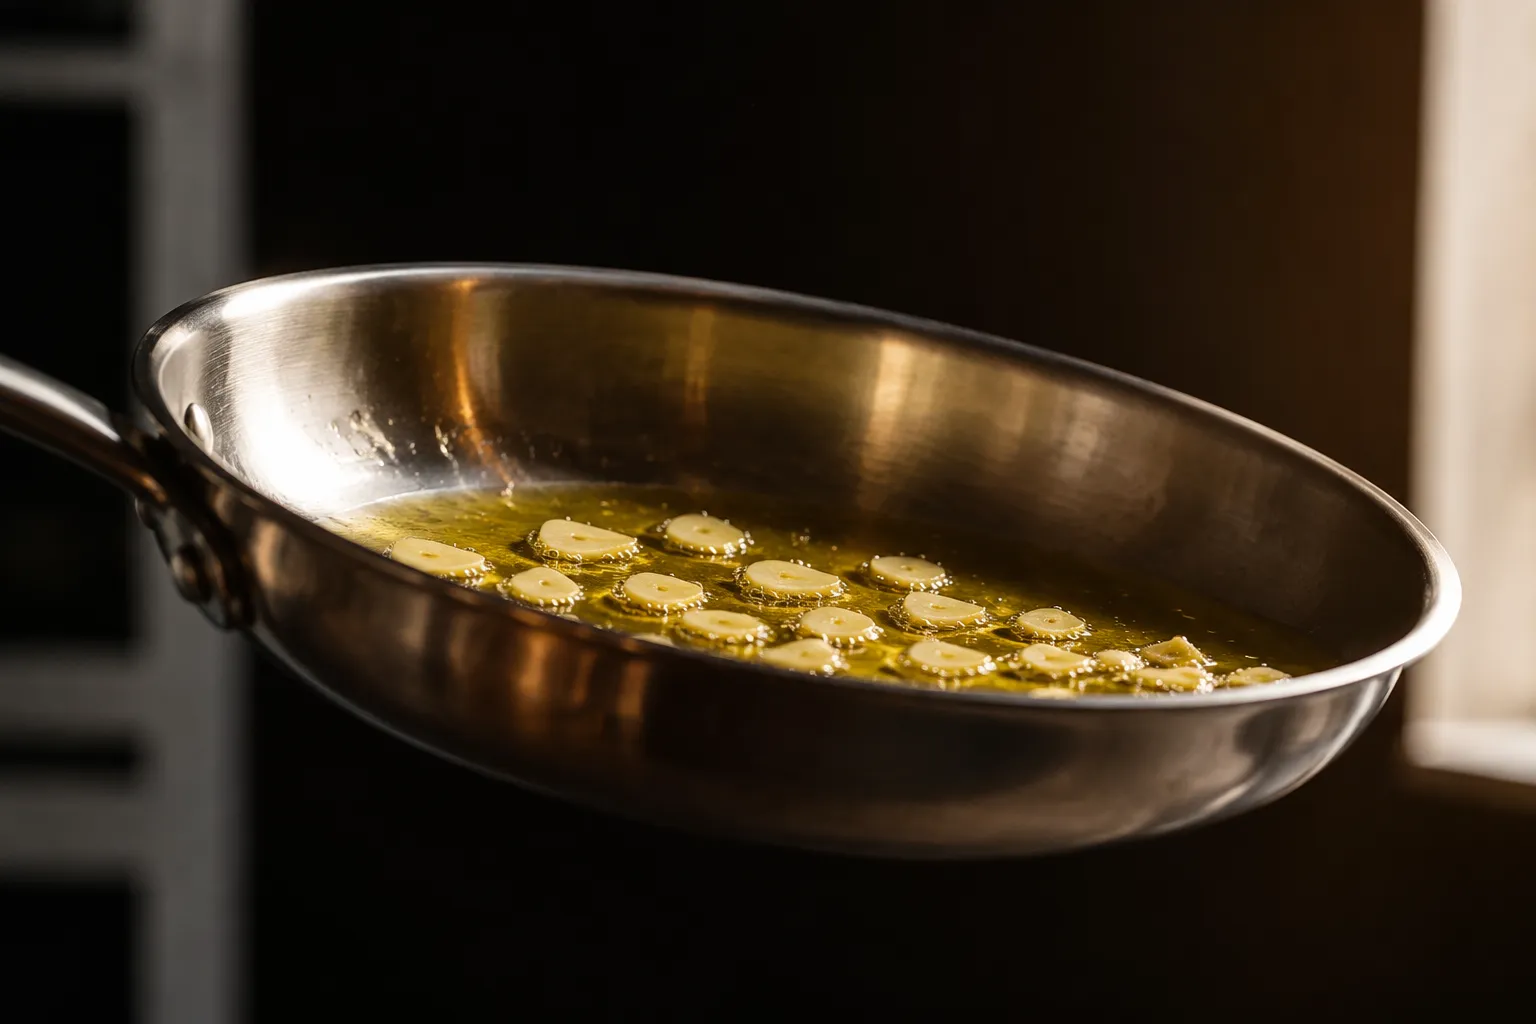
Drop the spaghetti into the boiling water and set a timer for one minute less than the package recommends. While it cooks, add the olive oil and sliced garlic to a wide skillet, cold and off the heat, then turn the burner to medium-low.
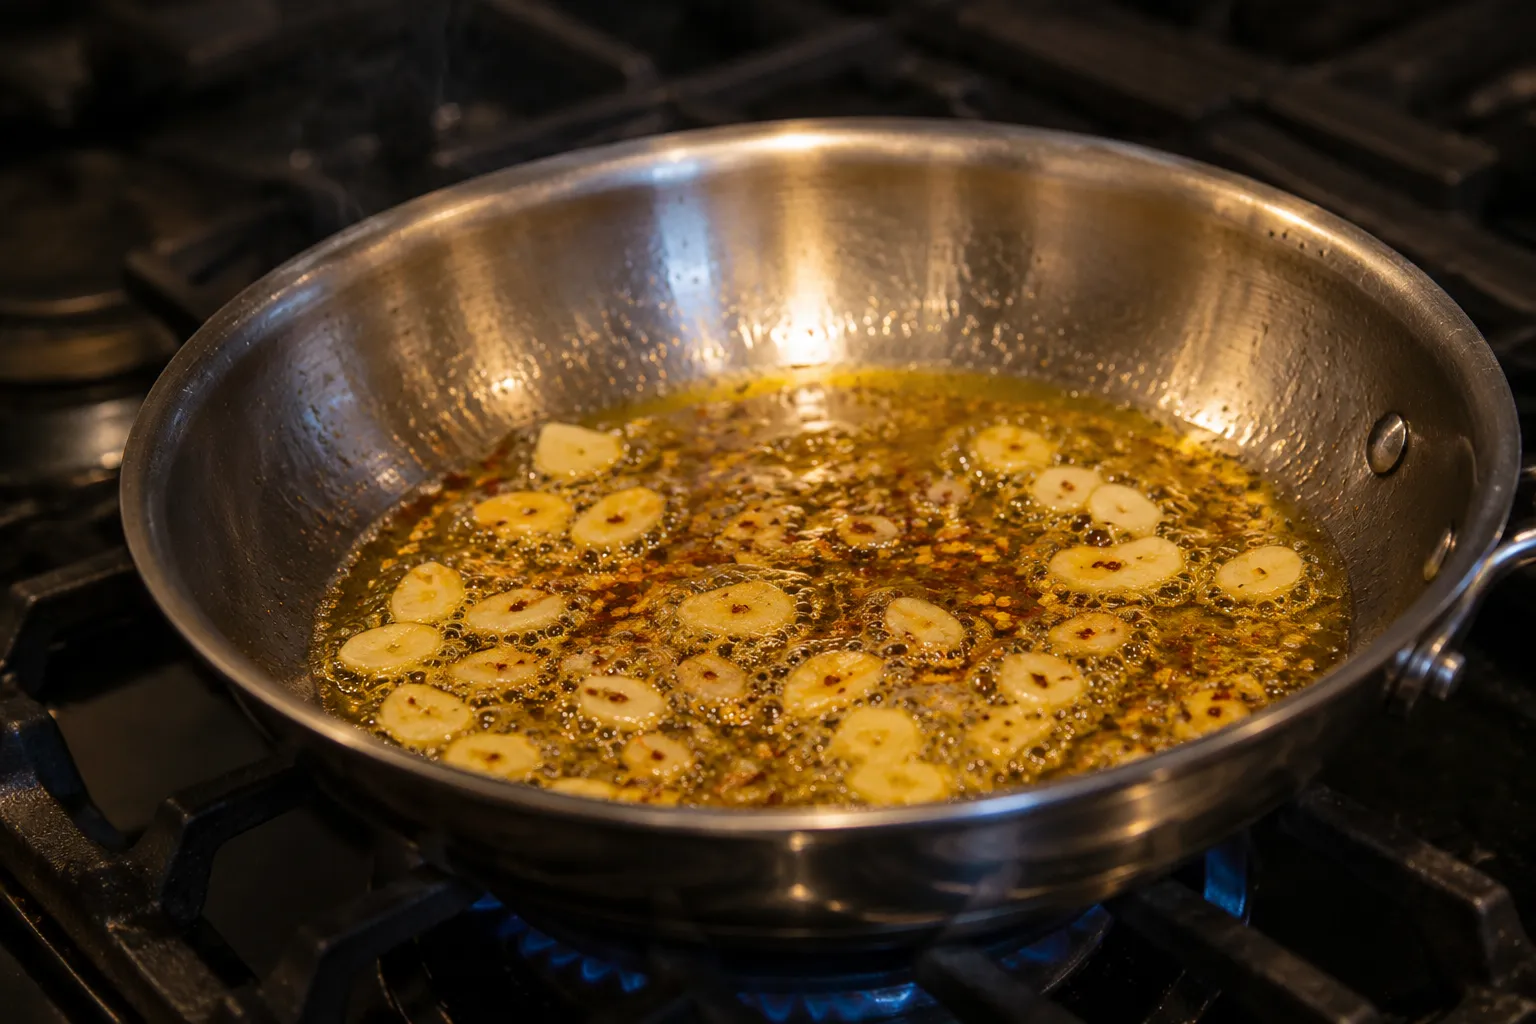
Starting in cold oil is the secret to evenly cooked, never-burned garlic. As the oil warms, the slices will start to bubble lazily around the edges. Swirl the pan now and then, and pull it off the heat the moment the garlic turns the color of pale straw. Add the red pepper flakes and a pinch of salt for the last 30 seconds to bloom the chili without scorching it.
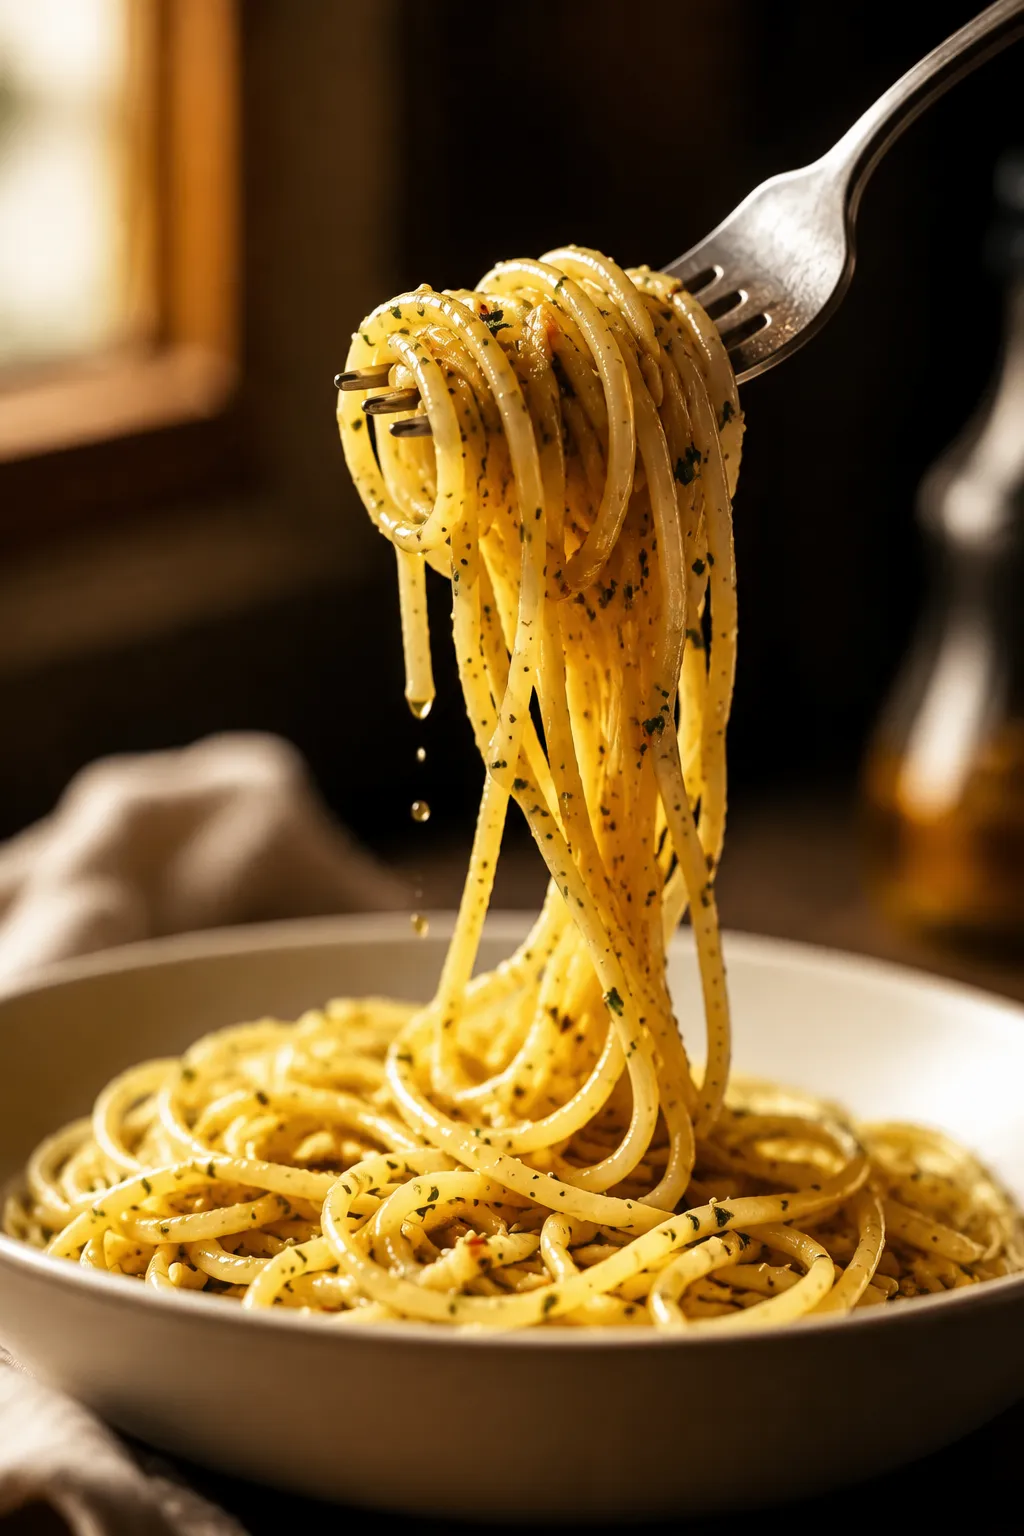
This is the make-or-break step, the one most home cooks skip. Before you drain the pasta, scoop out at least a cup and a half of the cloudy, starchy cooking water, it's liquid gold. Use tongs to lift the spaghetti directly from the pot into the skillet with the warm garlic oil; a little extra water clinging to the noodles is exactly what you want.
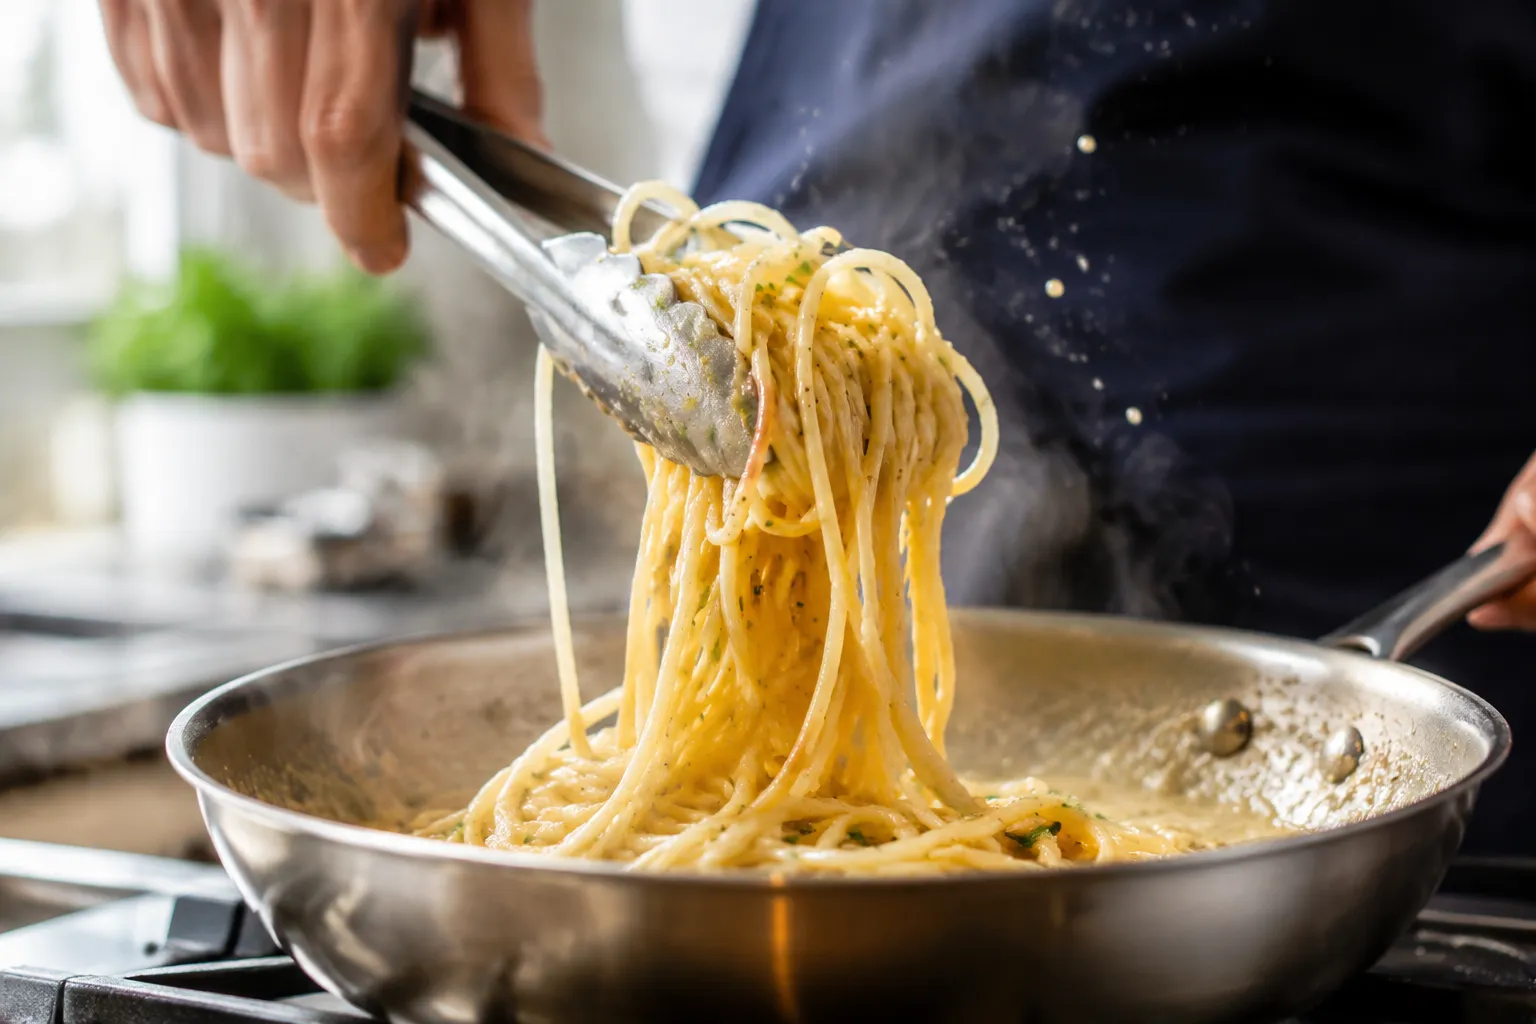
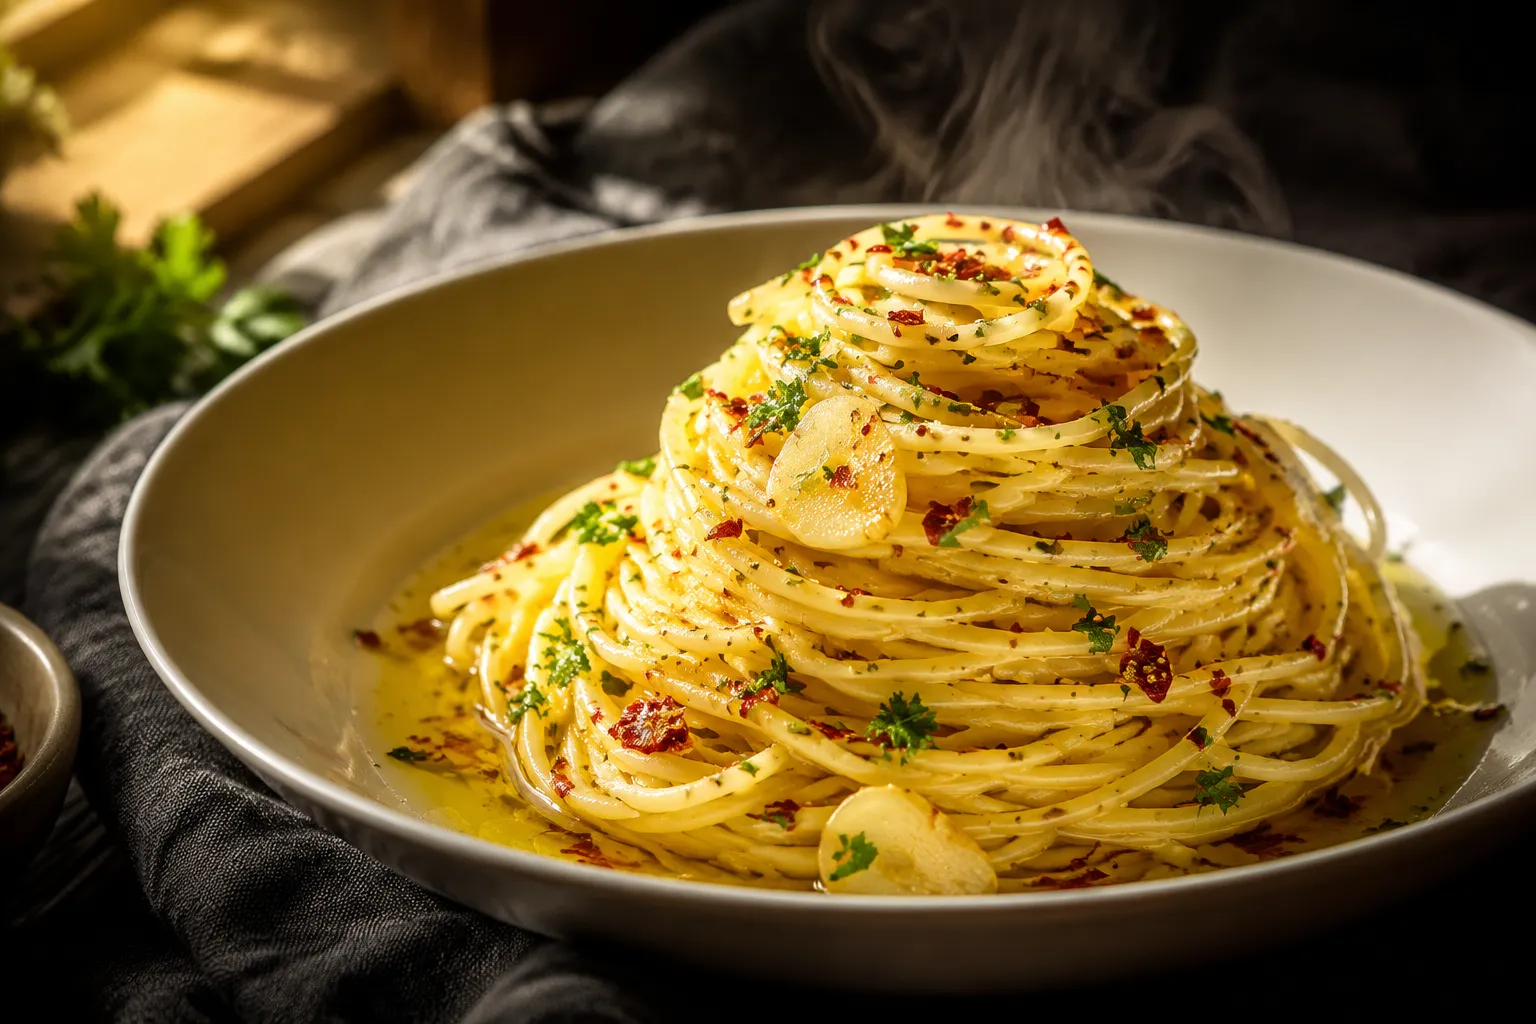
Add half a cup of pasta water to the skillet over medium heat and start tossing vigorously, like you mean it. Within a minute or two, the oil and starchy water will pull together into a creamy, glossy garlic olive oil sauce that coats every strand. If it looks oily and broken, add another splash of pasta water and keep tossing. The starch is the magic; without it, you'll have spaghetti swimming in greasy oil instead of a proper sauce.
Once the sauce is glossy and clinging, kill the heat. Stir in the chopped parsley and a generous turn of black pepper. Taste and adjust salt, then plate immediately in warmed bowls because this dish waits for no one and tightens up fast as it cools.
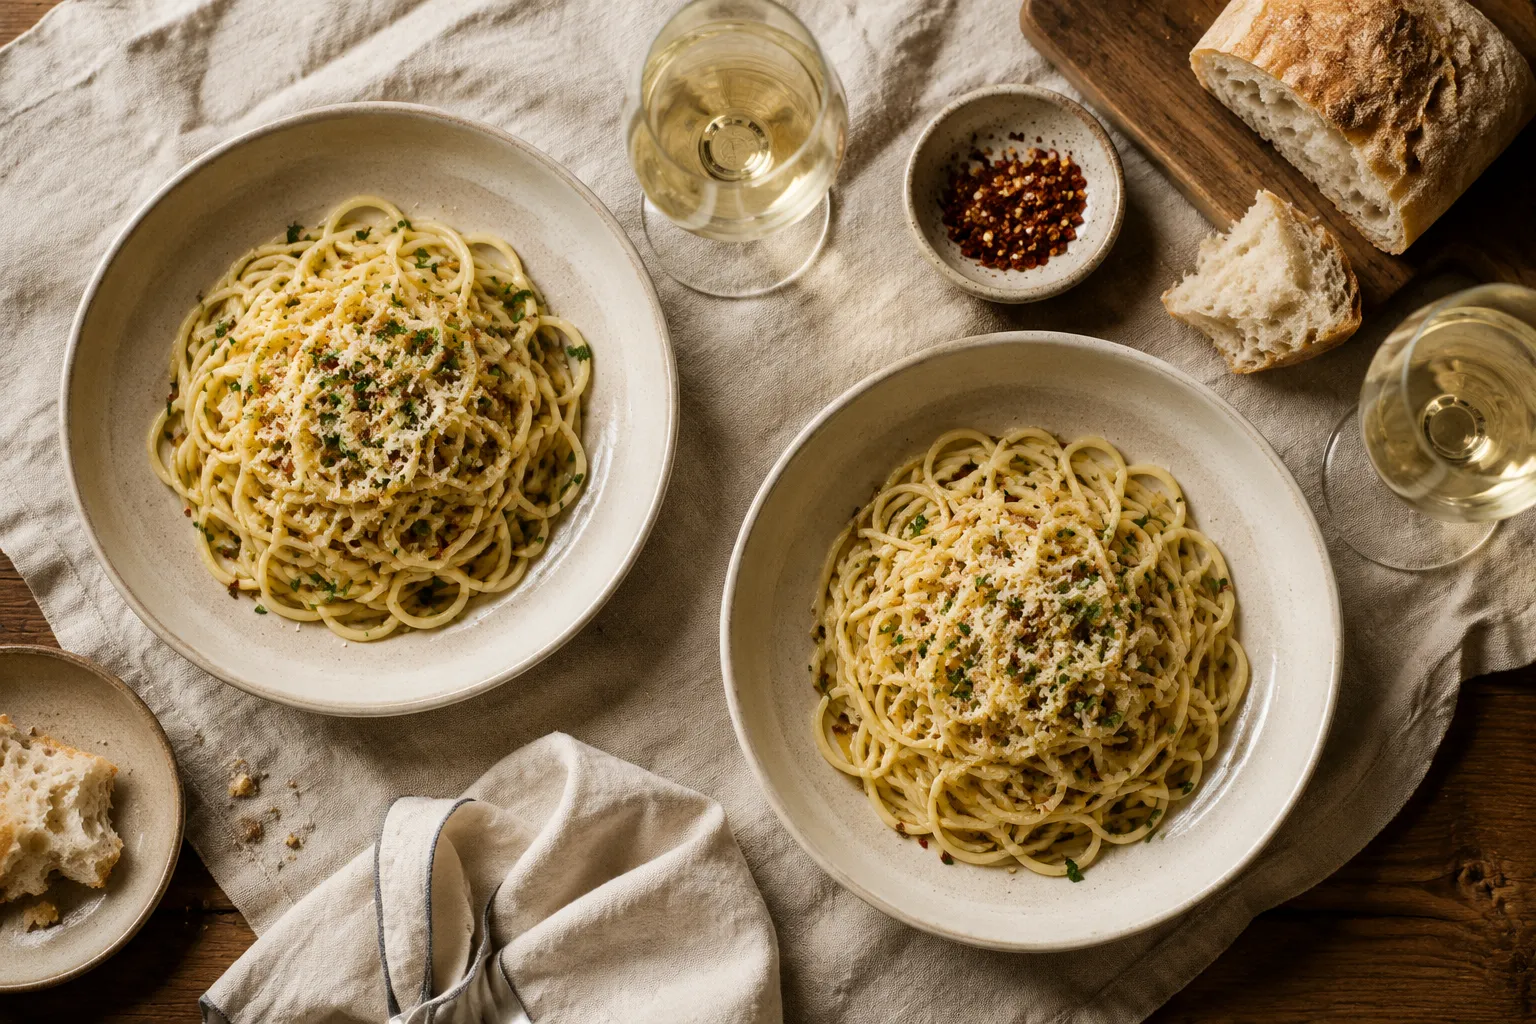
If you want, finish with a fine grating of Parmigiano-Reggiano and a final drizzle of raw olive oil straight from the bottle. That last drizzle adds a grassy, peppery top note you cooked off in the pan, and it's the move that takes the dish from very good to memorable.
Most online versions, including the ones with thousands of five-star reviews, skip the emulsion step entirely. They tell you to toss cooked pasta with garlic oil and call it done. That's how you end up with a slick, oily plate instead of the silky, restaurant-style finish you remember from a great Italian meal.
The difference is treating the starchy pasta water as an ingredient, not a waste product. It's the same technique that gives cacio e pepe its creamy bind without any cream, and it's why a few simple Roman recipes have stood up to decades of trends. Once you've tried it, you'll find yourself reaching for the move across all your pantry pasta dinners, not just garlic-and-oil, but anything where you want a clean sauce to actually behave like a sauce.
This dish is happy at a Tuesday dinner and equally at home as the secondo at a long Sunday lunch. Serve it in warm shallow bowls with a wedge of crusty bread for sopping up the oil at the bottom. A simple arugula salad with lemon and shaved Parmigiano cuts the richness beautifully, and a few oil-cured olives on the side never hurt anyone.
For wine, lean dry and high-acid: a Vermentino from Sardinia, a young Verdicchio, or a chilled Falanghina from Campania mirrors the dish's home turf. If you prefer red, choose something light and bright, a Frascati Superiore or a chilled Chianti Classico, never anything heavy and oaked that would steamroll the garlic.
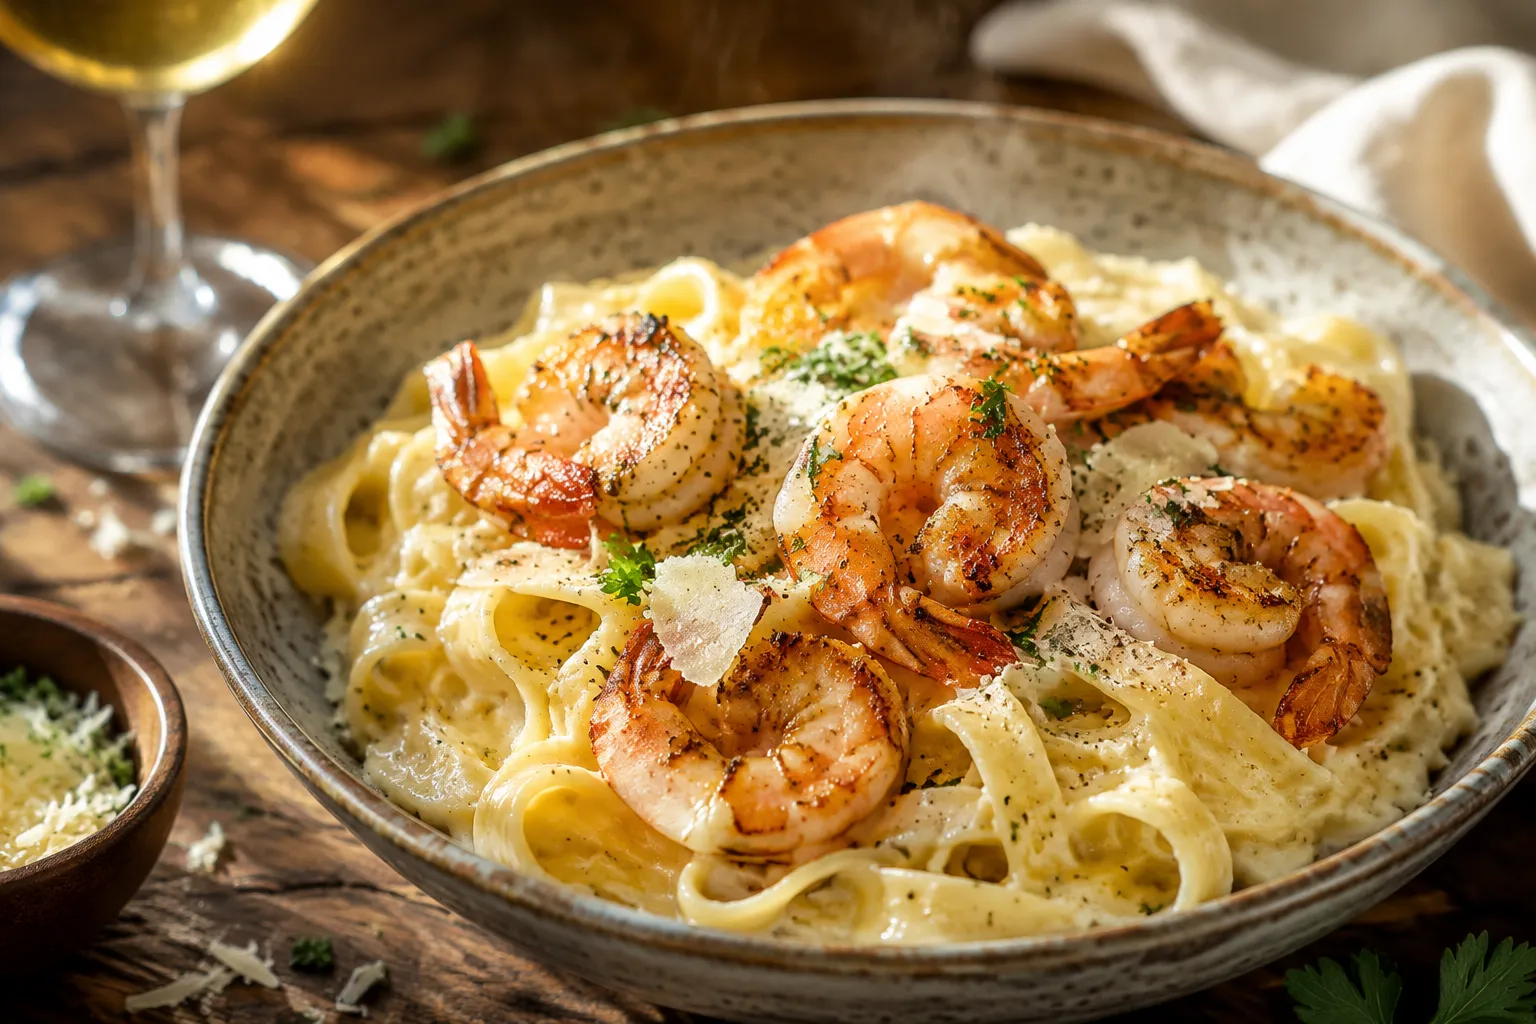
If you want to bulk it up into a proper main course, this dish takes well to a handful of sautéed shrimp, charred broccolini, or a fried egg slipped on top at the last second. But honestly, the version with nothing else on the plate is still the one I make most often, which is exactly why this aglio e olio recipe earns a permanent spot in my weekly rotation.
The bones of this dish are non-negotiable, but the optional flourishes are where you can make it your own. Italian-American kitchens have spent a century riffing on the formula, and most of the variations only take an extra ingredient or two.
Honestly, this dish is best the moment you plate it. The emulsion that makes it silky starts to break down within minutes of cooling, so cook only what you'll eat that night whenever possible.
If you do have leftovers, store them in an airtight container in the refrigerator for up to 2 days. To reheat, skip the microwave (it dries the noodles into ropes) and warm them in a skillet over medium-low heat with a splash of water and an extra drizzle of olive oil. Toss gently for 2 to 3 minutes until the sauce loosens and re-coats the strands. A fresh sprinkle of parsley brings it back to life.