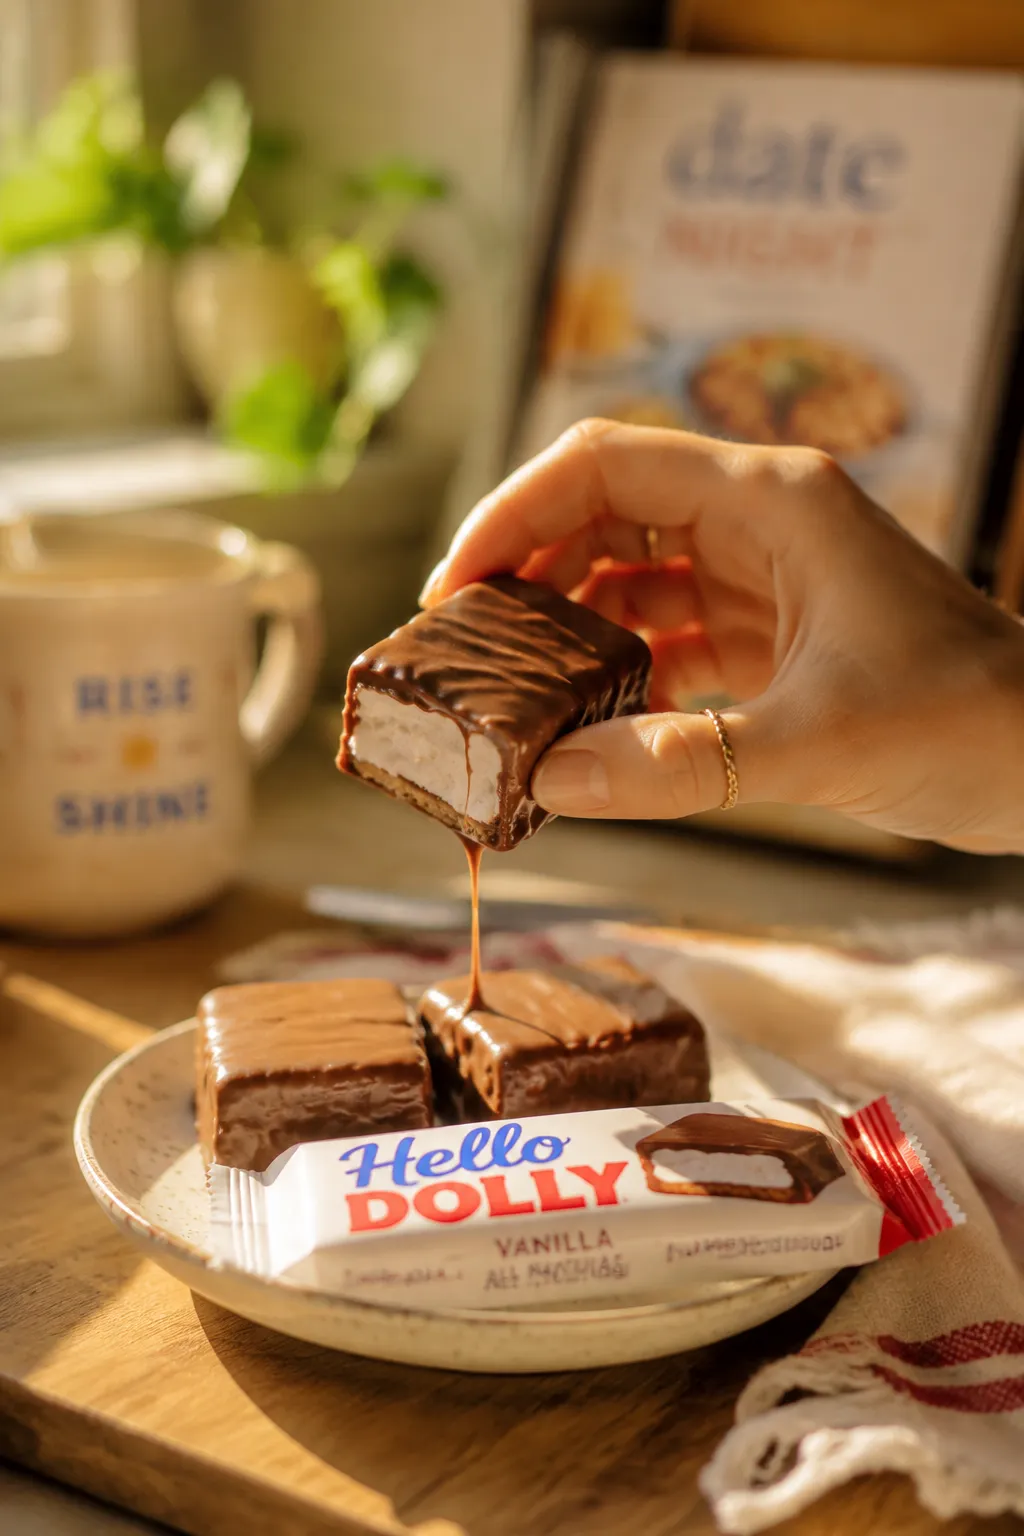
Hello Dollies: The Classic 7-Layer Magic Bar Recipe
Ingredients
Scale
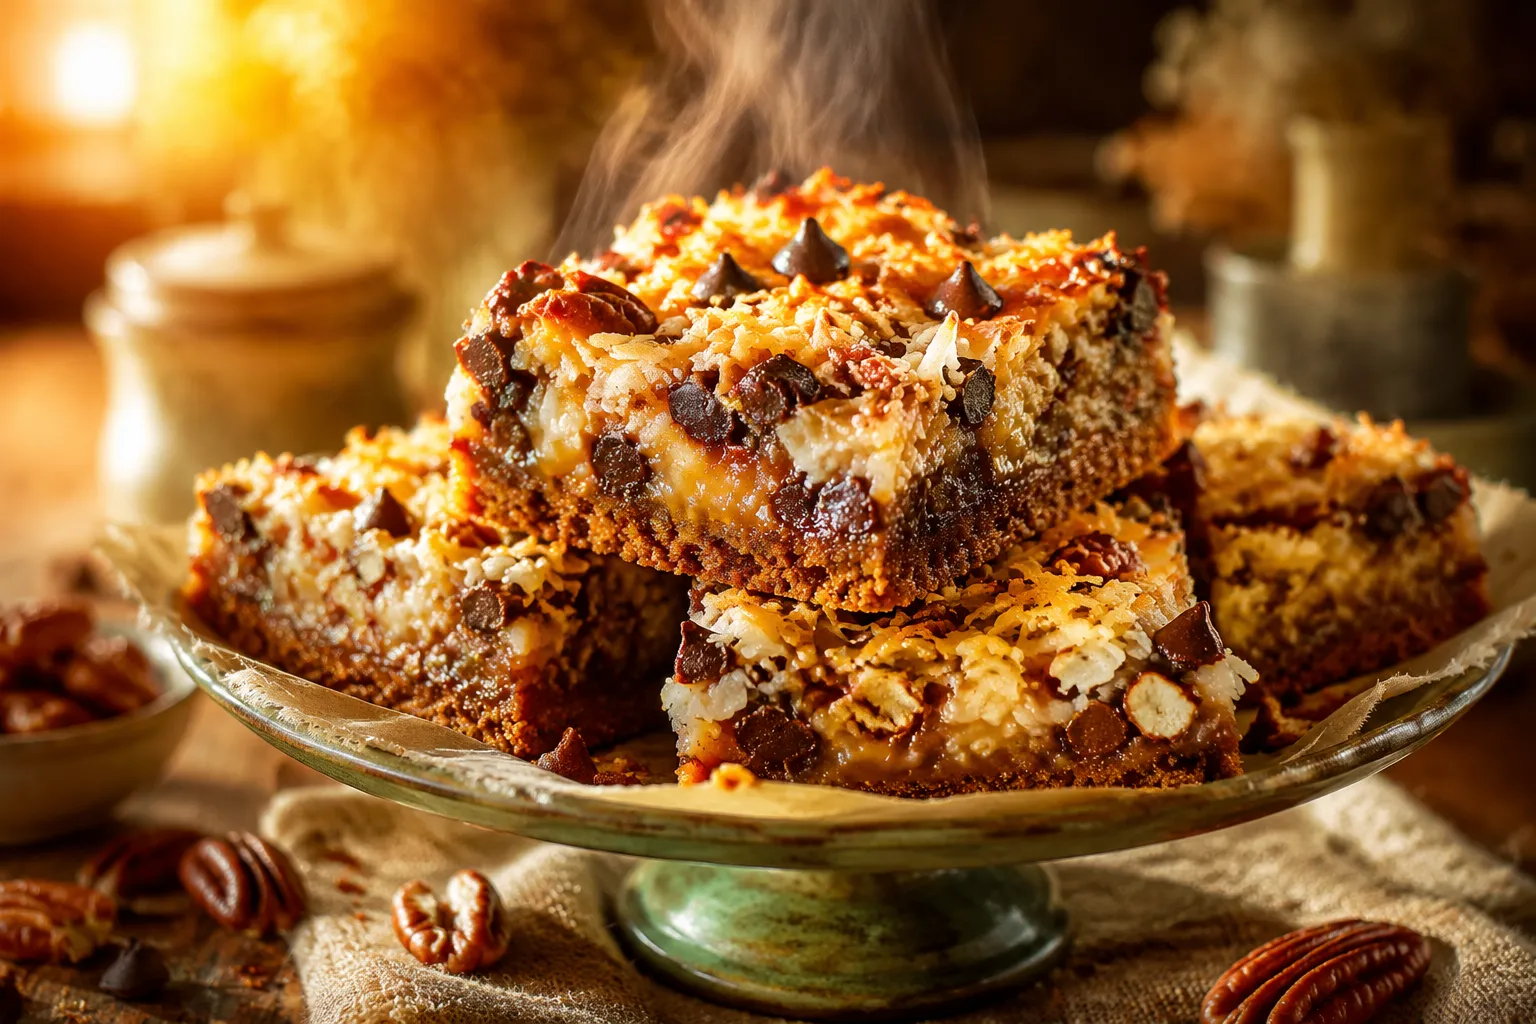
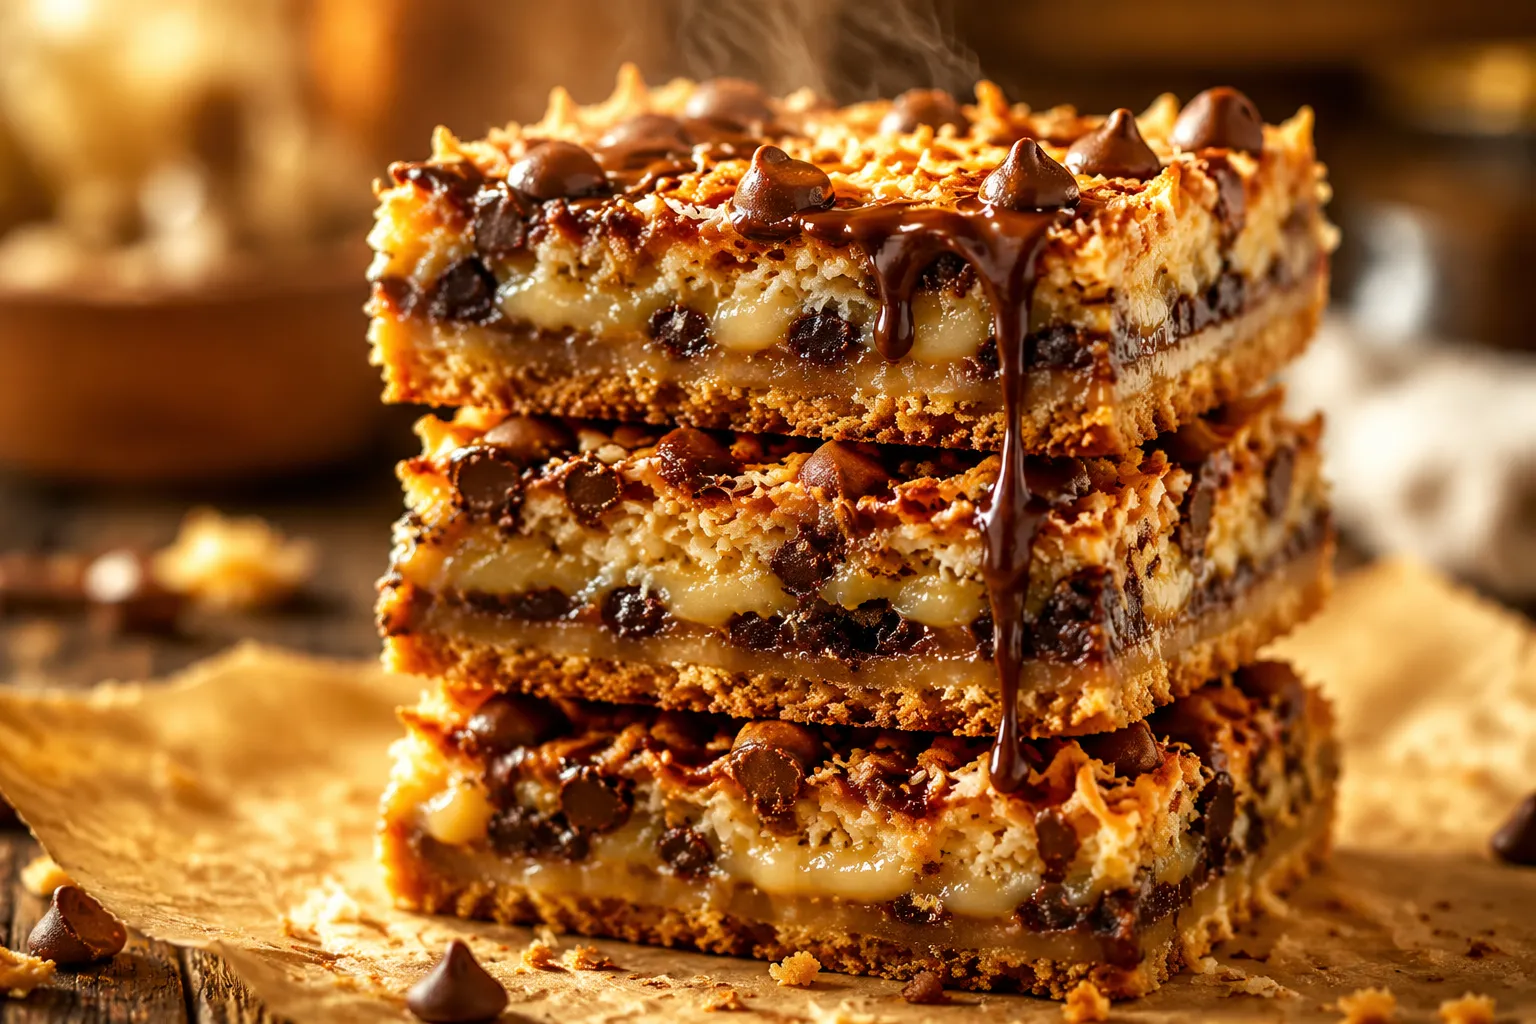
Hello Dollies are the no-fuss, layered cookie bars your grandma made on rainy Sundays: buttery graham crust, chocolate, coconut, pecans, all glued together with sweetened condensed milk.
Hello Dollies are the kind of dessert that makes people pause mid-bite and ask, "wait, what's in these?" The answer is everything good: a buttery graham base, a snowy drift of coconut, melted chocolate, toasty pecans, and a slow rain of sweetened condensed milk that pulls it all together into one chewy, gooey, golden-edged bar. They're nostalgia in pan form, the dessert your aunt brought to every cookout in a Pyrex with a hand-scrawled label, and they're back on the rotation for very good reason.
If you grew up calling these 7-layer magic bars or just "those coconut things from the church cookbook," you're in the right place. Same recipe, slightly tightened ratios, and a few small upgrades that make the difference between bars that slice clean and bars that slump into a sticky puddle. No mixer, no fussy steps, no chilling overnight required. Just one pan, seven layers, and about thirty-five minutes from butter-melting to first bite.
This is the version I make when I need a dessert that travels well, feeds a crowd, and disappears before the coffee's even poured. It's the kind of recipe that turns up at every gathering for a reason: it's foolproof, it's genuinely delicious, and it somehow tastes even better the next day.
Hello Dollies are a layered cookie bar built on a graham cracker crust, topped with chocolate, coconut, nuts, and other sweet bits, then bound together with a generous pour of sweetened condensed milk. They go by a lot of names depending on which decade your grandma's cookbook is from: Magic Bars, Seven Layer Bars, Magic Cookie Bars, or just "those bars." The recipe most likely traces back to a 1960s Southern community cookbook, where a baker named Dolly submitted her version and the name stuck.
The defining feature is that no-mixer, no-batter approach. You don't cream butter and sugar. You don't fold in flour. You melt, press, sprinkle, pour, and bake. The condensed milk does the heavy lifting, melting into the layers below it and turning the whole thing into a single chewy slab once it cools. That's the "magic" part of magic bars: there's no batter holding it together, just dairy alchemy and a hot oven.
What separates a great Hello Dolly from a soggy one is mostly about ratios and bake time. Too much milk and the center never sets. Too little and the layers feel dry and disconnected. The recipe below has been tested in a US-standard 9x13 metal pan with the exact amounts that give you clean slices, gooey middles, and those craggy, deeply caramelized edges that bakers actually fight over. If you've been searching for chocolate chip cookie bars that go beyond the basic, this is the upgrade. They have all the comfort of a cookie with the architecture of a layered dessert.

The ingredient list reads like a pantry inventory, which is part of the appeal. Most of this is probably already in your baking cabinet, and what isn't can be picked up on a single grocery run.
For the graham cracker crust, you'll need 1 1/2 cups of graham cracker crumbs (about 10 to 12 full sheets, crushed) and 1/2 cup of melted unsalted butter. That's it. The butter binds the crumbs, and once it bakes it crisps into the foundation that holds every other layer. Use real butter, not margarine, and use unsalted so you can control the final saltiness.
For the layers, you'll want 1 cup of semi-sweet chocolate chips, 1 cup of butterscotch chips, 1 1/3 cups of sweetened shredded coconut, and 1 cup of chopped pecans. The semi-sweet chocolate chips give you that classic dark, slightly bittersweet contrast against all the sugar. The butterscotch chips are the secret weapon — they melt into the condensed milk and add a caramel-toffee depth that plain chocolate can't match. Sweetened shredded coconut (not unsweetened, not flaked) toasts to a perfect golden brown on top. And pecans bring buttery crunch, though walnuts work in a pinch.
The binder is one 14-ounce can of sweetened condensed milk. This is the non-negotiable ingredient. Don't substitute evaporated milk — it's not the same thing and it won't set. Sweetened condensed milk is thick, syrupy, and intensely sweet, and it transforms in the oven into a soft caramel that glues everything together. A pinch of flaky sea salt over the top before baking is optional but highly encouraged. It cuts the sweetness and makes every other flavor sharper.
The full numbered method is in the recipe card below, but here's the visual walkthrough so you know what to look for at each stage.
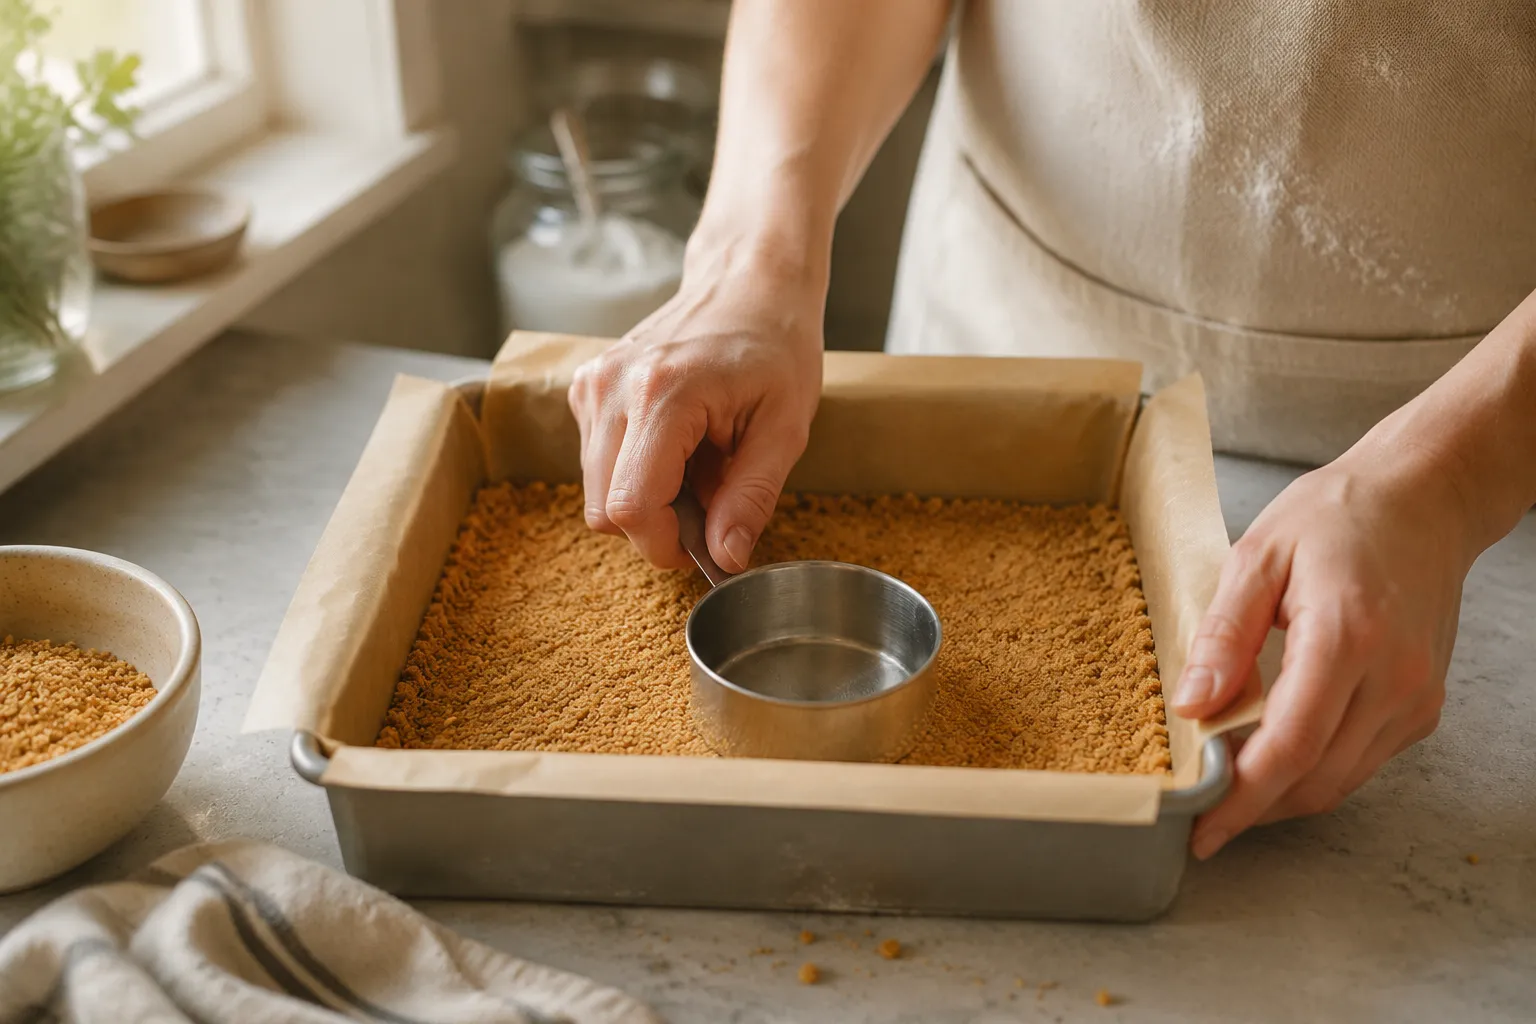
Start by heating your oven to 350°F and lining a 9x13-inch metal baking pan with parchment paper, leaving a few inches of overhang on the long sides. This is your parchment sling, and it's the difference between bars you can lift out cleanly and bars you scrape out in chunks.
Combine the graham cracker crumbs and melted butter in a bowl until the texture is like wet sand, then dump it into the lined pan and press it down hard. Use the flat bottom of a measuring cup or a glass to compact the crust into an even layer. Firm pressing here means a crust that holds together when you slice, instead of crumbling at the first bite.
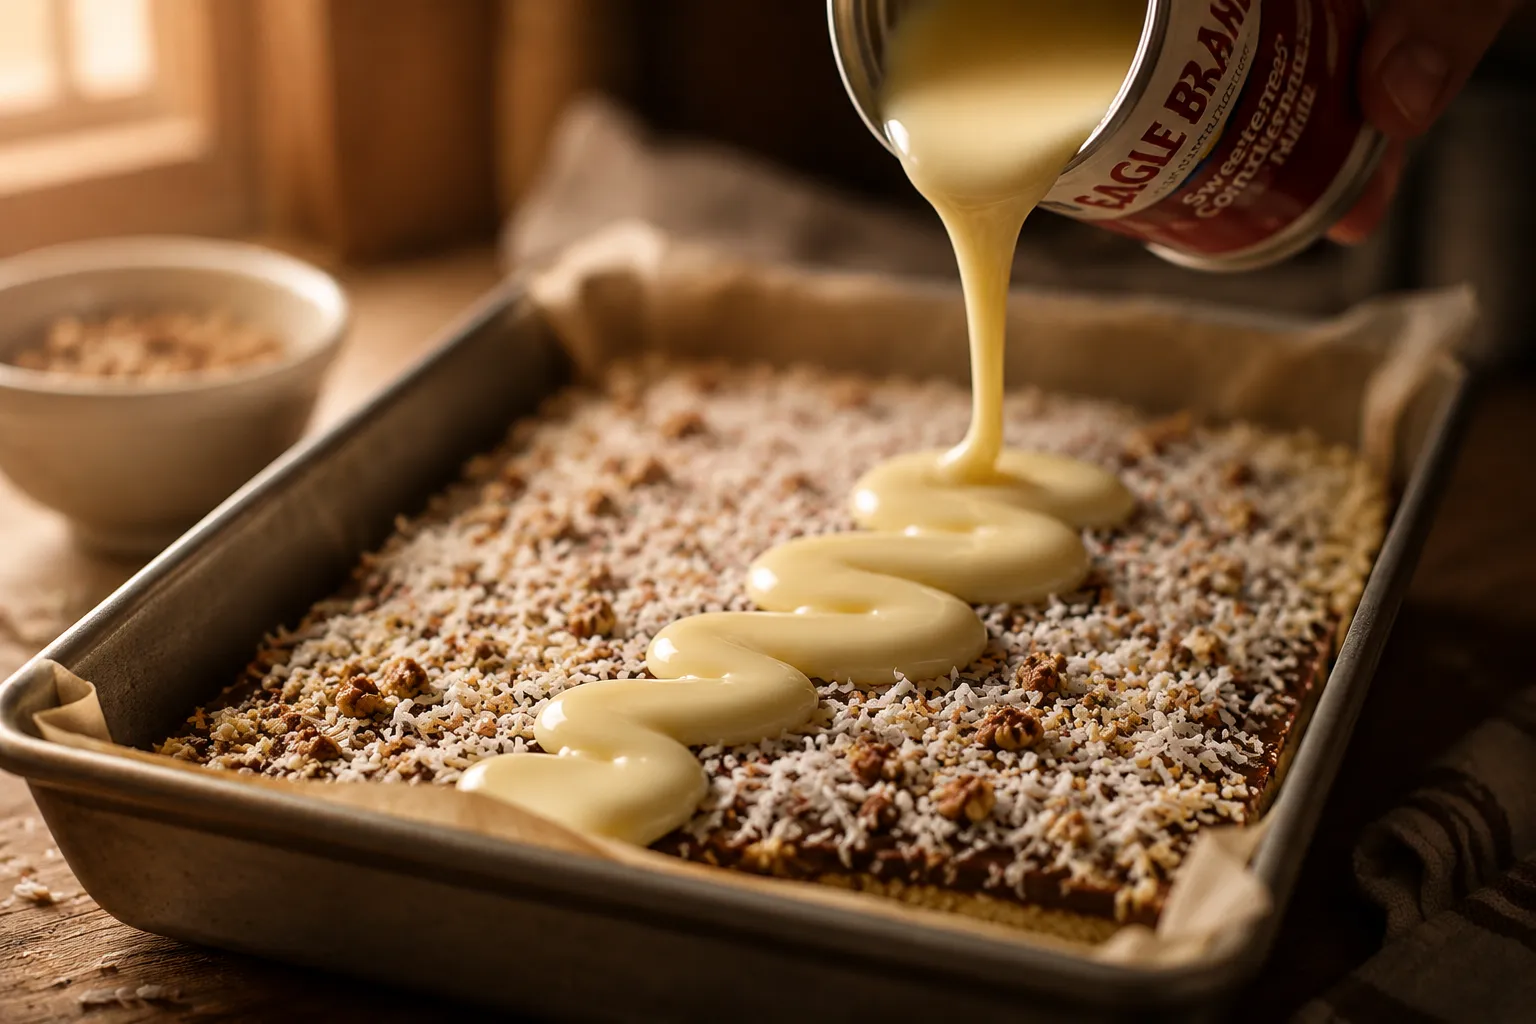
Now comes the fun part: layering. Sprinkle the semi-sweet chocolate chips evenly over the crust, followed by the butterscotch chips, then the shredded coconut, then the chopped pecans. Order matters. Chips on the bottom melt into the warm crust and form a sealed chocolate stratum. Coconut goes near the top so it can toast. Pecans sit on top so they get a deep, nutty roast in the oven.

Open your can of sweetened condensed milk and drizzle it slowly and evenly across the entire surface in a tight zigzag pattern. Take your time — you want every corner of the pan to get some, not just the middle. Once it's poured, you can use the back of a spoon to nudge it toward any dry patches, but don't stir or disturb the layers underneath.
Bake for about 25 minutes, until the edges are deeply golden, the coconut on top is toasted to a rich tan, and the whole surface is bubbling. The center will look soft when you pull it out — that's correct. It firms up as it cools.
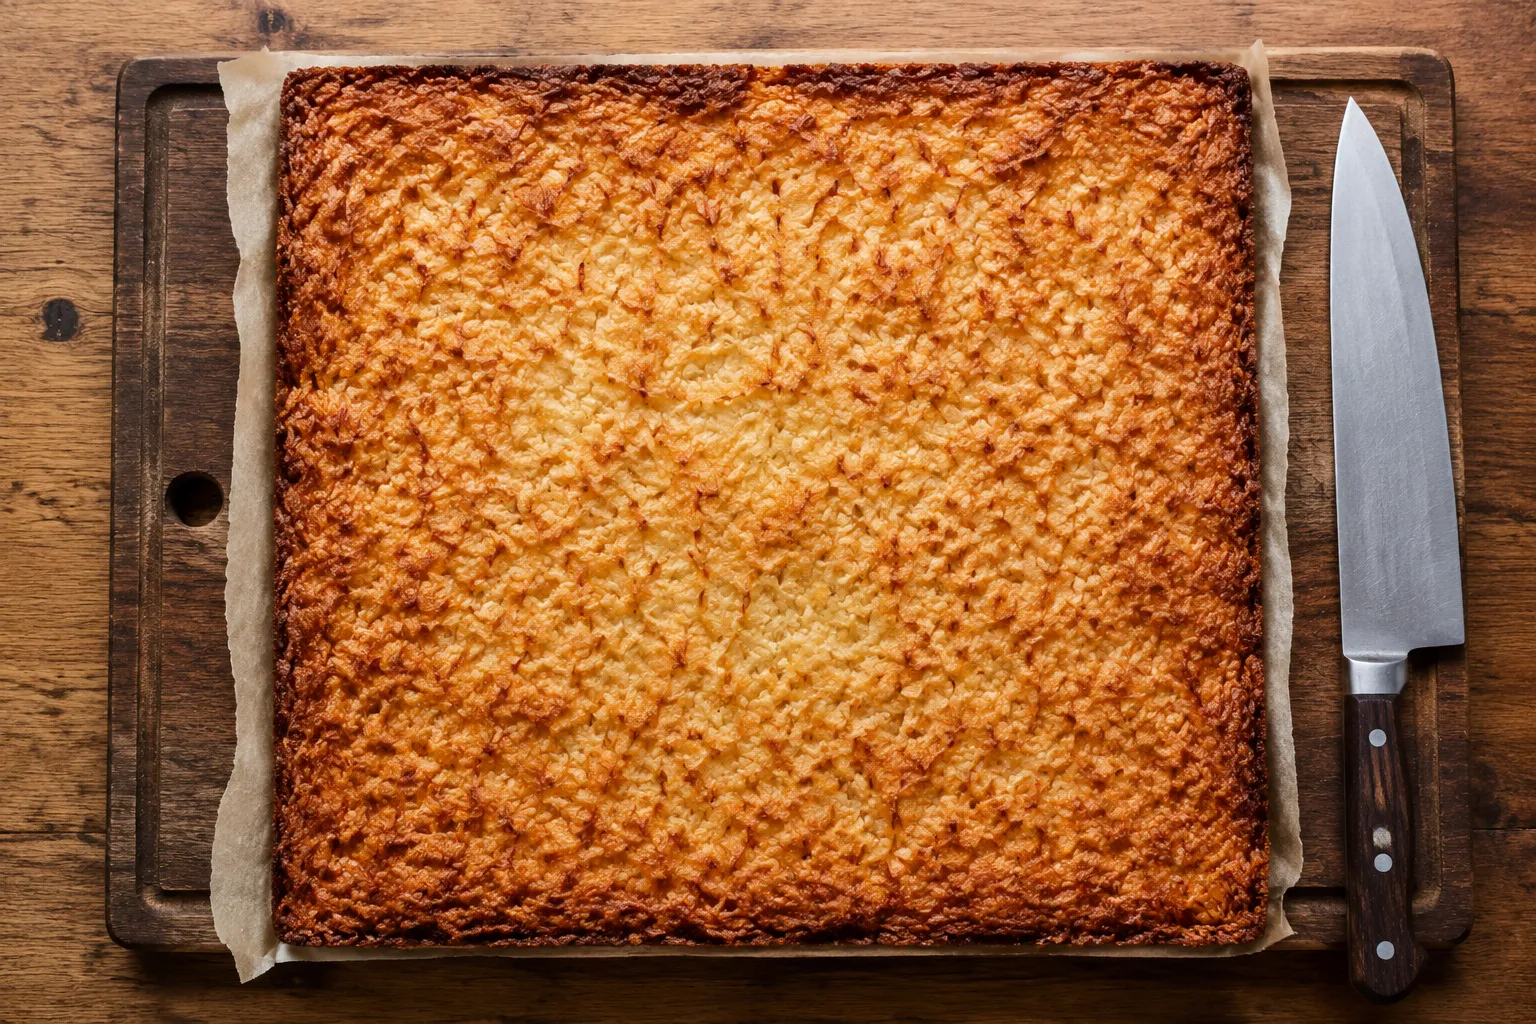
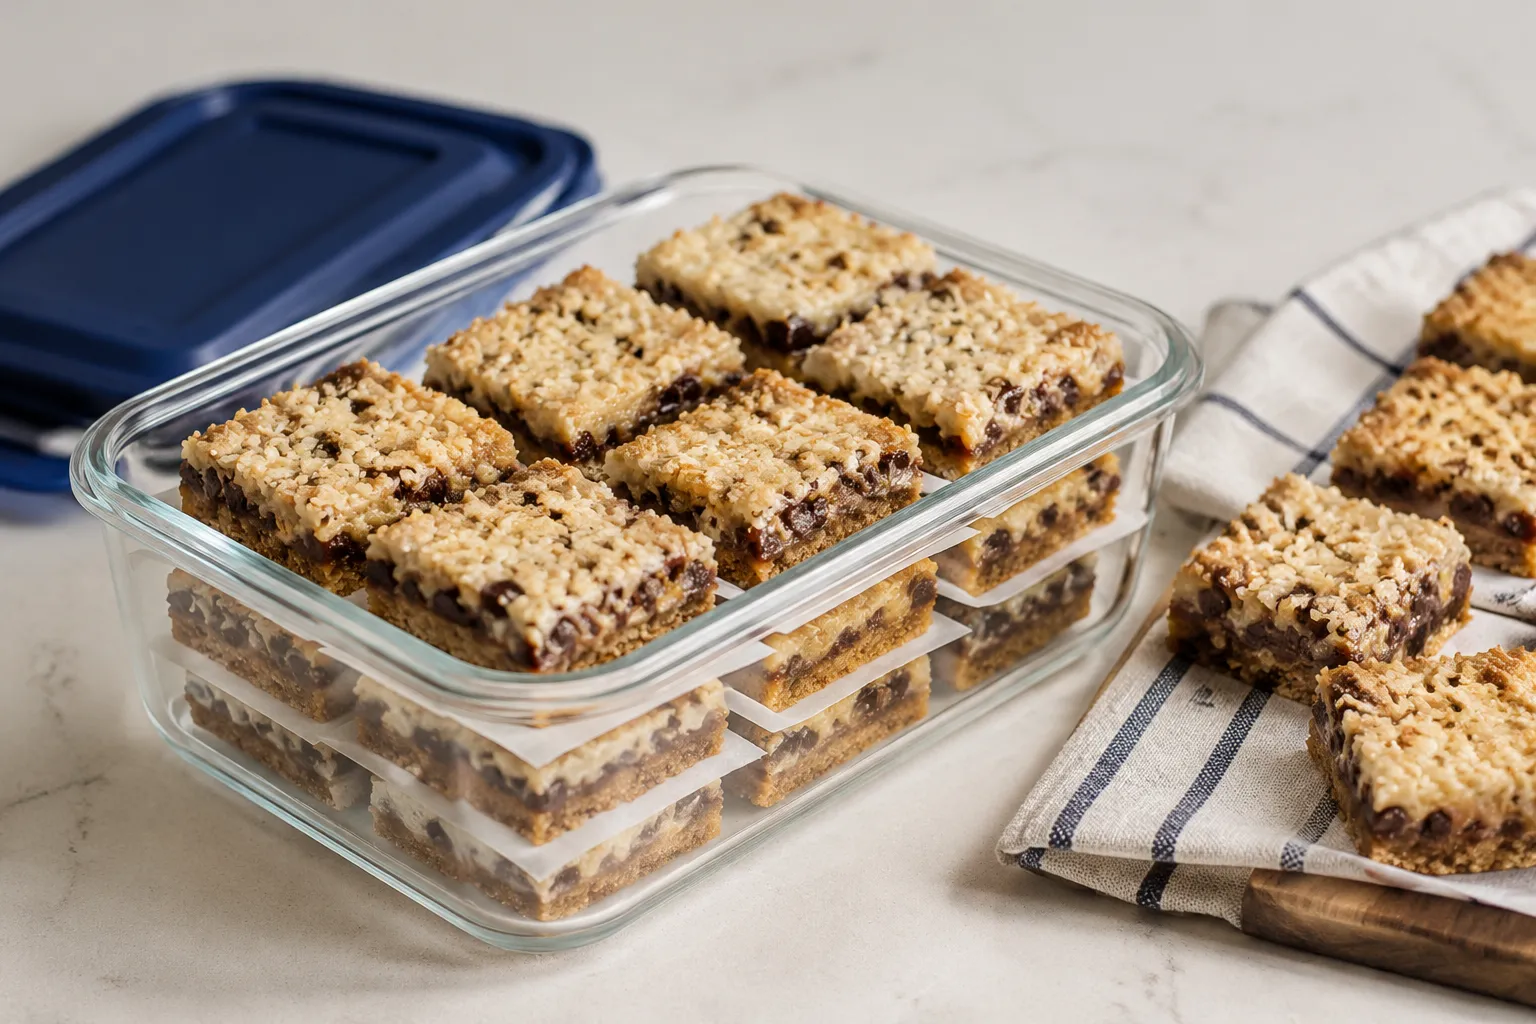
Use the parchment sling to lift the entire slab out of the pan, transfer to a cutting board, and slice into 16 squares with a long sharp knife, wiping the blade with a damp paper towel between cuts.
There's a reason these layered treats have shown up at every potluck, bake sale, and holiday cookie tray since the Kennedy administration. They check every box. They're sturdy enough to travel, they slice into neat squares, they don't need refrigeration for a few hours, and they appeal to every age group at the table. If you need easy potluck desserts that don't require a pie carrier or last-minute assembly, this is the one.
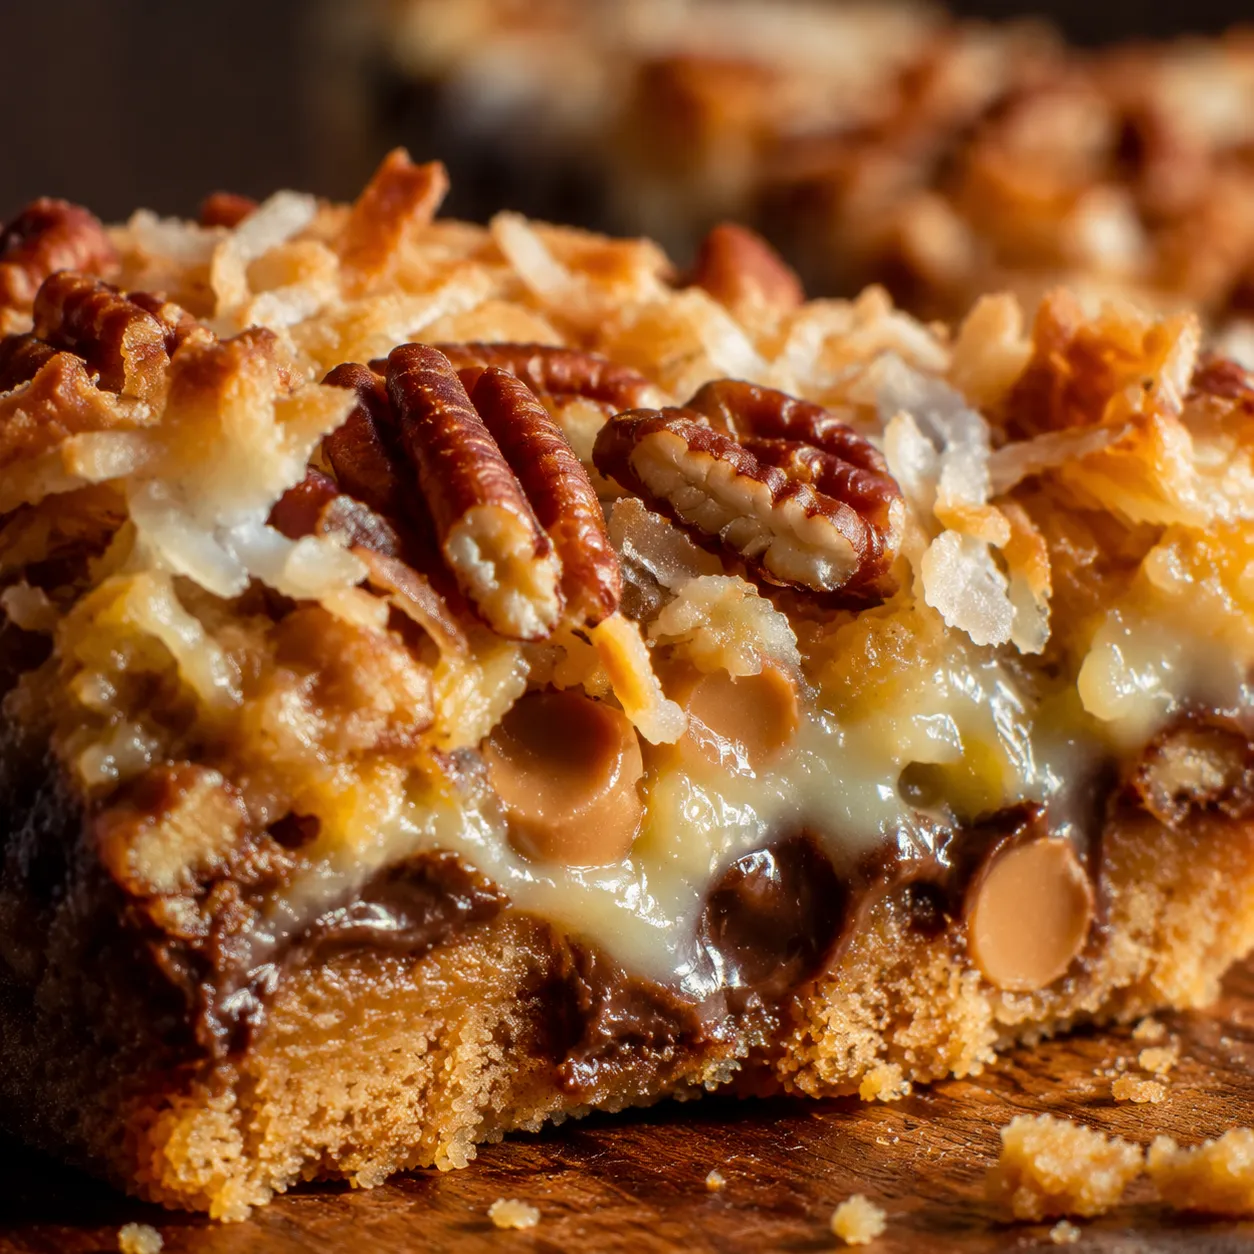
The texture is what really sells it. You get crunch from the graham base, snap from the toasted coconut, chew from the caramelized milk, and a gentle melt from the chocolate and butterscotch chips. Each bite is a little different depending on which ratio of layers you happen to hit. They're often grouped with other coconut pecan bars, but the chocolate-butterscotch combo and the magic of the condensed milk binder put Hello Dollies in their own category.
These belong on the same shortlist as your favorite sweetened condensed milk desserts, the ones where one humble can does all the heavy lifting and the result tastes wildly more complicated than the work involved.
Hello Dollies are perfect at room temperature with a cold glass of milk or a strong cup of coffee, but they have range. Warm one in the microwave for about 8 seconds and serve it with a scoop of vanilla ice cream and a drizzle of warm caramel for an instant sundae situation. Crumble cooled bars over Greek yogurt for a not-quite-virtuous breakfast. Or pack them into a holiday cookie box alongside spritz cookies and gingerbread for a layered, chewy contrast to all the crisp, snappy stuff.
For a party tray, slice them smaller — into 24 or even 32 pieces — so guests can grab a bite without committing to a whole bar. They hold their shape beautifully even at petite sizes, which makes them a smart choice when you need a dessert that looks intentional next to a cheese board or a coffee setup.
Whether you call them Hello Dollies, Magic Bars, or just "those things with the coconut," they earn their reputation every single time. Bake a pan this weekend, hide a few from yourself for Monday morning coffee, and watch the rest disappear faster than you'd expect.
Once you've nailed the classic version, the format begs to be played with. Hello Dollies are a template, not a rulebook — any combination of chips, nuts, and crunchy bits works as long as you keep the total volume of mix-ins about the same.
Hello Dollies keep beautifully thanks to all that condensed milk, which acts as a built-in preservative. Store cooled, sliced bars in an airtight container at room temperature for up to 5 days, or refrigerated for up to 2 weeks. If stacking, slip a small square of parchment between layers so they don't fuse together. They're great cold too — a chilled bar has an almost fudge-like density that some people prefer to the room-temperature version.
For longer storage, freeze them. Wrap individual bars in plastic wrap, then transfer to a freezer bag or airtight container with parchment between layers. They'll keep their texture for up to 3 months. To thaw, leave them on the counter for about 30 minutes, or microwave a frozen bar for 15 seconds for an instant warm dessert. You can also bake the pan a day or two ahead — they actually slice cleaner after a night in the fridge.