Graham Cracker Crust Recipe (Buttery, No-Fail in 10 Minutes)
Ingredients
Scale
A buttery, golden graham cracker crust with the perfect crisp-yet-tender bite. Just 3 pantry ingredients and 10 minutes — the only base recipe you'll ever need.
A truly spectacular graham cracker crust is the unsung hero of the dessert world, quietly providing the structural integrity and textural contrast that makes our favorite sweets so irresistible. It is the buttery, golden foundation that holds up towering layers of cream, rich baked cheeses, and luscious fruit curds. Whether you are whipping up a quick weeknight treat or a show-stopping holiday dessert, having a reliable base recipe changes everything about your baking experience.
For years, I struggled with crusts that were either too dry and crumbly, turning into a dusty mess the moment a fork hit the plate, or so overly greasy that they slid right down the sides of the pan during baking. After endless testing and tweaking, I finally landed on the ultimate foolproof ratio. It takes just 10 minutes to pull together, requires zero fancy equipment, and guarantees a crisp-tender bite that slices beautifully every single time.
Mastering a homemade pie crust from scratch with flour and ice water can be incredibly intimidating, requiring a delicate touch and a watchful eye on temperature. In contrast, this crumb-based version is wonderfully forgiving and accessible to bakers of all skill levels. The magic lies in the precise balance of dry crumbs to fat. When you use the exact right amount of melted butter, it acts as a delicious, golden glue that binds the dry ingredients together without making them soggy.
Many older recipes skimp on the butter or rely heavily on excess sugar to create a hard candy-like shell, which can be tough to cut through. This recipe prioritizes a tender, buttery crust that yields gently to a fork while still holding its distinct shape. By focusing on a tested, mathematical ratio rather than just tossing ingredients into a bowl, you ensure that your dessert has a sturdy, reliable foundation that will never let you down.
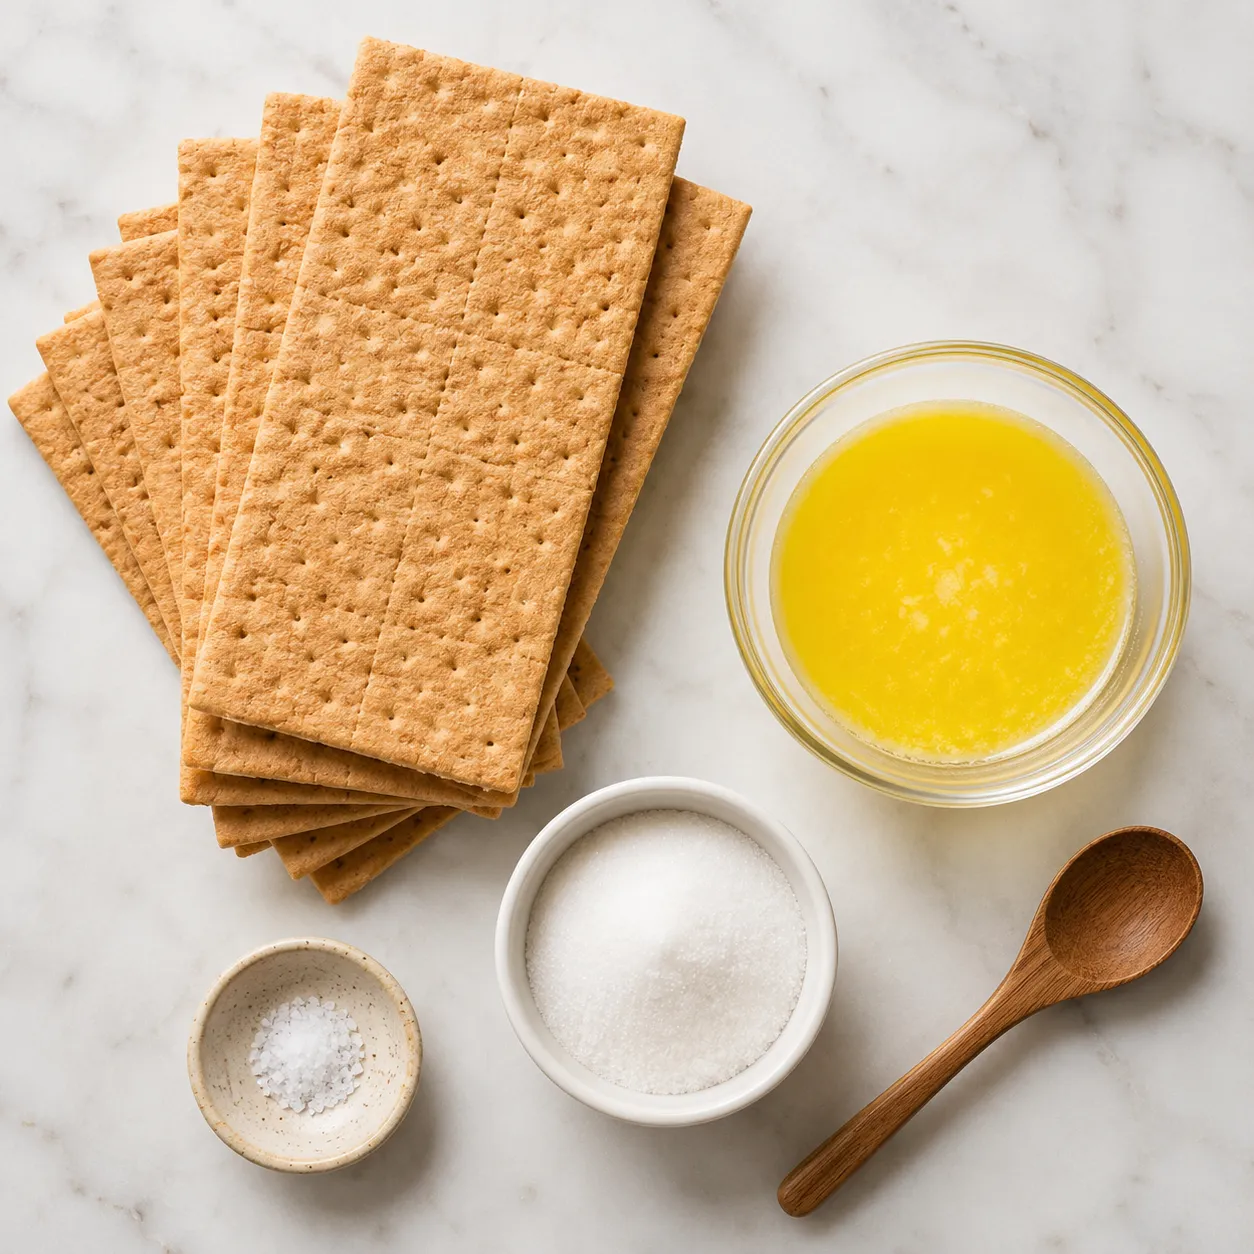
Let's talk about the three simple pantry staples you need to create this masterpiece. First, the star of the show: the crackers themselves. You can absolutely buy boxes of pre-crushed graham cracker crumbs at the grocery store to save a few minutes of prep time. However, many bakers prefer to crush their own from full sheets, as they often taste fresher and have a slightly coarser, more rustic texture that adds character to the final dessert. If you are crushing your own, you will need about 12 full sheets to yield the necessary 1 1/2 cups of crumbs.
Next, you need high-quality unsalted butter. Because this recipe has so few components, the flavor of the butter really shines through, so choose a brand you love. Finally, a touch of granulated sugar is essential. Not only does it add a delicate hint of sweetness, but as the crust bakes, the sugar melts and caramelizes, helping to cement the crumbs together into a crisp shell. I also highly recommend adding a tiny pinch of fine sea salt to the mix; it perfectly balances the sweetness and enhances the toasted, nutty notes of the graham flour.
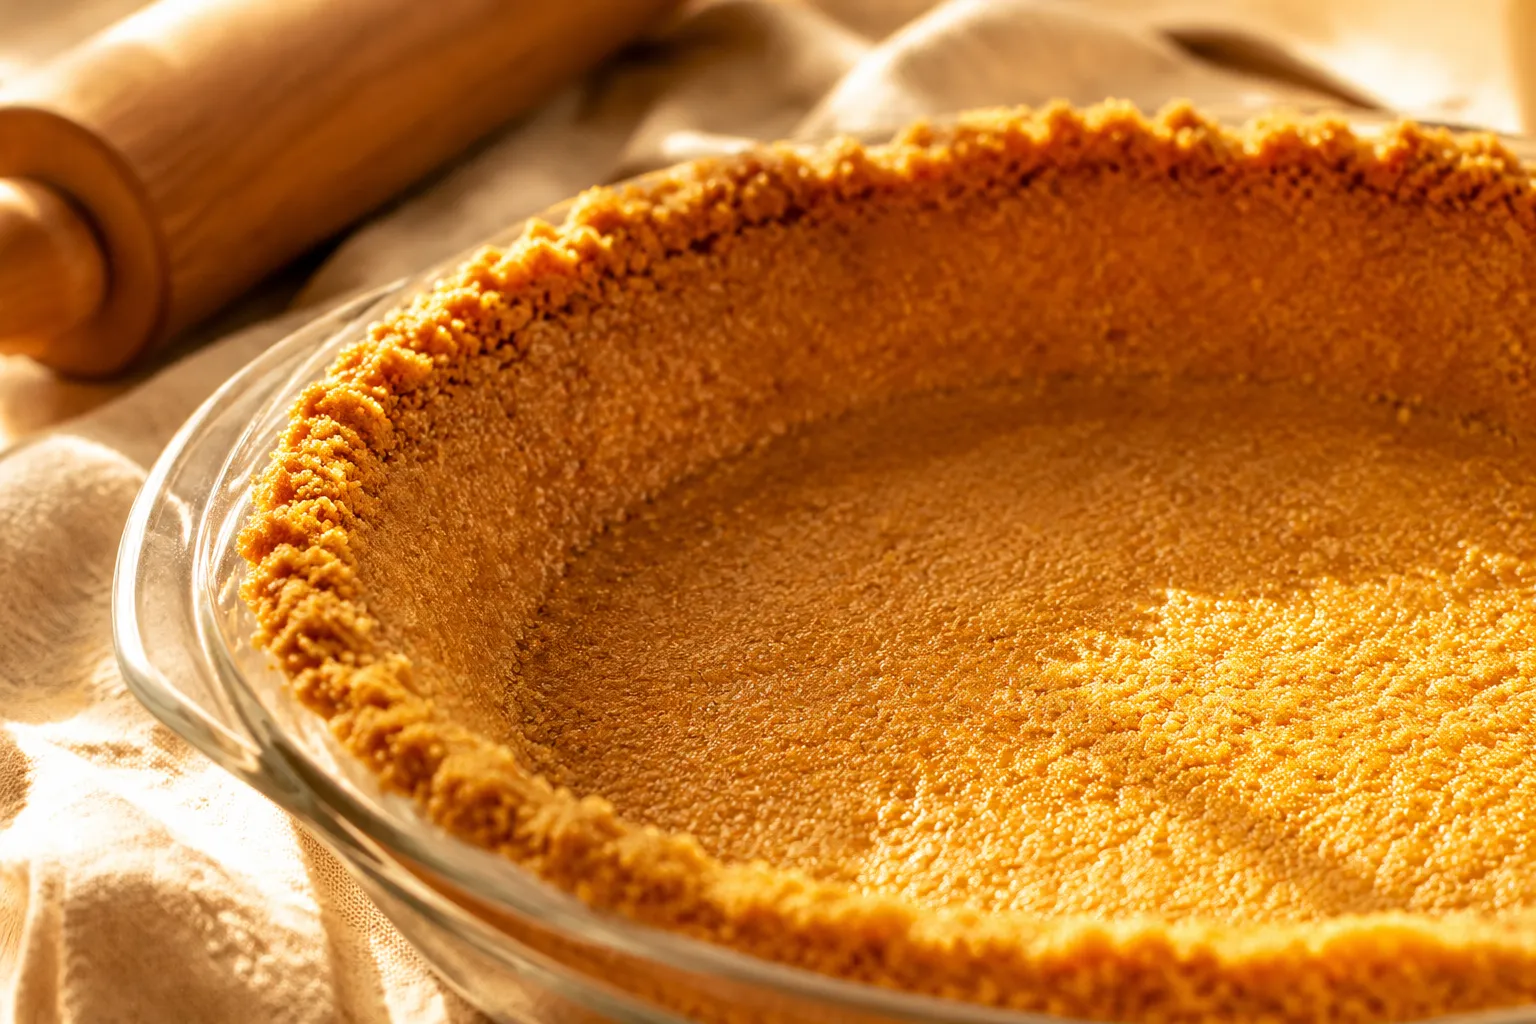
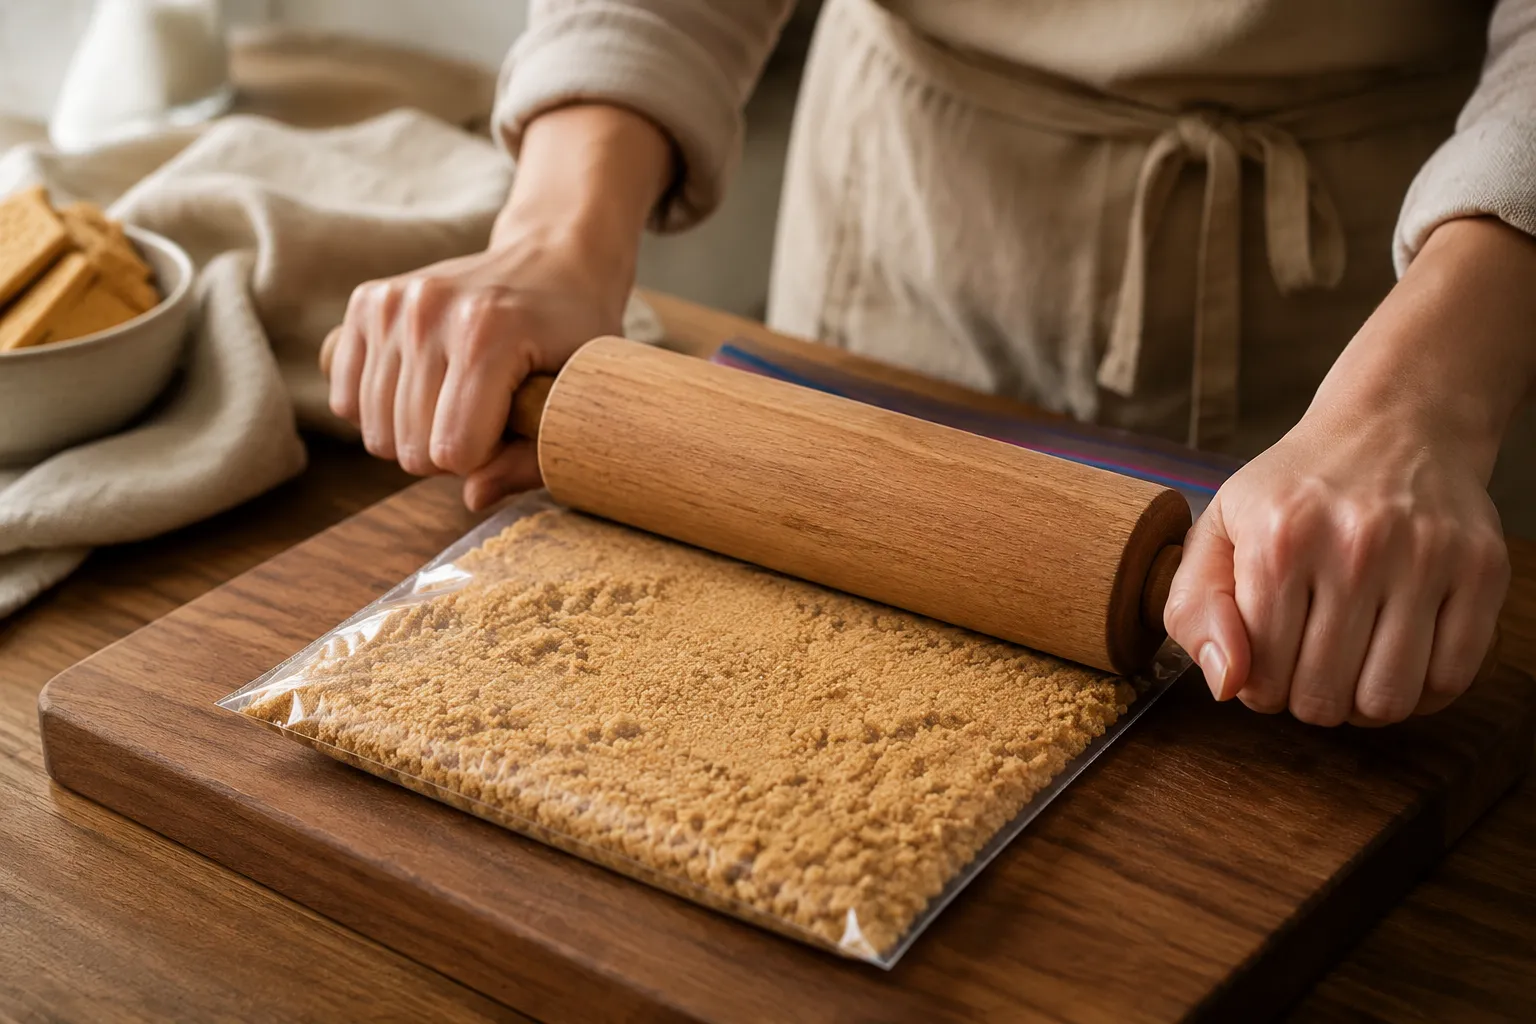
Making this base is wonderfully straightforward and incredibly satisfying. You start by pulverizing your crackers into a fine, sandy texture. If you have a food processor, a few quick pulses will do the job perfectly. If you prefer a more hands-on approach, simply place the crackers in a large zip-top bag, seal it tight, and roll over them with a heavy wooden rolling pin. The key here is consistency; you want to avoid leaving any large, unbroken chunks, which can create weak spots and cause the crust to crack later on.
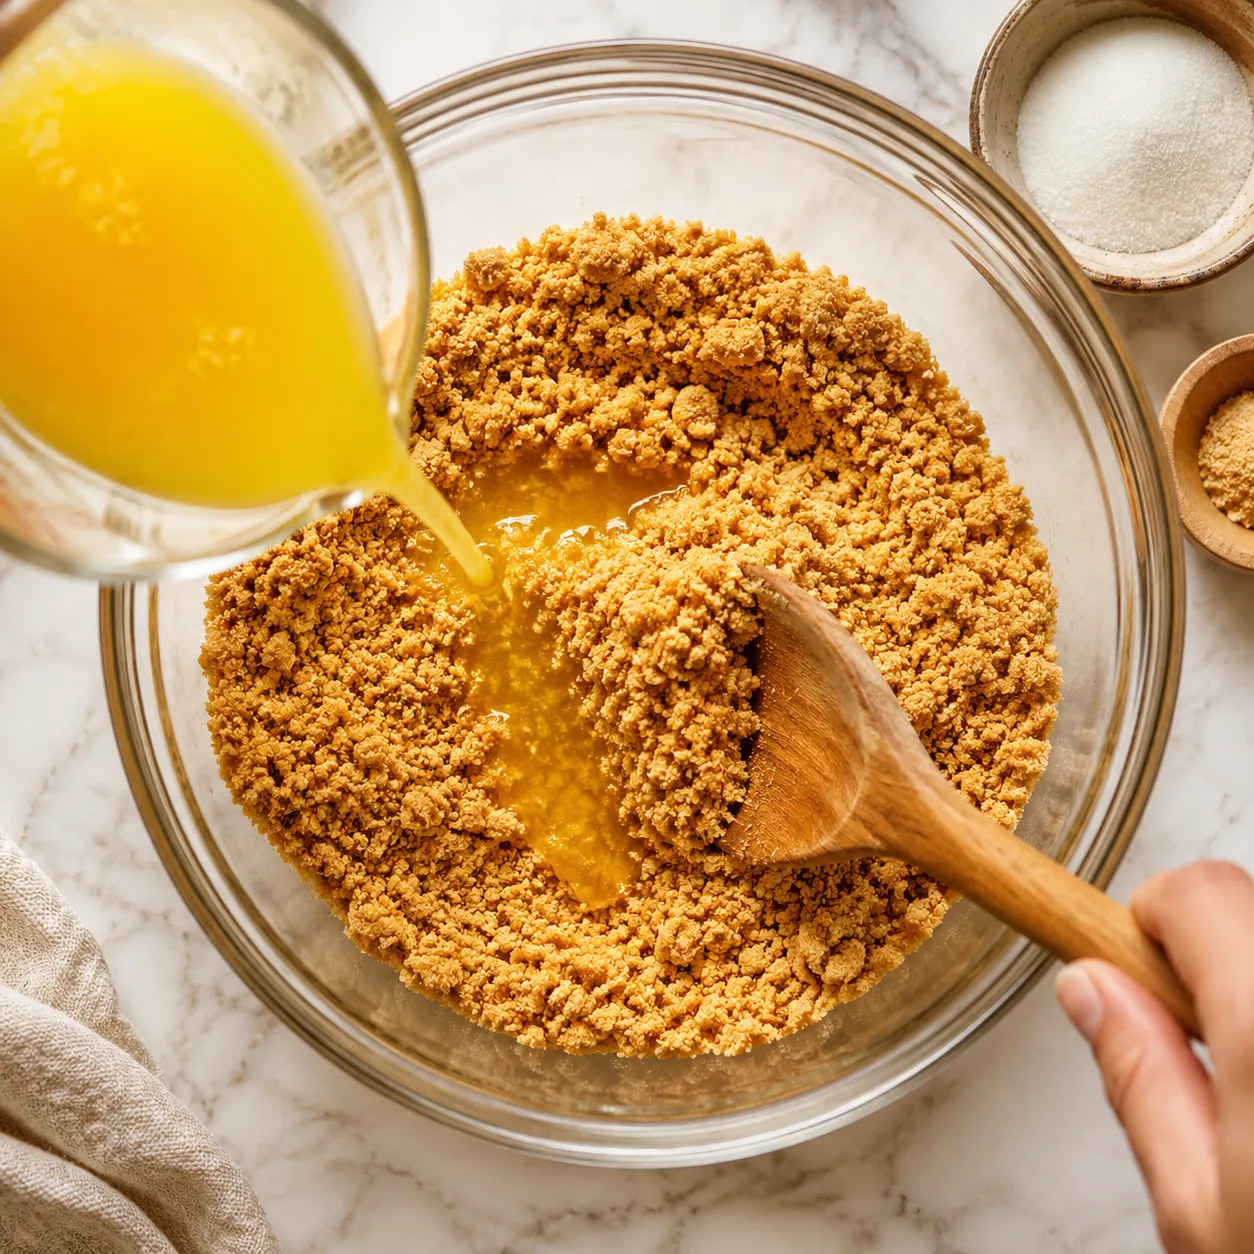
Once your crumbs are fine and uniform, toss them in a mixing bowl with your granulated sugar and that optional, but highly recommended, pinch of salt. Pour in the warm, liquid butter and toss everything together with a fork or a rubber spatula. You are looking for a texture that resembles wet sand.
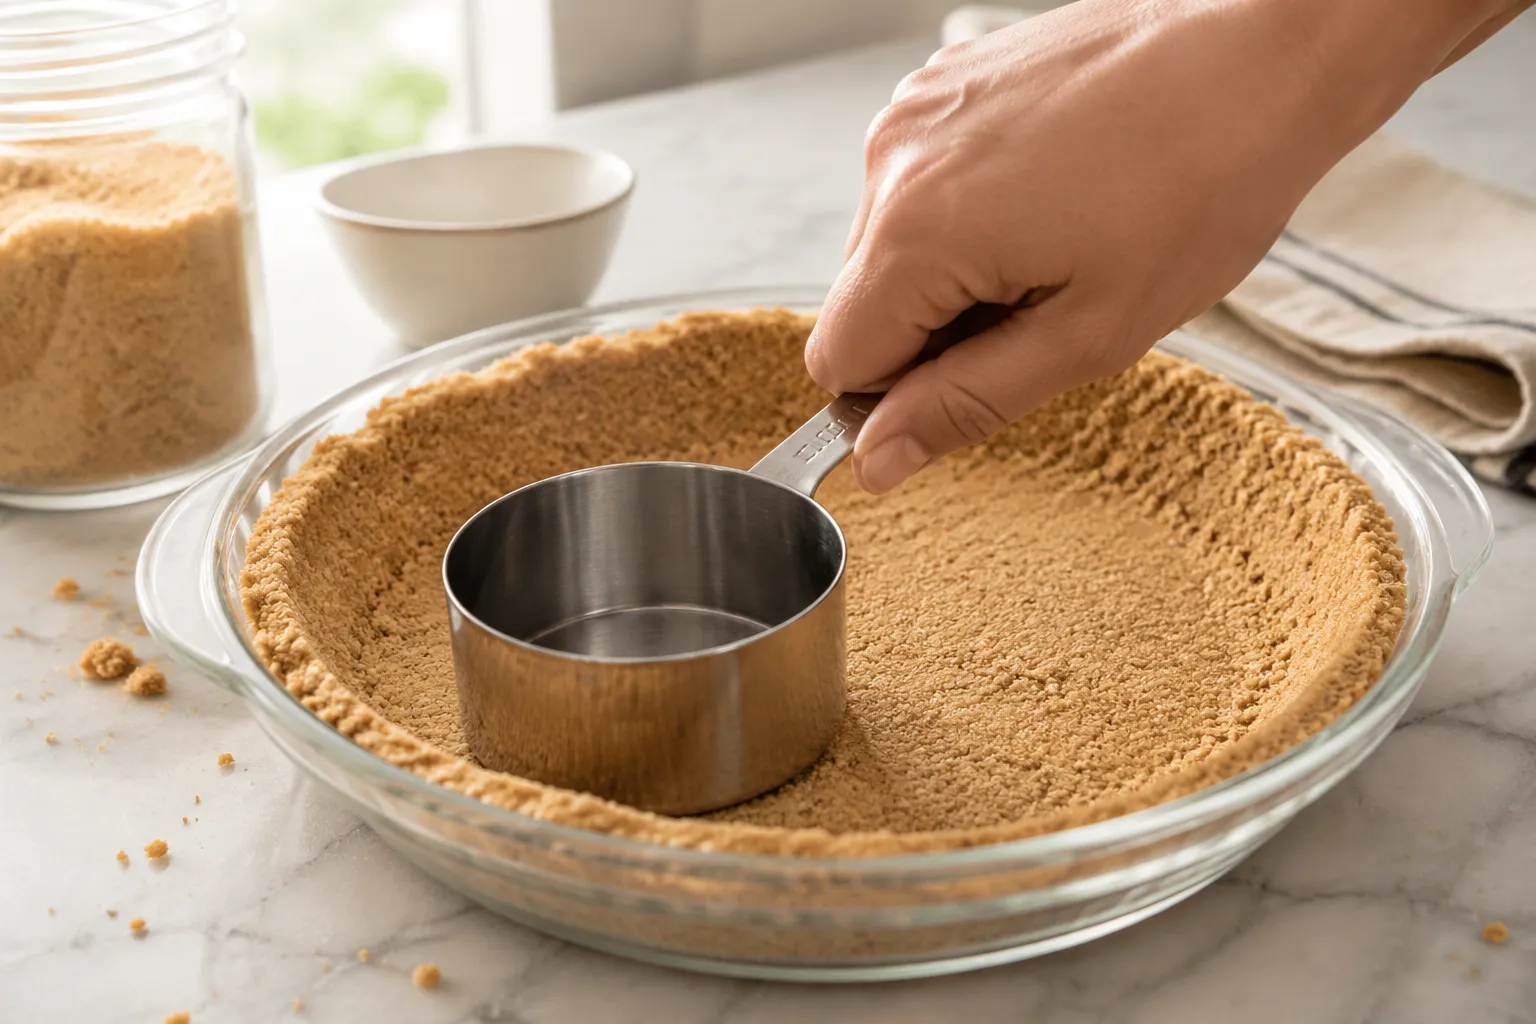
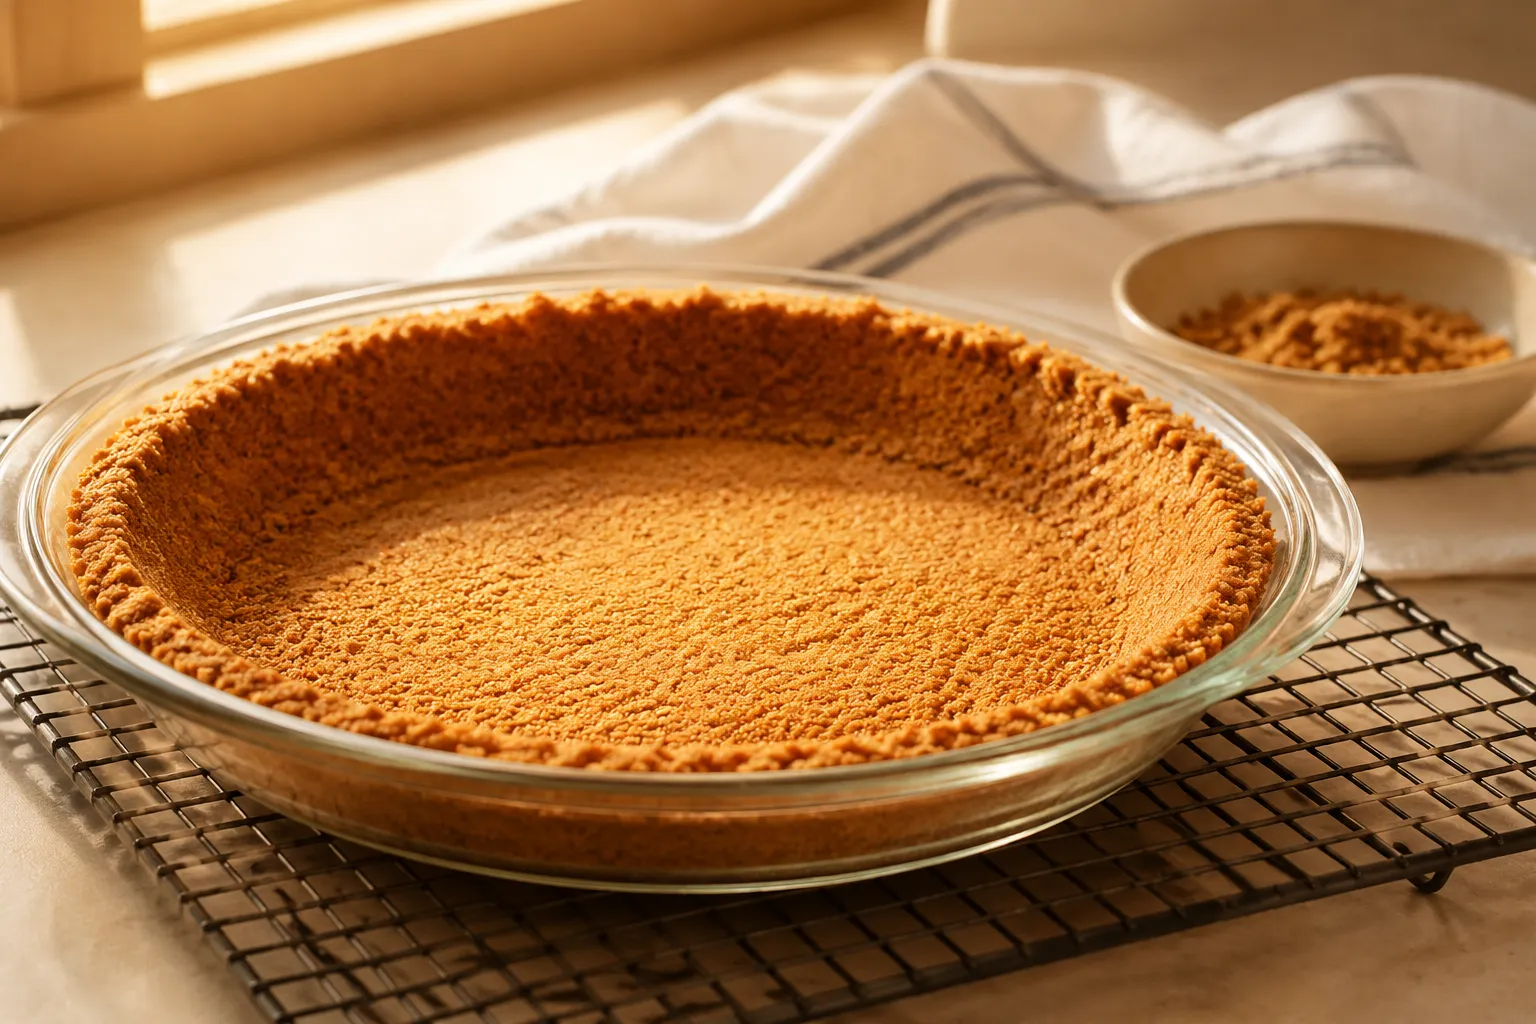
Transfer the buttery crumb mixture into your chosen pan. For standard pies, a classic 9-inch pie pan is exactly what you need. The trick to achieving a professional-looking, razor-sharp finish is using the flat bottom of a stainless steel measuring cup or a smooth drinking glass to press the crumbs firmly and evenly across the bottom and up the sides. Take your time with this step, working the crumbs up the walls of the dish and ensuring the corner where the bottom meets the sides isn't too thick.
The true secret to this graham cracker crust is the precision-tested 3:1:0.5 ratio: three parts crumbs, one part butter, and a half part sugar. This golden ratio ensures your base holds together beautifully, providing structural integrity without becoming rock hard. But what happens when you want to make a dessert that doesn't fit in a standard pie dish? Scaling this recipe is incredibly easy once you know the math.
If you are planning to bake a tall, towering classic cheesecake, you will likely be using a springform pan. To get those beautiful, high walls that reach all the way up the sides of a 9-inch springform pan, you will want to double this recipe entirely. Having a thick crust on a heavy cheesecake is crucial for supporting the dense filling. Similarly, if you are making a large batch of gooey s'mores bars for a potluck, you will be using a 9x13-inch baking dish. You should also double the recipe for a 9x13 pan to ensure a thick, sturdy bottom layer that can support heavy chocolate and marshmallow toppings without falling apart in your hands.
One of the most frequently asked questions in baking is whether you actually need to bake a crumb crust. The short answer is: it completely depends on your filling! If you are making a light, fluffy no-bake cheesecake, you can simply pop the pressed crust into the refrigerator or freezer to chill. The cold temperature hardens the melted butter, setting the crust firmly in place without ever needing to turn on the oven.
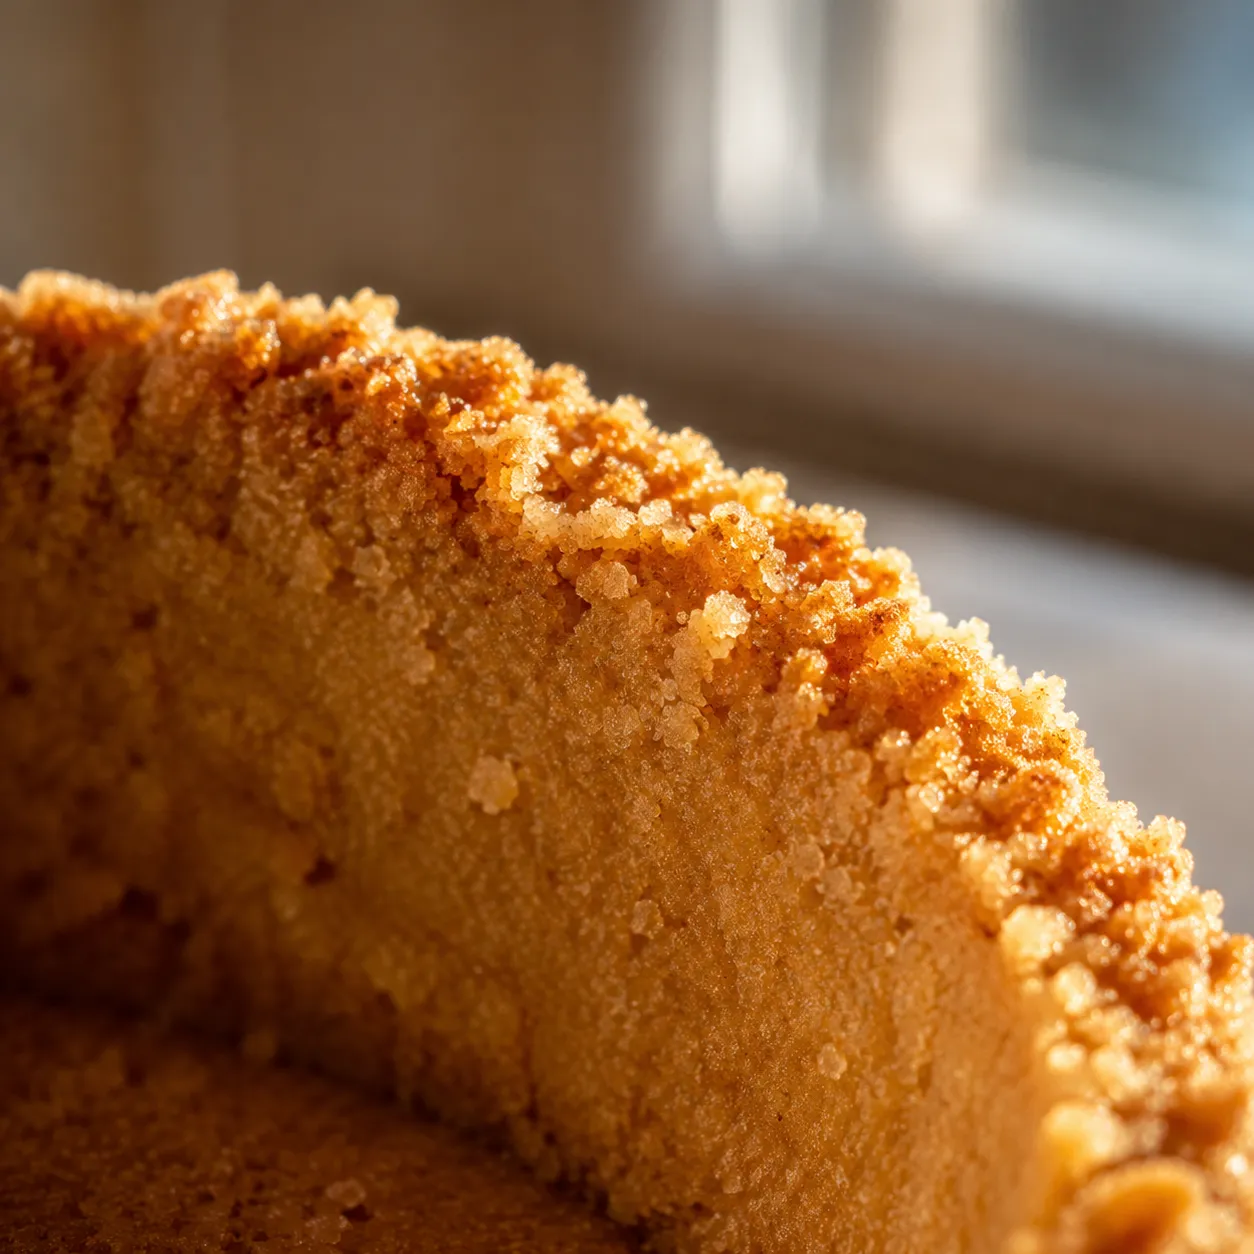
However, if you want the absolute best flavor and a delightfully crunchy texture, I highly recommend that you pre-bake it, even for fillings that aren't going in the oven. Baking the crust for just 10 minutes at 350°F toasts the graham flour, bringing out incredible nutty aromas. More importantly, the heat melts the sugar slightly, binding everything together and creating a sturdier, crispier base that stands up beautifully to wet fillings.
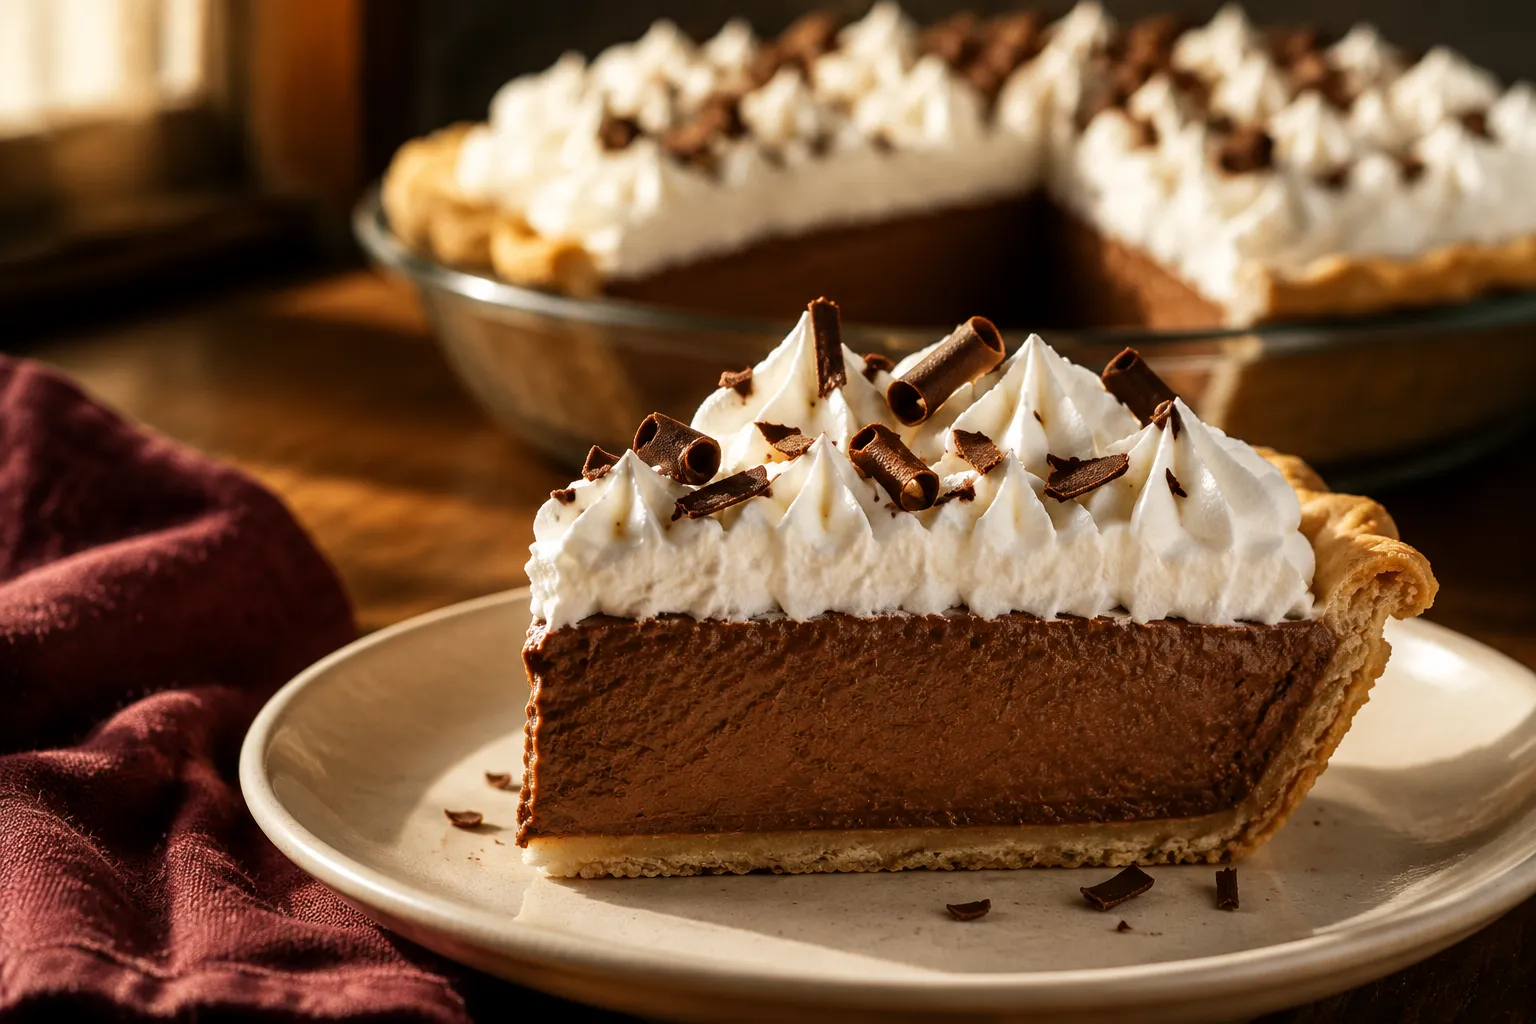
This versatile graham cracker crust is the starting point for so many incredible, crowd-pleasing desserts. It is the traditional, non-negotiable base for a tangy, refreshing key lime pie, providing the perfect sweet, toasted contrast to the sharp citrus filling. The slight crunch of the crumbs against a smooth, creamy filling is a textural match made in heaven.
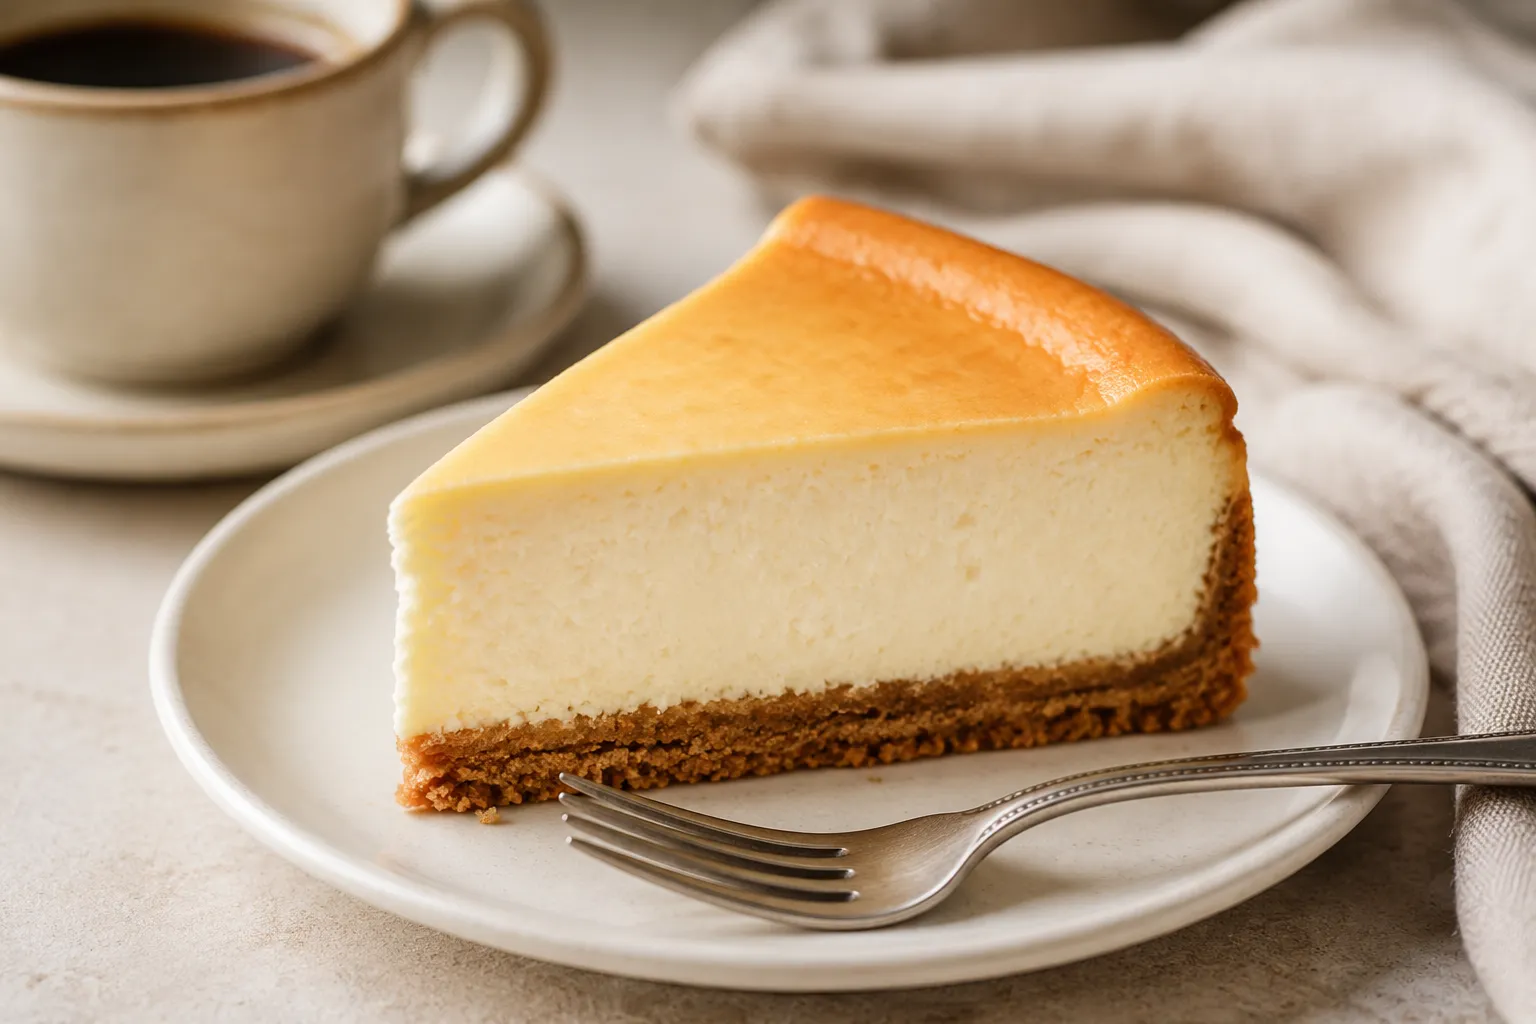
It is also absolutely phenomenal when filled with lush, creamy puddings or mousses. Try using it for a rich French silk chocolate pie, a peanut butter mousse pie, or an old-fashioned banana cream pie piled high with freshly whipped cream. The buttery, honey-laced flavor profile complements almost any filling you can dream up. Whether you are keeping things simple with a quick summer ice cream pie or layering it with complex, multi-step pastry creams, this base is the reliable workhorse your recipe box needs.
When hosting a dinner party, preparing for a holiday feast, or simply trying to get ahead of a busy weekend, getting a head start on your baking is an absolute lifesaver. Thankfully, this graham cracker crust is wonderfully prep-friendly and holds up beautifully over time. You can easily assemble the crust in your pie dish days before you actually need to serve your final dessert.
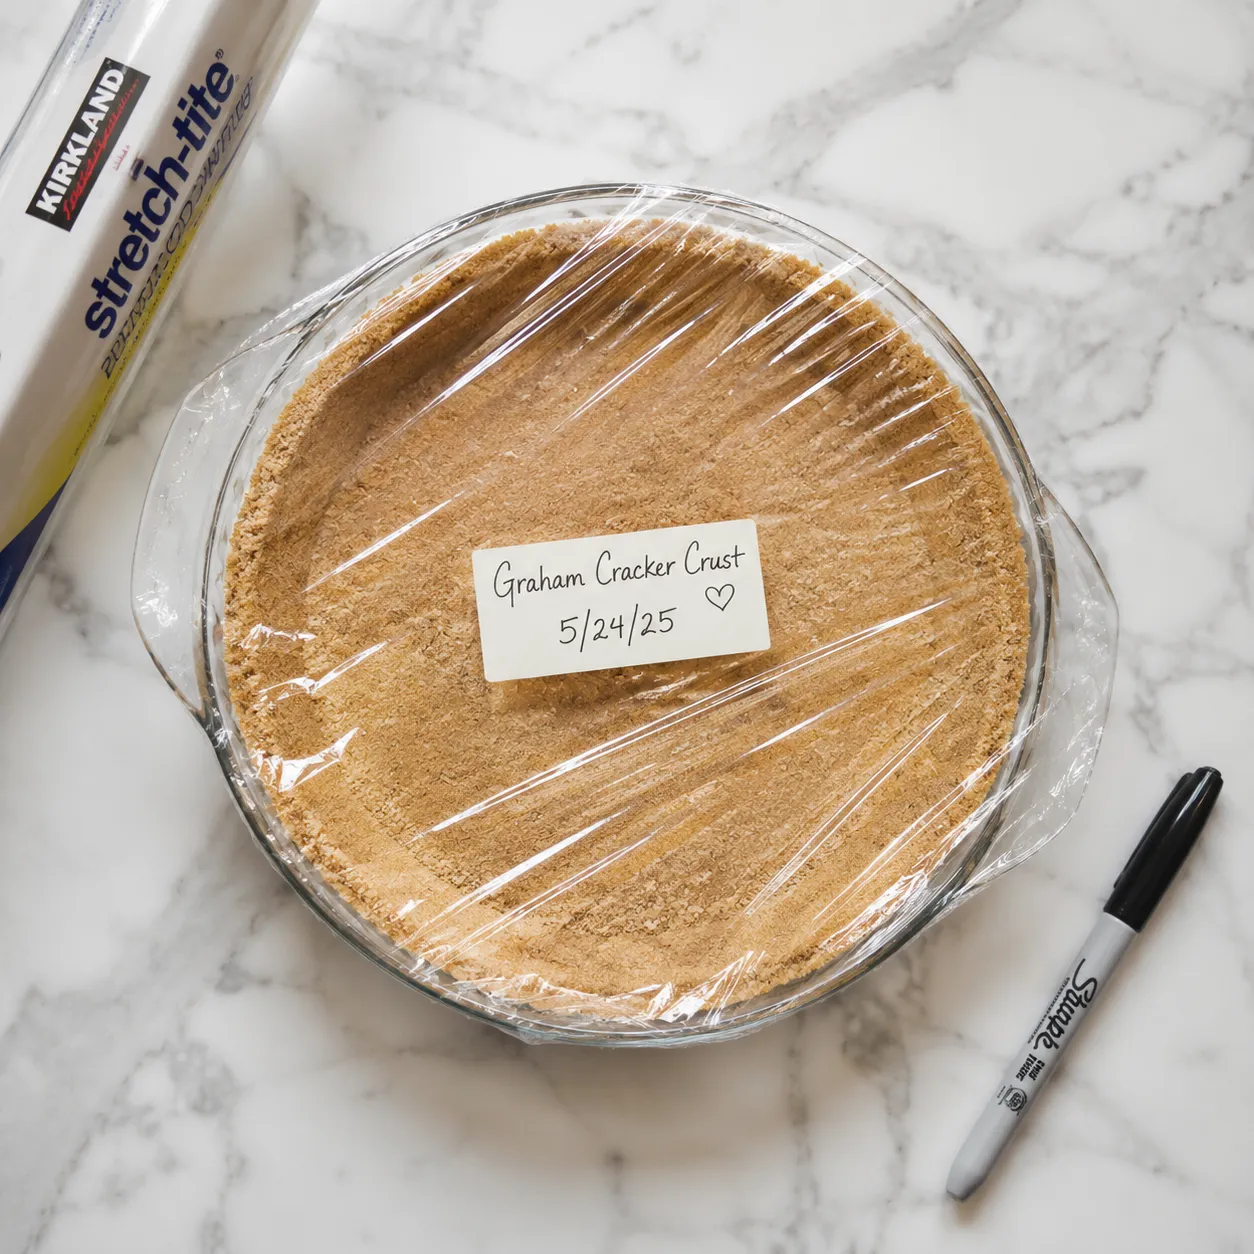
Simply press the mixture into your pan, whether you choose to bake it or leave it unbaked, and let it cool completely if it went into the oven. Wrap it tightly in plastic wrap to protect it from absorbing any stray odors, and keep it tucked away in the fridge or freezer until you're ready to fill it. Having the base completely finished and ready to go makes assembling a last-minute dessert feel completely effortless. It’s a small, simple step that yields massive rewards in the kitchen, giving you more time to focus on your guests and less time stressing over crumbly messes.
Once you master the basic ratio, this crust is incredibly easy to customize to complement different fillings. Here are a few of our favorite ways to switch up the flavor profile:
Refrigerator storage: An unbaked or fully baked and cooled crust can be wrapped tightly in plastic wrap and stored in the refrigerator for up to 3 days before you plan to fill it. This makes it an excellent make-ahead option for holiday baking.
Freezing instructions: For longer storage, wrap the crust (still in its pan) in a layer of plastic wrap followed by a layer of aluminum foil. It can be frozen for up to 2 months. You can pour most fillings directly into the frozen crust, or let it sit at room temperature for 20 minutes before using.