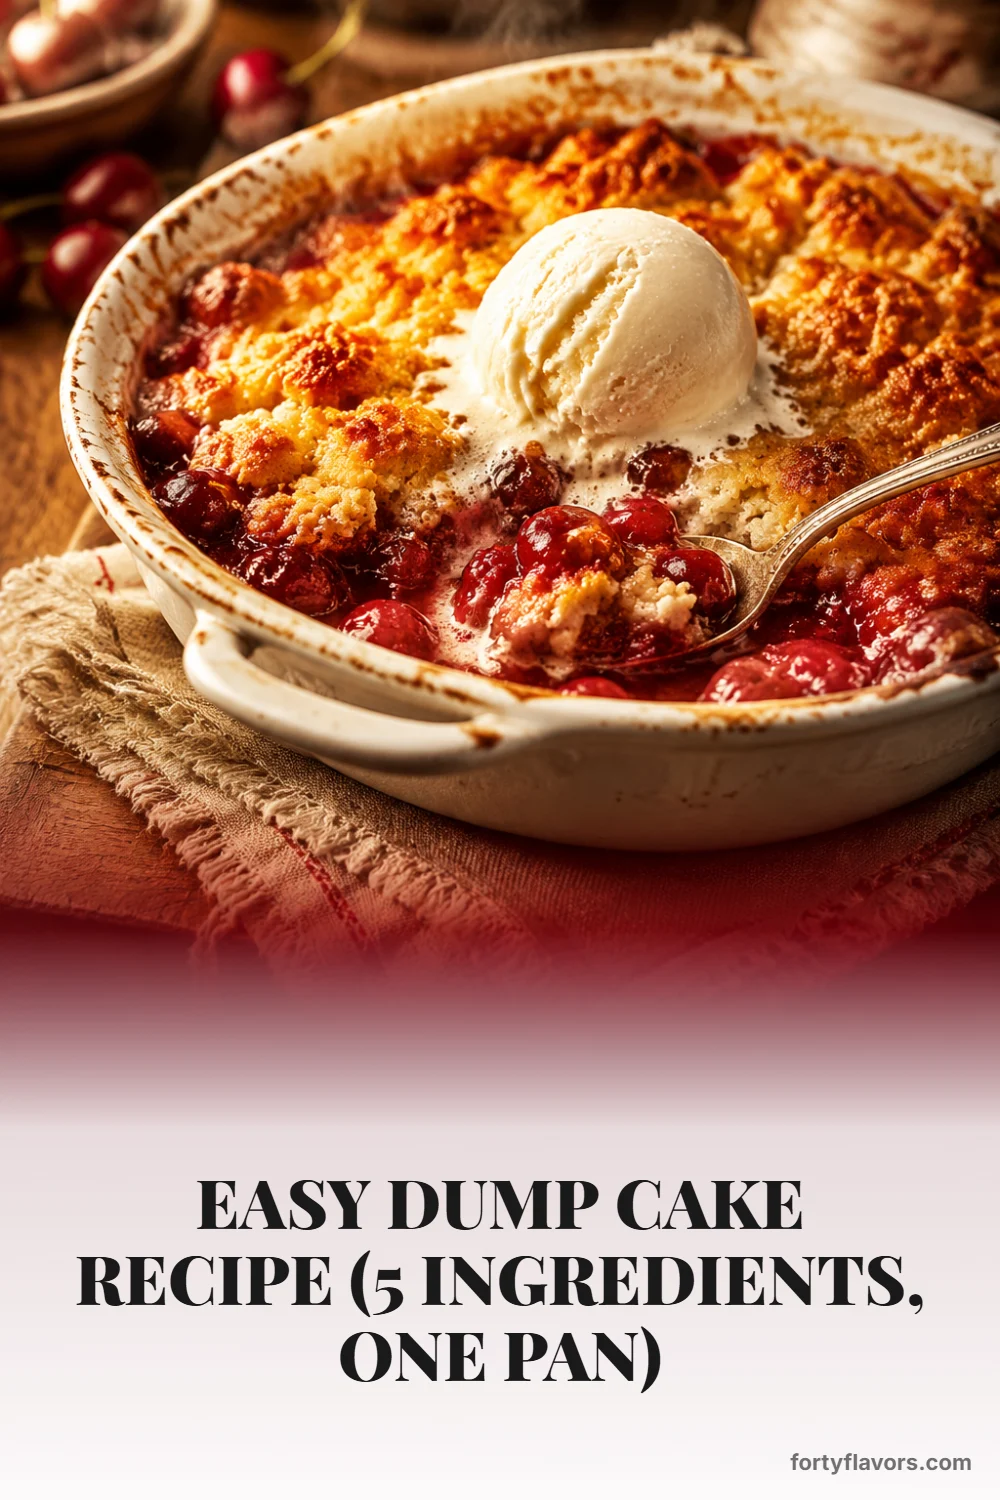
Dump cake is the lazy baker's best friend: dump canned fruit and cake mix in a pan, top with butter, bake until golden and bubbly.
Why You'll Love This Recipe
- Five ingredients, one pan: Everything layers directly into a 9x13 baking dish, so cleanup is refreshingly minimal.
- Beginner-friendly: There is no batter to mix, no crust to roll, and no frosting to fuss over—just layer, bake, and serve.
- Big payoff for pantry staples: Canned fruit, boxed cake mix, and butter turn into a bubbling, golden dessert that tastes far more special than the effort required.
- Perfect for sharing: It serves 12 and travels well, making it ideal for potlucks, family dinners, and casual holidays.
- Easy to customize: Swap the fruit filling, cake mix flavor, or nuts to match the season or whatever is already in your cupboard.
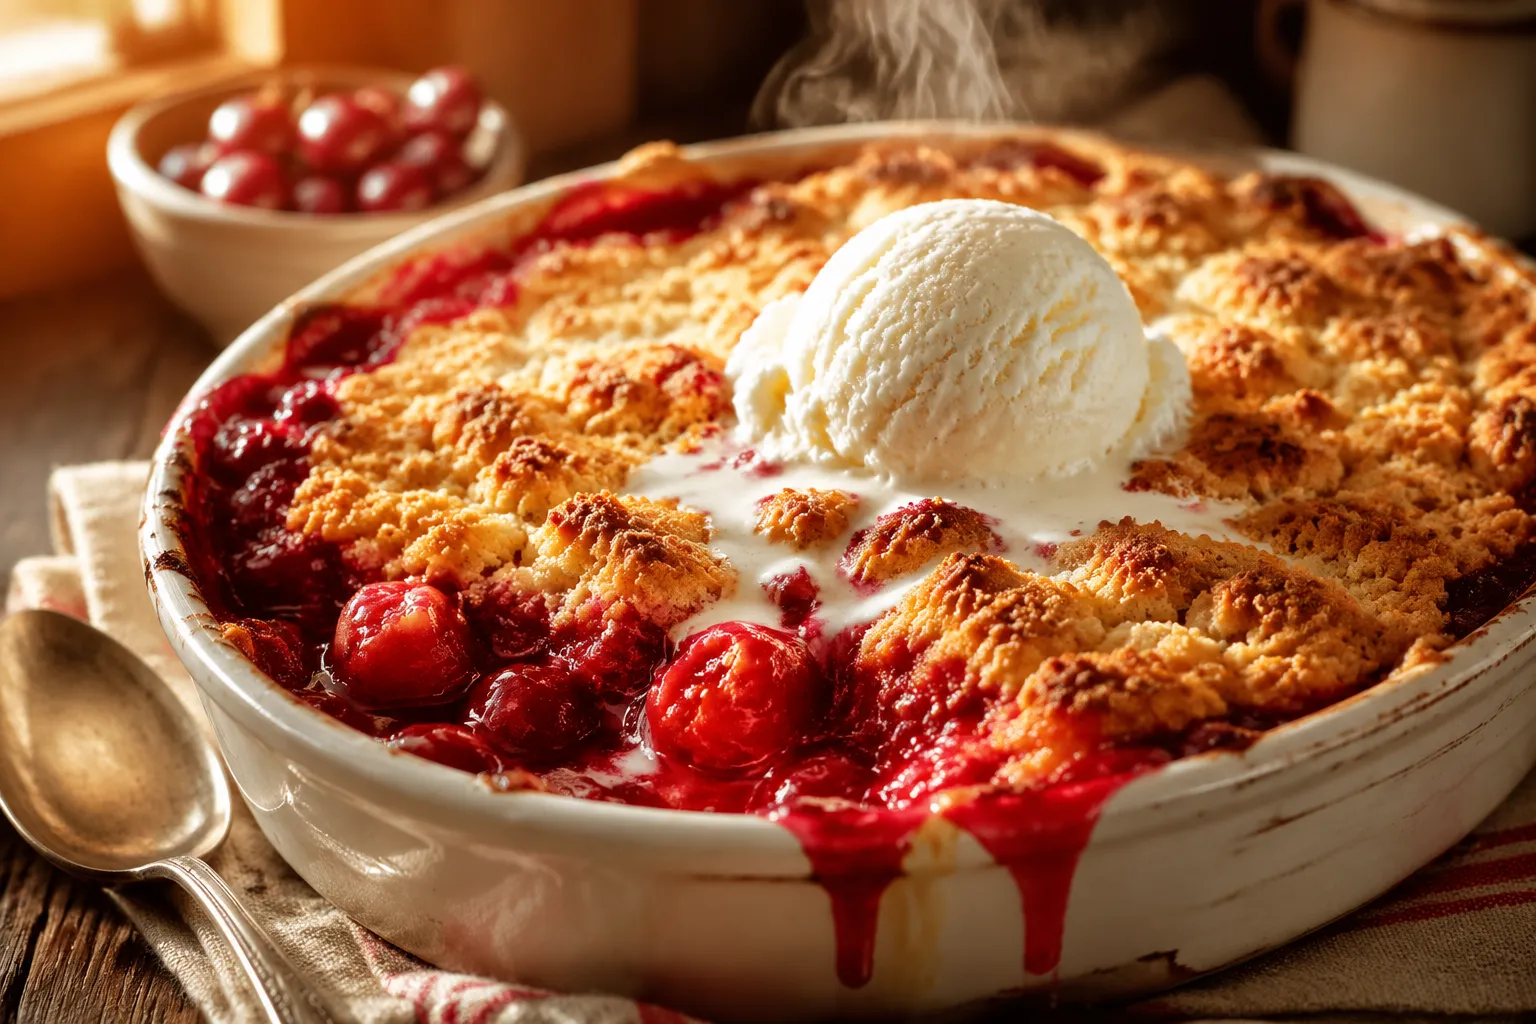
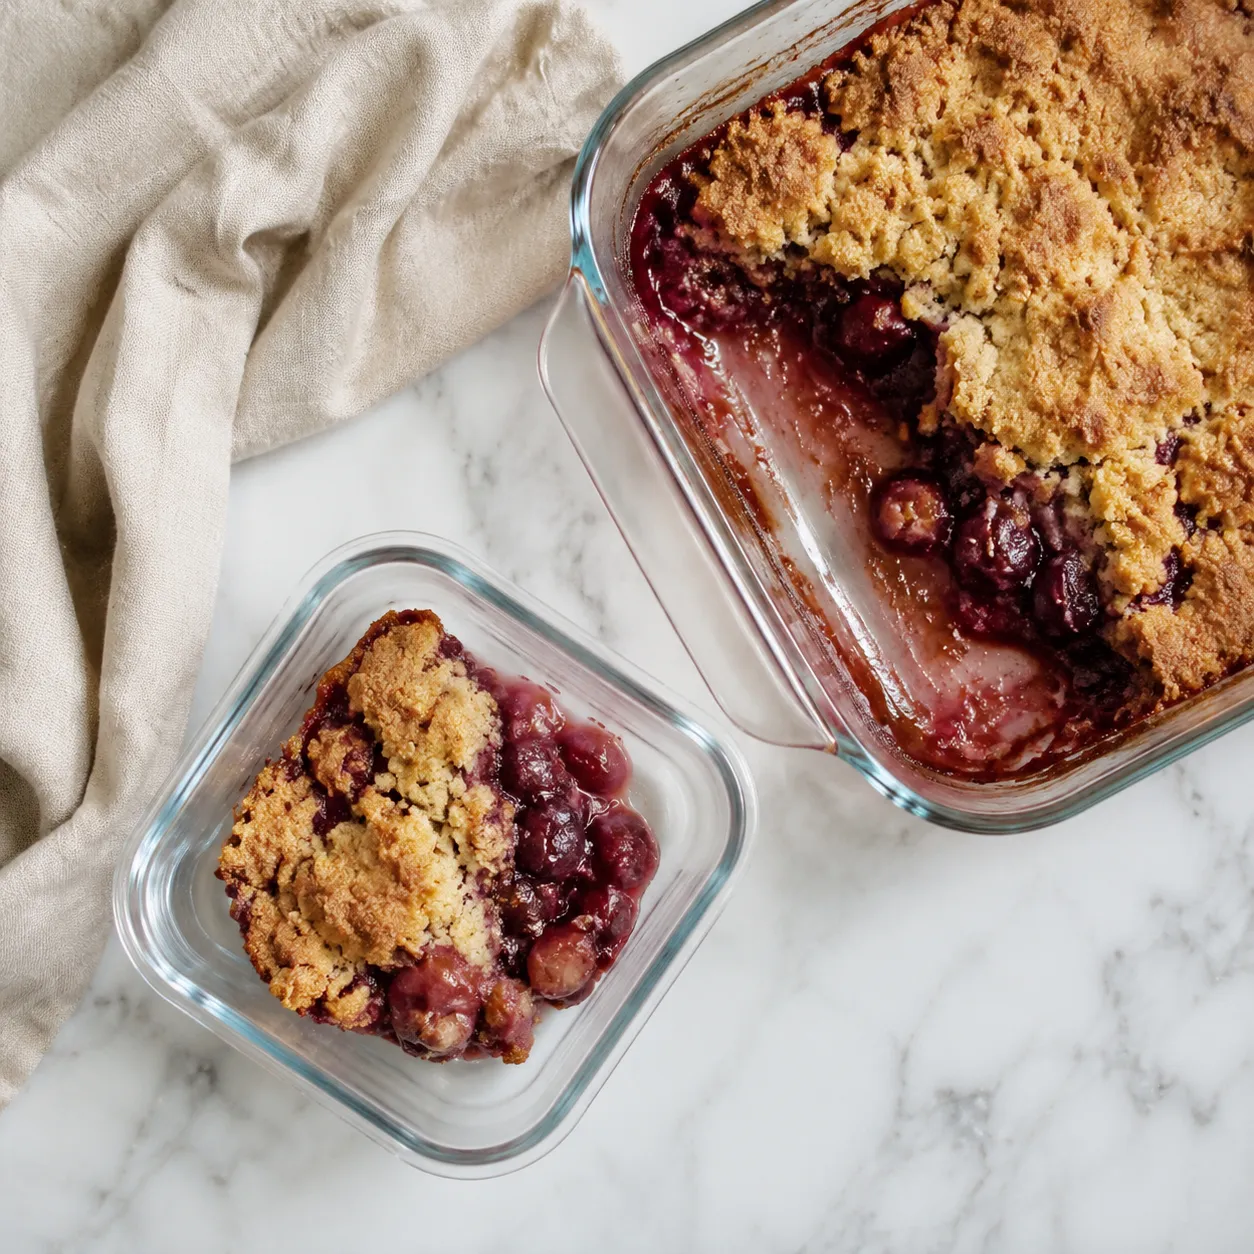
dump cake is the kind of old-school, one-pan dessert that makes busy weeknights, last-minute guests, and neighborhood gatherings feel easy. You layer juicy canned fruit in a baking dish, shower it with dry cake mix, cover it with butter, and let the oven do the rest. What comes out is bubbly around the edges, crisp and golden on top, and spoonably soft underneath—somewhere between a cobbler, a crumble, and the easiest cake you will ever make.
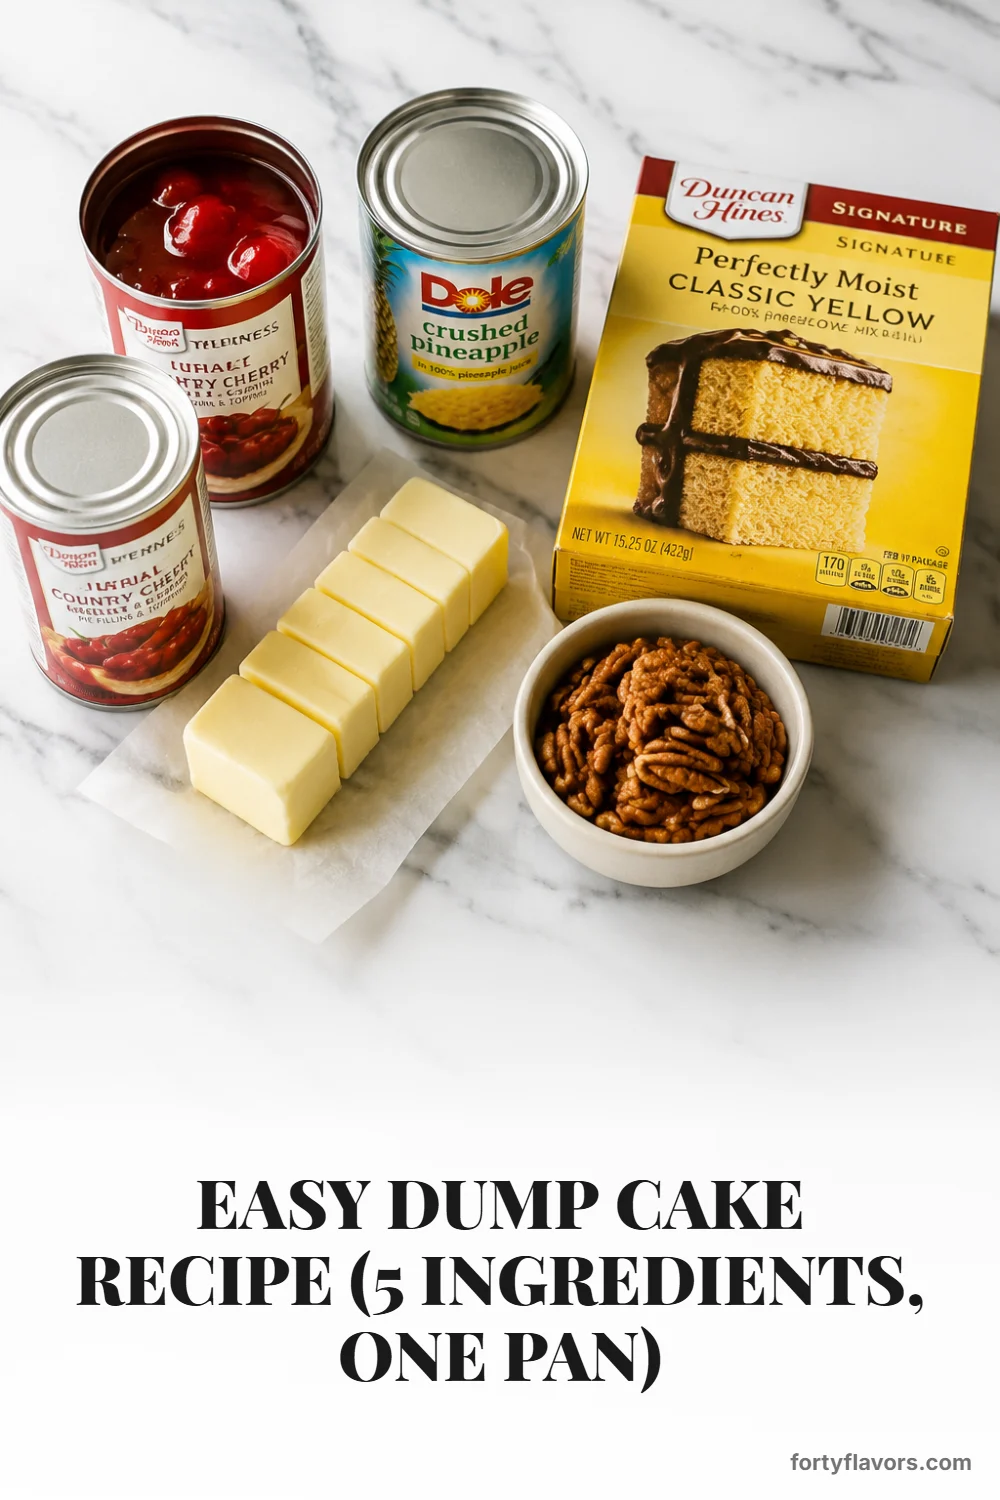
This version leans into the classic cherry-pineapple combination: ruby cherry pie filling, sunny crushed pineapple, yellow cake mix, cold butter slices, and pecans if you like a little crunch. The small upgrade that makes it feel bakery-worthy is the butter technique—thin, even slices placed over the surface so every bit of cake mix gets a chance to toast. Finish with a quick broil, and you get that irresistible golden cap that crackles under a spoon.
What Is a Classic Fruit Dump Cake?
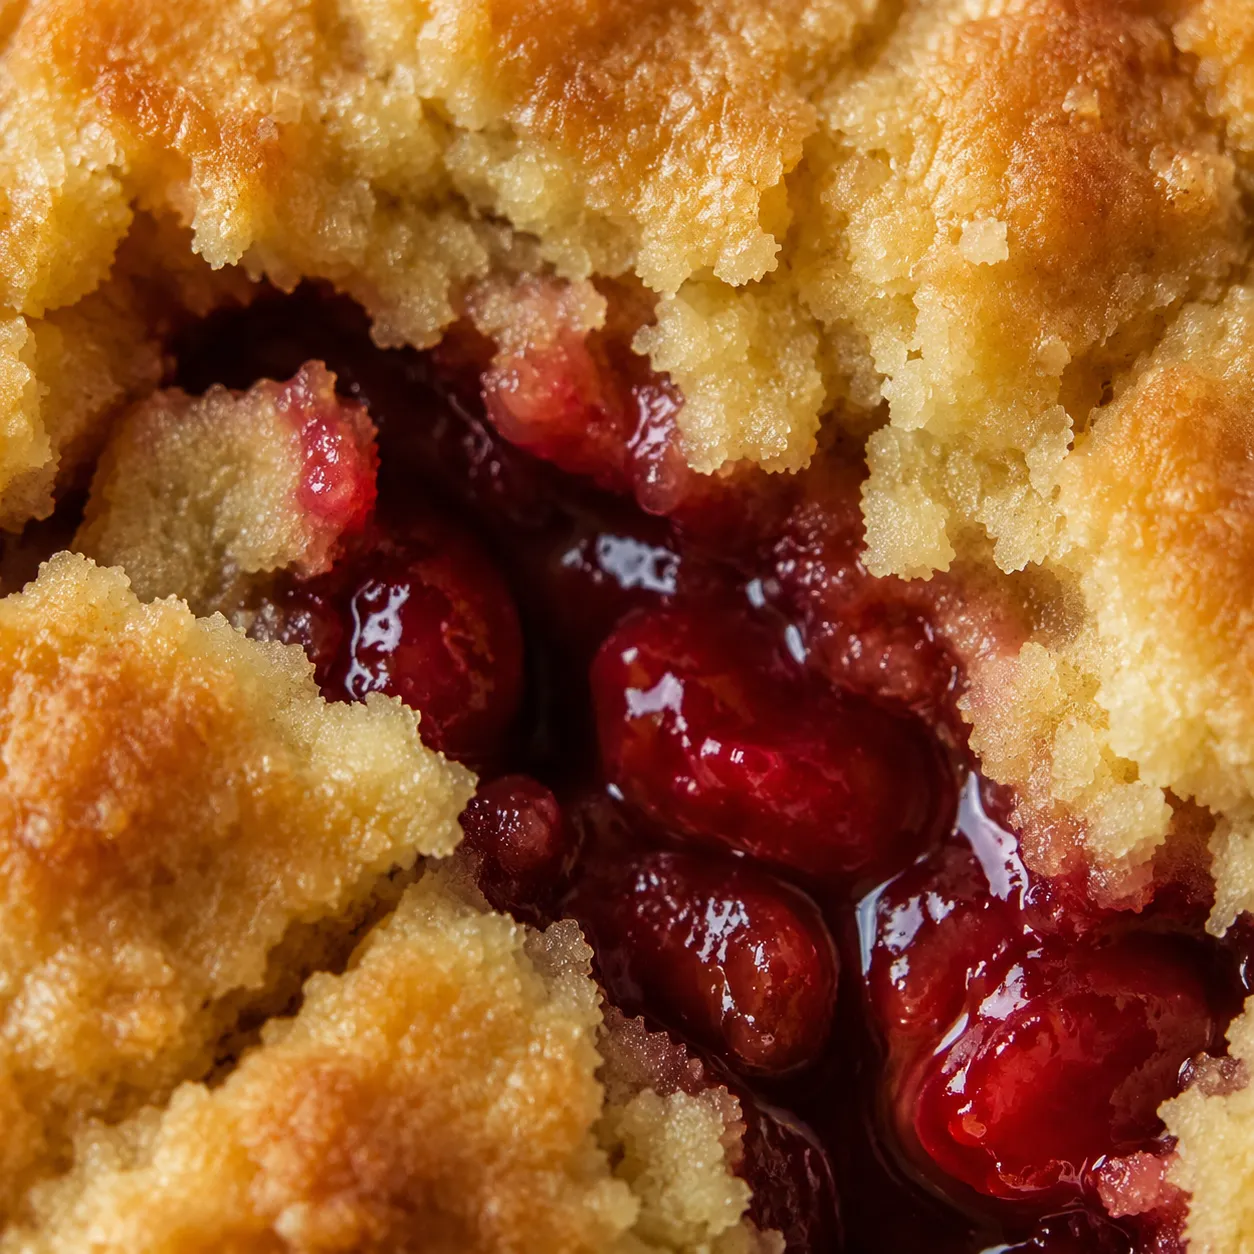
At its simplest, this dessert is exactly what the name promises: ingredients are “dumped” into a pan in layers rather than mixed into a batter. The fruit goes on the bottom, dry cake mix goes over the top, and butter melts down through the mix as it bakes. The fruit bubbles up into the topping, creating pockets of syrupy filling beneath a buttery, crumbly crust. It is beloved because it tastes like a homemade cherry pie filling dessert, but it asks for almost none of the labor of pie dough, lattice, or chilling time.
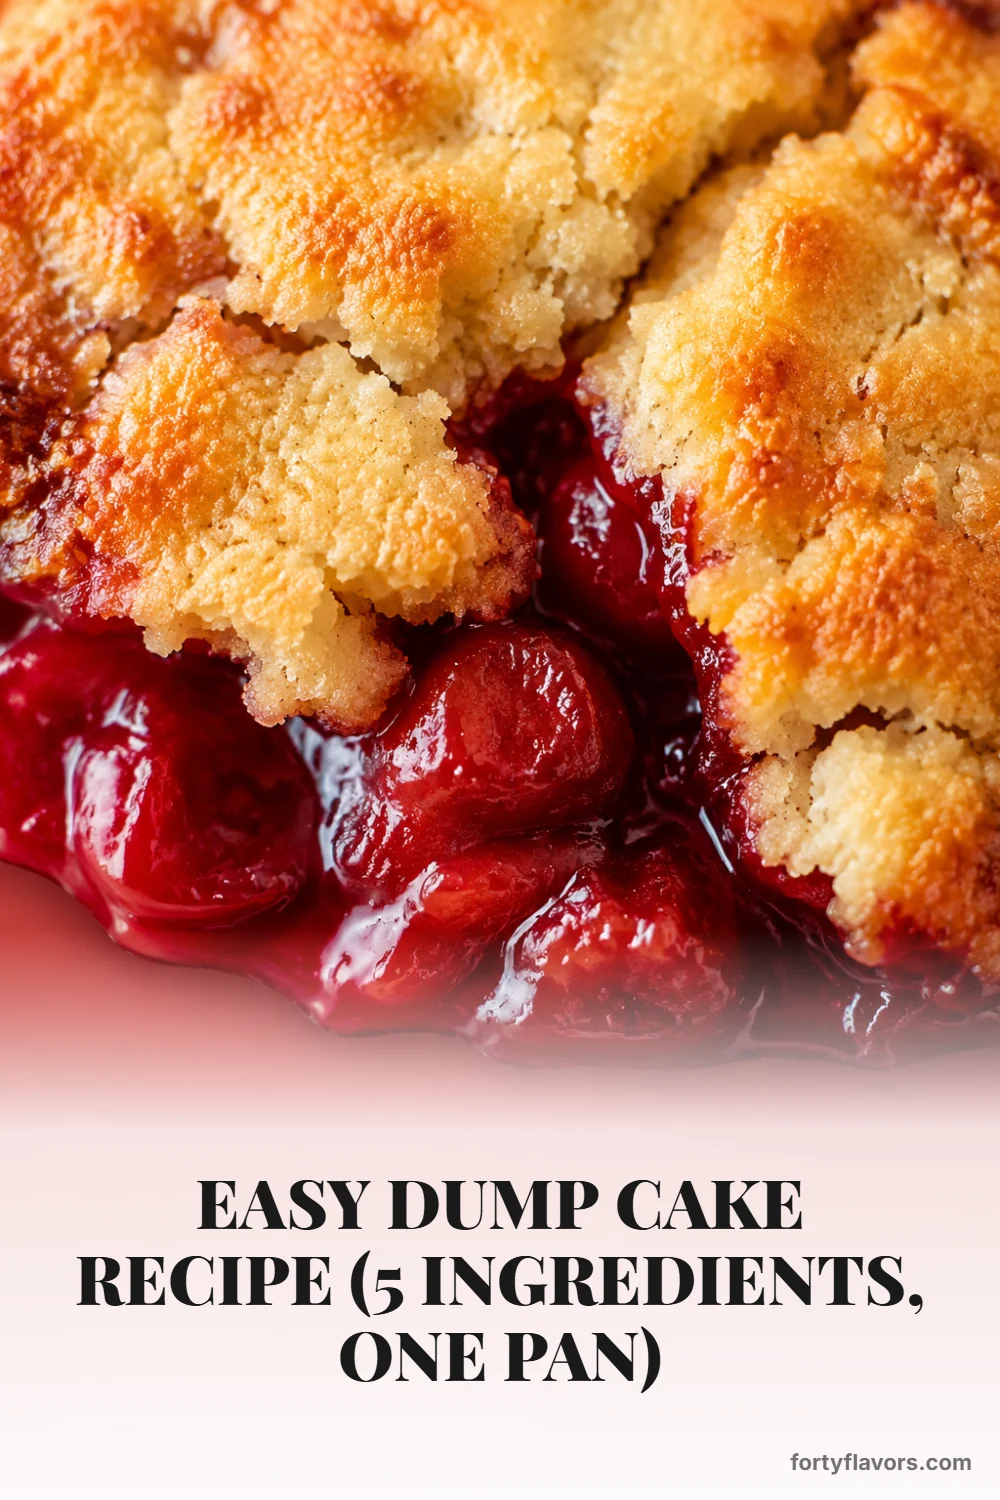
The texture is what makes it so nostalgic. The edges get jammy and caramelized, the center stays plush and scoopable, and the top lands somewhere between a tender cake crumb and a crisp streusel. It is not meant to slice into neat bakery squares; it is a spoon dessert, best served warm in bowls. If you grew up with church suppers, family reunions, or potluck desserts lined up on folding tables, this one probably feels familiar.
Dump Cake vs. Cobbler vs. Crisp
A cobbler usually has a biscuit, batter, or dumpling-style topping spooned over fruit, while a crisp relies on oats, flour, sugar, and butter for a crunchy topping. This easy fruit cobbler-style dessert borrows from both, but uses boxed cake mix as the shortcut. That means you get the buttery top of a crisp and the soft, syrupy fruit base of a cobbler without making a separate dough.
The biggest difference is the layering. A true cake batter is stirred together before baking, but here the dry mix stays on top and hydrates as the fruit juices steam and the butter melts. That is why you should resist the urge to stir everything together. The contrast between the juicy bottom and the golden top is the whole point.
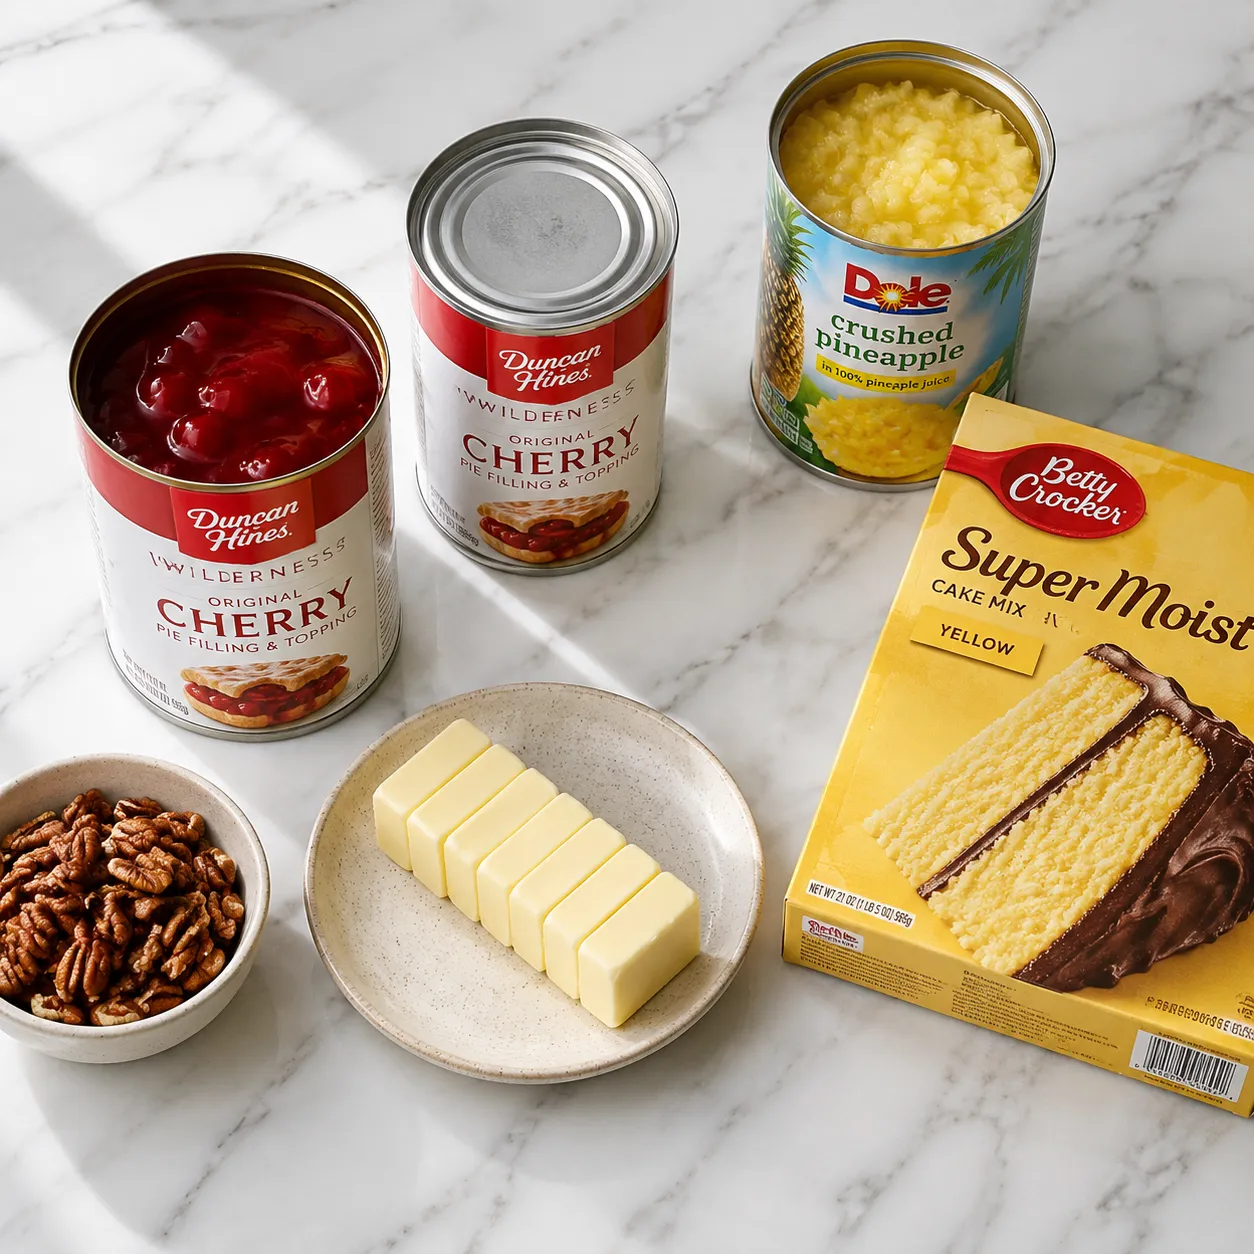
Ingredients You’ll Need for a 5-Ingredient Dessert
You only need a handful of pantry staples, which is why this is one of my favorite canned pie filling recipes to keep in my back pocket. Two cans of cherry pie filling create a thick, glossy fruit layer with just the right balance of sweet and tart. A can of crushed pineapple, added undrained, brings brightness and enough juice to help the topping soften underneath while still crisping on top.
The topping starts with yellow cake mix, which is classic for its buttery vanilla flavor and beautiful color. If you love browsing yellow cake mix recipes, this is one of the easiest ways to turn a box into something that tastes warm, homemade, and generous. Cold unsalted butter is the secret to even coverage: slice it thinly and arrange it over the dry mix like shingles on a roof. Pecans are optional, but they toast beautifully and add a nutty crunch against the jammy fruit.
The Best Pan for a One-Pan Cake Mix Dessert
A 9x13 baking dish is the sweet spot for this recipe because it gives the fruit enough surface area to bubble and the topping enough room to brown evenly. Ceramic, glass, or metal all work, though the bake time can vary slightly depending on the material. Glass and ceramic hold heat well and make a pretty serving dish, while metal often browns the edges a little faster.
Lightly greasing the pan makes serving easier, especially around those sticky cherry edges. You do not need parchment, and you do not need a mixer, bowls, or special tools. A small offset spatula or the back of a spoon is helpful for gently spreading the fruit and leveling the cake mix, but even that can be done casually. This is the kind of dessert that rewards relaxed baking.
How to Make This Easy Dessert
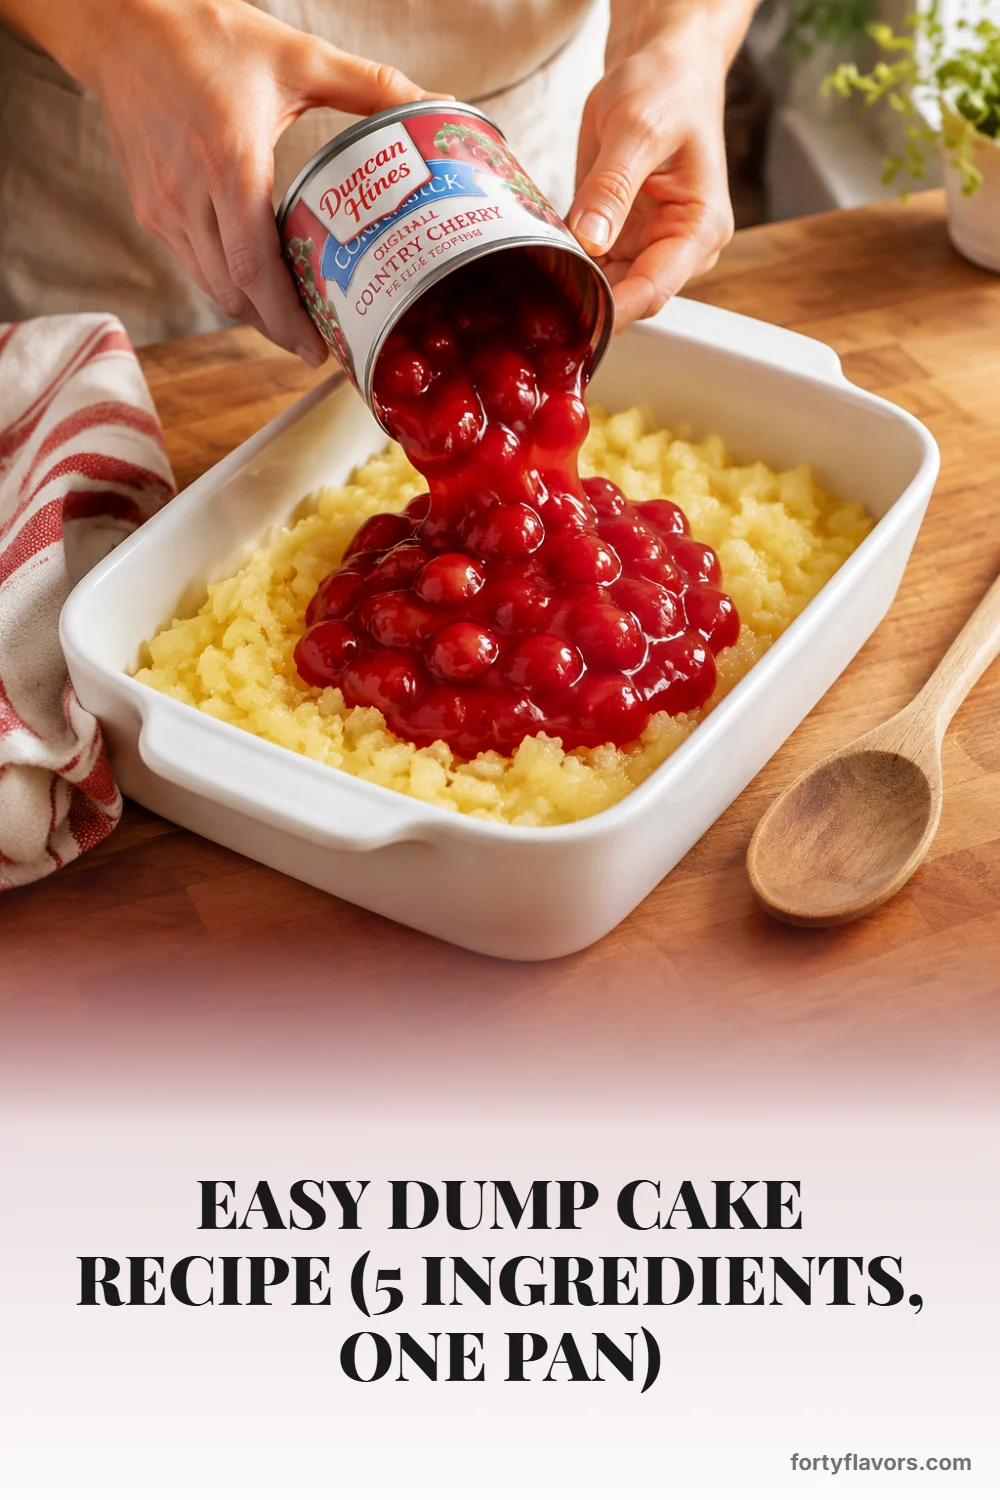
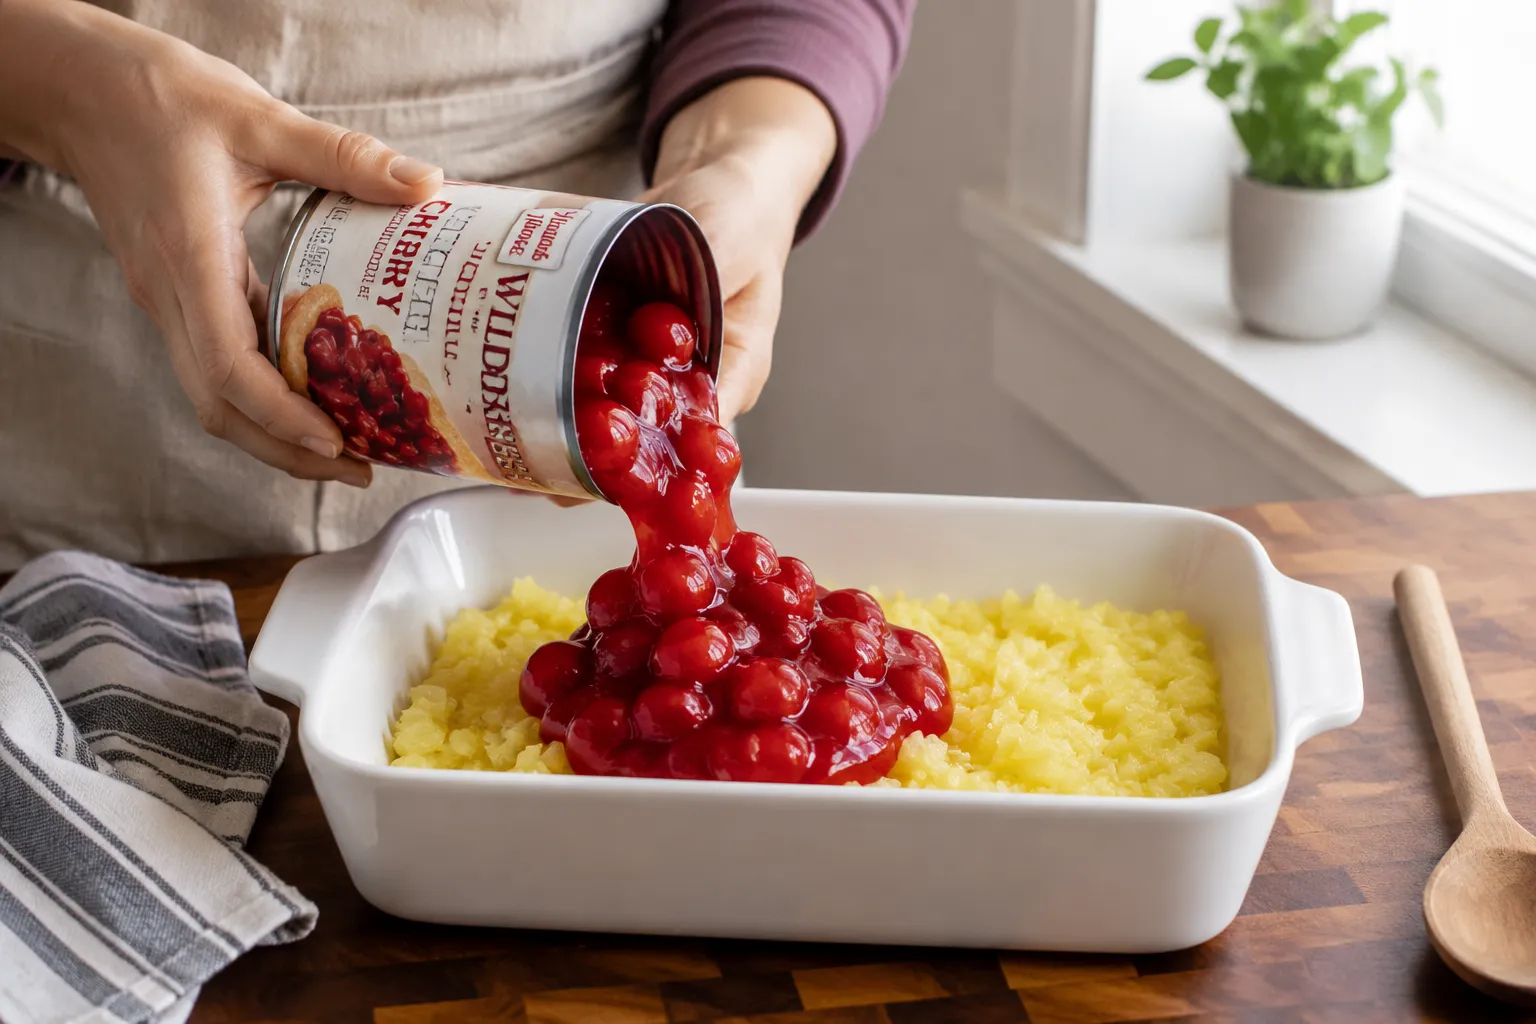
The process begins with the fruit layer. Spread the crushed pineapple, juices and all, across the bottom of the dish, then spoon the cherry filling over it. The goal is an even layer, not a perfectly blended one, so a few swirls of red and gold are welcome. As the fruit bakes, the pineapple keeps the filling lively and prevents the whole dessert from tasting one-note sweet.
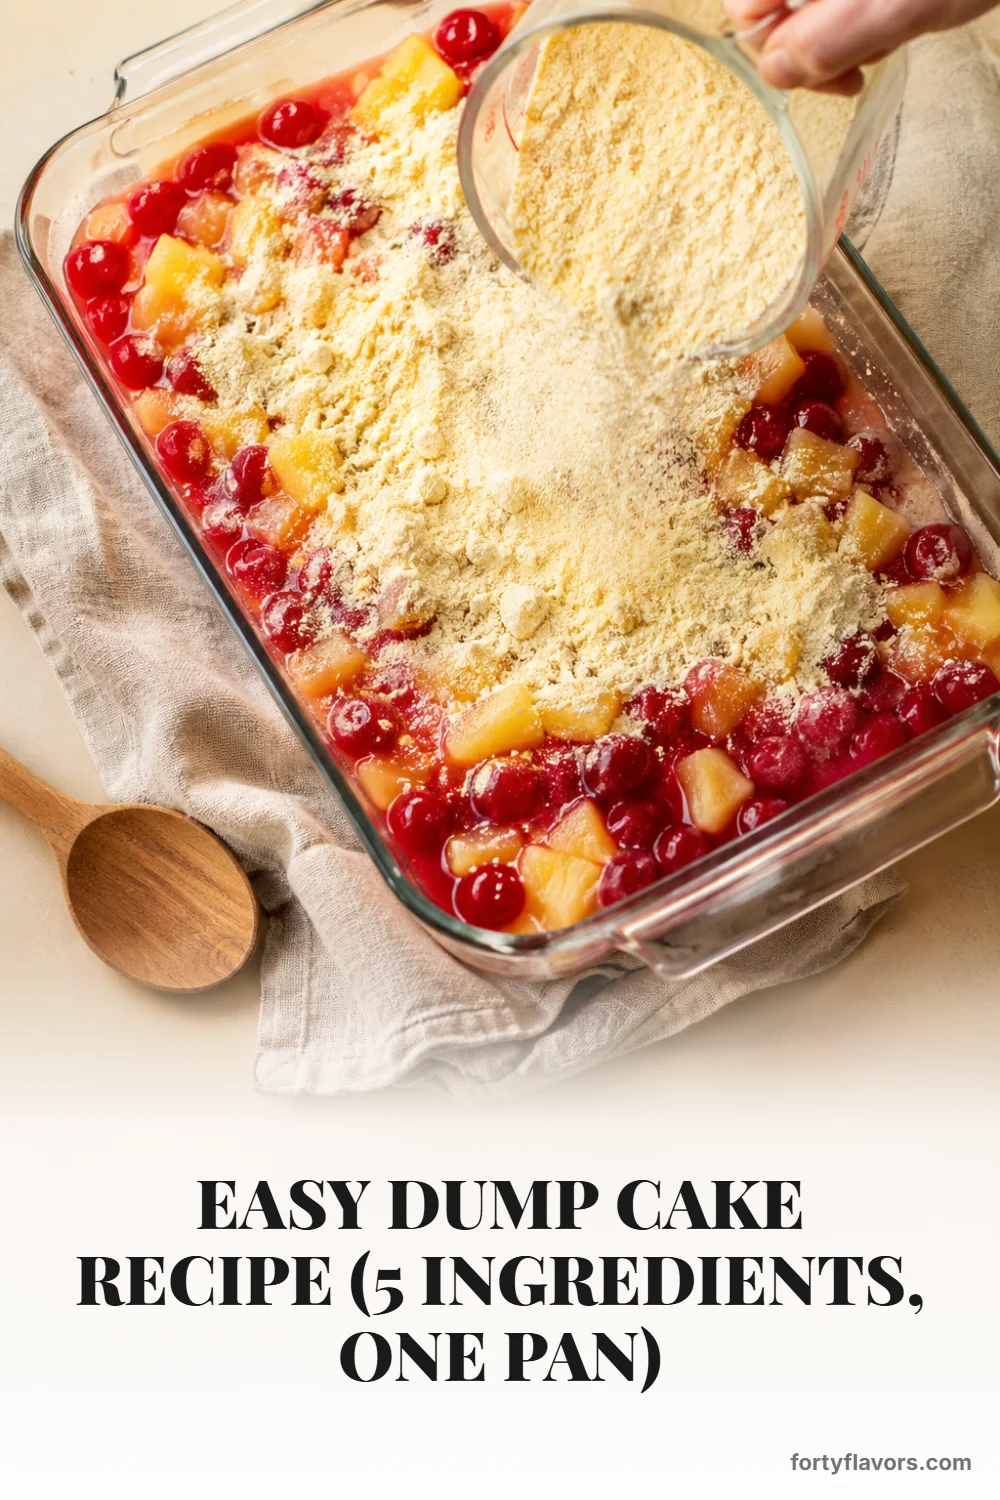
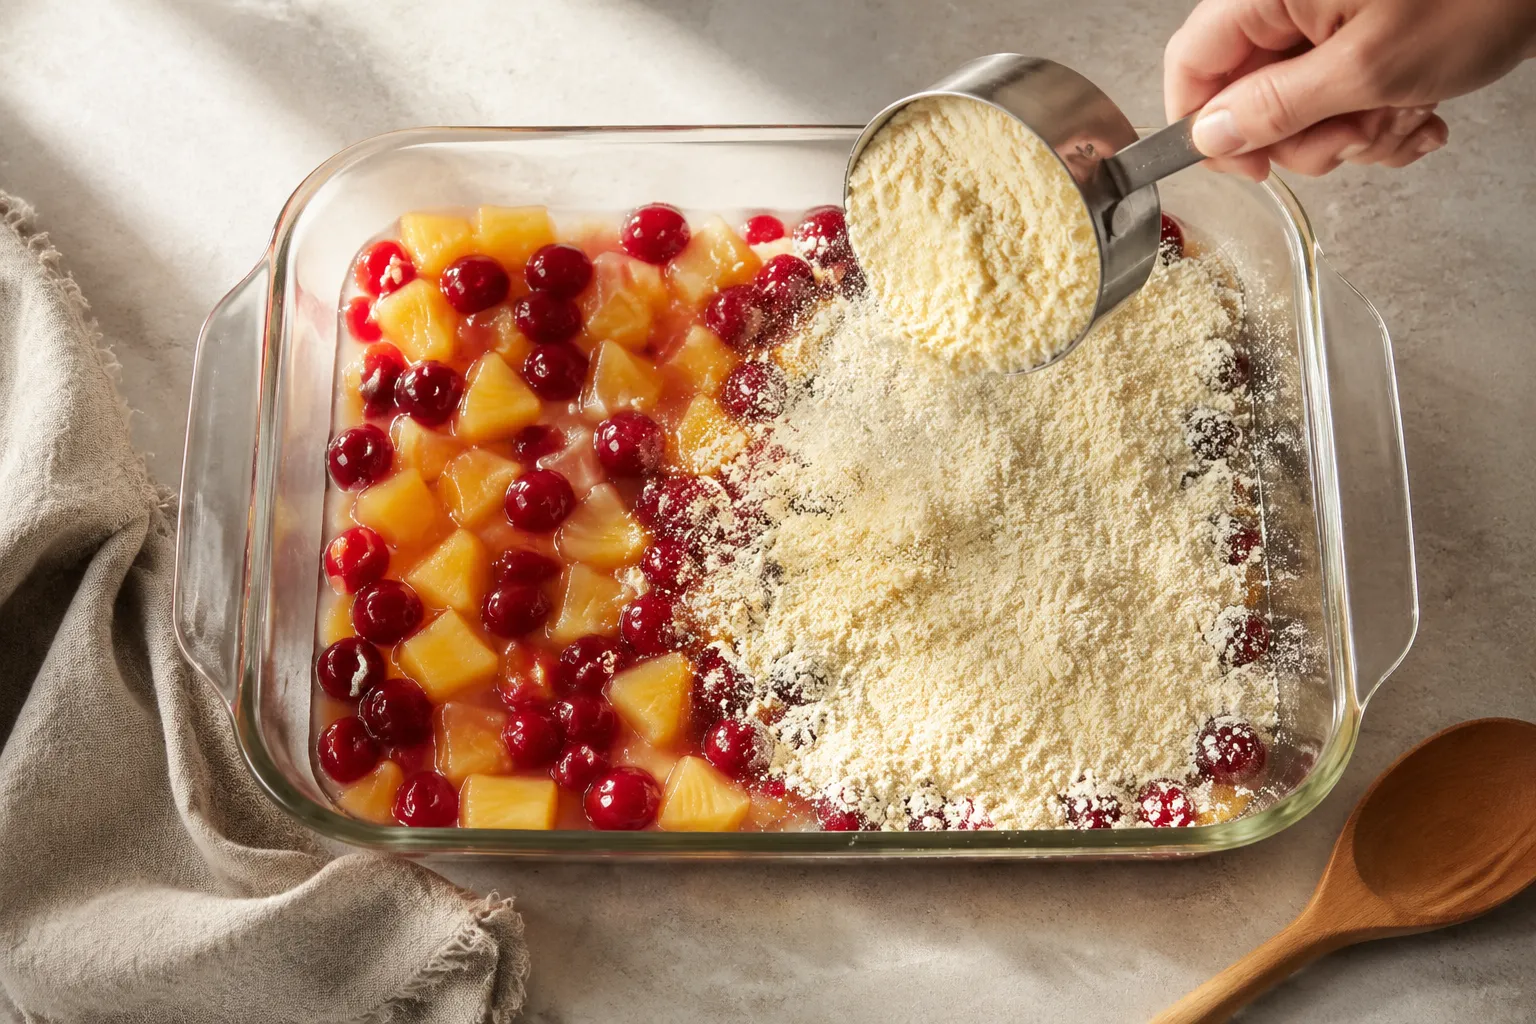
Next comes the dry cake mix. Sprinkle it evenly from corner to corner, breaking up any large clumps with your fingers as you go. You want a level blanket of mix, because tall mounds are more likely to stay dry while thin spots can become too juicy. A gentle pat is fine, but avoid pressing it down firmly into the fruit.
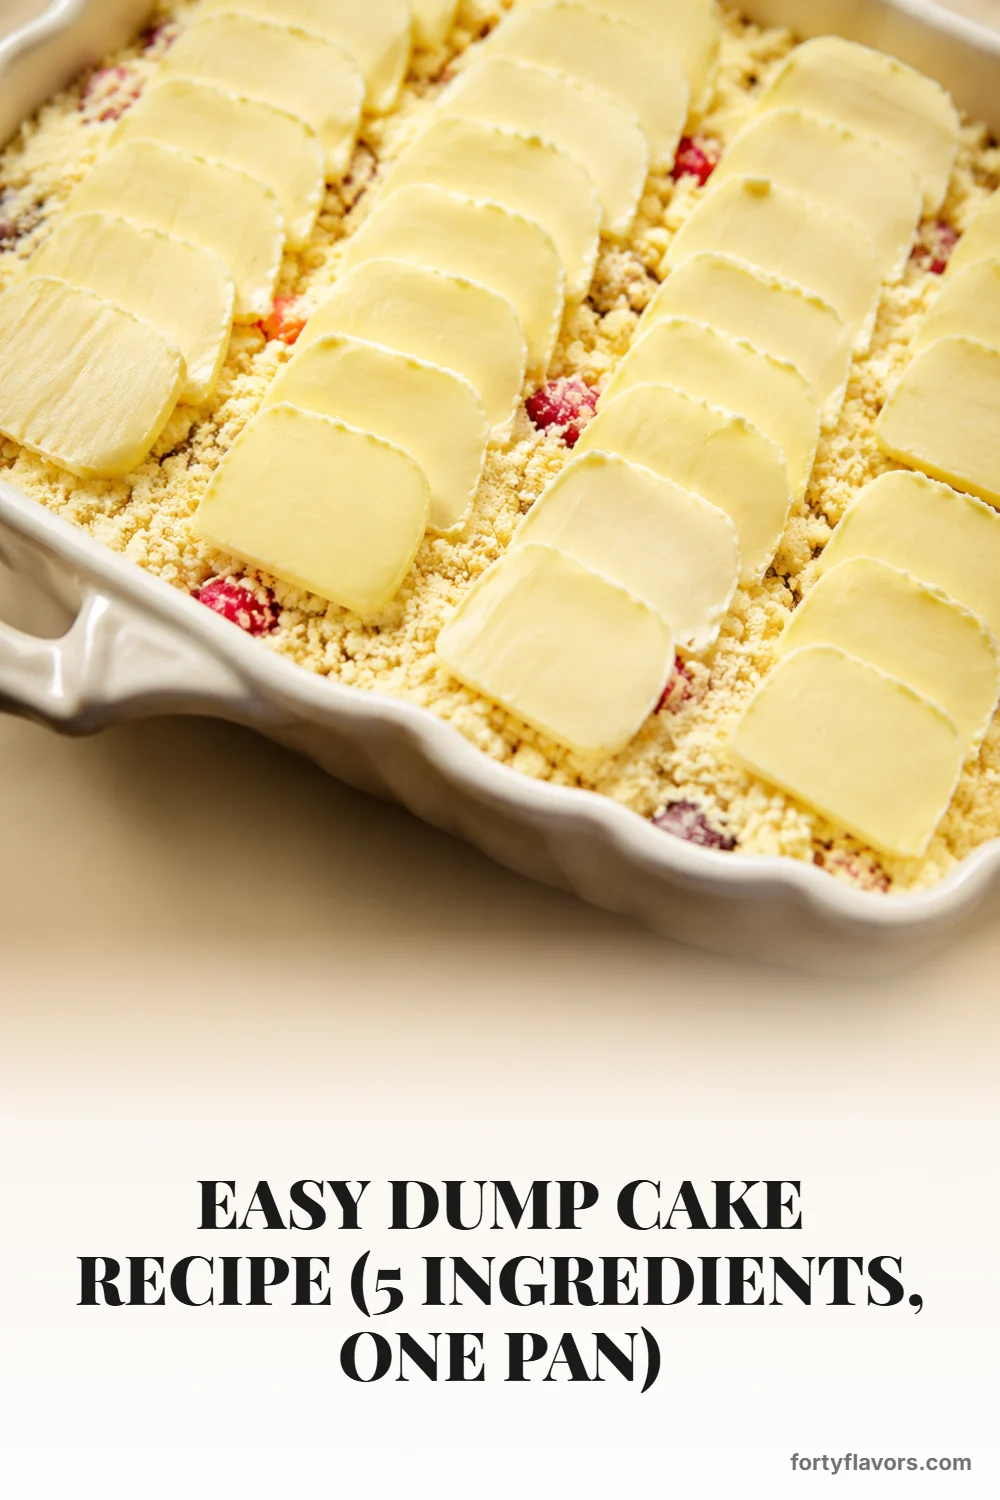
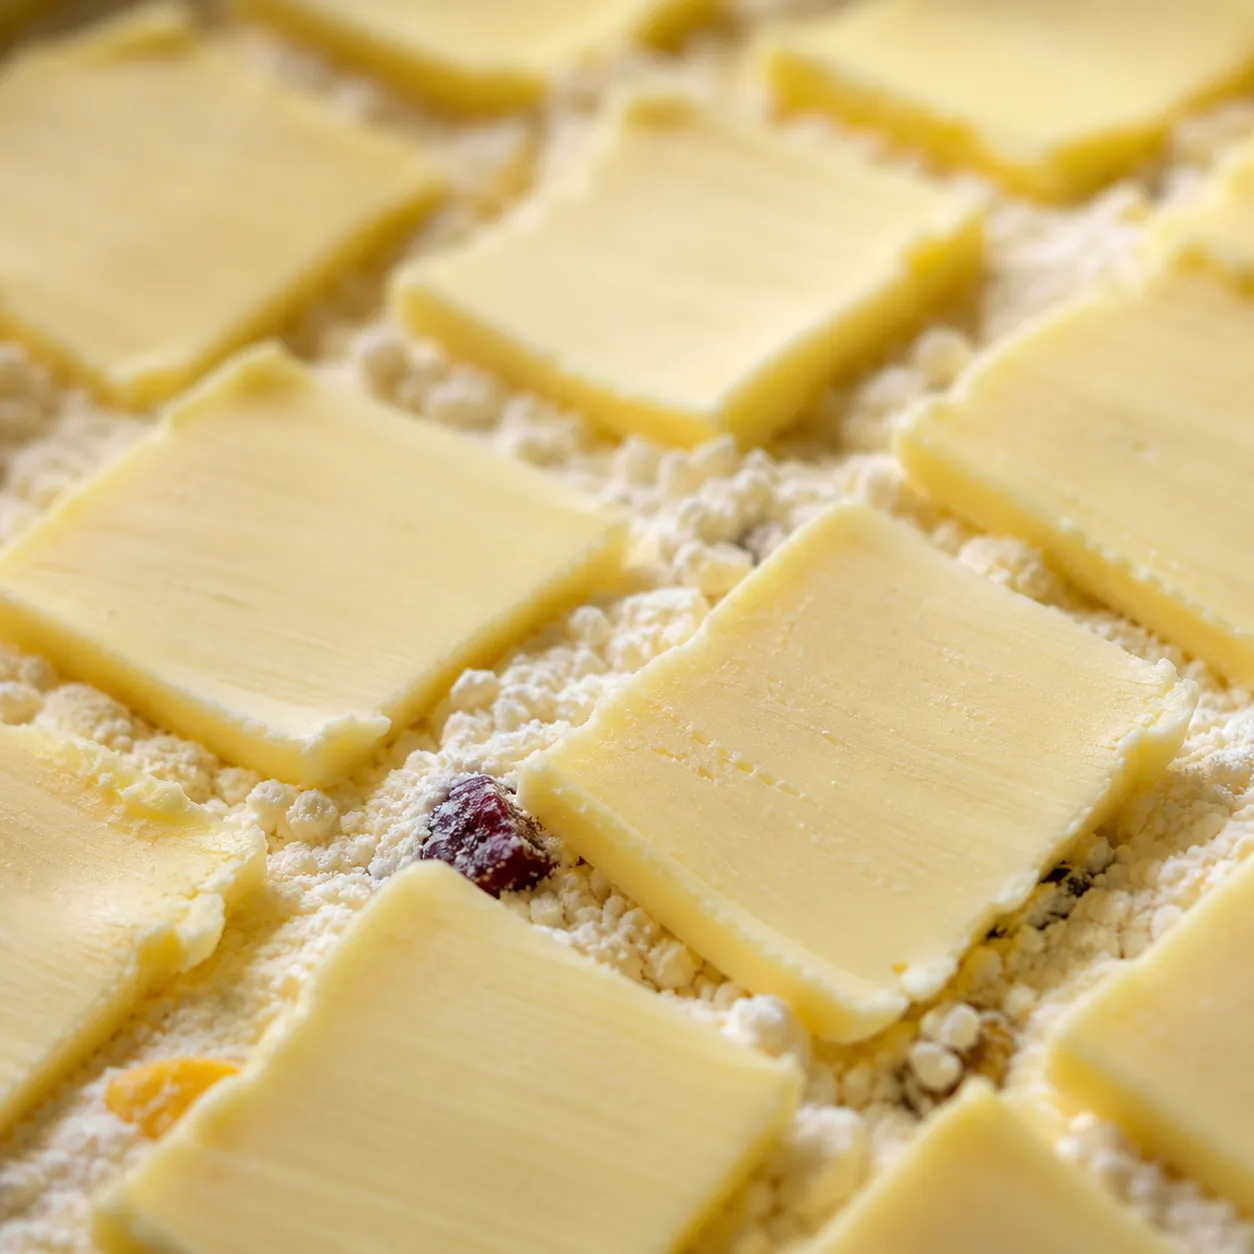
Now for the butter. Instead of pouring melted butter over the top, use thin cold butter slices and arrange them in rows so they cover as much of the surface as possible. This technique slows the melting just enough to baste the cake mix gradually, giving you a more even, crisp, golden topping. It also helps avoid those pale, floury patches that can happen when butter pools in only a few places.
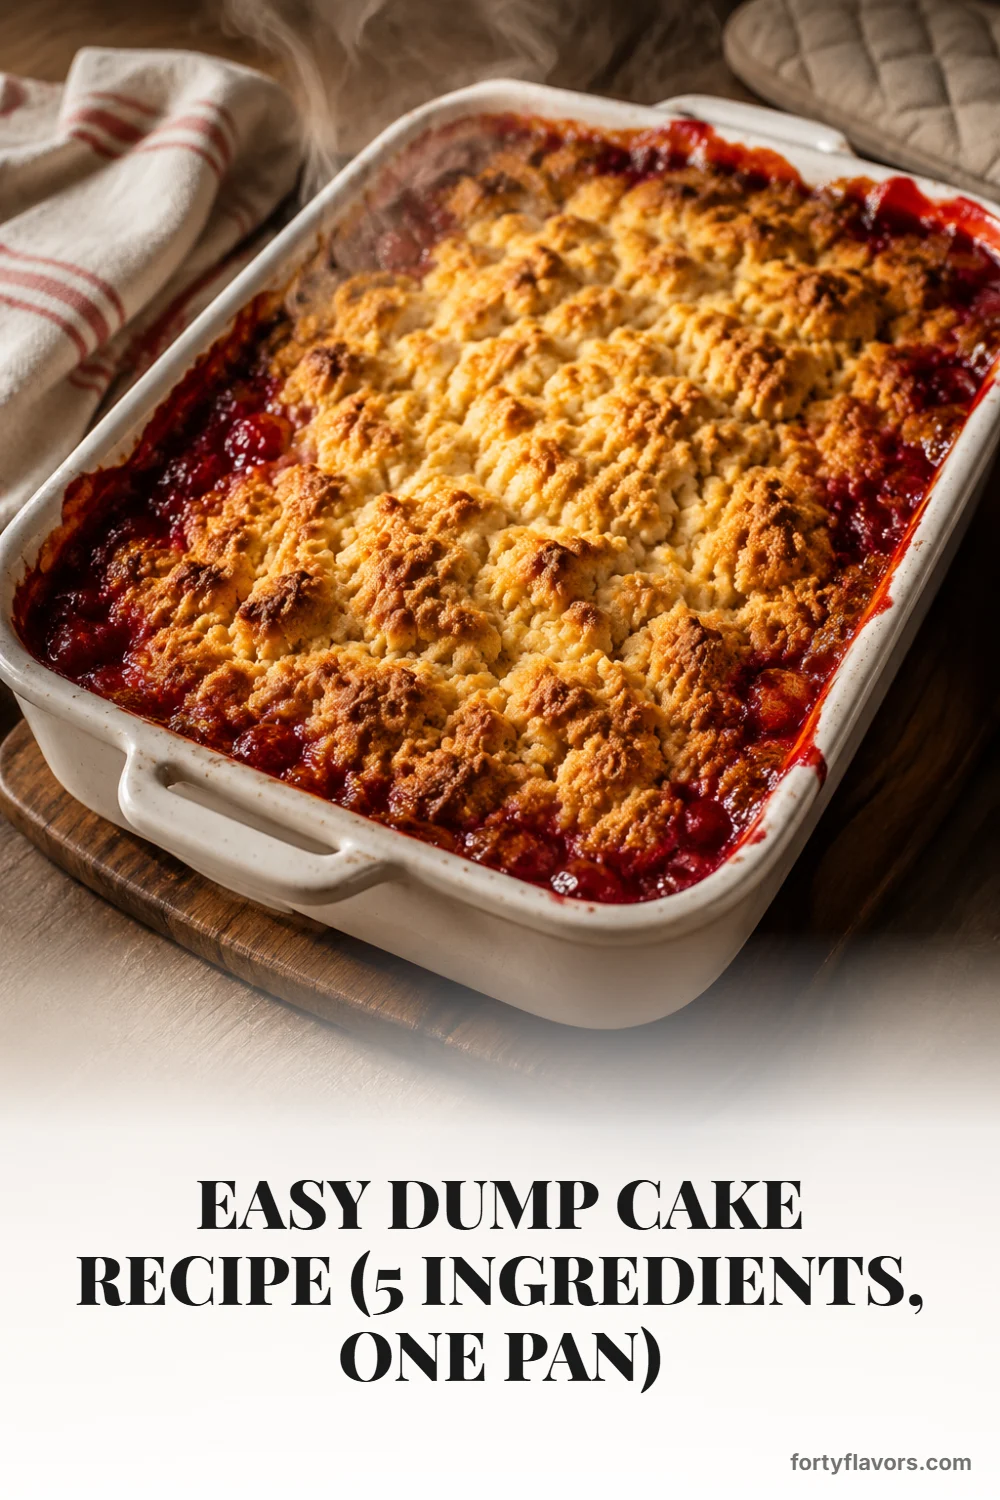
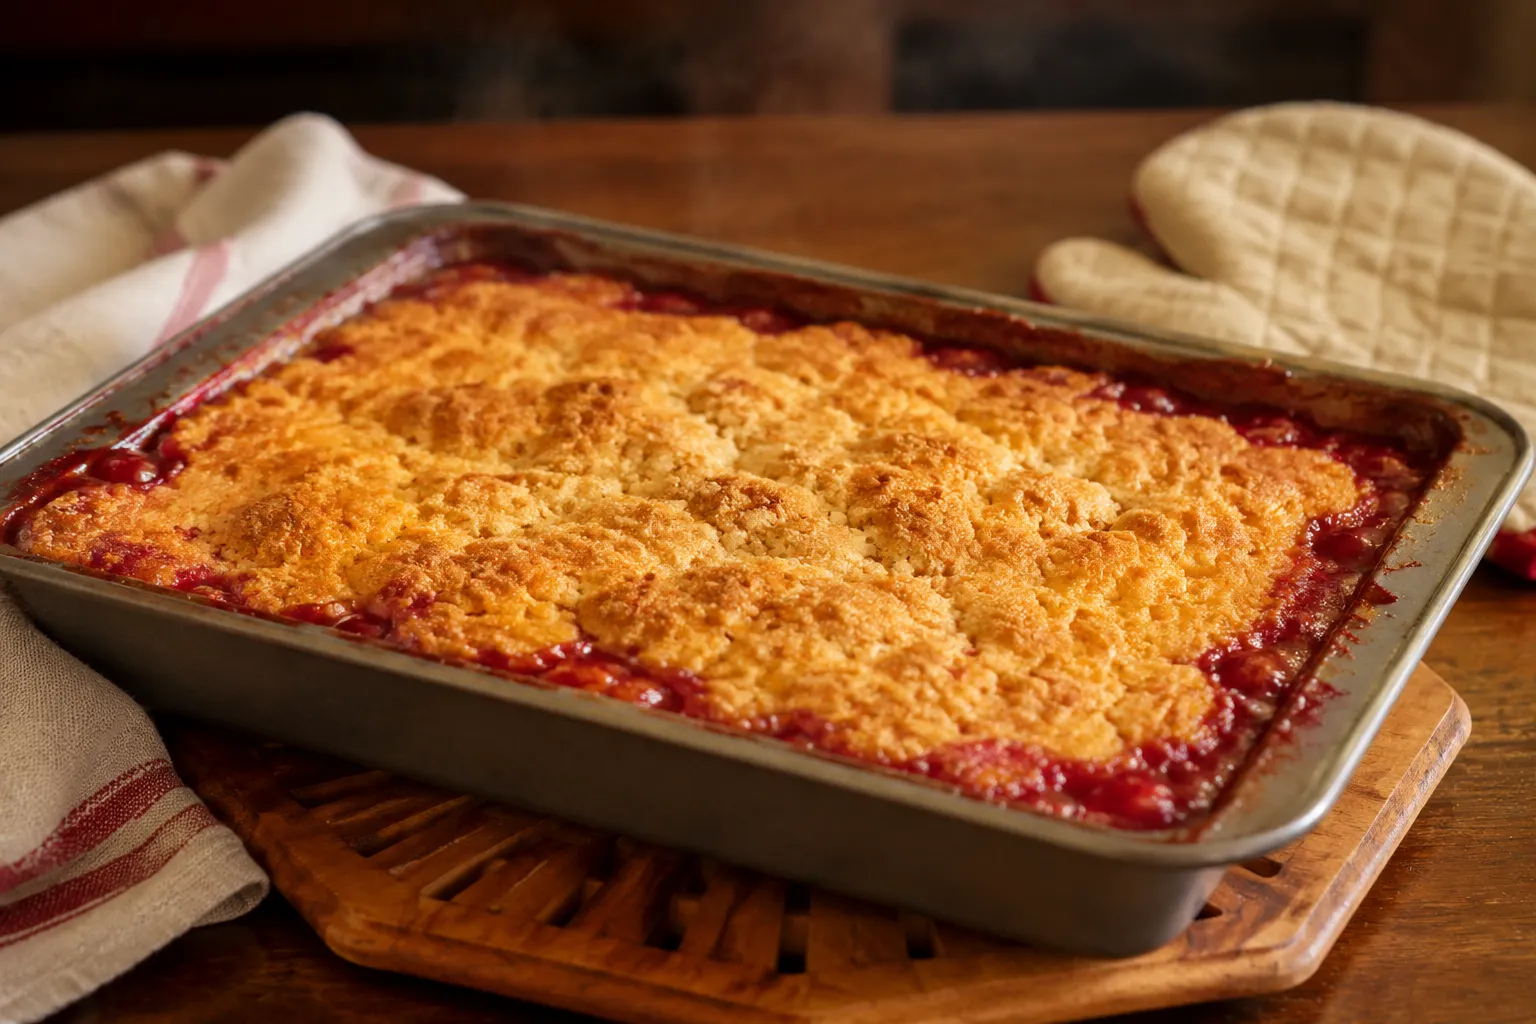
Once the dish goes into the oven, the layers start working together. The fruit bubbles up, the cake mix hydrates from below, and the butter toasts the top into a crumbly crust. When the surface is deeply golden and the filling is bubbling at the edges, it is ready. If you want the extra bakery-style finish, a short broil at the end adds color and crunch—just watch closely, because buttery toppings can go from bronze to scorched quickly.
How to Know When It’s Done
Look for bubbling fruit around the sides and in a few spots near the center. The top should be golden, not pale beige, and the butter should be fully melted into the cake mix. If you see small dry patches near the end of baking, they may still absorb moisture as the dessert rests, but larger powdery areas usually need a few more minutes or a tiny dot of butter.
Resting matters more than you might think. Give the pan at least 15 minutes after baking so the fruit syrup can thicken slightly and the topping can settle into its crisp-tender texture. Straight from the oven, the filling is molten and loose; after a short rest, it scoops into lush spoonfuls. This also gives you time to pull out bowls, spoons, and ice cream.
Serving Ideas for Warm Cherry-Pineapple Cake
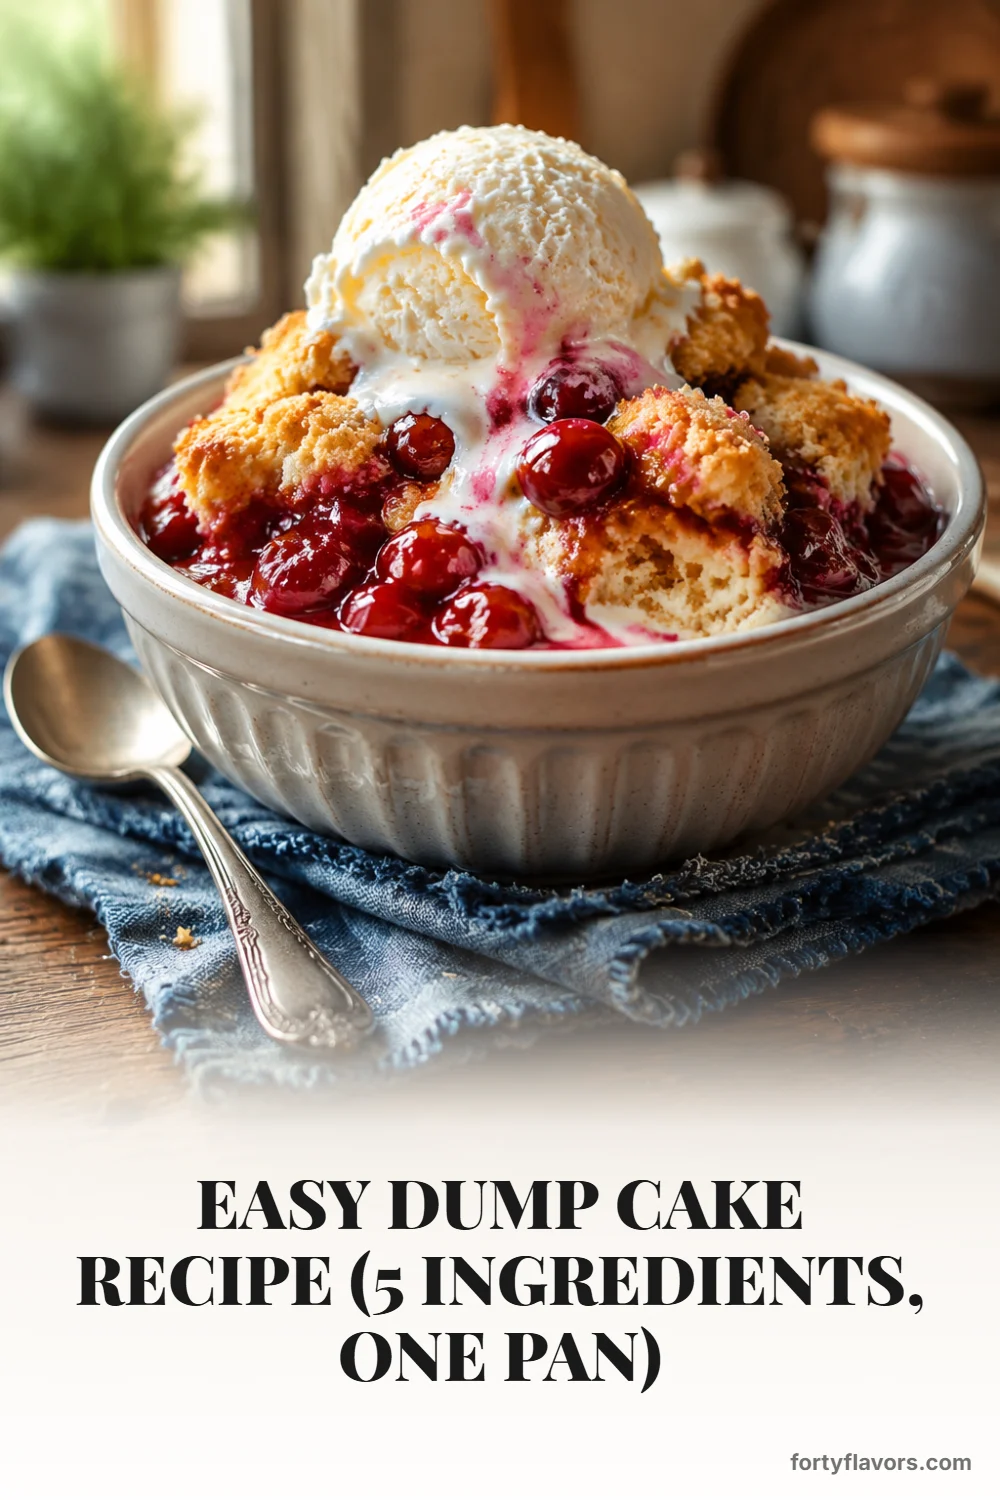
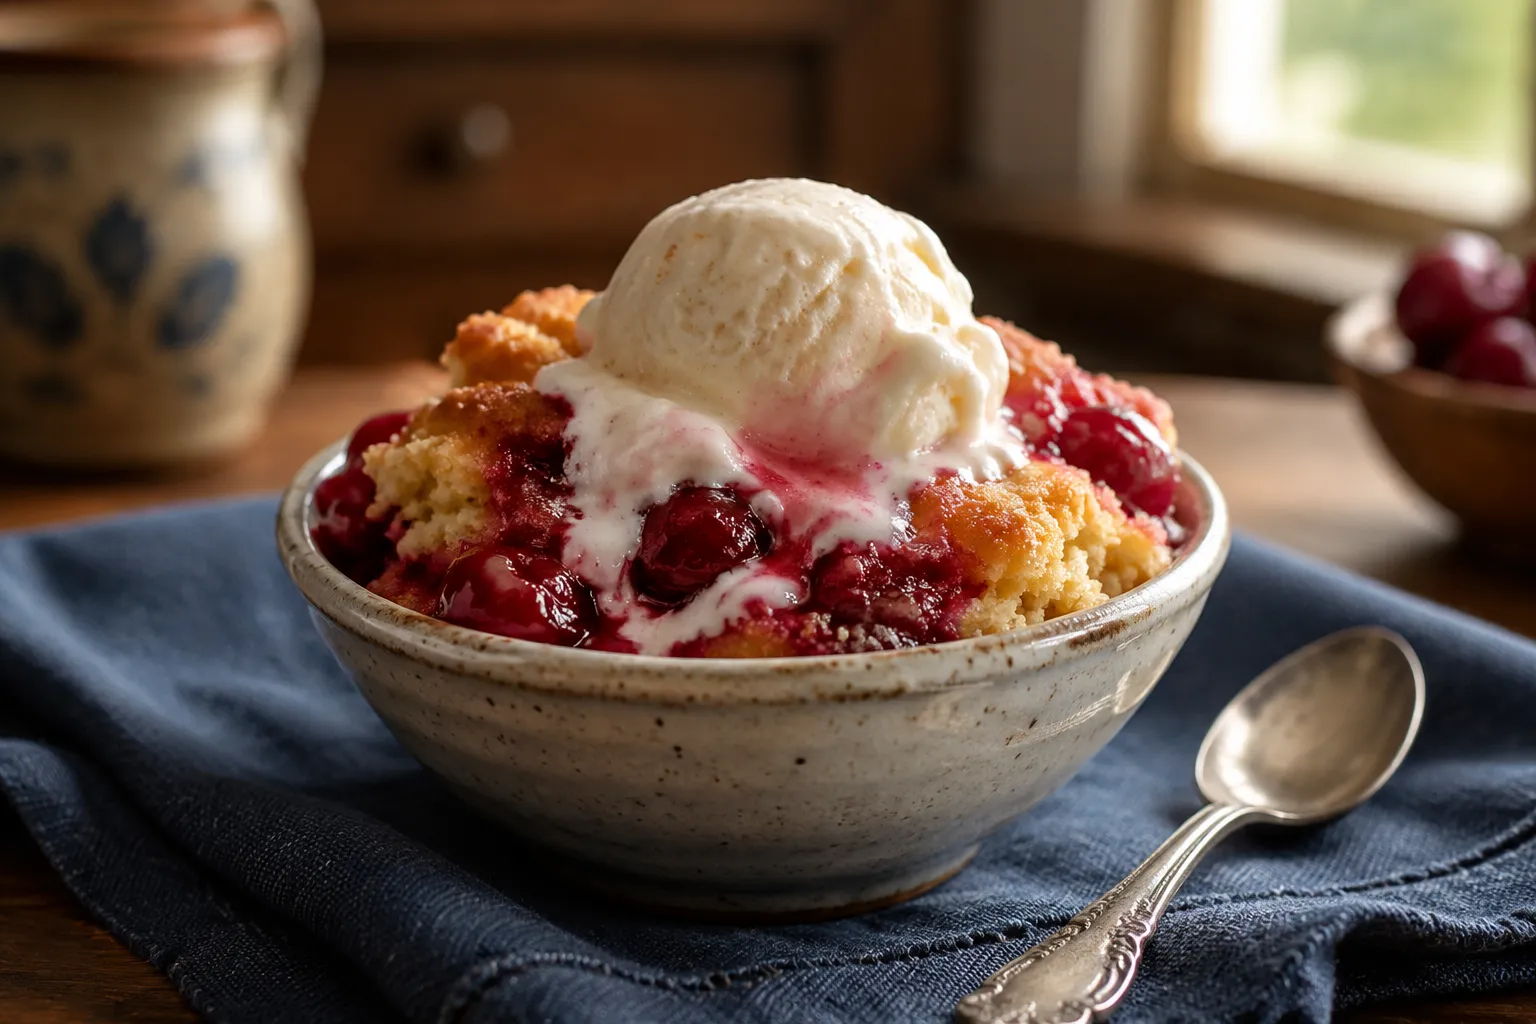
This dessert is at its absolute best served warm, when the topping is still crisp and the filling is glossy and soft. A scoop of vanilla ice cream is the classic finish, melting into the cherry syrup and turning every bowl into a creamy, fruity sundae. If you are planning a menu, consider this the ultimate vanilla ice cream pairing for a casual Sunday supper or a holiday buffet where you want something low-stress.
Whipped cream is lovely too, especially if you prefer something lighter than ice cream. For a brunchy spin, spoon leftovers over Greek yogurt, or serve small portions alongside coffee after a big meal. Because it travels well in the pan, it is also a dependable potluck dessert—easy to bake, easy to carry, and easy for guests to scoop themselves. Bring a serving spoon and expect the crispy corner pieces to disappear first.
Make It Taste Homemade
Even though this recipe starts with store-bought shortcuts, a few small choices make it taste thoughtfully made. Use good-quality pie filling with visible fruit, and choose pineapple packed in juice rather than heavy syrup if you prefer a brighter flavor. A pinch of salt sprinkled over the cake mix before adding butter can balance the sweetness, especially if your fruit filling is very sweet.
Nuts add another layer of flavor, but they are not required. Pecans are buttery and classic, walnuts are slightly earthier, and sliced almonds can work if you are using peach or apple filling another time. You can also add a little vanilla extract to the fruit layer or a dusting of cinnamon over the dry mix. These tiny extras keep the recipe just as easy while making it feel like your signature dessert.
Planning for Parties and Gatherings
This is one of those desserts that fits neatly into real life. You can assemble it in minutes while dinner is finishing, bake it while everyone eats, and serve it warm without frosting, cooling, or decorating. The 9x13 pan makes 12 generous servings, or more if you are setting out a dessert table with several options.
For parties, bake it in a dish you are happy to place directly on the table. A trivet, a stack of napkins, and a big spoon are all you need. If you are carrying it to another house, bake it fully, let it rest, cover it loosely, and rewarm briefly before serving if an oven is available. It is forgiving, crowd-pleasing, and familiar in the best possible way.
A Cozy Finish
The magic of this dessert is that it asks for so little and gives back so much: bubbling fruit, a buttery golden crust, and a kitchen that smells like someone spent all afternoon baking. It is the recipe to make when you want comfort without complication, or when the pantry is doing most of the heavy lifting. Keep the ingredients on hand and you are never far from a warm, shareable sweet.
Once you have made the cherry-pineapple version, you will understand why families keep passing this recipe around. It is unfussy, nostalgic, and endlessly useful, with that perfect mix of crisp topping and syrupy fruit. Serve it warm, scoop it generously, and do not be surprised when someone asks for the recipe before the pan is empty.
💡 Expert Tips
- Slice the butter very thin: Thin butter slices give the dry cake mix better coverage and help prevent powdery patches on top.
- Do not stir the layers: Keeping the fruit, cake mix, and butter separate is what creates the cobbler-like fruit base and crumbly topping.
- Watch the broiler closely: A quick broil can make the topping beautifully golden, but it can burn fast, so stay by the oven.
- Let it rest before serving: A 15-minute rest thickens the fruit syrup and makes the dessert easier to scoop.
- Serve warm for best texture: The topping is crispiest and the fruit is glossiest when the dessert is warm from the oven or freshly reheated.
🔄 Variations & Substitutions
Once you know the basic formula, you can turn this recipe into dozens of easy desserts using the same one-pan method. Keep the fruit layer juicy, use a compatible cake mix, and adjust spices or nuts to match the flavor profile.
- Cherry Pineapple: The classic version with cherry pie filling, crushed pineapple, yellow cake mix, butter, and pecans.
- Apple Cinnamon: Use two cans apple pie filling, yellow or spice cake mix, a sprinkle of cinnamon, and chopped walnuts.
- Peach Cobbler Style: Use canned peaches in syrup or peach pie filling with yellow cake mix and a pinch of nutmeg.
- Chocolate Cherry: Pair cherry pie filling with chocolate cake mix and butter for a Black Forest-inspired dessert.
- Berry Vanilla: Use blueberry or mixed berry pie filling with white cake mix and sliced almonds.
🧊 Storage & Leftovers
Cover leftovers tightly or transfer them to an airtight container and refrigerate for up to 4 days. The topping softens as it sits, but the flavor stays rich and fruity. For longer storage, freeze cooled portions in freezer-safe containers for up to 2 months.
To reheat, warm individual servings in the microwave, or place a larger portion in a 350°F oven for about 15 minutes until heated through. The oven is the best choice if you want to bring back some of that fresh-baked crispness on top.
Save This Recipe to Pinterest
Hover any image and hit “Pin it” to save it to your Pinterest boards.
Powdery patches usually mean the butter did not reach all of the dry cake mix. For the most even topping, use cold butter sliced very thinly and arrange the slices close together over the entire surface. You can also lightly level the cake mix before adding butter so there are no tall mounds. If you notice a dry spot near the end of baking, add a small sliver of butter to that area and return the pan to the oven for a few minutes.
Can I use fresh fruit instead of canned pie filling?
Yes, fresh or frozen fruit can work well, but you need to create the syrupy texture that canned filling provides. Toss about 5 cups of fruit with 1/2 cup sugar and 2 tablespoons cornstarch, then spread it in the baking dish. Berries, peaches, apples, and cherries are all good options. If your fruit is very tart, add a little more sugar; if it is especially juicy, an extra teaspoon or two of cornstarch can help the filling thicken.
What’s the best cake mix for dump cake?
Yellow cake mix is the classic choice because it has a buttery vanilla flavor that pairs with almost any fruit filling. White cake mix is another versatile option, spice cake is wonderful with apples or peaches, and chocolate cake mix is delicious with cherries. I recommend avoiding pudding-in-the-mix varieties because they can bake up heavier and less crisp on top. A standard 15.25-ounce box gives the best ratio for a 9x13 pan.
Can I make dump cake ahead of time?
Yes. You can bake it up to 24 hours ahead, let it cool, cover it, and refrigerate until needed. Before serving, reheat it uncovered in a 350°F oven for about 15 minutes, or until the fruit is warm and the topping has crisped up again. If you are serving it for a party, it is best warm rather than piping hot, so a short rest after reheating is perfect.
Do I need to stir a dump cake?
No, and stirring is the one thing you want to avoid. The layered structure is what gives the dessert its signature texture: juicy fruit on the bottom, dry cake mix in the middle, and butter melting over the top. If you stir everything together, the topping becomes more like a dense batter and loses that crumbly, cobbler-like finish. You can gently spread each layer, but do not mix them.