Costco Food Court Chicken Strips: Copycat Recipe
Ingredients
Scale
Crave those Costco food court chicken strips? This copycat recipe nails the crispy golden coating and juicy interior—ready faster than driving to the warehouse.
The Costco food court chicken strips have a cult following for a reason — those four golden, shatter-crisp tenders for under seven bucks have ruined fast-food chicken for me forever. If you've ever finished a Costco run with a hot dog in one hand, eyeing the chicken-strip basket the kid next to you snagged, this copycat recipe is for you. Thirty minutes, a bag of panko, and a quick buttermilk soak is all it takes to bring that exact warehouse experience into your own kitchen — for about a quarter of the cost.
I worked through about a dozen test batches to nail this. Too much flour and the crust turns dusty, too little buttermilk and the panko slides right off, and an oil temperature even ten degrees off makes the difference between shatter-crisp and sad-and-soggy. What you actually want is a craggy, double-dredged armor that crackles when you bite through and gives way to white meat that's still steaming. The trick isn't fancy. It's mostly about temperature, dredge technique, and resting the breaded strips for ten minutes before they hit the oil — small moves that pay off in a big way.
This recipe also gives you three cooking paths so you can match your mood: a classic skillet fry for the truest food-court crunch, the air fryer route if you'd rather have weeknight-quick air fryer chicken tenders without standing over the stove, or the oven if you're feeding a crowd. Whichever route you take, you'll end up with crispy chicken tenders that taste like the Costco food court without the parking lot.
So what's the magic behind those legendary strips? It comes down to three things: a thick, well-seasoned coating, a buttermilk soak that tenderizes the meat, and a fry temperature high enough to set the crust before the chicken dries out. The Costco version uses a light-orange, paprika-tinted breading that fries up almost lacy on the surface — those craggy little spires sticking off the strip are what make the crunch feel so explosive in your mouth. We're recreating that texture at home with panko instead of standard breadcrumbs, because panko's larger, sharper flakes give you exponentially more surface area to crisp up. Add the right seasoning blend, the right rest time, and the right oil temperature, and you genuinely cannot tell the home version from the warehouse version in a blind taste test. I tested. My family failed. Twice.
Costco's coating is generously seasoned but never overpowering — you taste salt, paprika, garlic, and a whisper of pepper underneath the chicken itself. We're matching that profile in our panko breading, then doing a double-dredge to build a thicker shell. That second pass through the egg and panko is the real difference between “homemade tender” and “wait, did you buy these?” — it doubles the surface area and creates those signature craggy peaks that catch and hold dipping sauce.
The buttermilk marinade does two jobs at once. The acid gently breaks down the proteins so the meat stays tender even when fried hard, and the dairy clings to the chicken so the flour layer has something to grip. Skip this step and you'll end up with bland, tough strips and breading that flakes off in the oil. An hour of soaking is plenty for a weeknight; overnight is even better if you have the time and want maximum tenderness.
Nothing exotic here — most of this is probably already in your kitchen, and the rest is a single Costco run away. The full quantities live in the recipe card below; this section is a quick walkthrough of why each ingredient earns its spot in the lineup. Read through before you shop, especially if you want to skip ahead to the gluten-free or spicy variations.
Boneless skinless chicken tenders are the obvious pick — they're already the right shape and cook through in about four minutes. If your store doesn't carry tenders, slice boneless skinless chicken breasts lengthwise into one-inch-wide strips. Avoid pre-seasoned or “enhanced” chicken; the marinade does all the seasoning work, and the bottled stuff often contains sodium phosphate that gives a weirdly spongy texture once fried.
You want plain panko (not Italian-seasoned), all-purpose flour, two large eggs, garlic powder, sweet paprika, kosher salt, and freshly ground black pepper. Panko is non-negotiable for that signature texture — supermarket breadcrumbs simply will not get you there. A spoonful of cornstarch mixed into the flour also helps if you want extra shatter; it weakens the gluten and crisps harder. Optional, but I almost always add it.
The food court traditionally serves these with a tangy honey-mustard, but ranch, BBQ, and a quick chipotle mayo all work beautifully. Three ingredients — Dijon, yellow mustard, and honey, equal parts — get you eerily close to Costco's house dipping sauce. I usually set out three sauces and let everyone pick their favorite combo.
Here's the high-level walkthrough so you understand the why behind each move. The full numbered method with exact timing lives in the recipe card at the bottom of this post — this section is the field guide so you can adjust on the fly when something looks off. Confidence at the stove comes from understanding what each step is actually doing, not from following directions blindly.
Whisk buttermilk with hot sauce and a pinch of salt, then submerge the tenders for at least an hour. The acid in the dairy gently tenderizes the meat while the fat coats the surface so the flour has something to grab onto. The buttermilk marinade is what separates a homemade chicken strips project from a buttermilk fried chicken classic — same idea your grandmother used, same result.
Set up a station: seasoned flour in one shallow dish, beaten eggs in another, panko in a third. Pull each tender from the buttermilk, let the excess drip off, dredge in flour, dip in egg, then press firmly into the panko. Press, don't sprinkle — the more contact you make, the better the crumbs anchor to the chicken. For thicker, food-court-style coverage, dip the breaded tender back into the egg and re-press into panko for a second coat.
Heat about an inch of vegetable oil in a heavy skillet or Dutch oven to 350°F (use a thermometer — guessing here is how strips end up greasy). Lay the strips in away from you and don't crowd the pan; four at a time is plenty. Fry three to four minutes per side until deeply golden and the internal temp reads 165°F on an instant-read thermometer. Drain on a wire rack, not paper towels — paper towels trap steam underneath and ruin your crunch in about thirty seconds.
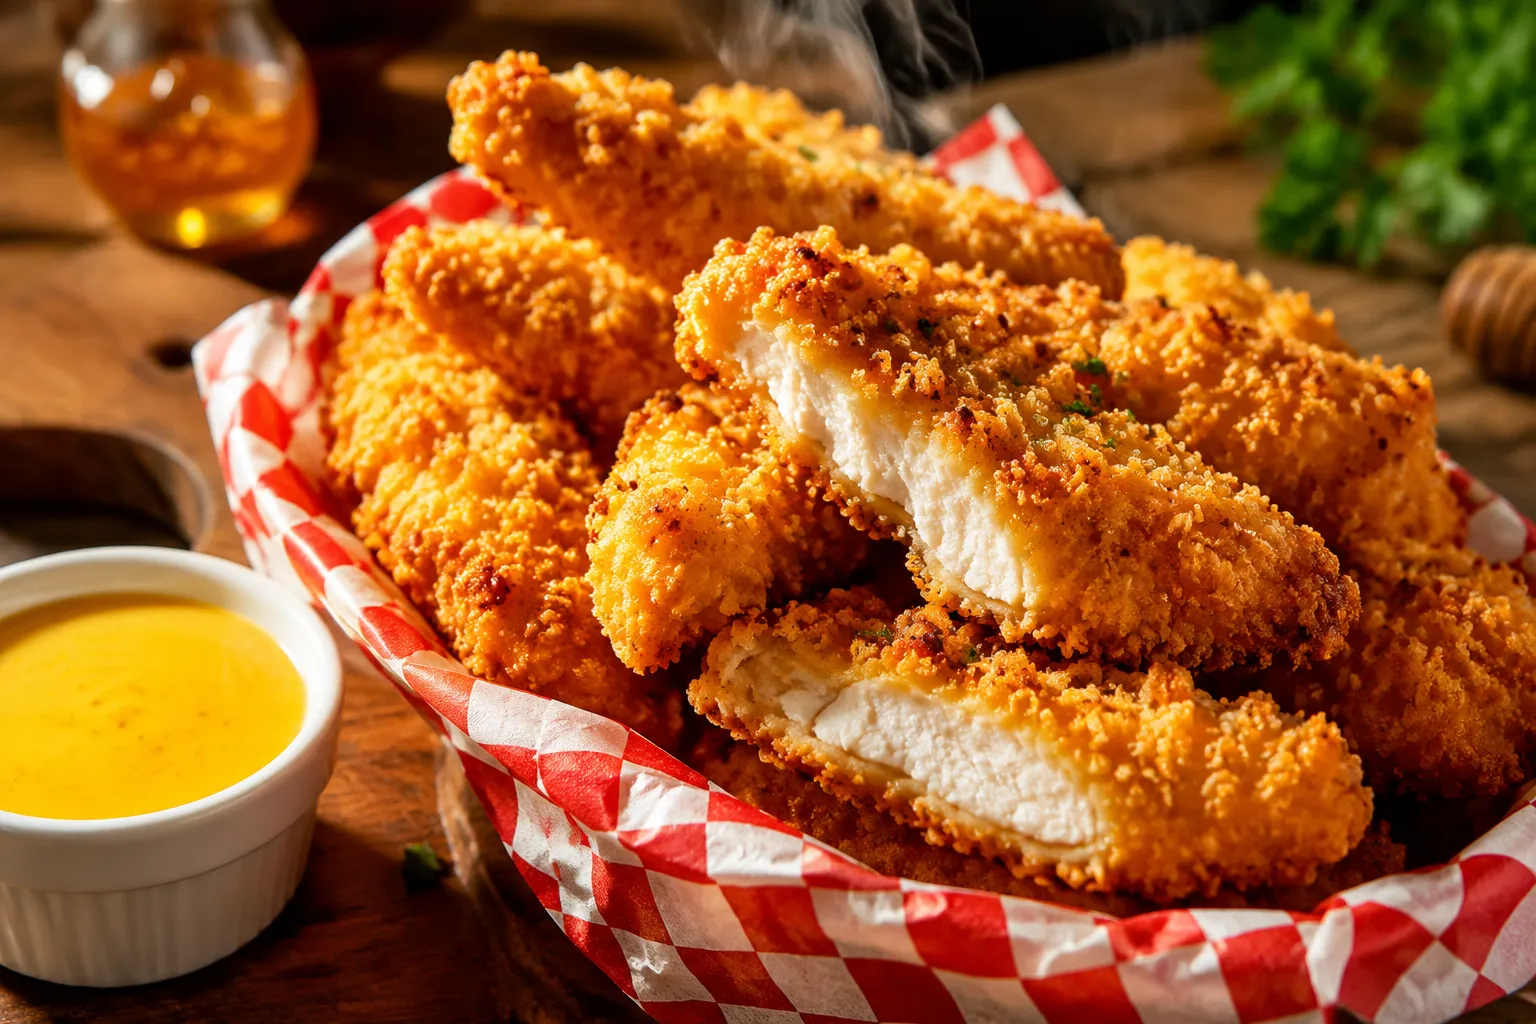
Pulled straight from the oil, these strips have the same glossy, golden, slightly bumpy crust as the warehouse original — and a juicy interior that practically steams when you tear one open. After all those test batches, this is the bite I keep chasing every time we get the urge for the food court but don't actually want to leave the house.
The first bite tells the story: a sharp crackle, a quick exhale of steam, and that clean, almost-savory chicken flavor underneath. Nothing greasy, nothing soggy — just the texture you've been paying for at the Costco food court for a quarter of the price. Look at the cross-section and you'll see what good breading is supposed to look like: a defined crust with no soggy under-layer, and meat that's still pearly white instead of dried out into rope.
Serve them hot with crinkle-cut fries and a trio of dipping sauces for full food-court energy, or plate them up with a crisp slaw and pickles for something more dinner-table-worthy. They also disappear fast on a game-day spread, especially next to a pile of garlic bread and a stack of napkins. If you want to lean further into the copycat Costco recipes lane, pair them with their famous Caesar salad kit and a slice of warehouse-style pizza for a full Costco night at home — kids love it, adults secretly love it more.
Leftovers (if you have any) keep beautifully — just plan ahead for a quick reheat in the air fryer or oven so you don't lose the crunch. Storage details and reheating tips live in the section just below the recipe card.
The skillet-fry method is the truest copycat, but two other paths get you close with less oil and less mess. Both rely on the same buttermilk soak and double-dredge — only the cooking step changes. You can also tweak the seasoning to match your mood, from spicy buffalo to herby Italian.
Let cooked chicken strips cool to room temperature, then transfer them to an airtight container and refrigerate for up to 3 days. For longer storage, freeze cooled strips in a single layer on a sheet pan first, then move them to a freezer bag — they'll keep for up to 3 months without losing texture. Label the bag with the date so you don't end up playing freezer-archaeology a month from now.
To reheat without sogginess, skip the microwave and use a 400°F oven or air fryer for 5 to 7 minutes from the fridge, or 10 to 12 minutes from frozen. The high, dry heat re-crisps the panko coating and warms the inside without drying out the meat. Avoid stacking the strips during reheating; a single layer ensures every piece regains its full crackle.