Homemade Chicken Broth Recipe (Rich & Golden)
Ingredients
Scale
This homemade chicken broth simmers low and slow into a clear, golden, deeply savory liquid that beats anything from a carton.
There's a moment, usually around hour two, when a pot of chicken broth on the back of the stove starts to smell like a Sunday at someone's grandmother's house. The kind of smell that pulls people out of their rooms to ask what's for dinner. Making your own from scratch sounds like one of those projects you keep meaning to try, and then you finally do, and you realize it was mostly just waiting around while the stove did the work.
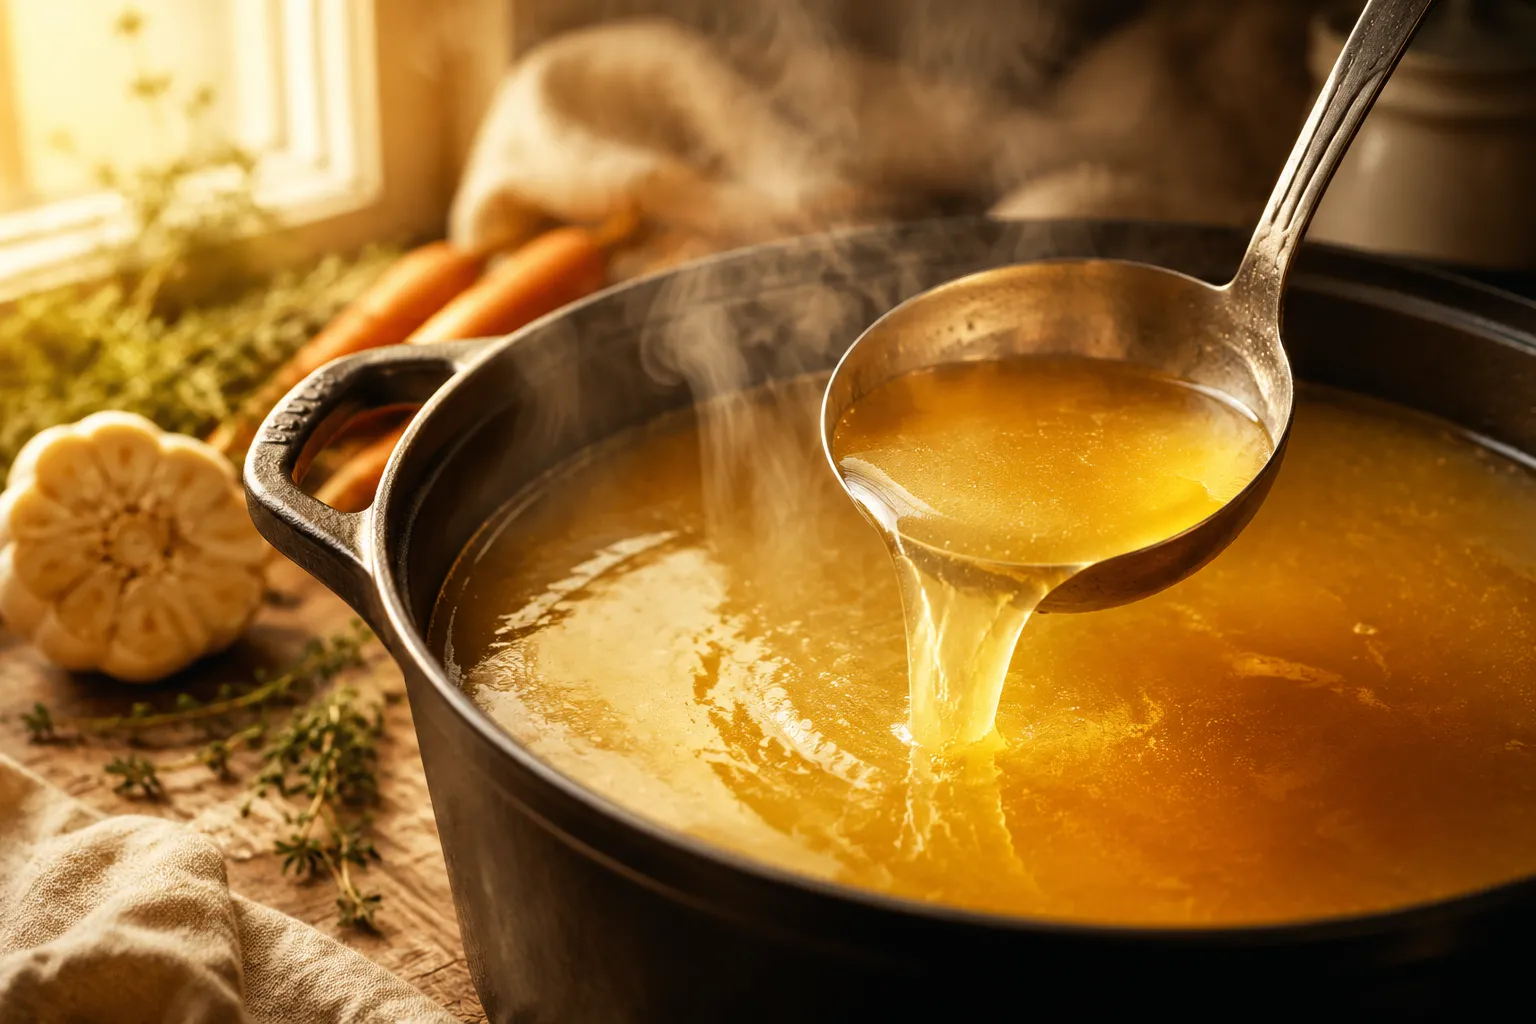
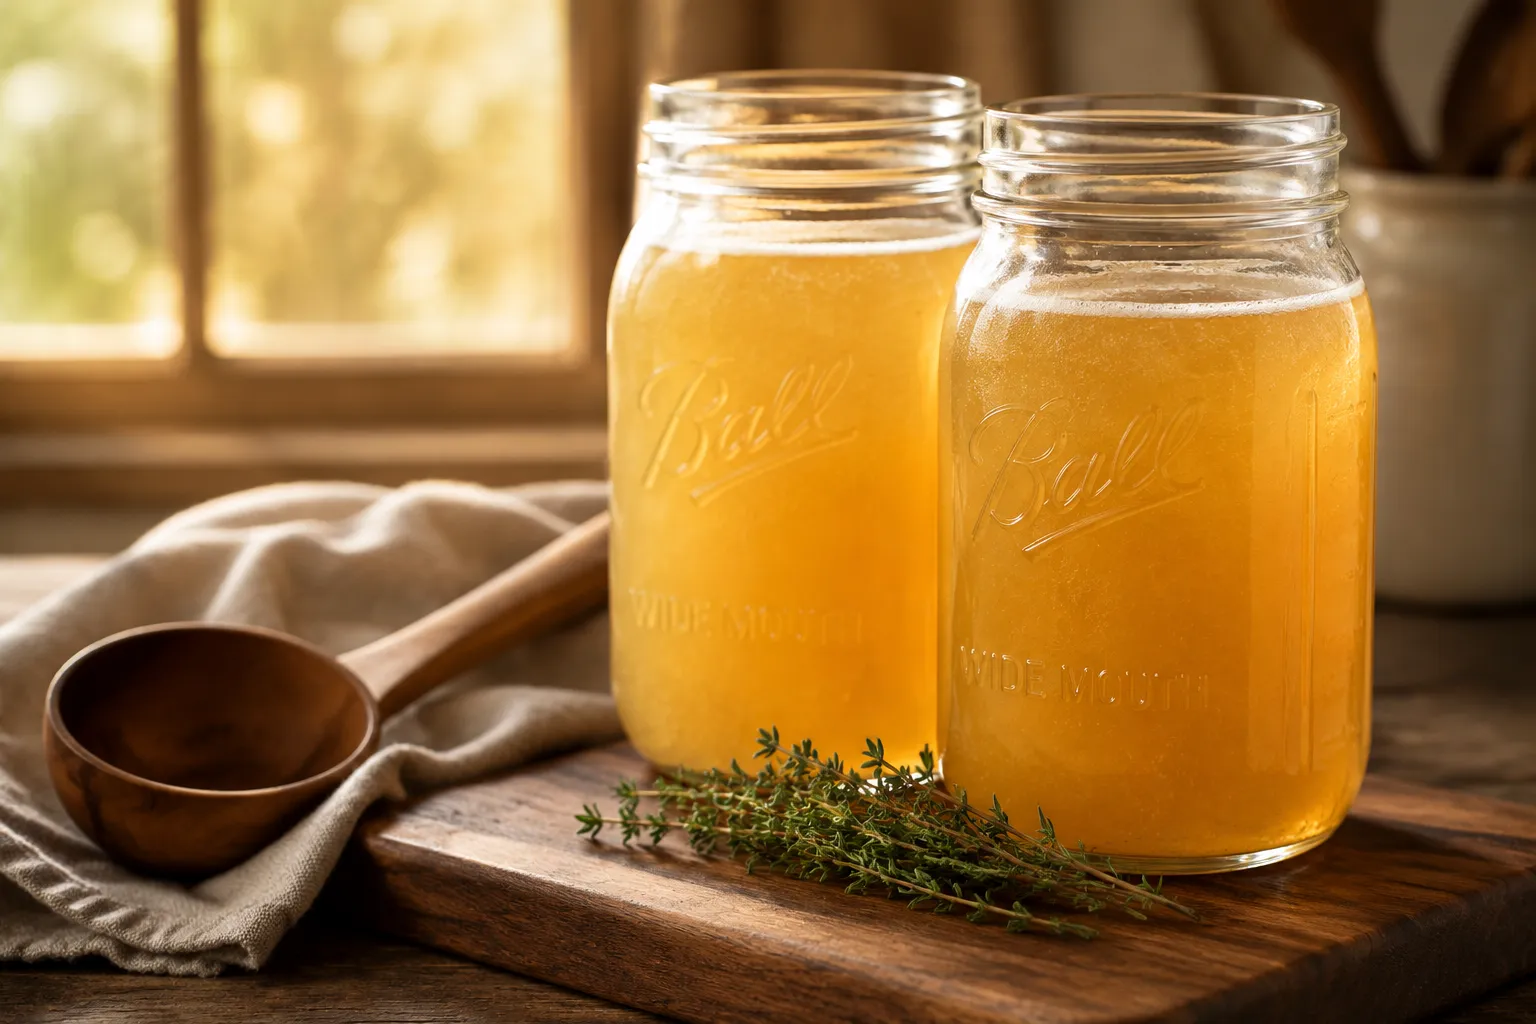
The version we're making today comes out clear, deeply golden, and so rich it sets up like loose jelly when chilled. That wobble is the sign of real gelatin pulled from the bones, and it's what makes everything you cook with it taste like it came from a restaurant kitchen. A carton of store-bought just can't touch it, no matter how fancy the label.
I'll walk through the roasted-bone method I default to after years of testing, plus how to translate it to a slow cooker or Instant Pot when you don't want to babysit the stove. Once you have a few quarts of chicken broth in the freezer, weeknight soups, risottos, braises, and pan sauces all become twenty percent better with zero extra effort on your part.
Plenty of cooks (and plenty of grocery store shelves) use these three terms like they mean the same thing, but there are real differences worth knowing before you start.
Traditionally, broth is made primarily from meat and simmered for a shorter time, giving you a lighter, more delicate liquid that's seasoned and ready to sip from a mug. Stock is built mostly on bones, which release collagen during a longer simmer and produce a thicker, more gelatinous base meant for cooking, not drinking straight. In practice, modern recipes (this one included) blur the line by using bones plus a little meat to get the best of both: clean savory flavor and that body-rich gelatin you want for soups.
Bone broth is the marathon runner of the family. It uses roasted bones, often with a splash of vinegar to help draw out minerals, and simmers anywhere from 12 to 24 hours. The result is intensely concentrated, sippable, and a touch murkier than a classic stock. If you want to go full long-haul, my dedicated bone broth recipe walks through the slower method with extra steps for clarity and minerals.
For everyday cooking, what we're making here covers about ninety percent of what you actually need. It has enough body for soups and braises, enough flavor for risotto and grain pilafs, and enough cleanness to drink from a mug on a sick day. Reach for true long-simmered bone broth when you specifically want that mineral-rich, almost stew-like character, and reach for a quick light broth when poaching delicate proteins like fish or chicken breasts.
You don't need anything fancy here. Most of this is probably already in your fridge drawer, especially if you're someone who saves carrot ends and onion peels in a freezer bag instead of tossing them.
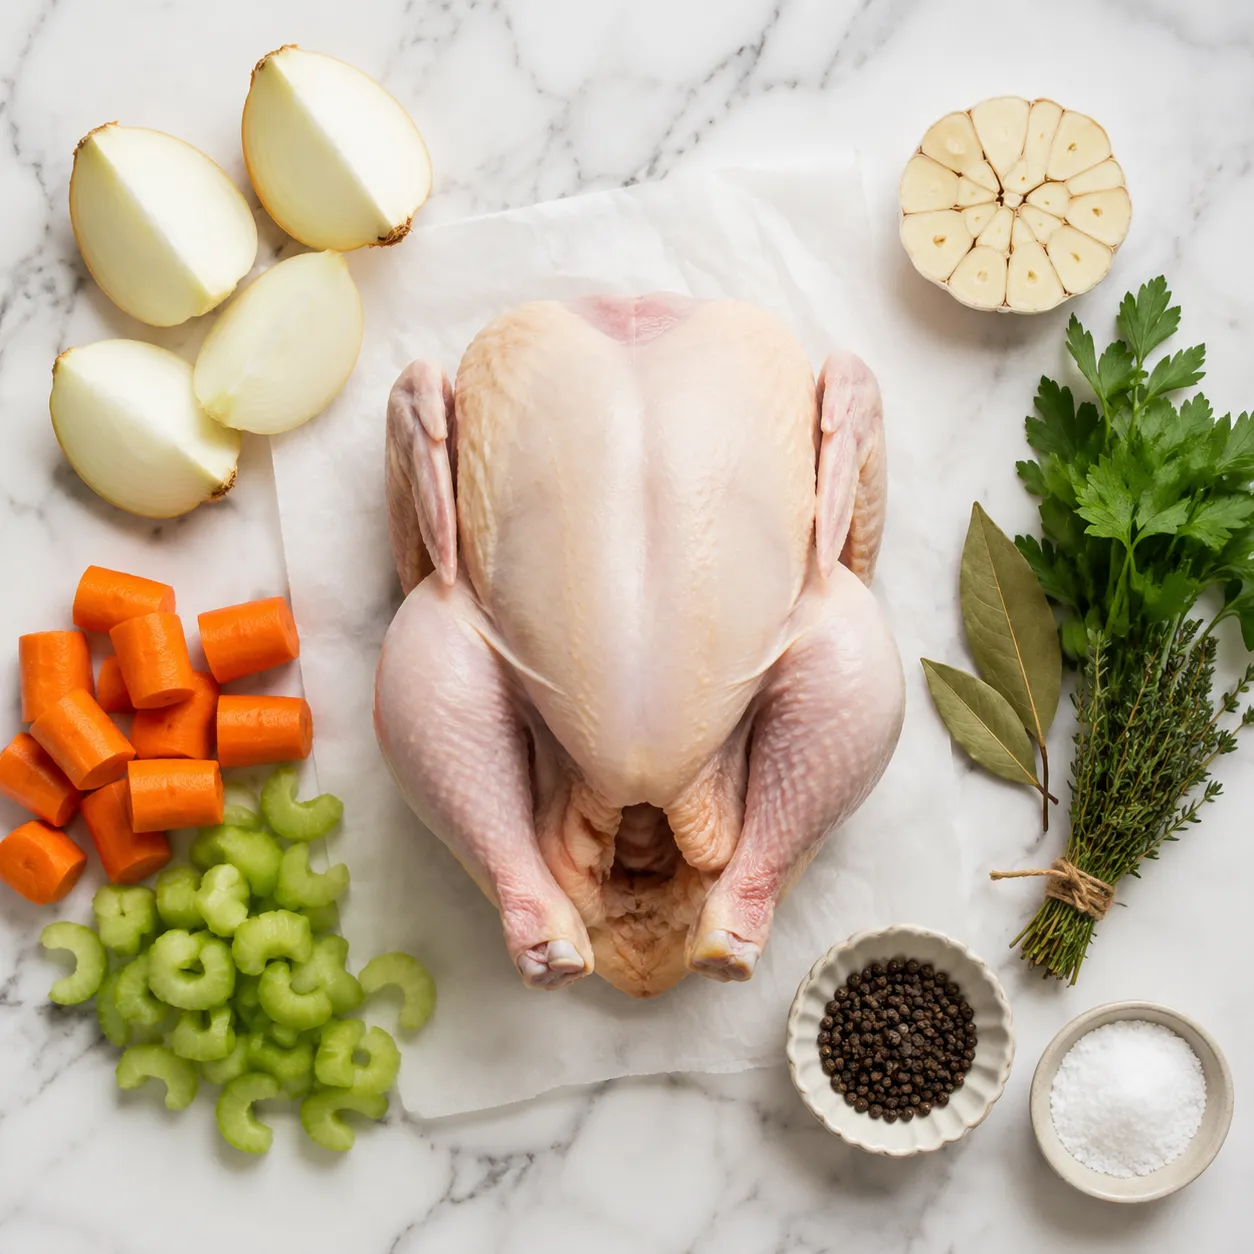
The chicken carcass is the soul of the pot. Save the bones from a roasted bird (this is exactly why I keep a gallon bag in the freezer after every how to roast a whole chicken night), buy a few pounds of backs and necks from the butcher counter, or use a whole bird if you want shredded meat for chicken noodle soup as a bonus prize. Roasted, browned bones give you golden color and deeper flavor; raw bones give you a paler, cleaner-tasting liquid more like a French-style white stock.
The classic mirepoix of onion, carrot, and celery is non-negotiable for me, plus a halved head of garlic, a couple of bay leaves, and a small bundle of parsley and thyme. Whole black peppercorns add gentle warmth without making the broth taste peppery. This is also the moment to use up your vegetable scraps stock stash if you keep one going in the freezer; leek tops, mushroom stems, parsley stems, and fennel fronds all earn their keep in the pot.
A Parmesan rind dropped in for the last hour adds a savory backbone you'll struggle to identify but absolutely miss when it's gone. A few dried mushrooms deepen the umami noticeably. A teaspoon of apple cider vinegar at the start helps pull minerals from the bones the way a true bone broth recipe does. Skip anything brassica (broccoli, cabbage, cauliflower) unless you want a sulfurous edge that ruins the pot, and go easy on potatoes, which can cloud the liquid.
The core method is simple: brown, cover with cold water, simmer gently, strain, cool. Each of those steps has small details that decide whether your finished pot tastes restaurant-quality or just okay.
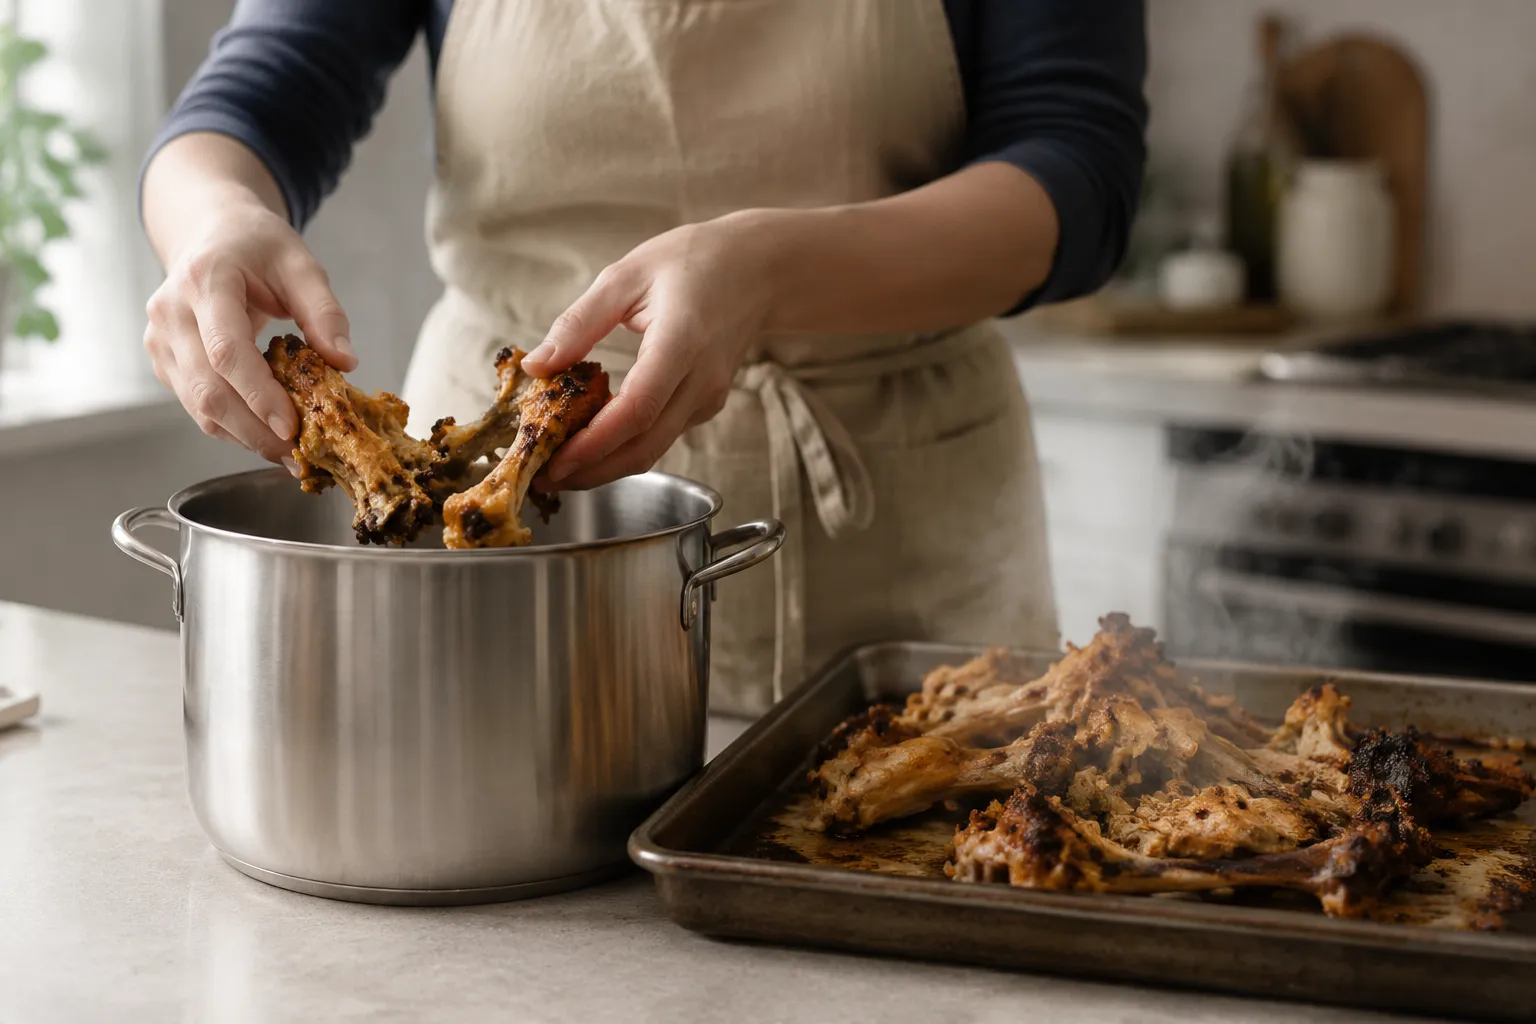
Spread your bones (and any chunks of onion and carrot you want extra-deep) on a sheet pan and roast at 425°F for 35 to 45 minutes until they're properly browned, not just warm. Those Maillard-browned edges are where golden color and meaty flavor come from. Skip this step entirely for a paler, more delicate result, similar to a homemade chicken stock you'd reach for in cream soups and white sauces where color matters as much as flavor.

Tip everything into your largest stockpot, scrape any browned bits from the sheet pan in with a splash of water, then cover with 12 cups of cold water. Cold is non-negotiable here. Starting cold lets proteins release slowly into the liquid instead of seizing up and clouding the pot. Bring it to a bare simmer over medium heat, never a rolling boil. You want lazy bubbles breaking the surface, not a churning, frothy pot.
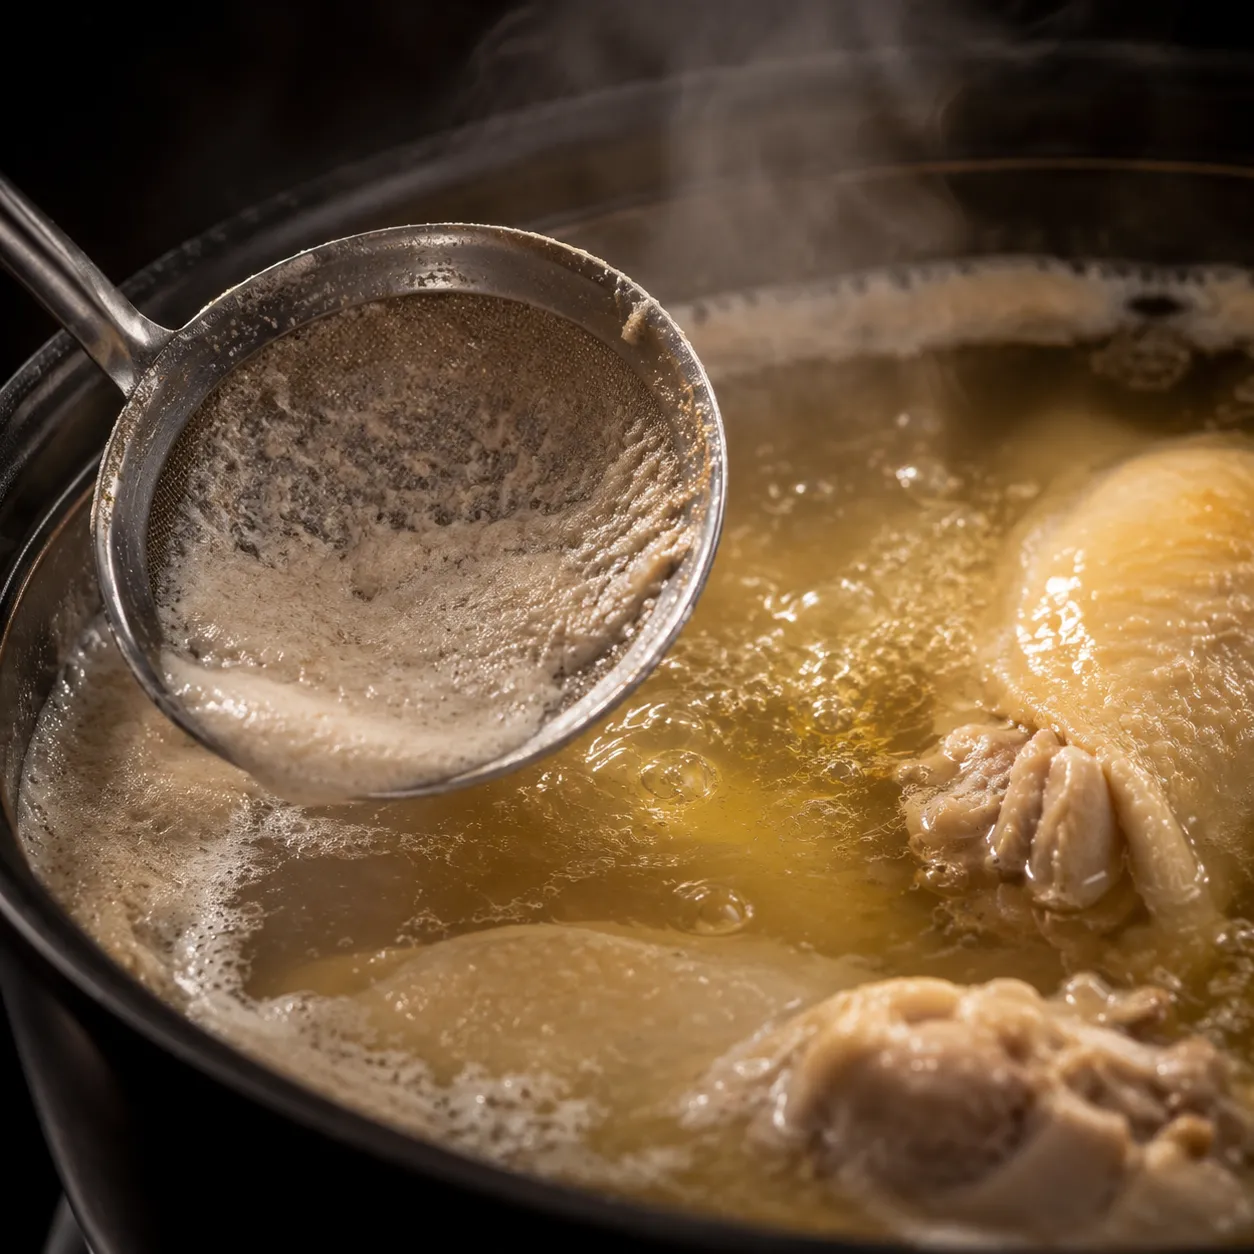
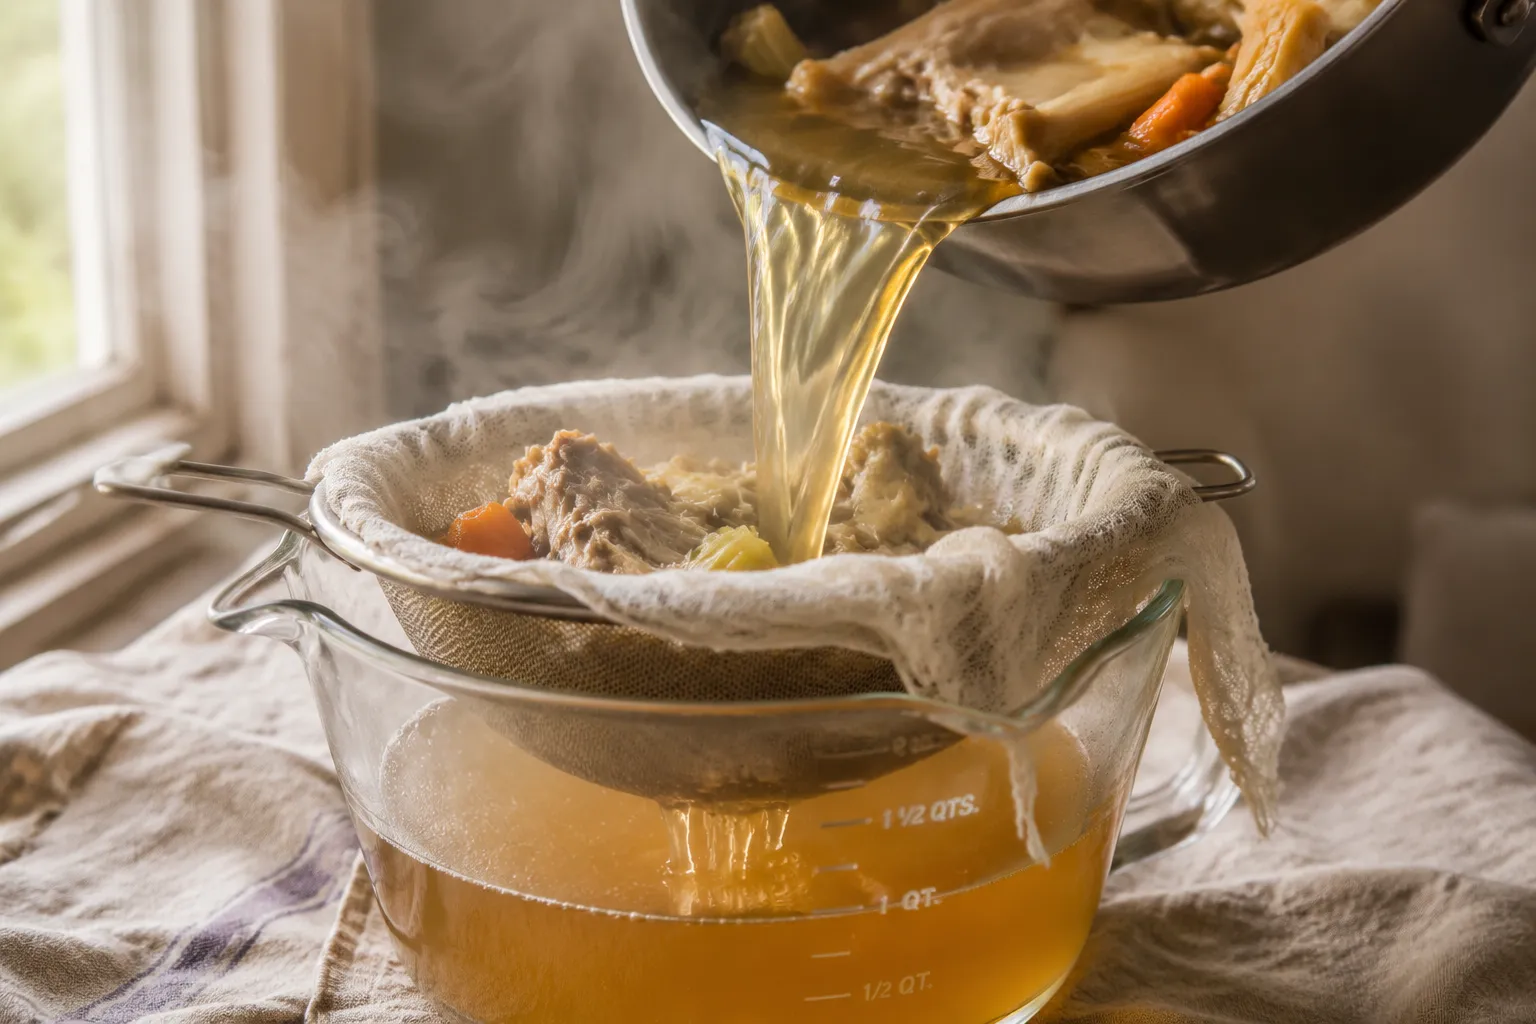
For the first 20 minutes, gray-brown foam will rise to the surface. Skim it patiently with a wide spoon or fine mesh skimmer; this is the single biggest factor in getting a clear final result. Keep simmering, partially covered, for 2½ to 3 hours total, then strain through a fine mesh sieve lined with cheesecloth into a heatproof bowl. Press lightly on the solids to extract every drop, then cool quickly in an ice bath before refrigerating overnight.
Once you understand the basic technique, you can run it through whichever appliance fits your day. The flavor differences between methods are real but small; the convenience differences are huge.
This is the method I just described, and it's still my favorite when I'm home and puttering around anyway. You get the most control over the simmer, easy access for skimming, and the kitchen smells incredible for hours. Plan on three hours mostly hands-off plus a quick strain, and you'll end up with the clearest, most golden result of any of these methods. It's the gold standard for a reason.
Pile everything into a 6-quart or larger slow cooker, cover with cold water to about an inch below the rim, and cook on LOW for 8 to 12 hours. Skim once or twice in the first hour if you happen to be in the kitchen; otherwise, the long, gentle heat does its thing while you sleep, work, or run errands. The broth comes out a touch less clear because you can't skim as actively, but the flavor is deep and the convenience is unmatched.
Pressure cooking compresses the timeline beautifully. Add bones, vegetables, herbs, and 10 to 12 cups of cold water (don't fill past the max line), seal, and cook on HIGH pressure for 45 minutes. Let the pressure release naturally for at least 20 minutes before opening the lid. The result is shockingly close to the three-hour stovetop version, with a slightly lighter color and a little more body from the sealed extraction.
Once you've got jars of homemade chicken broth lined up in the fridge and freezer, the question becomes what not to put it in.
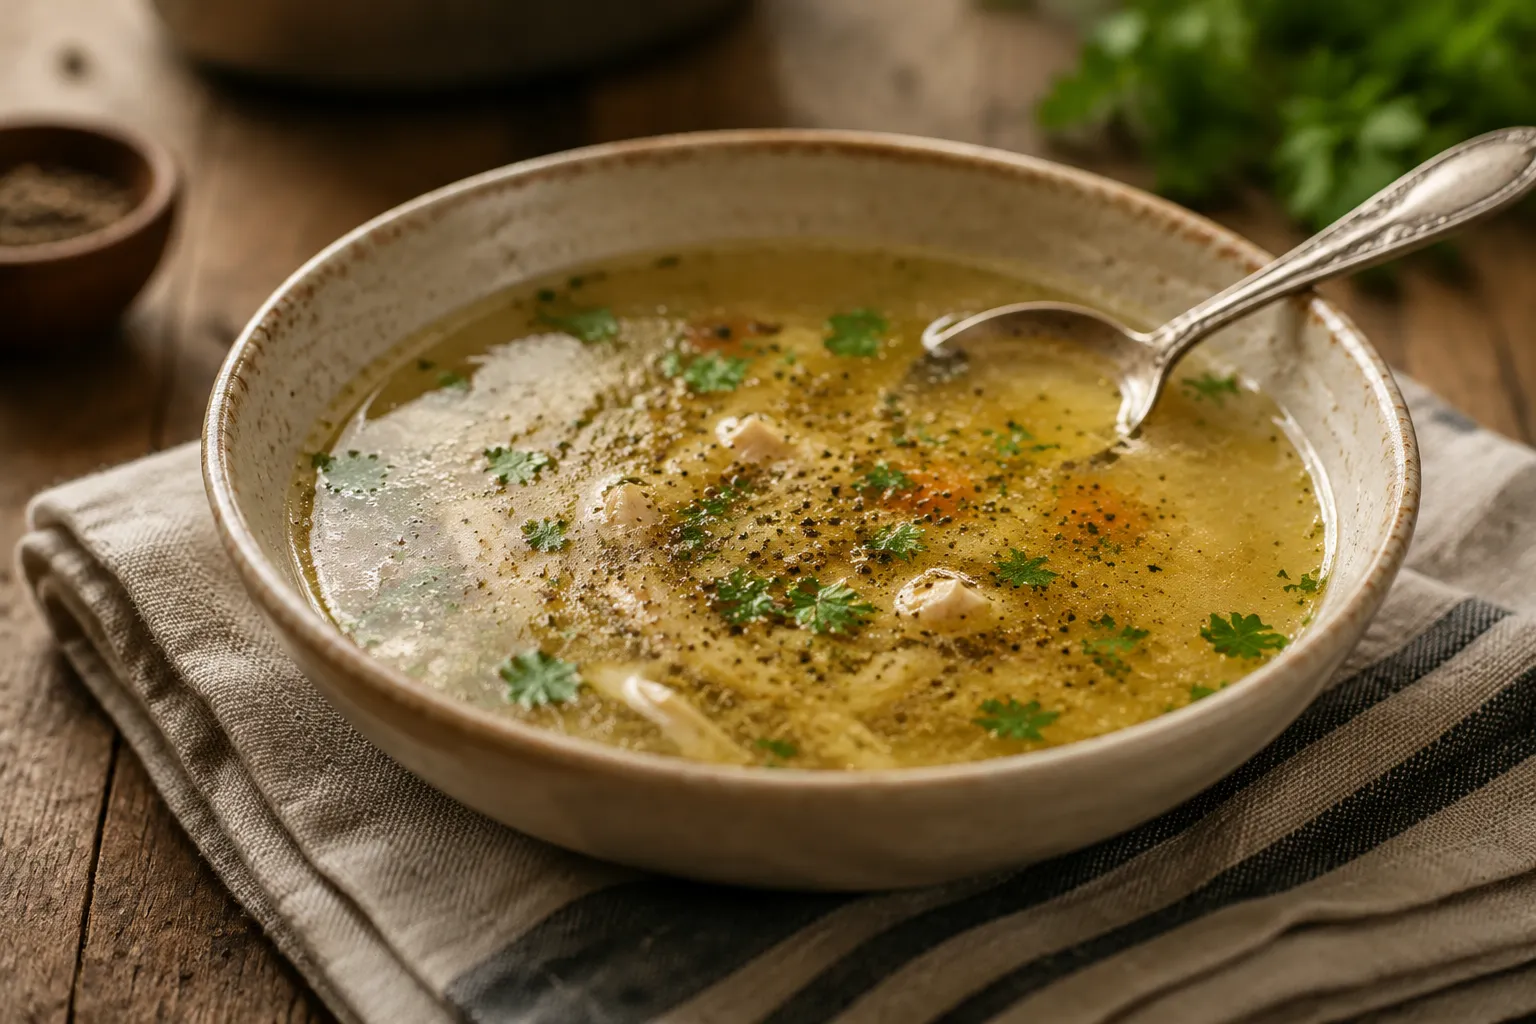
The simplest move is to drink it. Warm a mug, hit it with a pinch of salt, a grind of pepper, and a squeeze of lemon, and you have something between tea and soup that fixes a cold day in about ninety seconds. From there, it's the backbone of chicken noodle soup, tortilla soup, matzo ball soup, French onion, and any minestrone worth eating. Use it as the cooking liquid for rice and farro, for risotto, for braising chicken thighs or short ribs, or to deglaze a pan and turn fond into proper gravy.
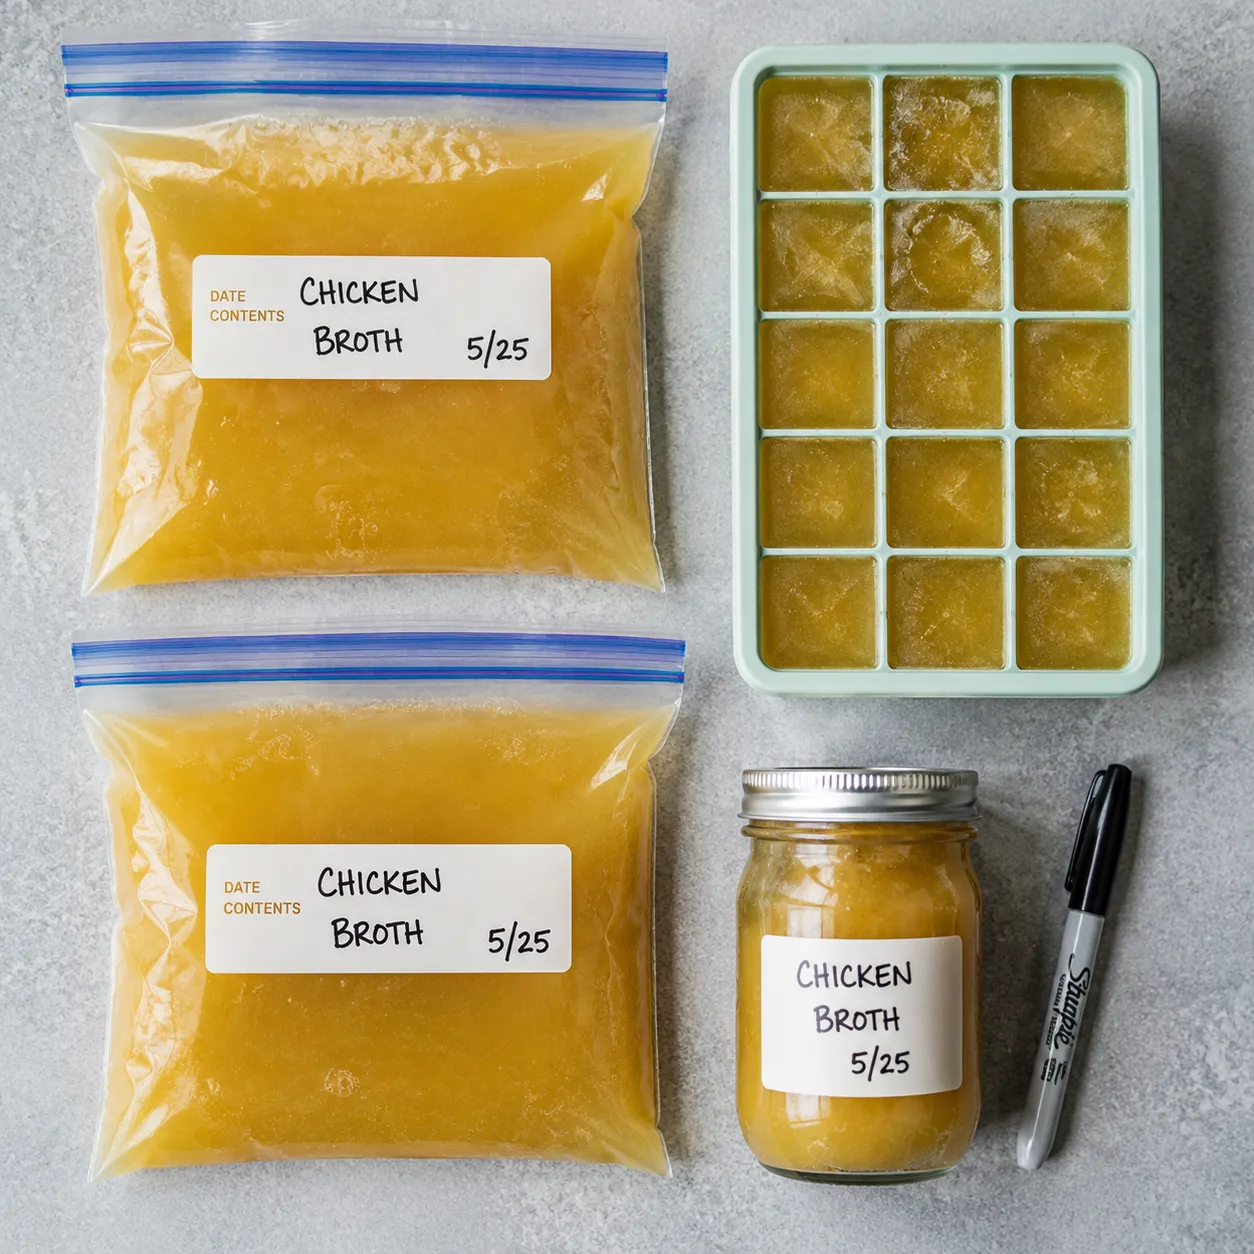
It also slots perfectly into freezer meal prep routines. I freeze it in two formats — quart bags for soup-volume needs and silicone cubes for the splash-of-liquid moments — so I always have whatever size I need on hand without thawing more than the recipe calls for. A handful of cubes can finish a pan sauce in seconds.
One last note: if you used a whole bird, don't toss the spent meat after straining. Pull off whatever's still tender, mix with a little of the broth to keep it moist, and you've got a head start on tomorrow's chicken salad, tacos, or pot pie filling. Nothing in this pot needs to go to waste, which is half of why I love making it in the first place.
The base recipe is forgiving and easy to riff on once you understand the simmer-low-and-slow rhythm. Try one of these adjustments depending on what you have on hand and what dish you're cooking it for.
Cool the strained broth completely before storing, ideally in an ice bath, since hot liquid sealed into a closed container can grow bacteria fast. Refrigerate in glass jars (leave headspace if you'll freeze them later) for up to 4 days. The fat will solidify on top overnight; lift it off for a leaner broth or stir it back in for richer flavor in soups and braises.
For longer storage, freeze for up to 6 months. I portion most of mine into quart-size freezer bags laid flat so they stack like books, and freeze a few silicone ice cube trays' worth for the times I just need a splash to deglaze a pan or finish a sauce. Always label with the date so you actually rotate through the stash, and thaw overnight in the fridge or directly in a saucepan over low heat.