Gender Reveal Cake: Easy Pink or Blue Surprise Inside
Ingredients
Scale
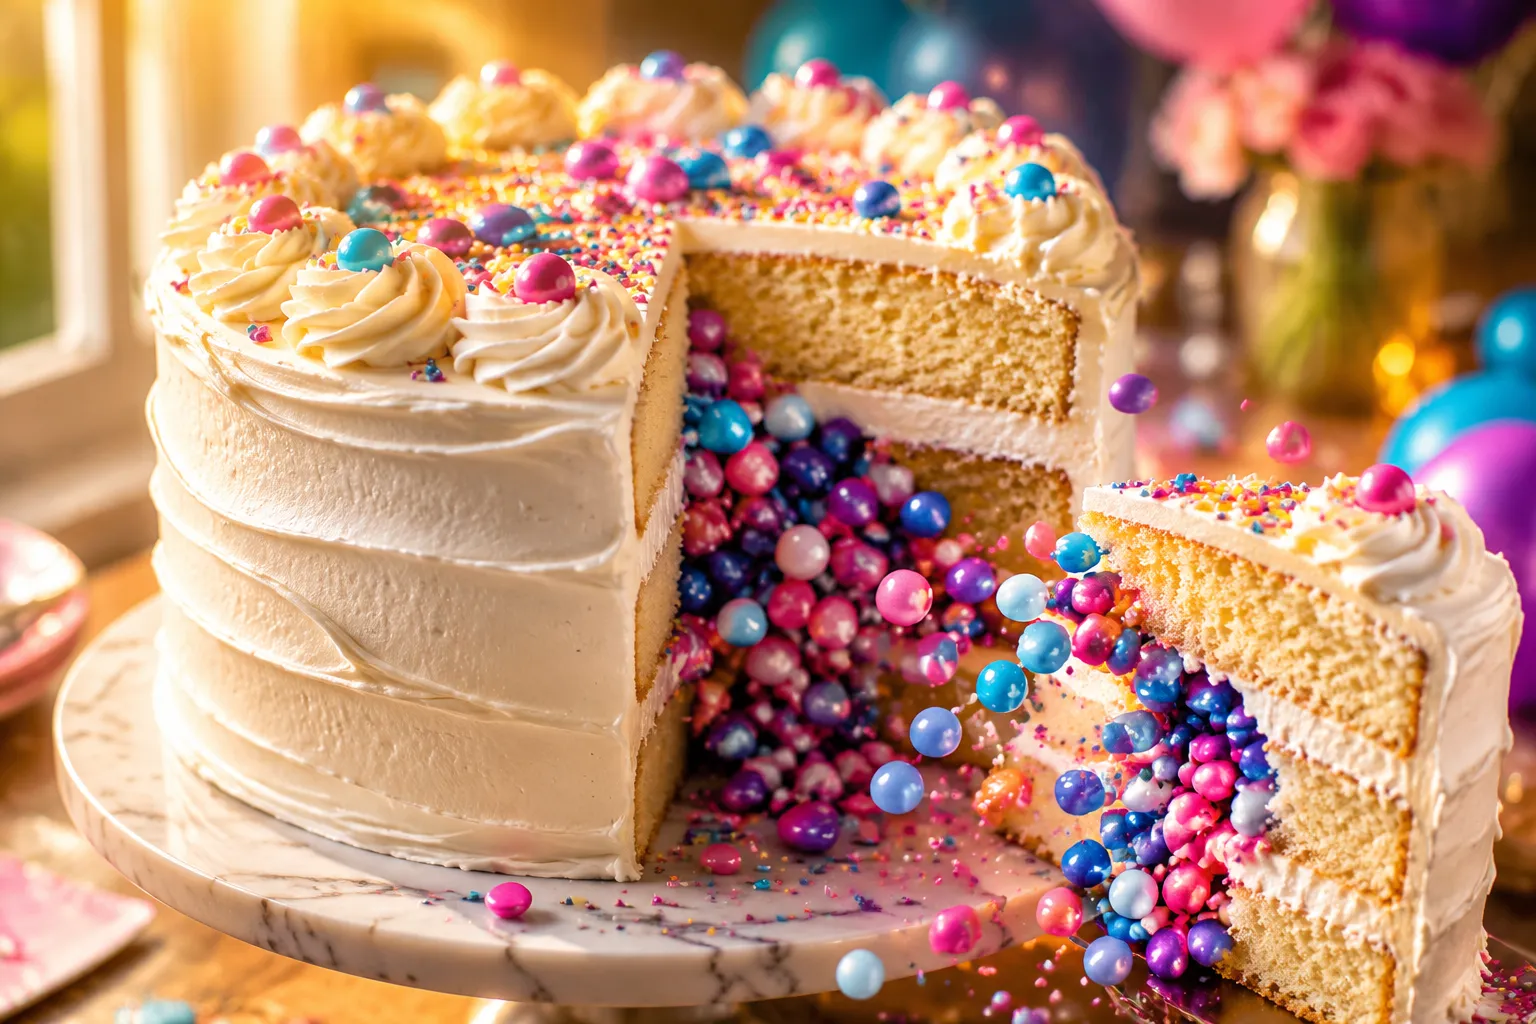
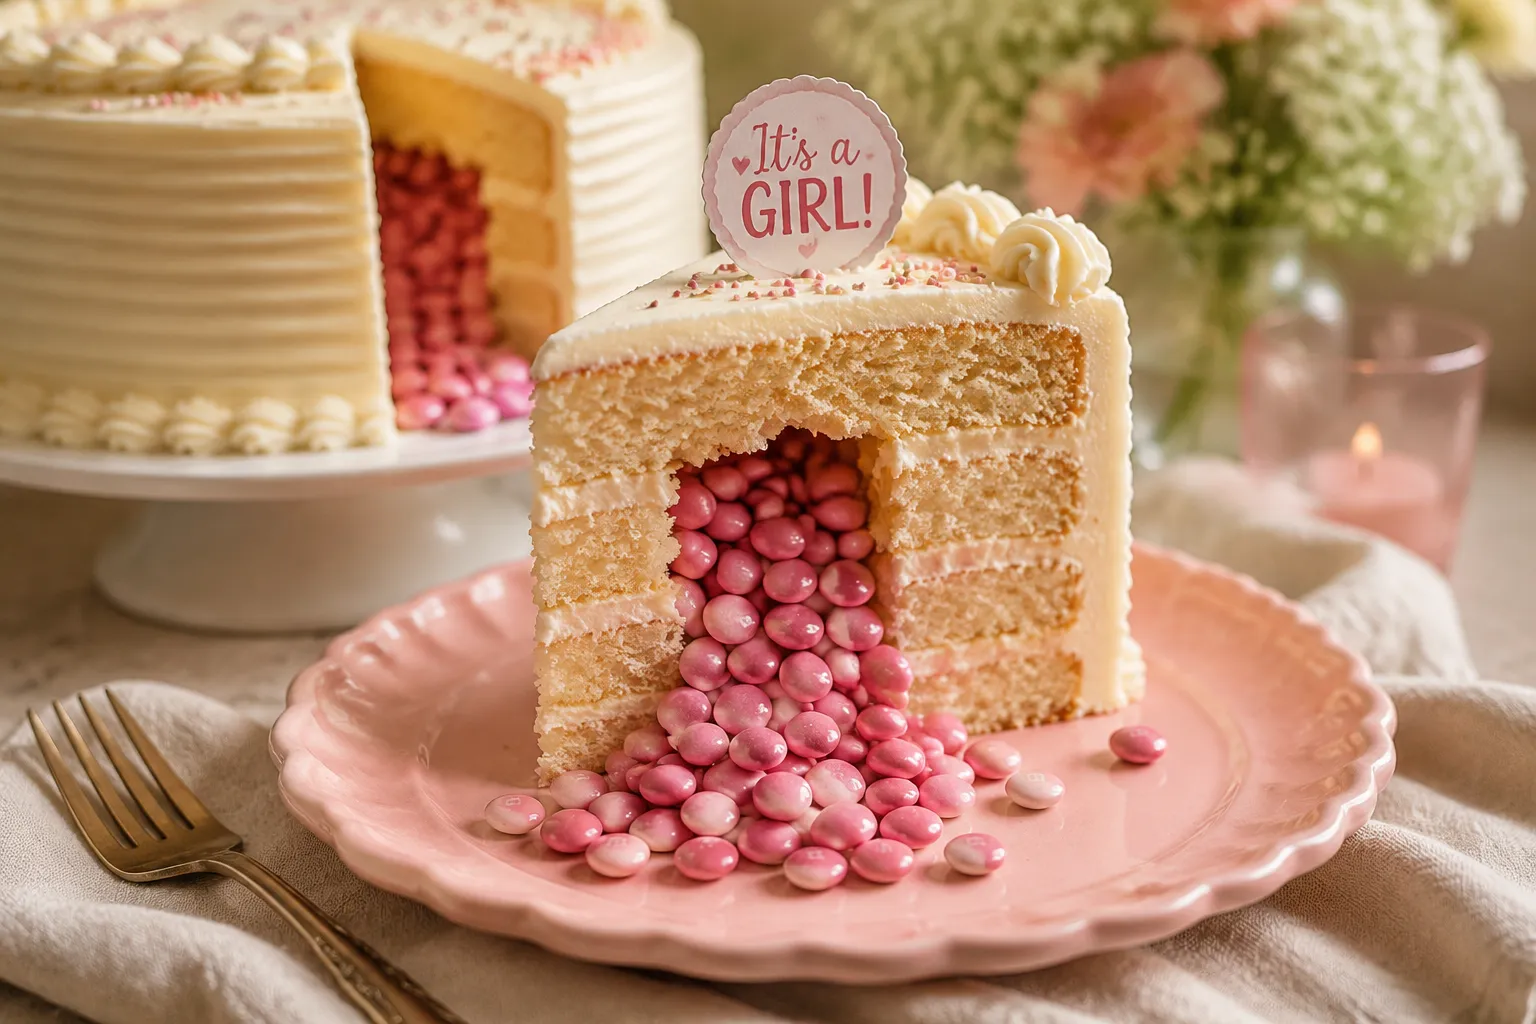
A showstopping gender reveal cake with fluffy vanilla layers, silky vanilla buttercream, and a hidden pink or blue surprise tucked inside.
This gender reveal cake is the dessert version of a confetti cannon: cut it open and a glorious cascade of pink or blue candies tumbles out to spill the secret. It is the centerpiece every reveal party deserves, and the best part is that it does not require pastry-school skills or specialty equipment. If you can bake a basic homemade vanilla cake and spread frosting with an offset spatula, you can absolutely pull this off.
I have made this cake for sisters, cousins, and one very nervous best friend who needed a foolproof plan for a backyard party of thirty people. The structure is simple: three fluffy vanilla layers, a hidden well carved into the middle layer, a pour of pink or blue candies, and a smooth coat of silky vanilla buttercream sealing the secret inside. From the outside it looks like a clean, photo-ready celebration cake. From the inside, it is pure showstopper.
What I love most is that it builds in a moment of suspense. Guests gather, phones come out, and the second that knife pulls back the first slice, the answer pours out for everyone to see. That is the magic of a true surprise inside cake, and once you see how the assembly works, you will want to make this one for every milestone party on your calendar.
There are a hundred ways to announce a baby, but very few of them feed the room while doing it. A gender reveal cake hands you both jobs in one beautiful package, the spectacle and the dessert. The cake itself is built on the same easy layer cake recipe I use for birthdays, with a tender vanilla crumb that holds up to slicing without crumbling apart at the big moment.
The trick is in the architecture. Instead of dyeing the cake itself, you carve a clean cylinder out of the middle layer and pack it tight with pink or blue M&Ms or sprinkles. Once the layers are stacked and frosted, gravity holds the candy in place, and only the person who filled it knows which color is hiding inside. That makes this version especially friendly when the parents-to-be want to be just as surprised as their guests.
It also slots right in next to your other baby shower desserts without competing for attention. The exterior reads as elegant, neutral, and timeless, so the photos look beautiful from every angle. Then comes the slice, and suddenly the whole table cheers. It is a recipe that does emotional work, not just dessert work.

You do not need anything fancy here, just classic baking staples and a small bag of brightly colored candy. Pull everything out and bring the dairy and eggs to room temperature before you start. It makes the batter come together more smoothly and bakes into a more even crumb.
The base is a buttery, vanilla-forward cake built on all-purpose flour, granulated sugar, unsalted butter, whole milk, eggs, baking powder, salt, and plenty of pure vanilla extract. Whole milk gives the layers the right richness, and good vanilla makes the frosting taste bakery-quality instead of generic. If you want a slightly more tender crumb, you can substitute cake flour cup-for-cup, but all-purpose works beautifully and is what most home kitchens already have on hand.
This is where you commit to the secret. Pink or blue M&Ms or sprinkles, Sixlets, or jumbo nonpareils all work well, since they pour cleanly, hold their color, and will not bleed into the cake during storage. You will need about three-quarters of a cup to fill the carved center generously without overstuffing it. Buy both colors so no one peeking at your shopping cart gets a clue, and stash the unused bag deep in a drawer until after the reveal.
The vanilla buttercream frosting is what seals the secret inside and gives the cake its clean white exterior. You will whip softened unsalted butter with powdered sugar, a splash of whole milk or heavy cream, vanilla extract, and a pinch of salt until it is pale, fluffy, and pipeable. Keep it bright white by using clear vanilla extract if you plan to pipe rosettes, or stick with regular vanilla for a slightly cream-toned finish that still photographs beautifully.
The full step-by-step measurements live in the recipe card below, but here is the big-picture flow so you know what you are walking into. Plan on about an hour of active work plus cooling time, and read through once before you start so the assembly feels natural and unhurried.
Divide your batter evenly between three greased and parchment-lined eight-inch round pans, then bake until a toothpick comes out with a few moist crumbs. Cool the layers in the pans for ten minutes before turning them out onto a wire rack to finish cooling completely. Once cool, this is where knowing how to level cake layers really pays off, since a long serrated knife or a simple cake leveler shaves the domed tops flat so your stack sits straight and the carved well stays neat.
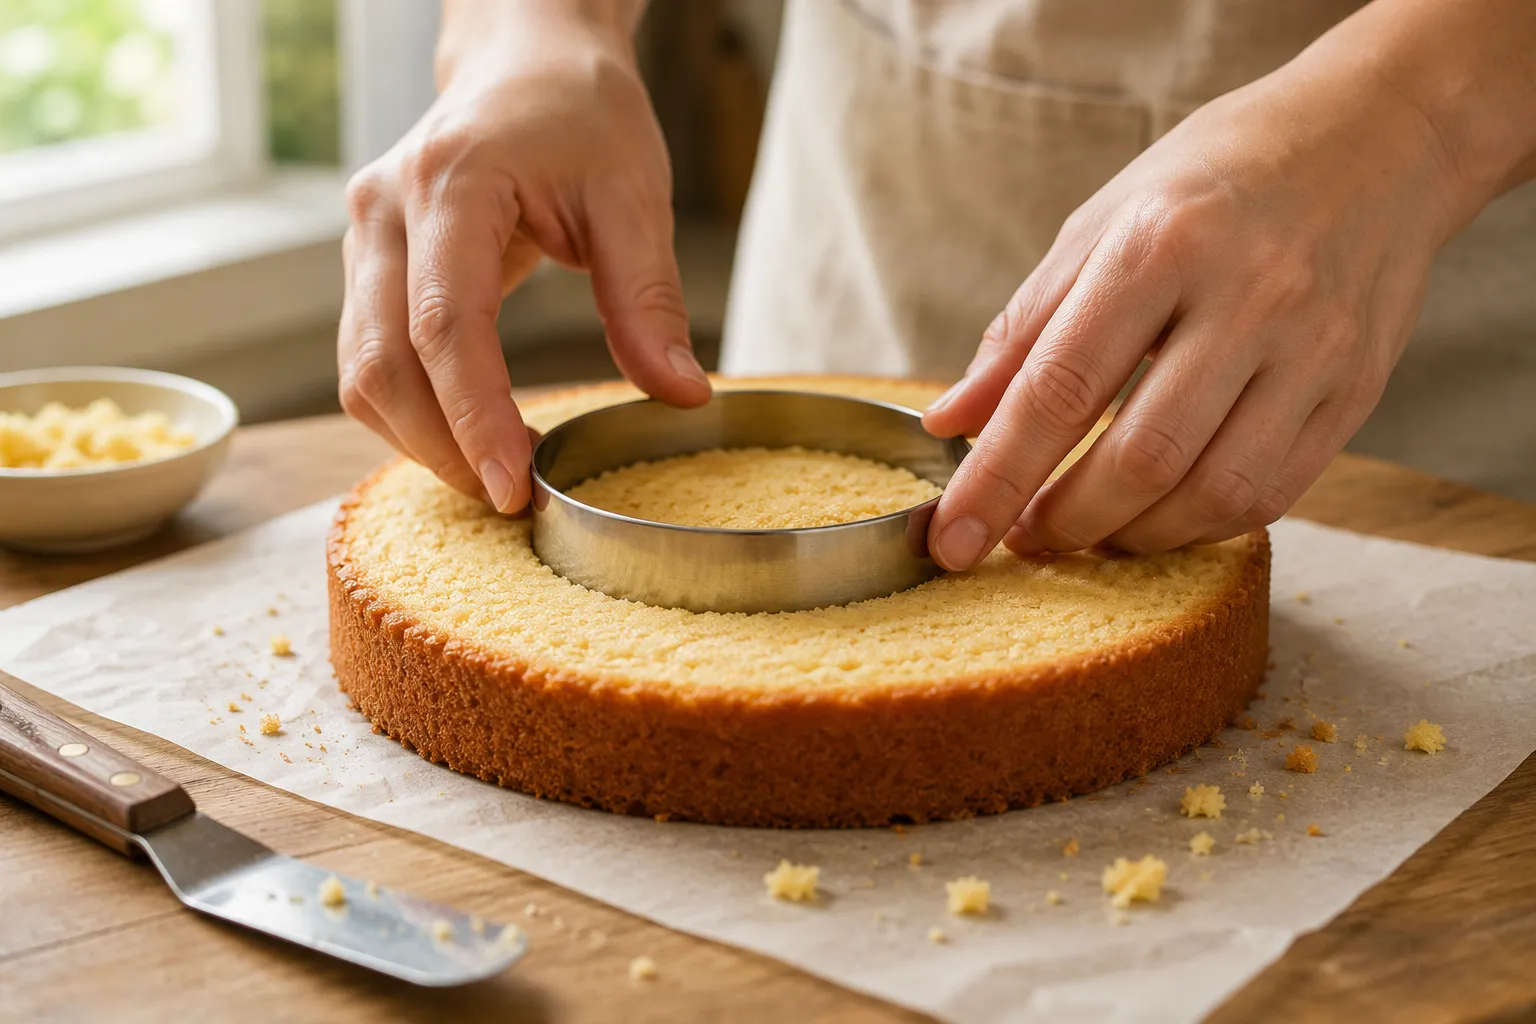
Set the middle layer on parchment and press a three-inch round biscuit cutter straight down into the center, stopping about half an inch from the bottom so the candy has a floor to rest on. Wiggle the cutter gently to release the plug, then lift it out and save the cake scraps for snacking. You are left with a tidy round well that will hold roughly three-quarters of a cup of candy.
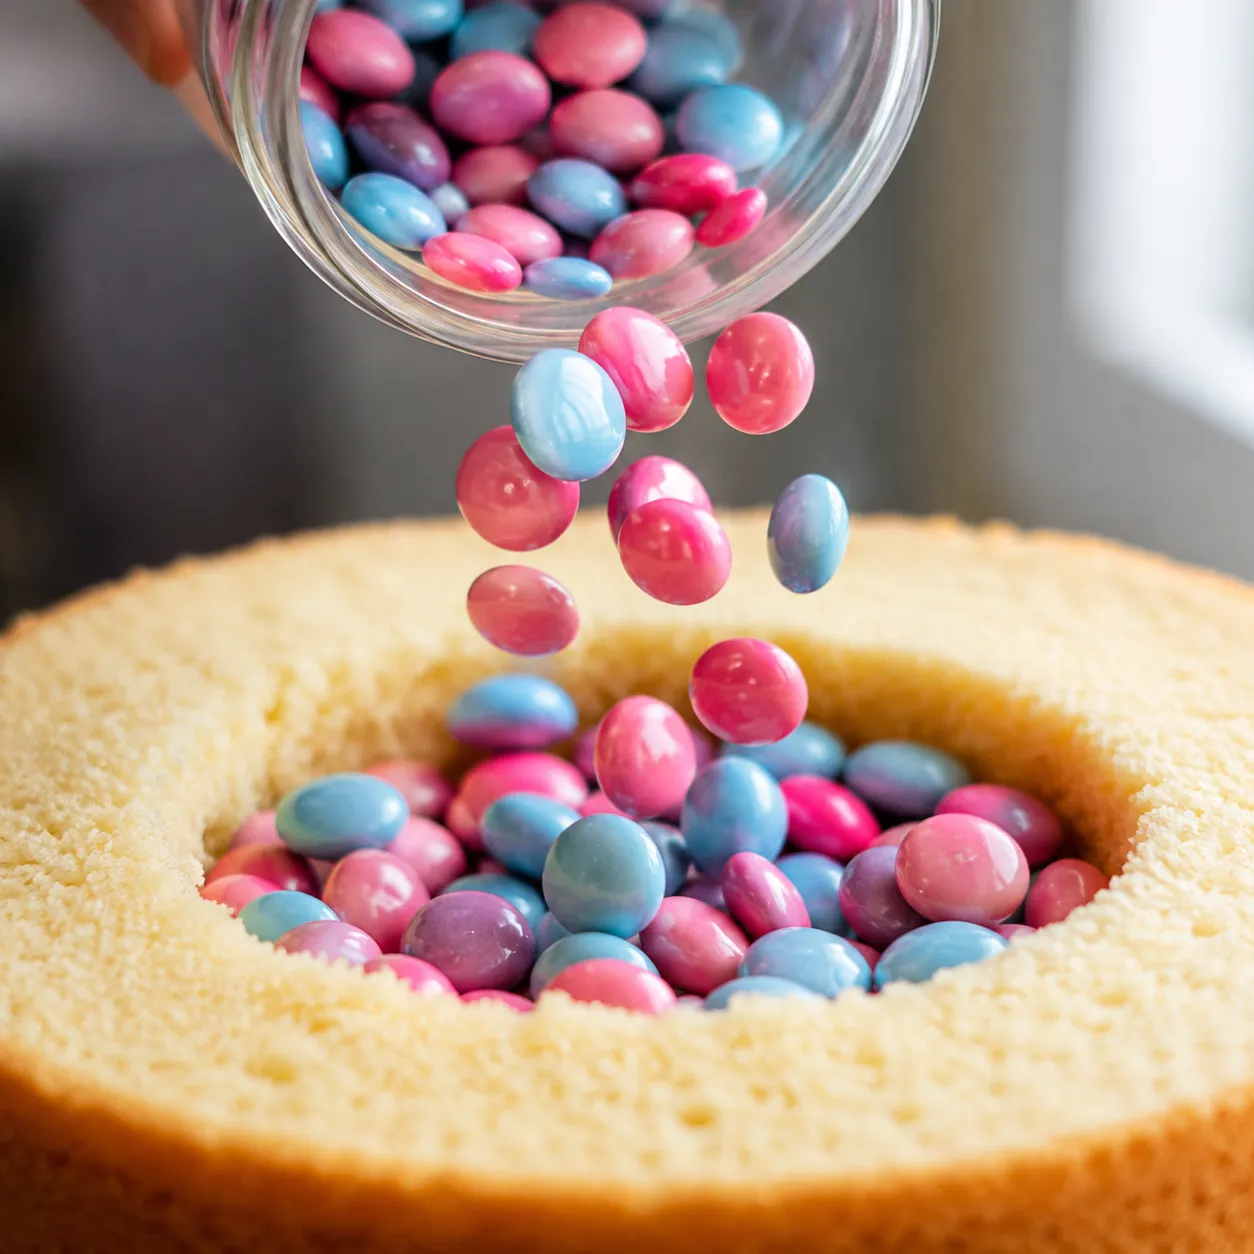
Pour your chosen pink or blue candies into the well until they reach just below the rim. Do not overfill, or the top layer will not sit flush. This is the moment to commit to the secret. If you want to be surprised yourself, this is the step a trusted friend should handle while you wait in another room with the door closed.
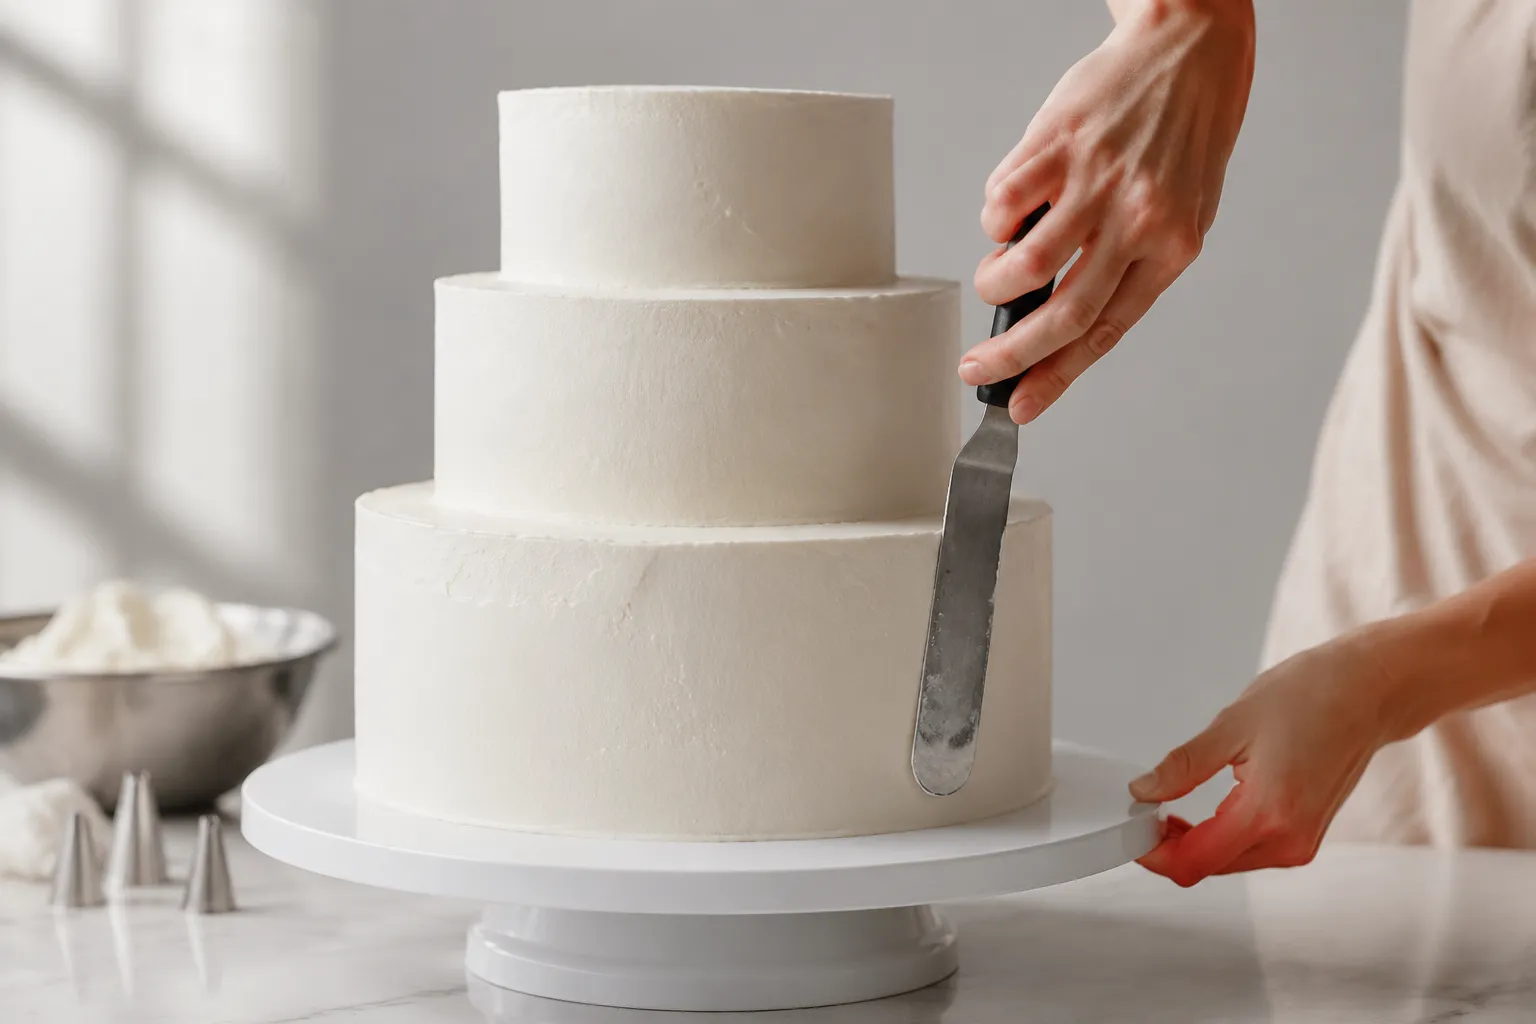
Spread a thin ring of buttercream around the rim of the filled layer to seal the candy in place, then set the top cake layer down gently and press to settle. Apply a thin crumb coat of frosting all over the cake and chill for fifteen minutes. Finish with a generous final coat of vanilla buttercream, smoothing the sides with a bench scraper for that clean, modern finish.
The decorations are where you can let your personality shine without giving away the answer. The rule is simple: keep the outside neutral, or use both pink and blue together so guests truly cannot guess which color is hiding under the frosting.
A pure white buttercream exterior is the most elegant choice and makes the inside reveal feel even more dramatic. Soft cream, pale yellow, sage green, or a watercolor blush-and-blue swirl all keep the secret while still looking party-perfect. Avoid heavy color washes that match the candy inside, since strong tinting can hint at the answer if any of it shows through a thin spot.
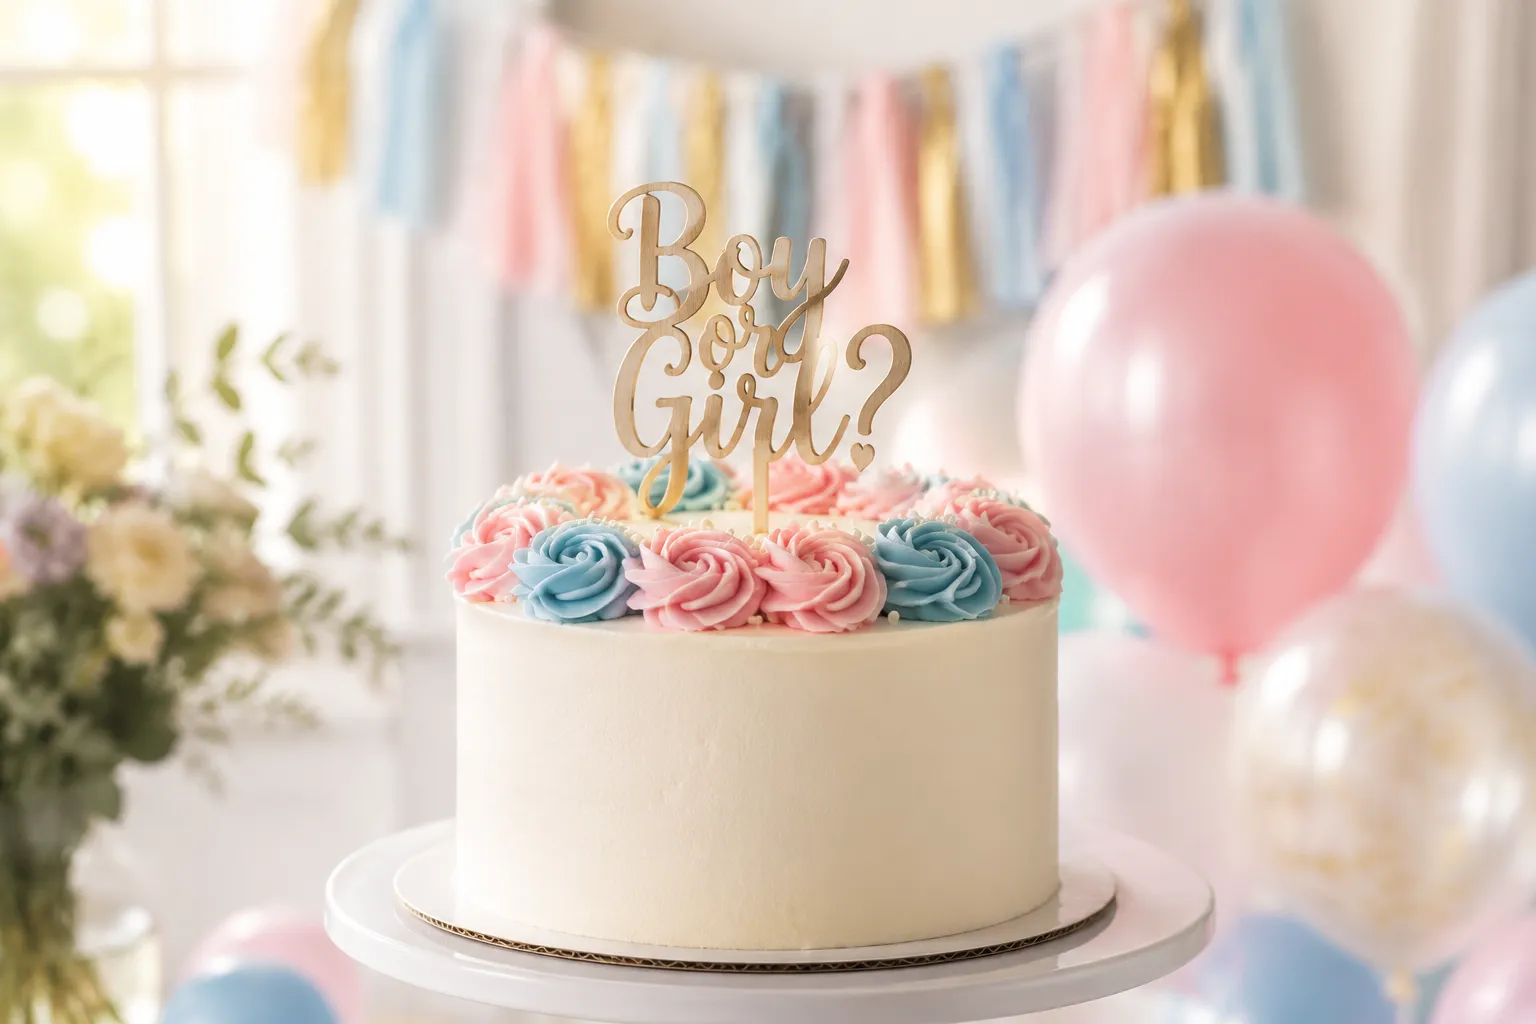
A ring of alternating pink and blue rosettes around the top edge nods to the question without answering it. Pipe them with a 1M star tip, then tuck pastel nonpareils between the swirls. A scattering of sprinkles cascading down one side gives the cake instant texture and a celebratory feel that photographs beautifully.
A wooden Boy or Girl topper, a tiny bunting banner, or a simple pair of cardstock question marks all work beautifully. Add fresh flowers in coordinating pastels for an heirloom-quality finish, or stick with balloons and confetti for a playful party vibe. Keep the topper lightweight so it does not sink into the buttercream while the cake waits to be cut.
The slice is the whole point, so it is worth a beat of practice in your head before you pick up the knife. Use a long serrated blade and start the cut directly through the center of the cake so the first slice releases the candy cleanly toward the camera.
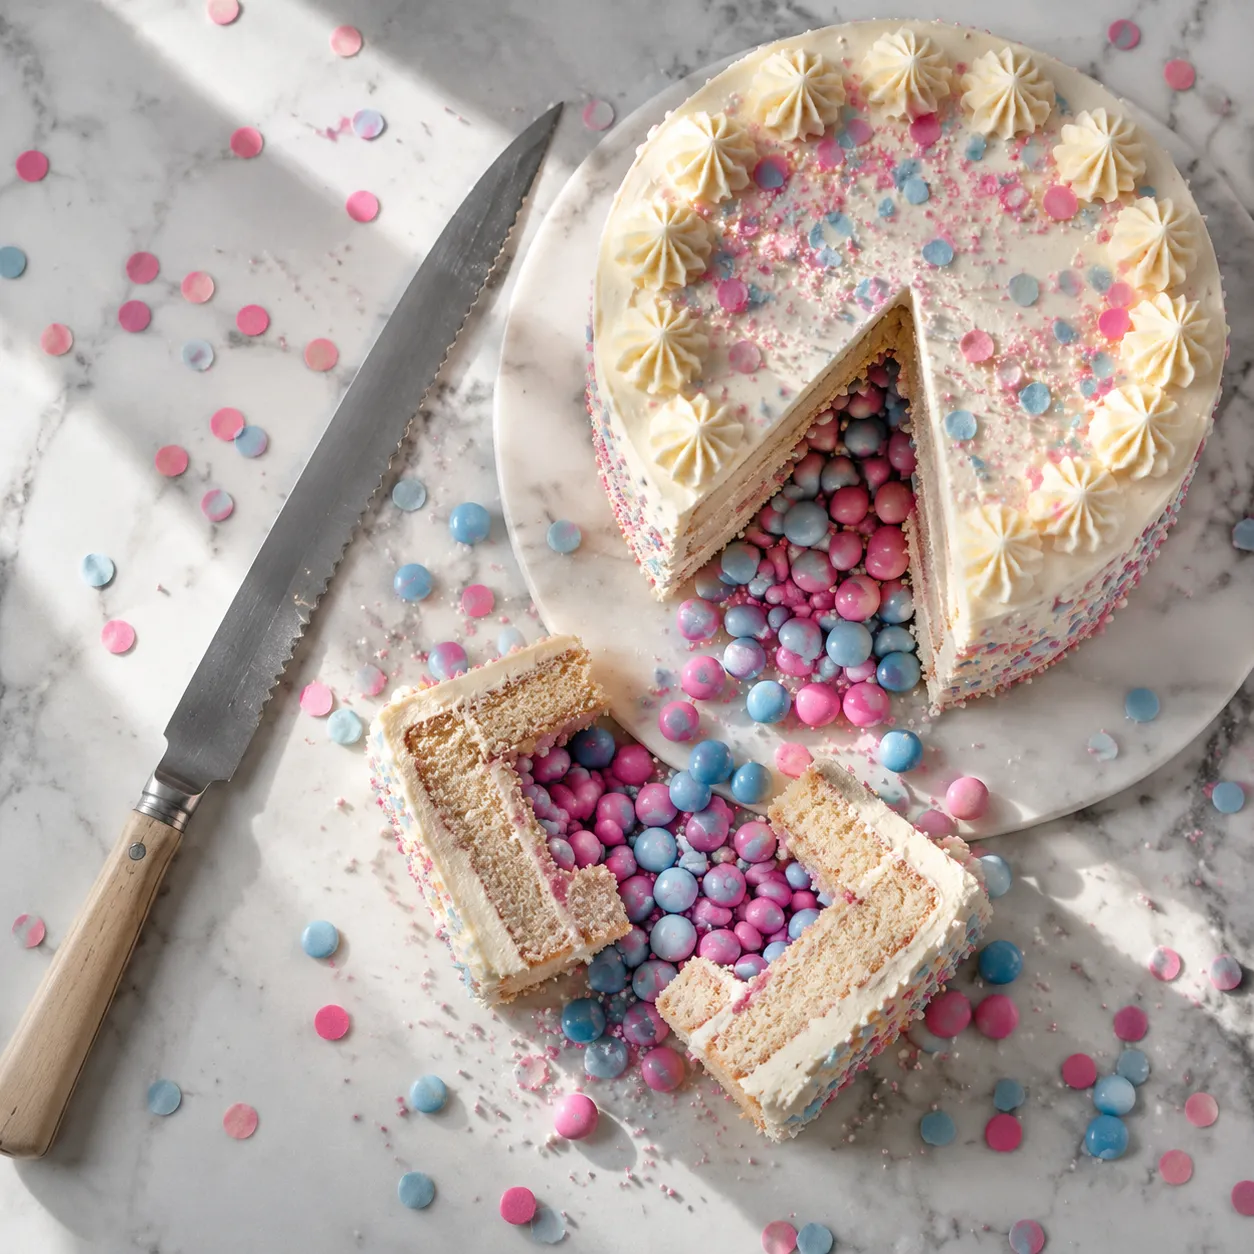
Press straight down rather than sawing back and forth, then gently pull the wedge forward and tilt it slightly. The candies will tumble onto the plate and the open cake face will photograph beautifully. Have someone ready to film from a low angle, a foot or two back from the cake, for the cleanest reveal video.
A gender reveal cake this special deserves a little logistical planning so the day itself feels calm. Bake the layers the night before and stash them wrapped at room temperature, then whip the buttercream in the morning while the coffee is brewing. If you are nervous about colors, do a small test pour with a few candies on a paper plate to see exactly how they cascade, since it will help you visualize the cut and where to position guests for the best view.
If you are also dialing in vibrant colors for matching cupcakes or accent cookies on the dessert table, it is worth browsing a few gel food coloring tips before you shop. Gels give you saturated, true pinks and blues without thinning your buttercream, and a tiny dab goes a remarkably long way. Now grab your apron, hide the candy bag, and let the baby reveal party begin.
The candy-filled center is the classic, but this cake welcomes plenty of creative spins depending on your party style and how much time you have.
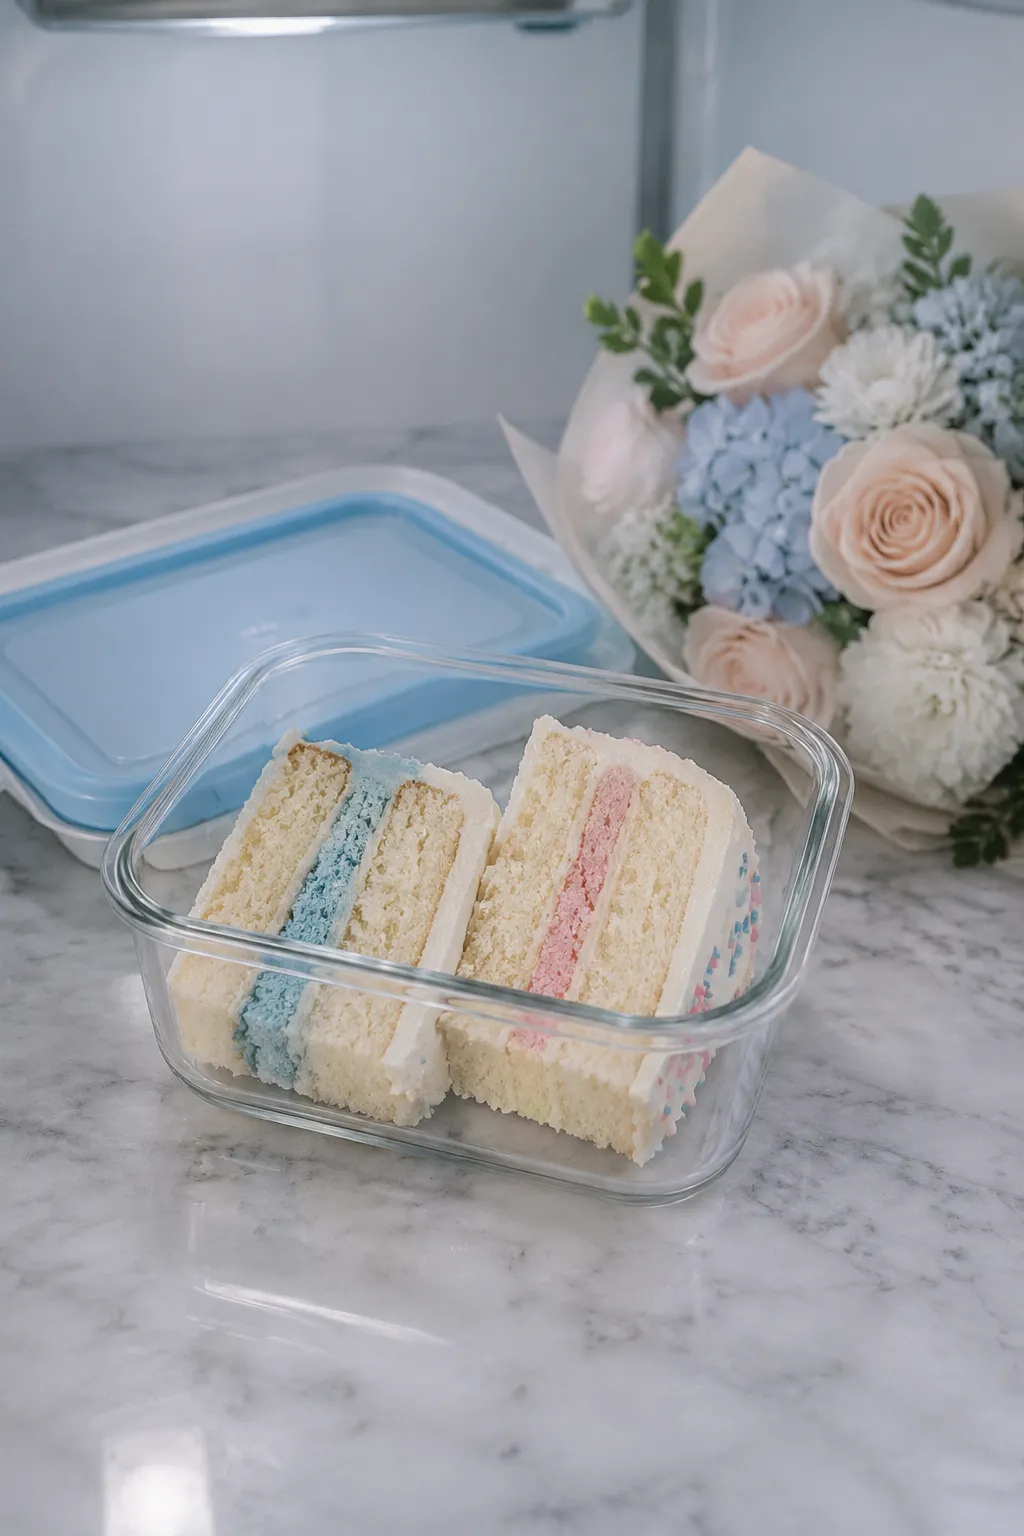
Store any leftover cake covered tightly in the refrigerator for up to four days. The buttercream firms up when chilled, so let slices sit at room temperature for thirty to forty-five minutes before serving to bring back the silky texture and tender crumb. A glass storage container with a snug lid keeps the cake from picking up other fridge odors and prevents the cut faces from drying out.
To get ahead, bake the cake layers up to two days early and refrigerate them tightly wrapped in plastic, or wrap and freeze for up to one month. Thaw frozen layers overnight in the refrigerator, still wrapped, before assembling. The buttercream is best whipped the day of decorating, but it can be made one day ahead and stored covered at cool room temperature, then rewhipped briefly to restore its fluffy texture before frosting.