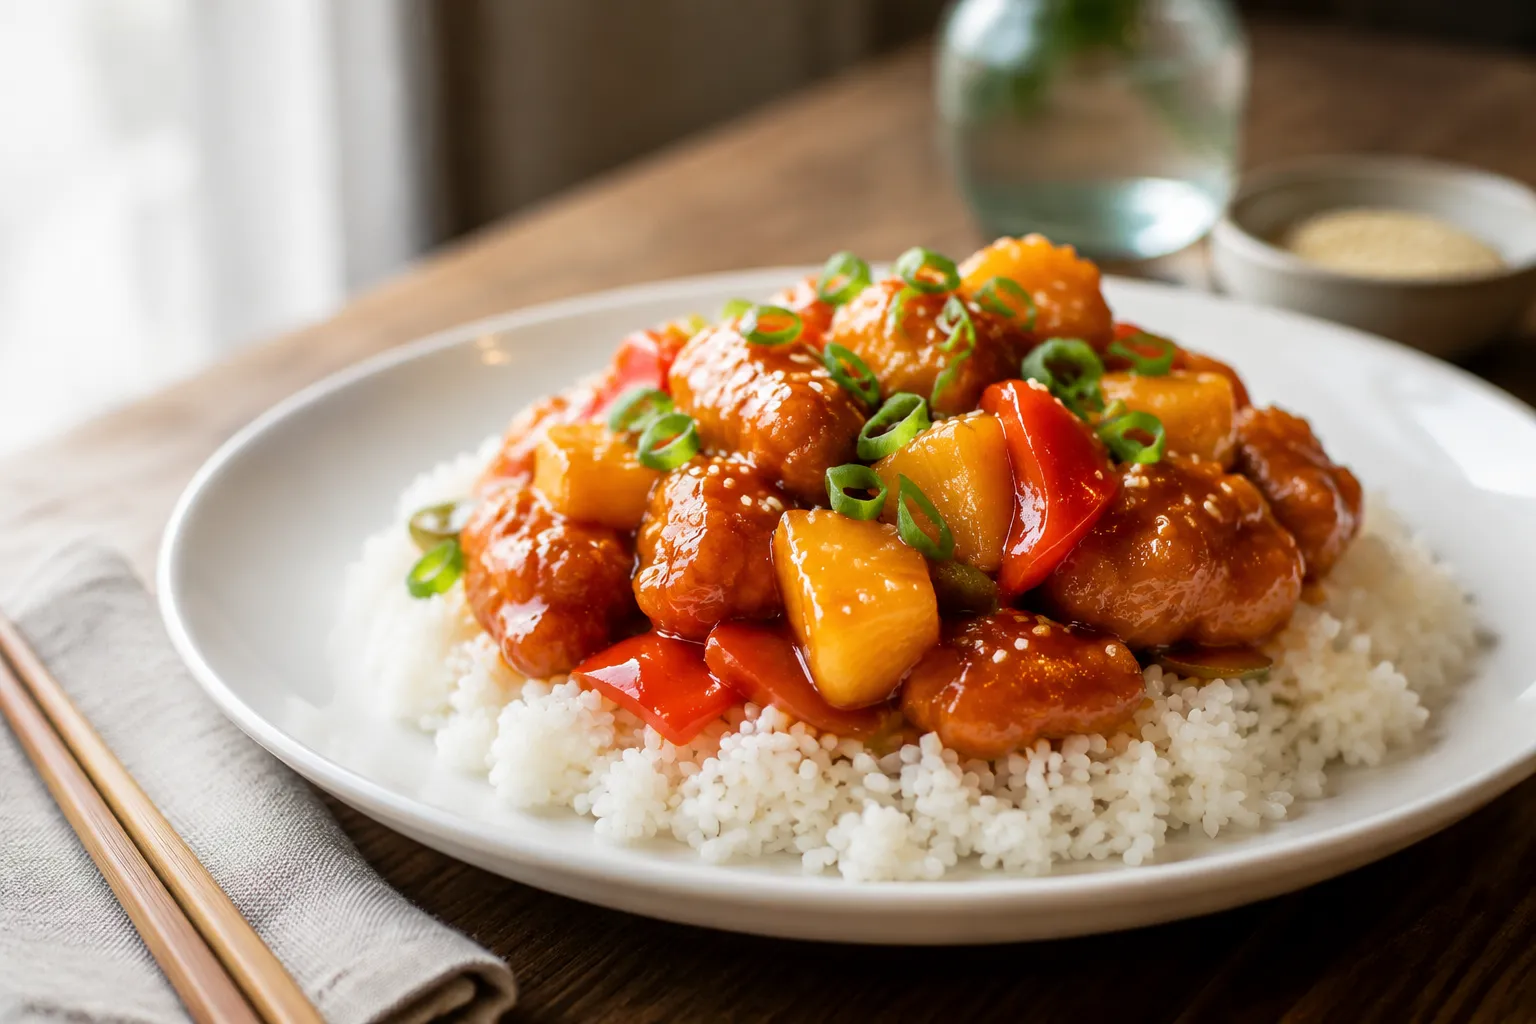
Sweet and Sour Chicken (Better Than Takeout in 30 Min)
Ingredients
Scale
Crispy golden chicken tossed in a glossy, tangy-sweet pineapple sauce. This sweet and sour chicken beats takeout and comes together in just 30 minutes.
There's a specific kind of craving that hits around 6 PM on a Tuesday: glossy, sticky-sweet, vinegar-bright sweet and sour chicken with golden crispy edges and warm chunks of pineapple bursting in every bite. For years I called the takeout place down the street and paid $14 for a sad styrofoam container. Then I started making it at home, and honestly, I cannot go back.
This 30-minute version skips the deep fryer entirely. The chicken gets a double dip in egg and cornstarch, pan-fries to a shatter-crisp gold in a regular skillet, then tumbles into a five-ingredient pineapple sauce that nails that ruby-red Chinese-American gloss. No corn syrup, no neon-red dye, no wondering what's actually in the bottle.
I've tested this recipe more times than I'd like to admit, and the version below is the one my husband requests on repeat. It's faster than waiting for delivery, cheaper than the $40 family meal, and the crispy coating actually holds up under the sauce. Let me walk you through it.
Most home versions of sweet and sour chicken either bake the chicken (no real crunch) or call for a full deep fryer (mess plus a quart of oil). This one splits the difference. Shallow pan-frying in three tablespoons of oil gives you the crackly coating you actually want without flooding your kitchen with smoke or filling a Dutch oven with grease.
The other thing I obsess over is the sauce ratio. Too much ketchup and it tastes like cocktail sauce. Too much vinegar and your face puckers on the first bite. The five-ingredient ratio below is what I landed on after a dozen tries, and it has that perfect Chinese takeout balance — sweet enough to make you reach for a second piece, tart enough to keep you eating it.
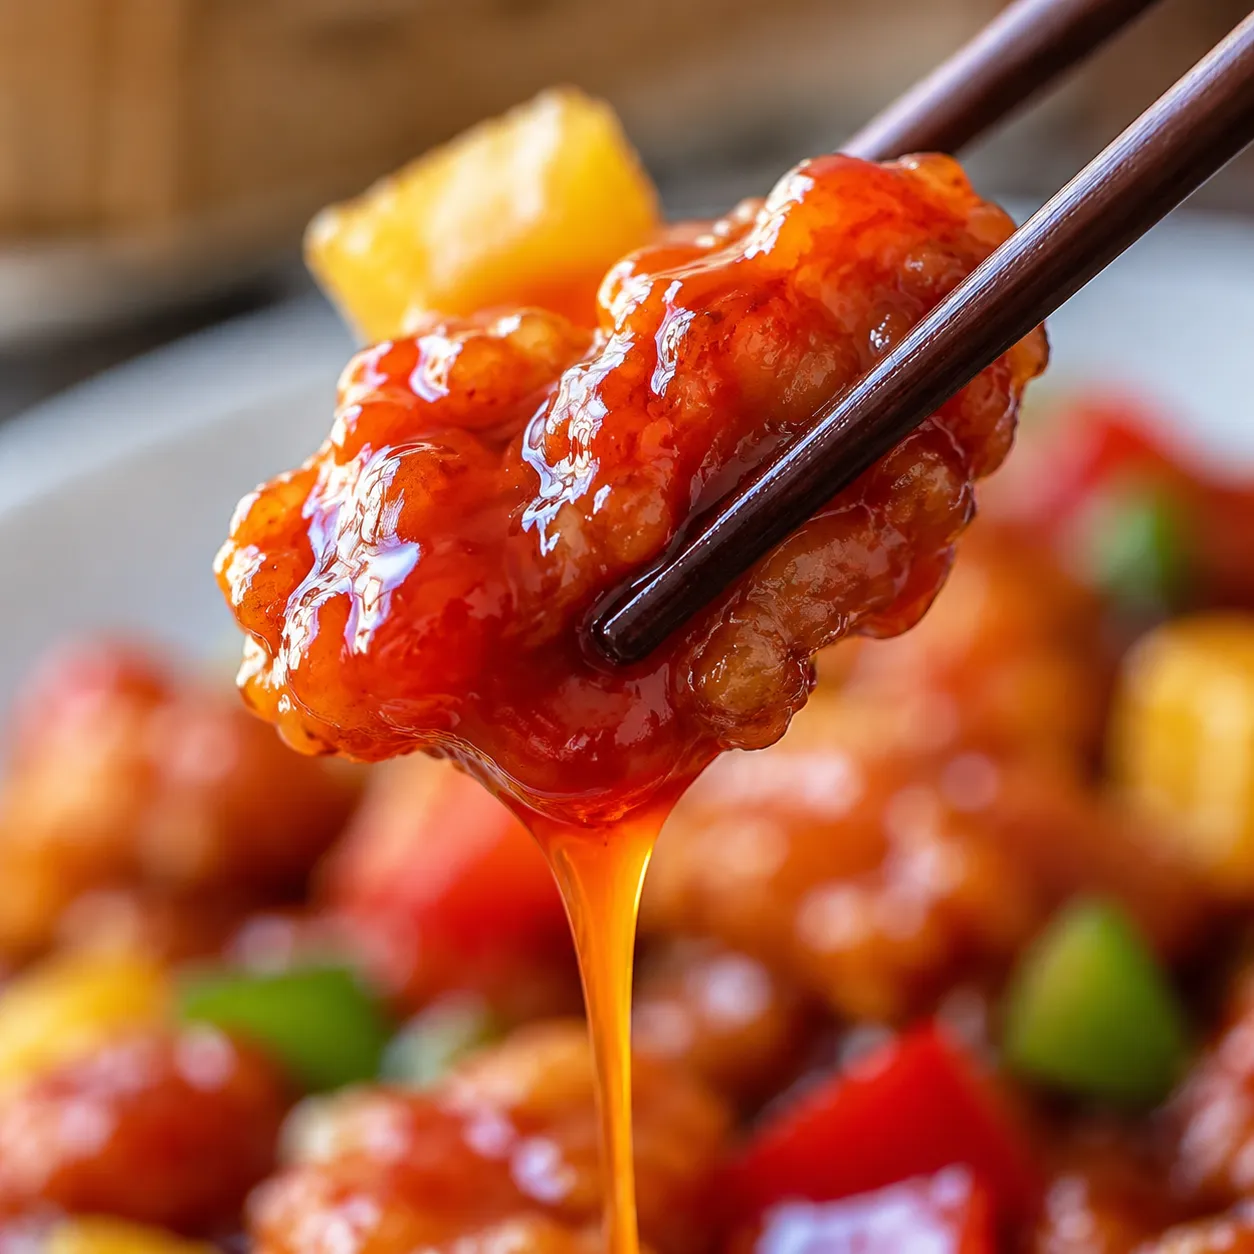
If you've been making the old-school baked-with-bottled-sauce version forever, this will feel like an upgrade. Real pineapple chunks add a fresh tropical sweetness that jarred sauce can't fake, and a quick cornstarch slurry at the end gives you that lacquered, mirror-glossy finish that screams restaurant in the best way.
Almost everything in this recipe lives in a standard American pantry. The only items you might need to grab on a special trip are rice vinegar and pineapple chunks, both available at any grocery store. Here's what each component is doing and why it's there.
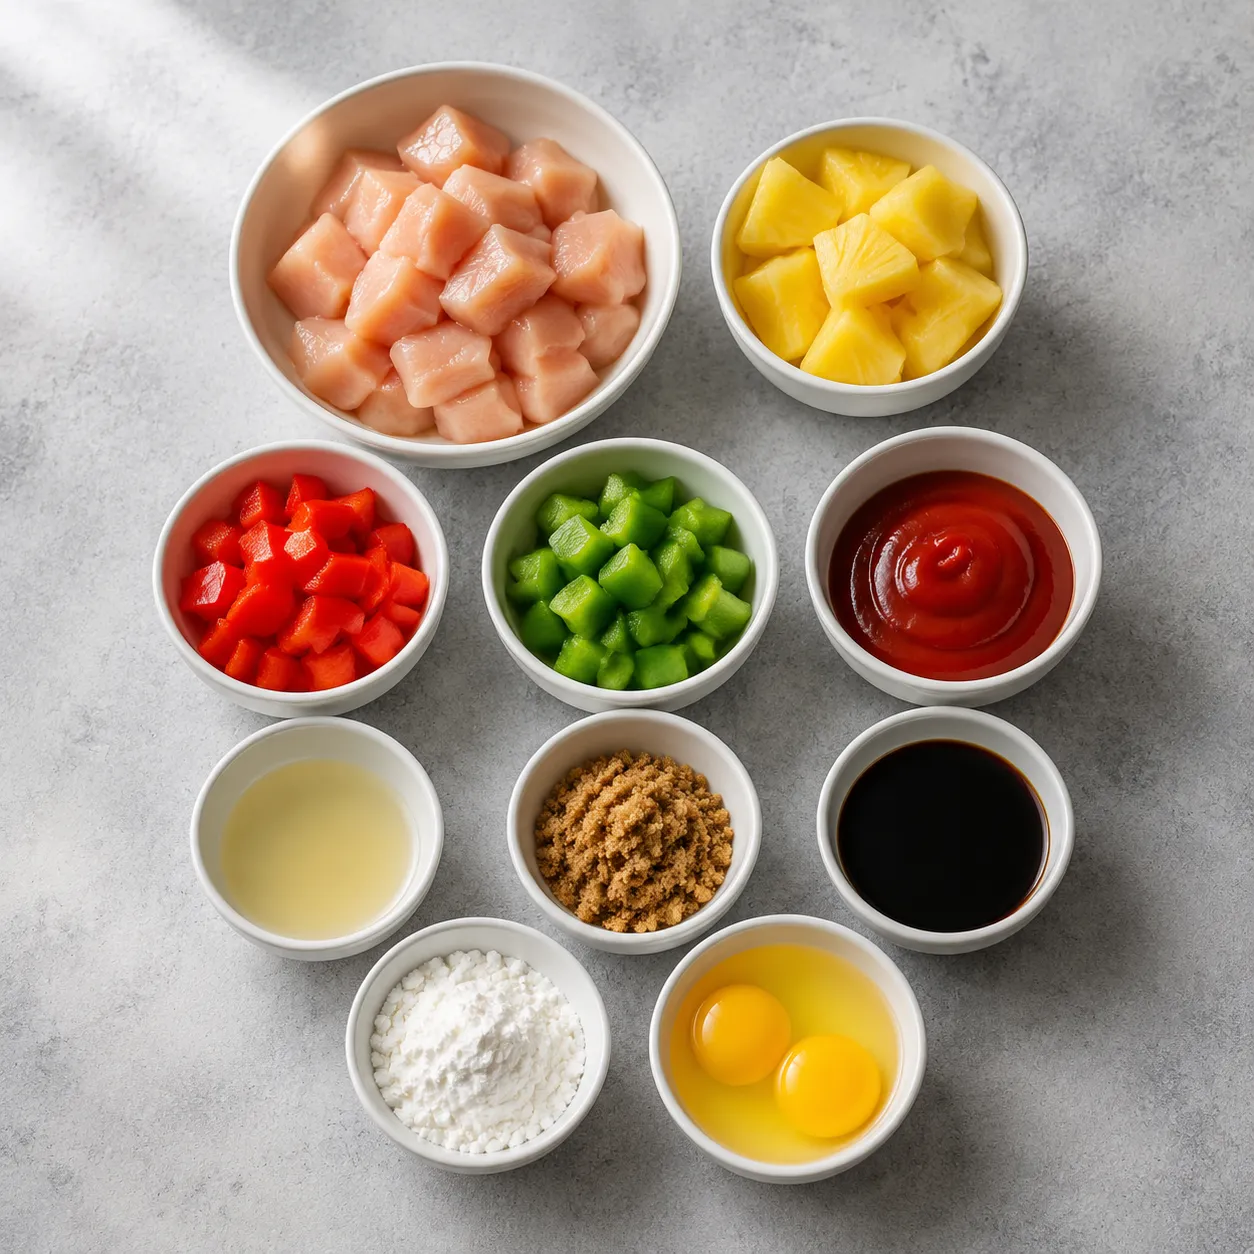
Boneless skinless chicken breasts cut into 1-inch cubes are my go-to for speed, but thighs work beautifully too if you want richer, juicier meat. The coating is just two ingredients: beaten eggs and cornstarch. Cornstarch (not flour) is non-negotiable here — it fries up glassier and stays crispier than any all-purpose flour coating I've tested. A pinch of salt and a splash of soy sauce on the raw chicken seasons it from the inside out.
Five things make up the sauce: ketchup, rice vinegar, brown sugar, soy sauce, and pineapple juice. That's it. Ketchup brings the color and a touch of tomato sweetness, rice vinegar carries the tang (do not substitute white vinegar — too harsh), brown sugar deepens the sweetness, soy sauce adds umami and salt, and pineapple juice ties it all together with a tropical edge. A small cornstarch slurry whisked in at the end thickens everything to the right cling-to-the-spoon consistency.
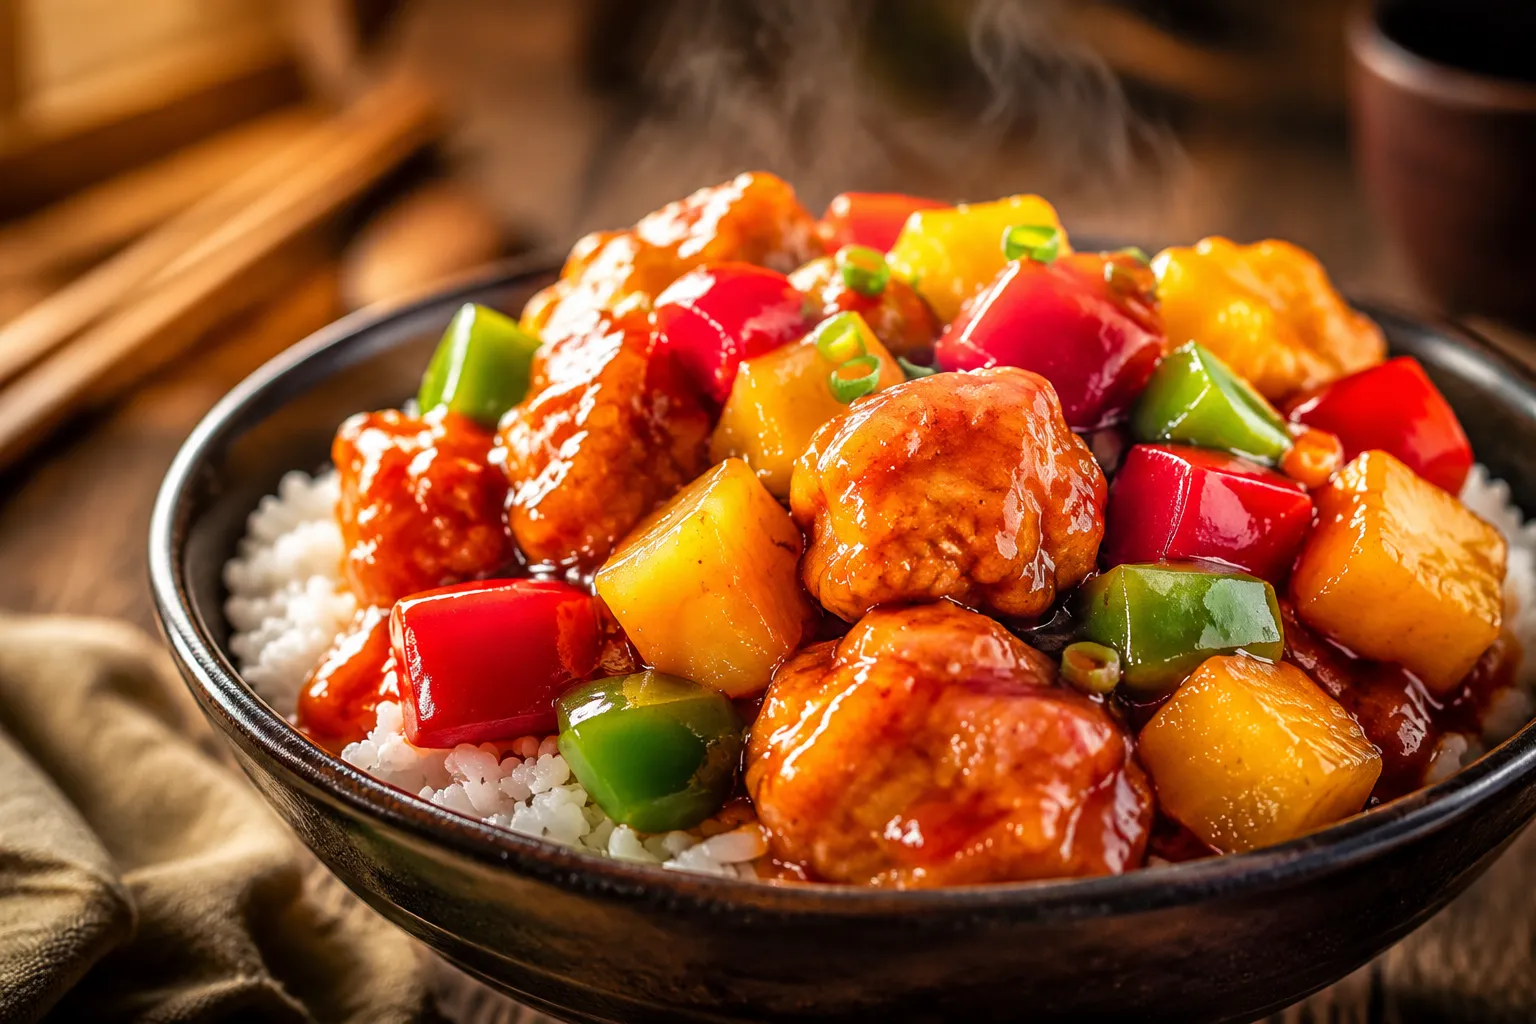
Red and green bell peppers are the classic combo for both color and crunch — keep them slightly under-cooked so they hold their bite against the soft chicken. Pineapple chunks (fresh if you have a ripe one, canned-in-juice if you don't) should be chopped to roughly the same size as the chicken so every forkful gets a little of everything. If you happen to have leftover bell peppers from making a pineapple chicken stir fry earlier in the week, those work perfectly here too.
The sauce is the heart of this recipe, and once you've memorized the ratio you'll never need to buy a bottle of the bright pink stuff again. A truly good homemade sweet and sour sauce comes together in under five minutes flat and tastes immediately fresher than anything jarred — you can taste the actual pineapple, the actual vinegar, the actual brown sugar.
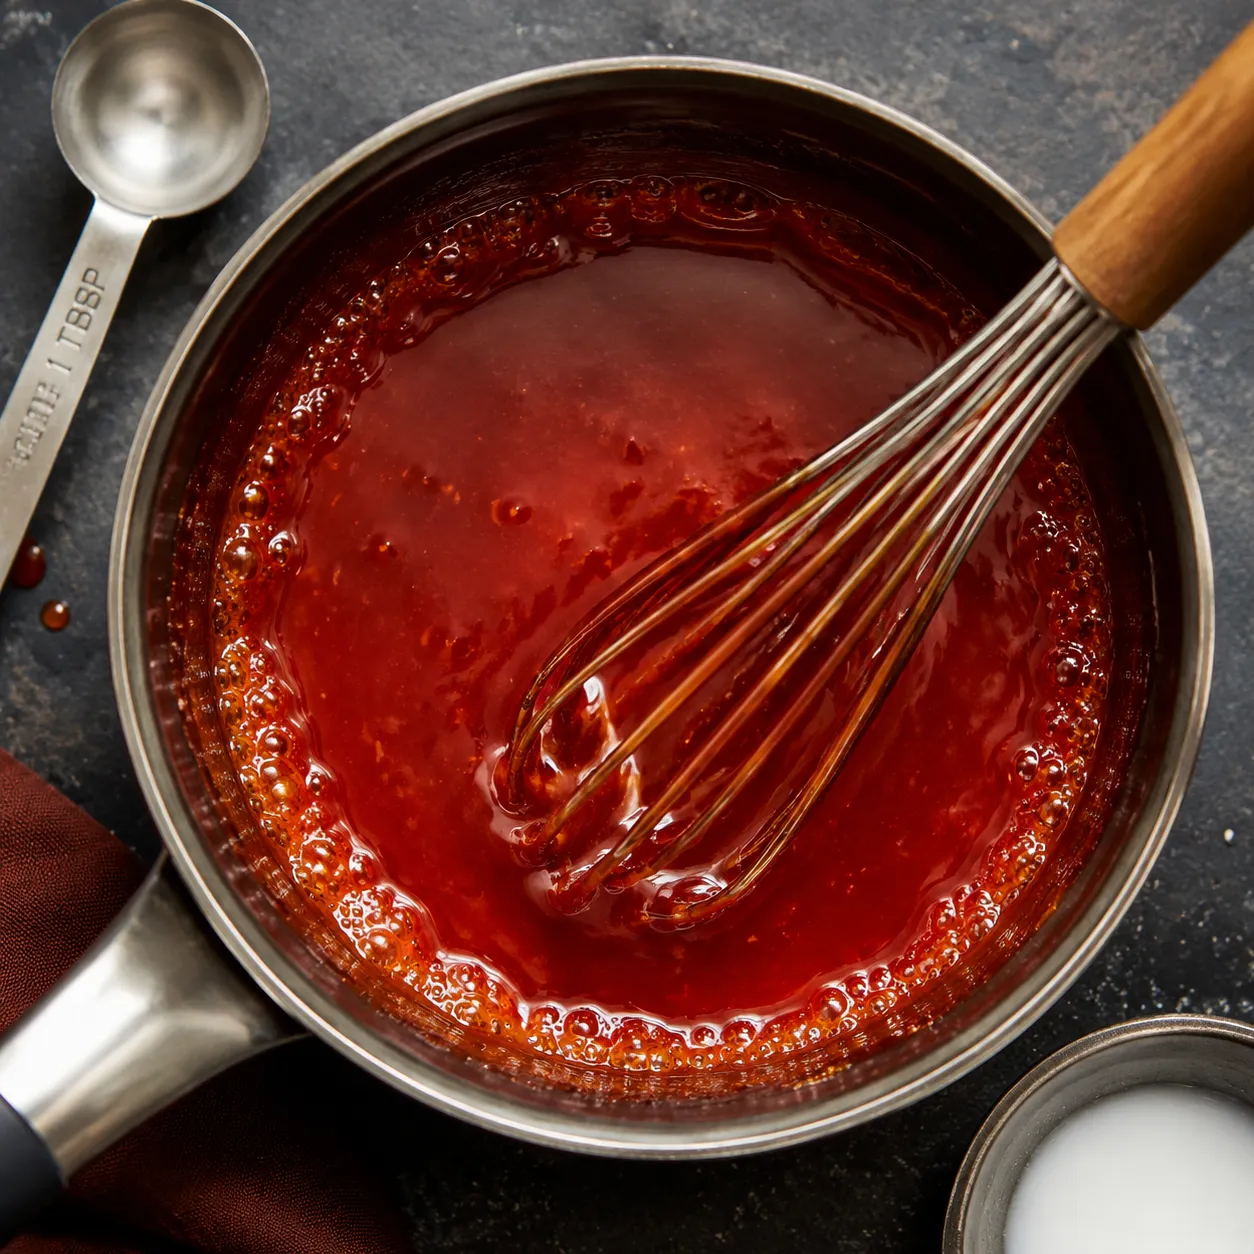
For four servings, whisk together 1/2 cup ketchup, 1/3 cup rice vinegar, 1/3 cup brown sugar, 2 tablespoons soy sauce, and 1/2 cup pineapple juice in a small saucepan. Bring it to a gentle simmer over medium heat while the chicken fries — the timing works out so the sauce is ready right when the last batch comes out of the skillet.

The trick is a cornstarch slurry: 1 tablespoon of cornstarch whisked into 2 tablespoons of cold water, then streamed into the simmering sauce while you whisk constantly. Within about thirty seconds the sauce transforms from watery to lacquered and glossy, exactly like the takeout version. Pull it off the heat as soon as it coats the back of a spoon — overcooking dulls the shine and can break the emulsion.
Taste the sauce before you toss it with the chicken and adjust to your palate. Too sweet? Another teaspoon of rice vinegar. Too tart? Another teaspoon of brown sugar. Want a whisper of heat? A pinch of red pepper flakes or a teaspoon of sambal oelek will lift the whole dish without competing with the sweet-tangy core flavor.
Now the fun part. From this point on you're about 15 minutes from a plate of sweet and sour chicken sitting on the table.
Cube the chicken into 1-inch pieces and toss with a pinch of salt and a tablespoon of soy sauce while you set up your coating station. Beat two eggs in one shallow bowl and put 1/2 cup of cornstarch in another. Dip each piece first in egg, then dredge in cornstarch, pressing gently so the coating sticks. This double-dip is what gives you those craggy, ultra-crispy edges that hold up under the sauce.
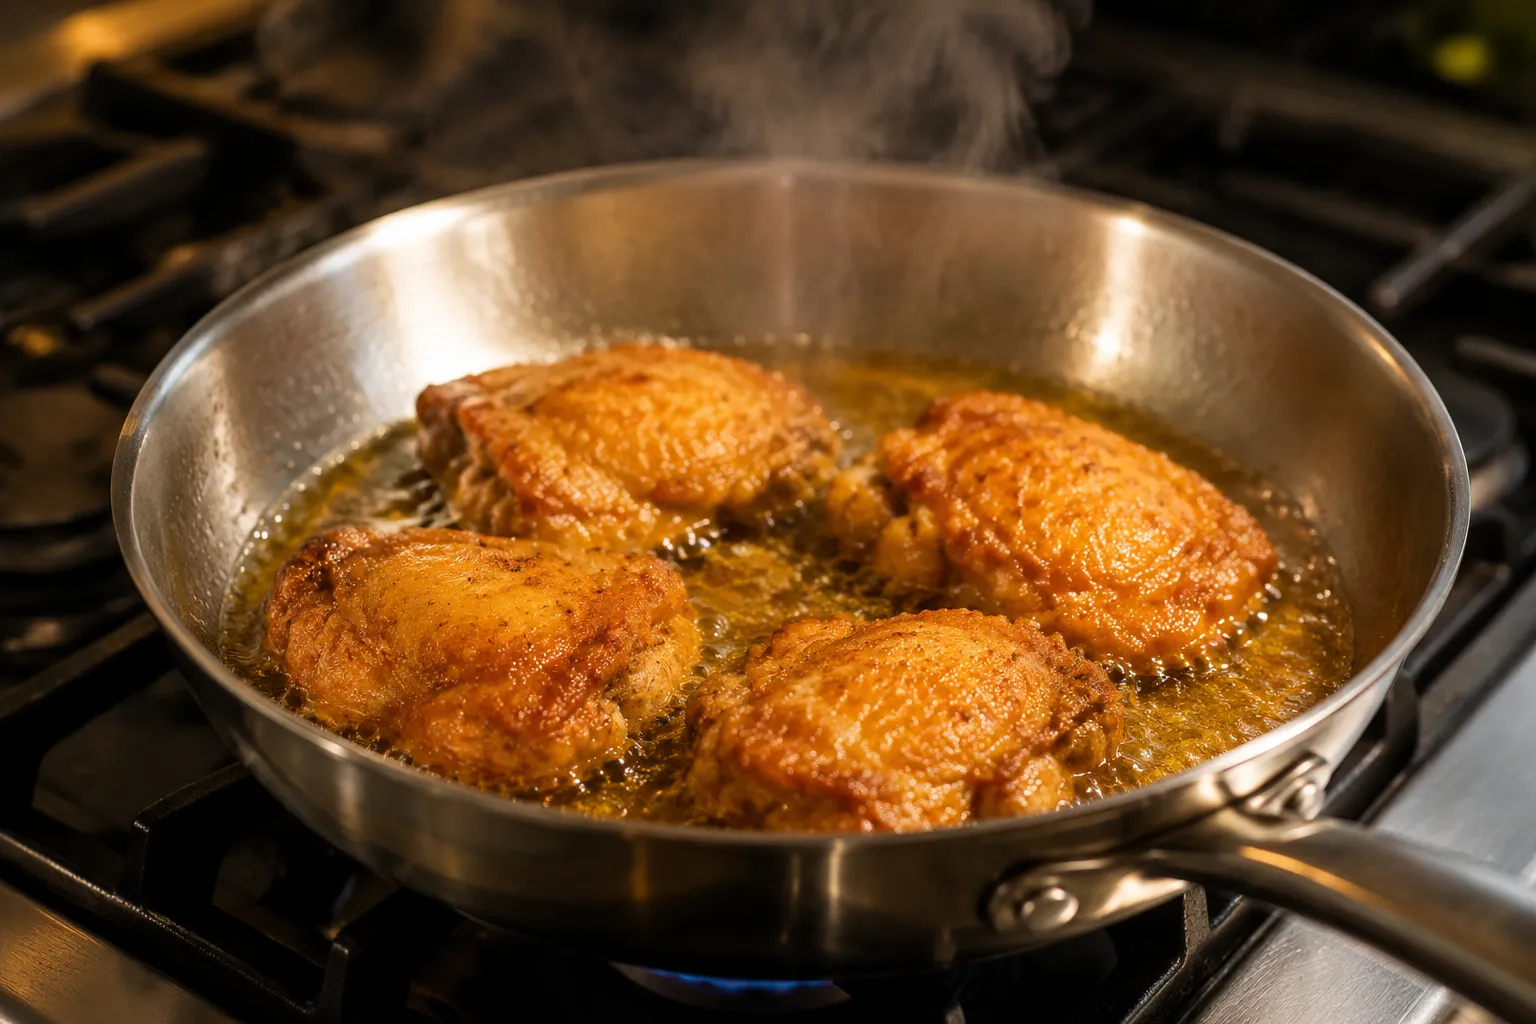
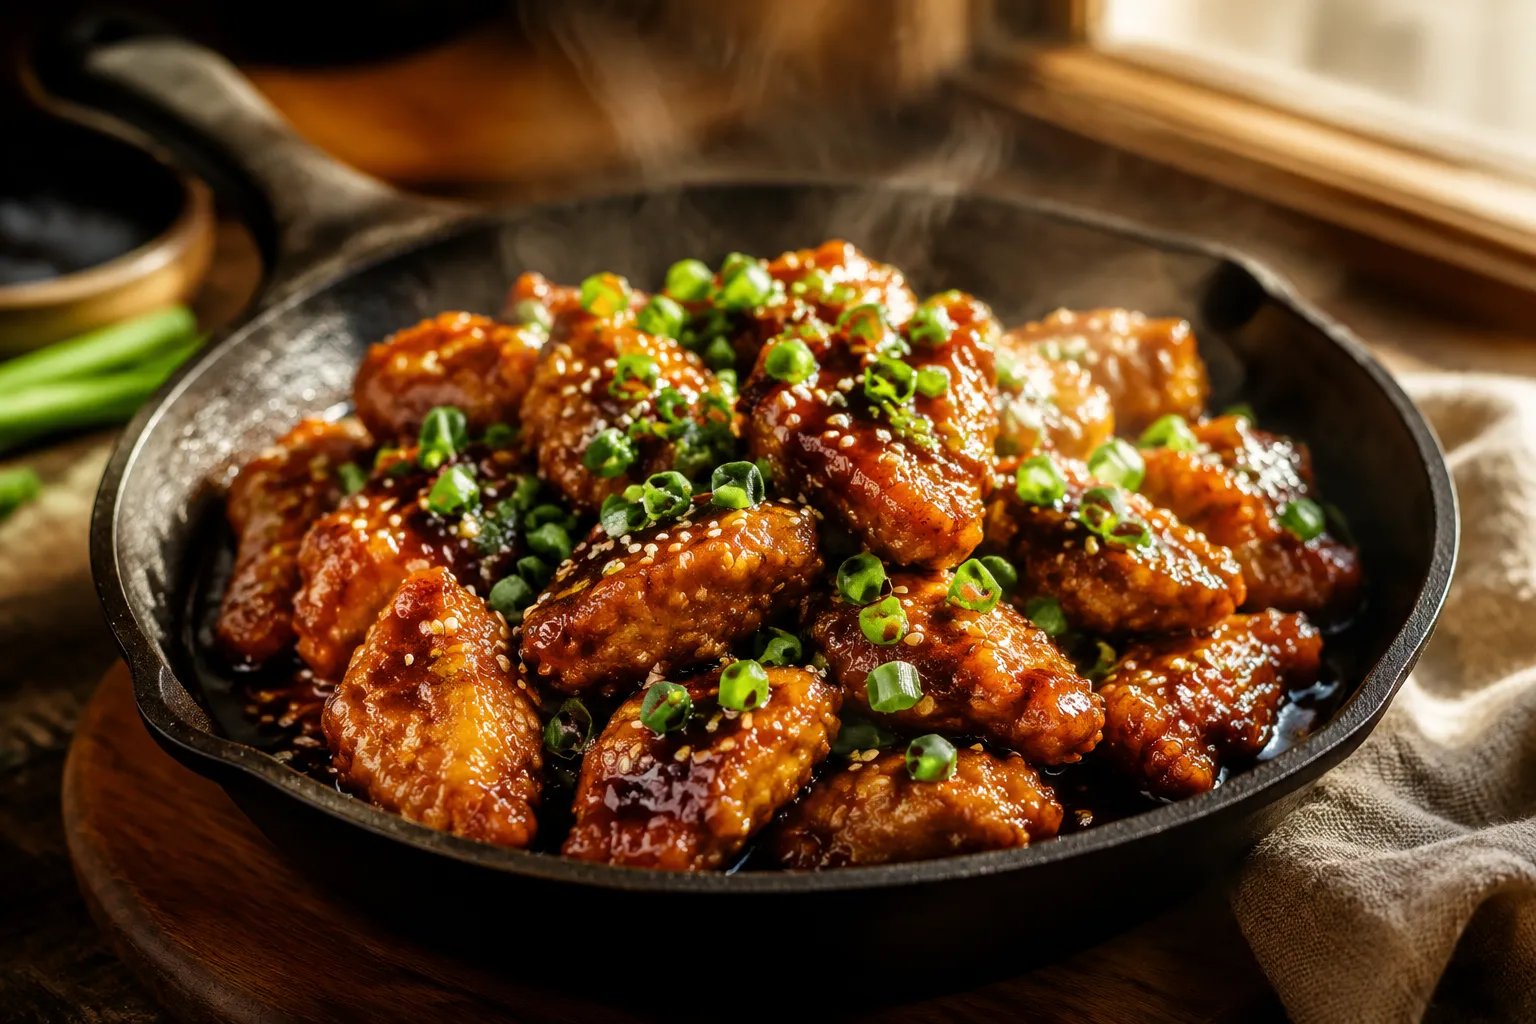
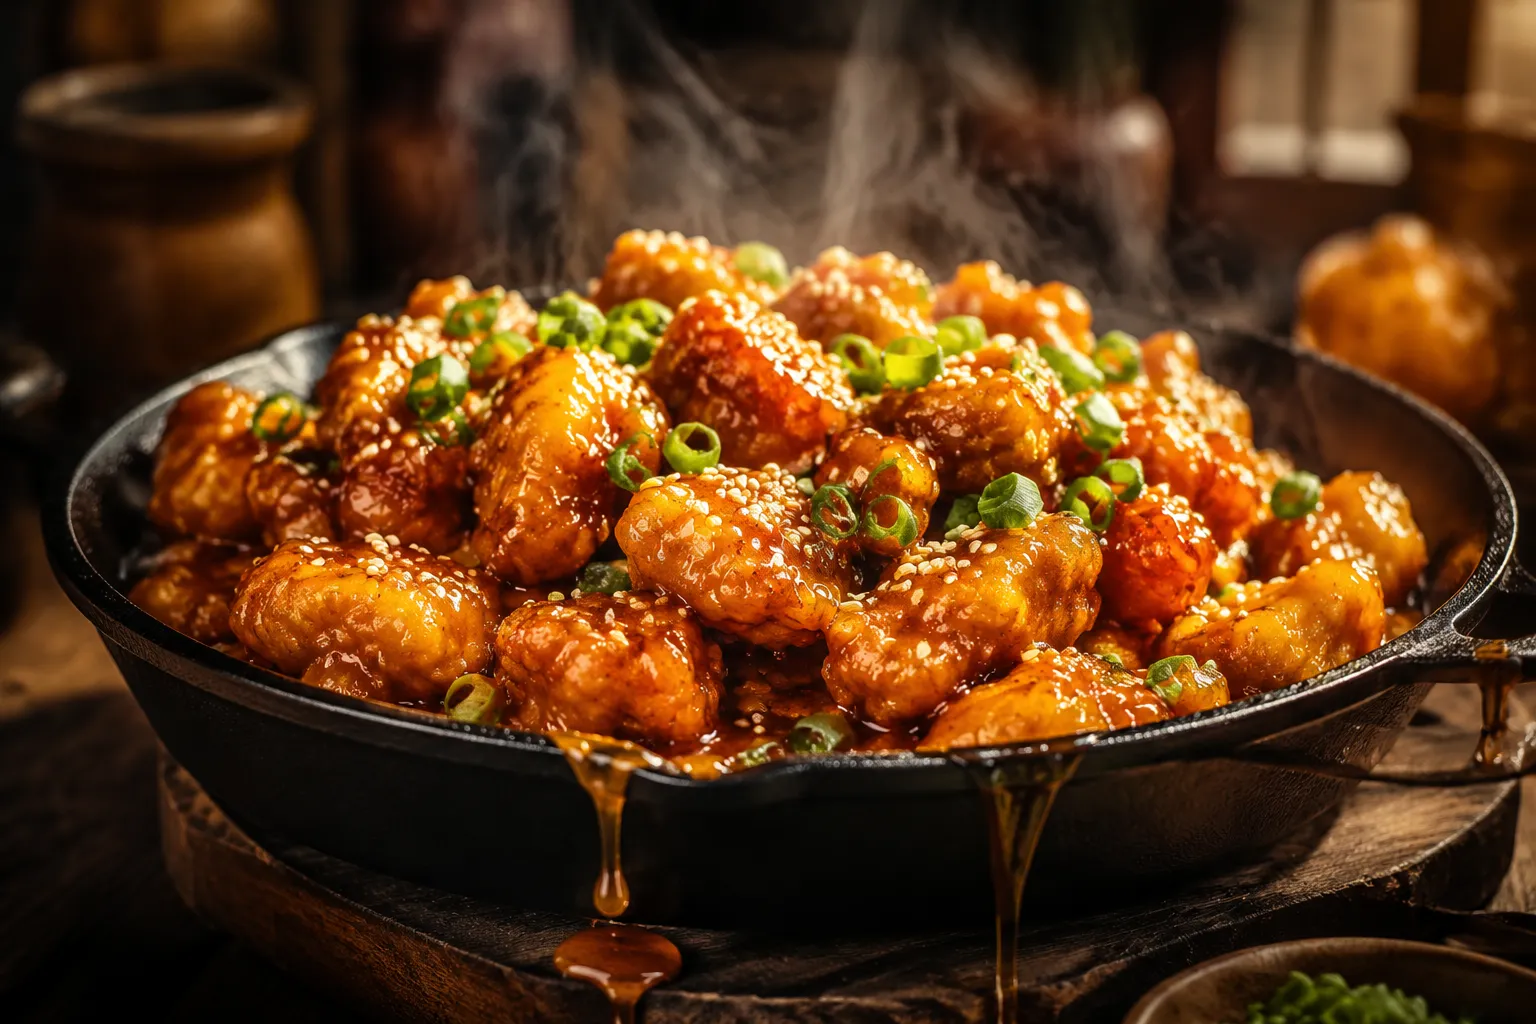
Heat 3 tablespoons of vegetable oil in a large skillet over medium-high until it's shimmering but not smoking. Add the chicken in a single layer — work in two batches if needed, because crowding the pan steams the coating instead of crisping it. Fry 3-4 minutes per side until deeply golden, then transfer to a wire rack rather than paper towels so the bottoms stay crispy while the rest cooks.
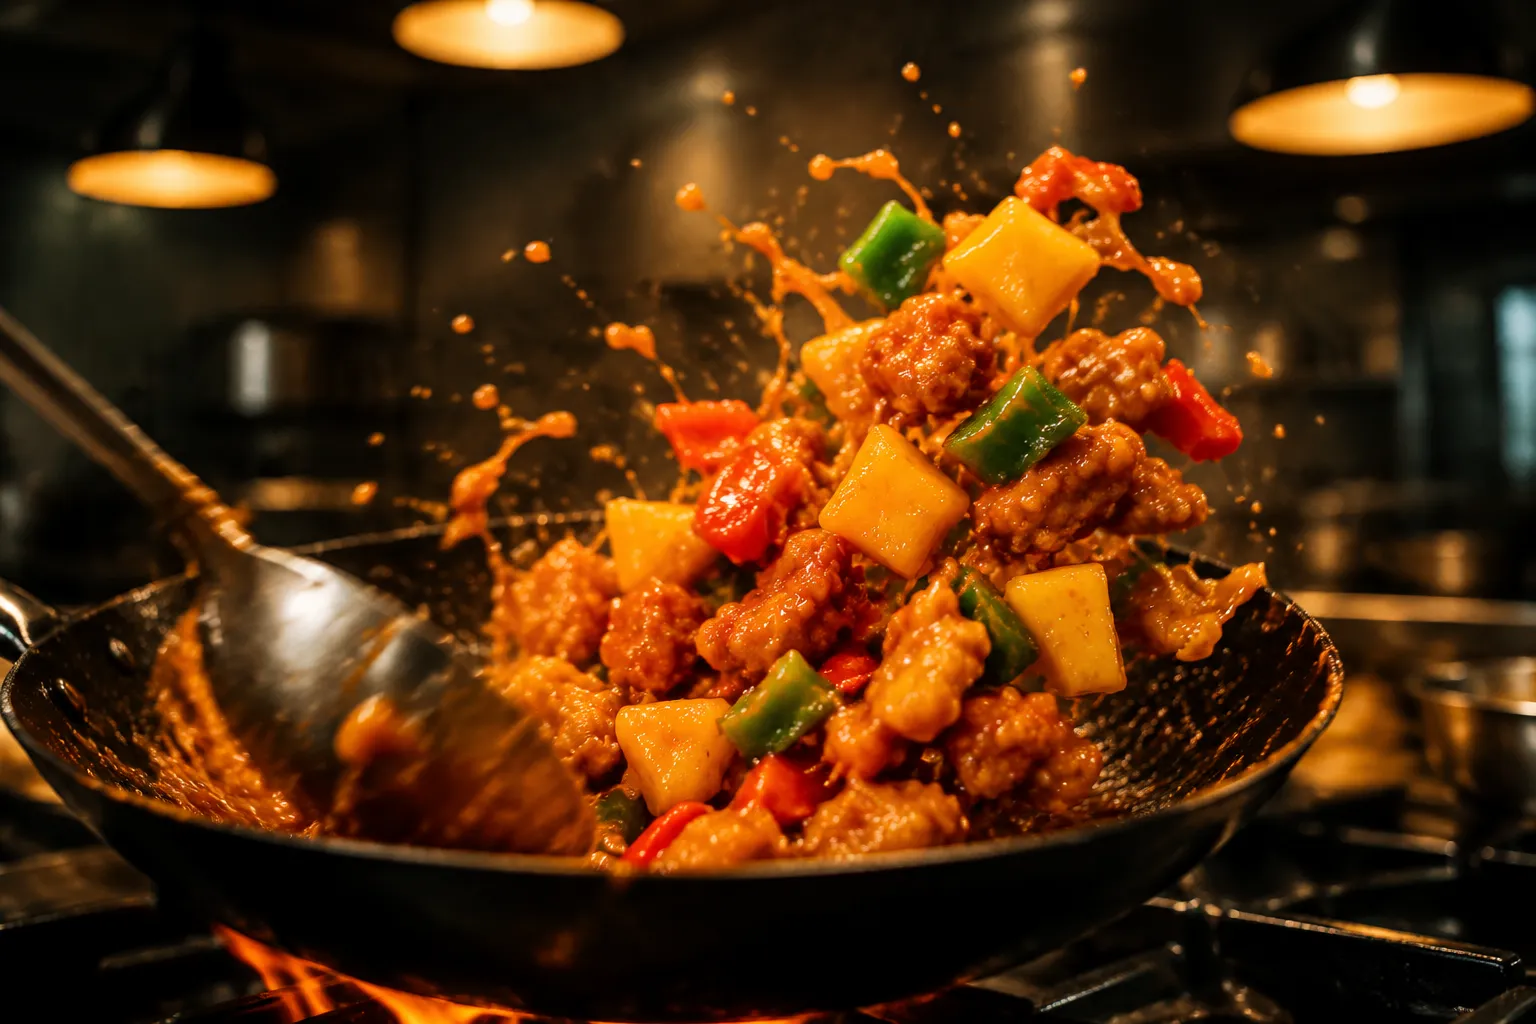
Drain all but 1 tablespoon of oil from the skillet (save the rest for another stir fry — it's flavored gold). Add the chopped bell peppers and stir-fry over high heat for about 90 seconds. You want them just barely tender with plenty of bite left. Toss in the pineapple chunks for the last 30 seconds, just to warm them through and pick up a little char around the edges.
Pour the simmering sauce into the skillet with the peppers and pineapple, then add the crispy chicken back in. Toss everything together for about 30 seconds, just until each piece is glazed and glossy. Pull it off the heat immediately — letting the chicken linger in the sauce is what turns the crispy coating soggy.
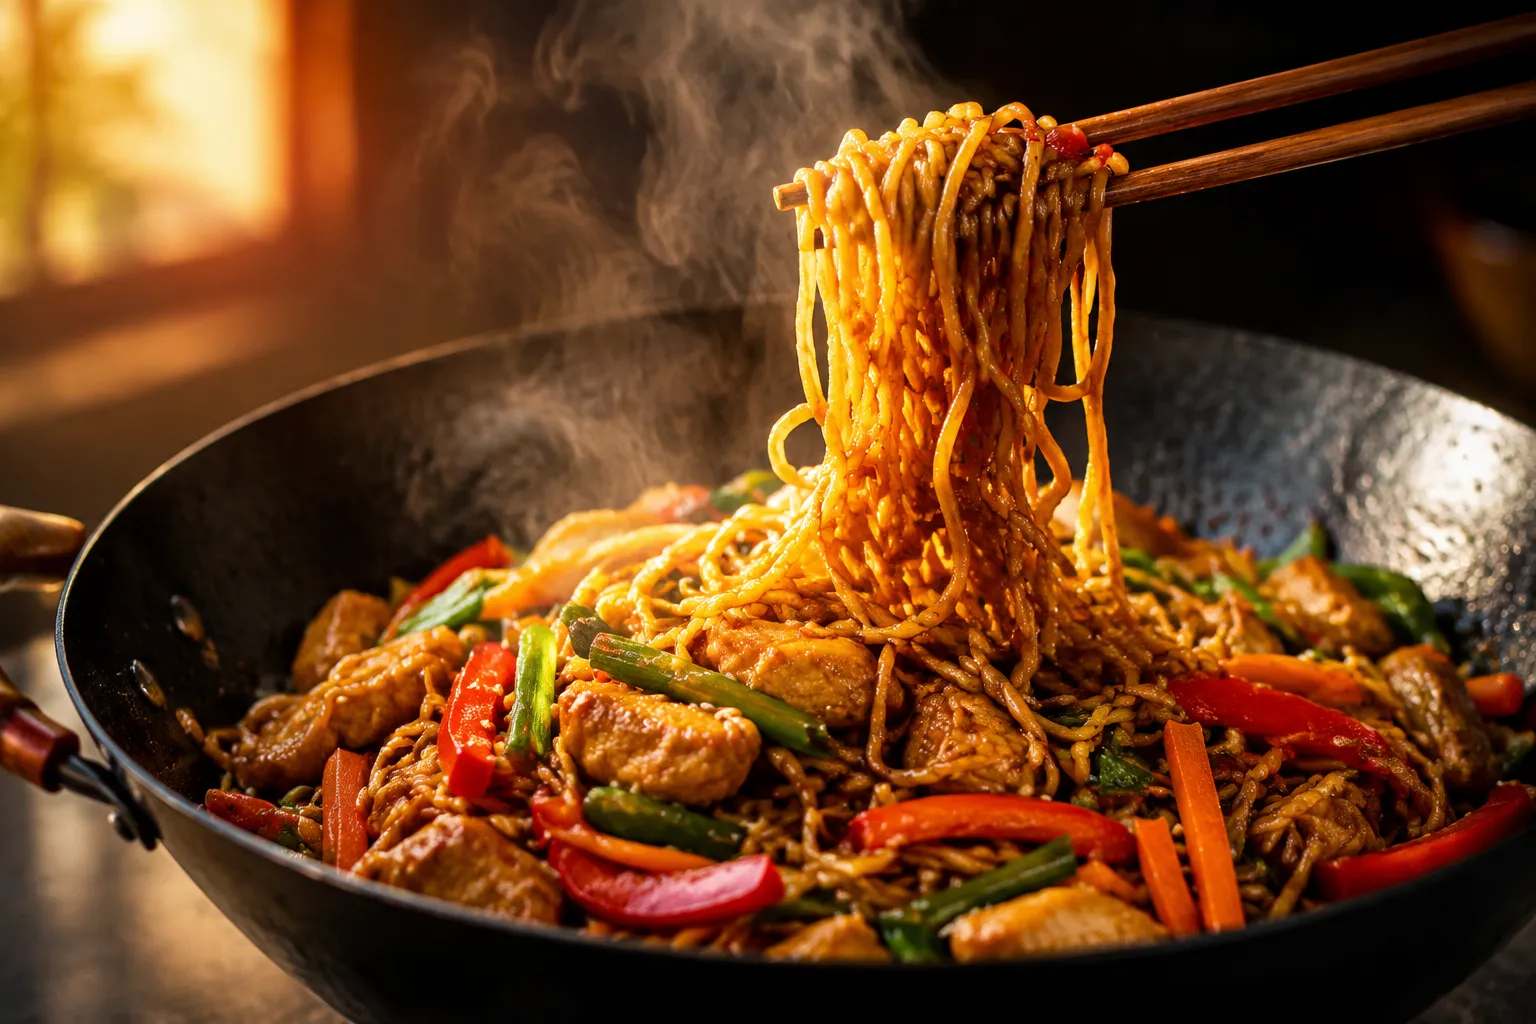
Steamed jasmine rice is the obvious move and the one I default to on weeknights, but a quick easy fried rice on the side turns this into a full takeout-style spread for not much extra effort. I often start a batch of fried rice with day-old leftover rice while the chicken marinates — it comes together in roughly the same time it takes to fry the chicken.
For a bigger Friday-night meal, this pairs beautifully with a homemade egg roll recipe or some quick steamed dumplings on the side. If you have extra sauce, drizzle it over the eggrolls. Lo mein, garlic-blistered green beans, and a cool cucumber salad all play nicely next to the dish too. And if you're feeling adventurous, the exact same coating-and-sauce technique scales to a sweet and sour pork shoulder version that stays even juicier than the chicken — try it next time you spot a pork butt on sale.
The leftover-sauce situation is real, by the way. I always make a little extra and keep it in a jar in the fridge for drizzling on rice the next day, or as a dipping sauce when I do a crispy orange chicken night later in the week. It keeps for about two weeks and the flavors actually mellow into something even better.
Once you nail this version of sweet and sour chicken, takeout starts to feel a lot less appealing. The flavor is brighter, the chicken is genuinely crispier, and you know exactly what's in the sauce. Make it on a Tuesday when you're craving Chinese takeout but don't want to wait 45 minutes for delivery, or on a Friday when you want to pull off something that feels like a treat without leaving the house.

If you make this recipe, I'd love to hear how it goes. Snap a photo, tag me, and let me know what you served alongside. I collect ideas constantly, and the next-day leftovers (yes, even slightly less crispy) are still better than anything in a takeout container.
The base recipe is endlessly flexible — once you have the sauce ratio memorized, you can swap proteins and cooking methods to fit whatever you have on hand.
Leftovers keep in an airtight container in the fridge for up to 4 days. The coating loses some crisp overnight, but the flavor actually deepens — leftover sweet and sour chicken over fresh rice for lunch is its own kind of perfect. To freeze, store the chicken and sauce separately for up to 2 months; freezing them together makes the coating mushy on thaw.
To reheat without sogginess, skip the microwave if you can. Spread the chicken on a sheet pan in a single layer and reheat at 400°F for 8-10 minutes until the coating re-crisps and the sauce bubbles. The air fryer at 375°F for 5-6 minutes works even better. If you must microwave, do it in 30-second bursts and accept that you're trading texture for speed.