Green Juice Recipe: Energizing 5-Minute Blender Method
Ingredients
Scale
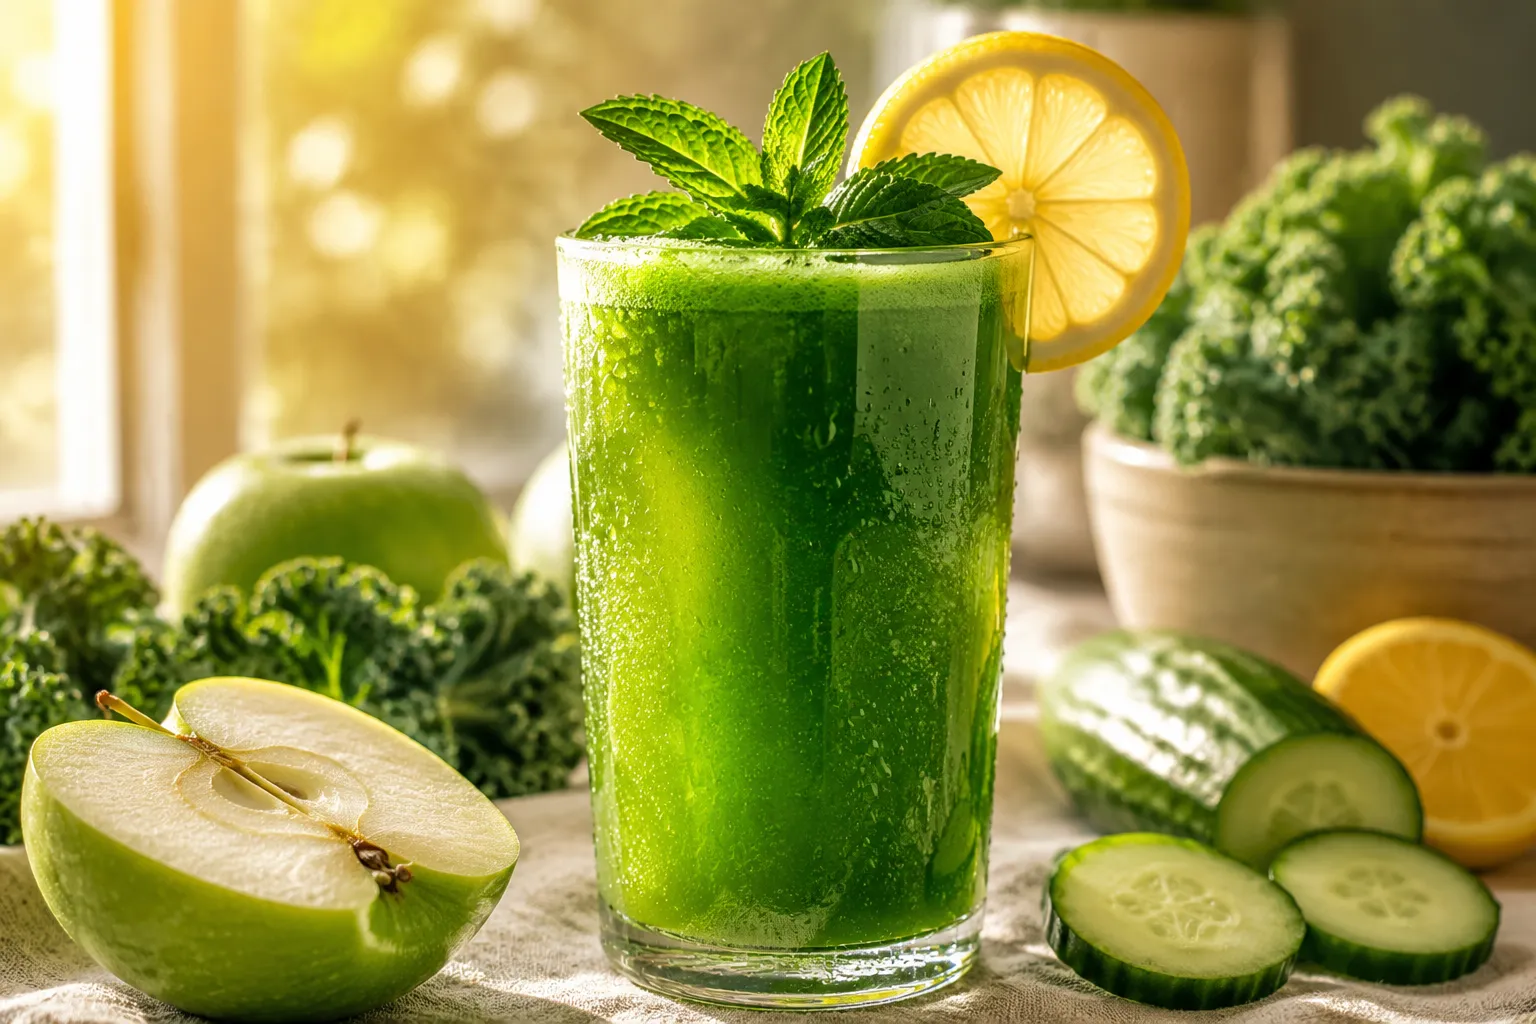
A bright, refreshing green juice that tastes like a clean reset in a glass. Made with everyday produce and ready in 5 minutes flat, no juicer needed.
This green juice recipe has been my morning ritual for years, and it's the kind of bright, energizing drink that genuinely earns its place in your routine. We're skipping the four-hundred-dollar juicer and using something almost everyone already owns: a blender and a simple straining bag. The result is a vivid emerald glass that tastes clean and crisp, never grassy or punishingly bitter, with just enough sweetness from green apple and a sharp little kick of ginger.
I'll be honest: my first attempts at homemade green juice were rough. Too much kale, not enough fruit, a flavor somewhere between lawn clippings and quiet despair. After a lot of tinkering, I landed on a ratio that hits the sweet spot, hydrating and mildly sweet with a peppery ginger finish. The technique matters too. Cold ingredients, a powerful blender, and a quick second strain make the difference between a chunky smoothie-juice hybrid and the silky, café-style glass you actually want to drink twice.
What I love most is how flexible this becomes once you have the formula down. Some mornings I'll add pineapple for a tropical twist, other days I'll skip the apple entirely for a lower-sugar version that pairs with eggs and toast. If you've been making an easy green smoothie in the mornings and want to step into something lighter and more refreshing, this is the natural next move.
The beauty of this drink is that every ingredient pulls double duty: flavor, texture, hydration, and nutrition. Let's walk through what's going in the blender and why each piece matters, because the ratio is the whole game.
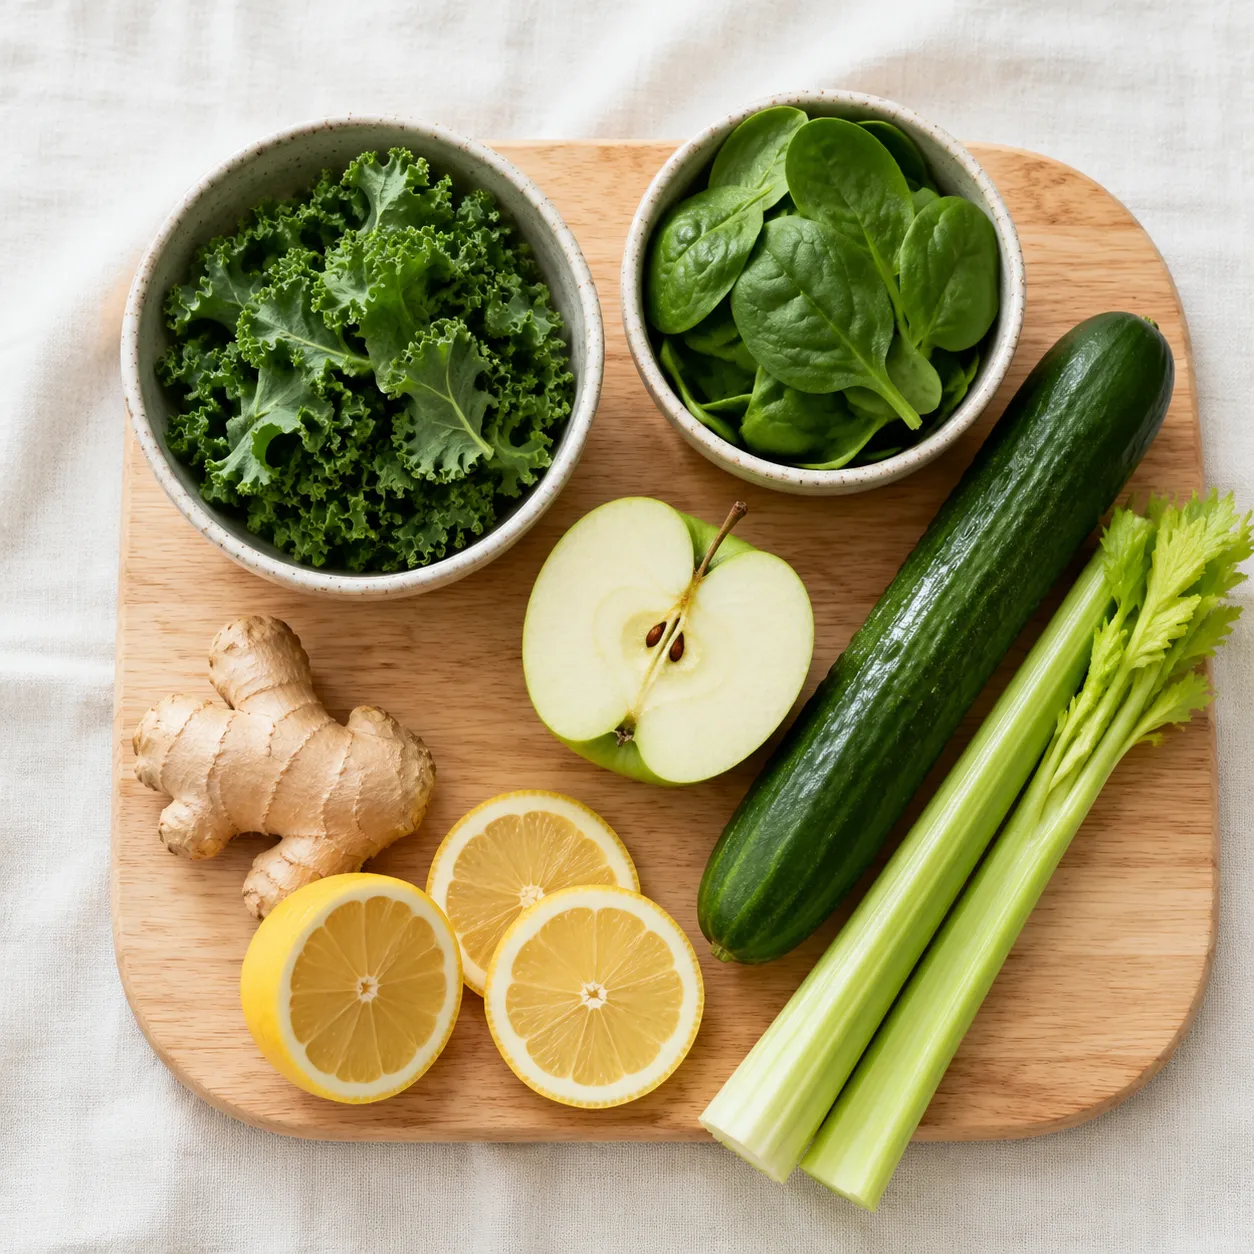
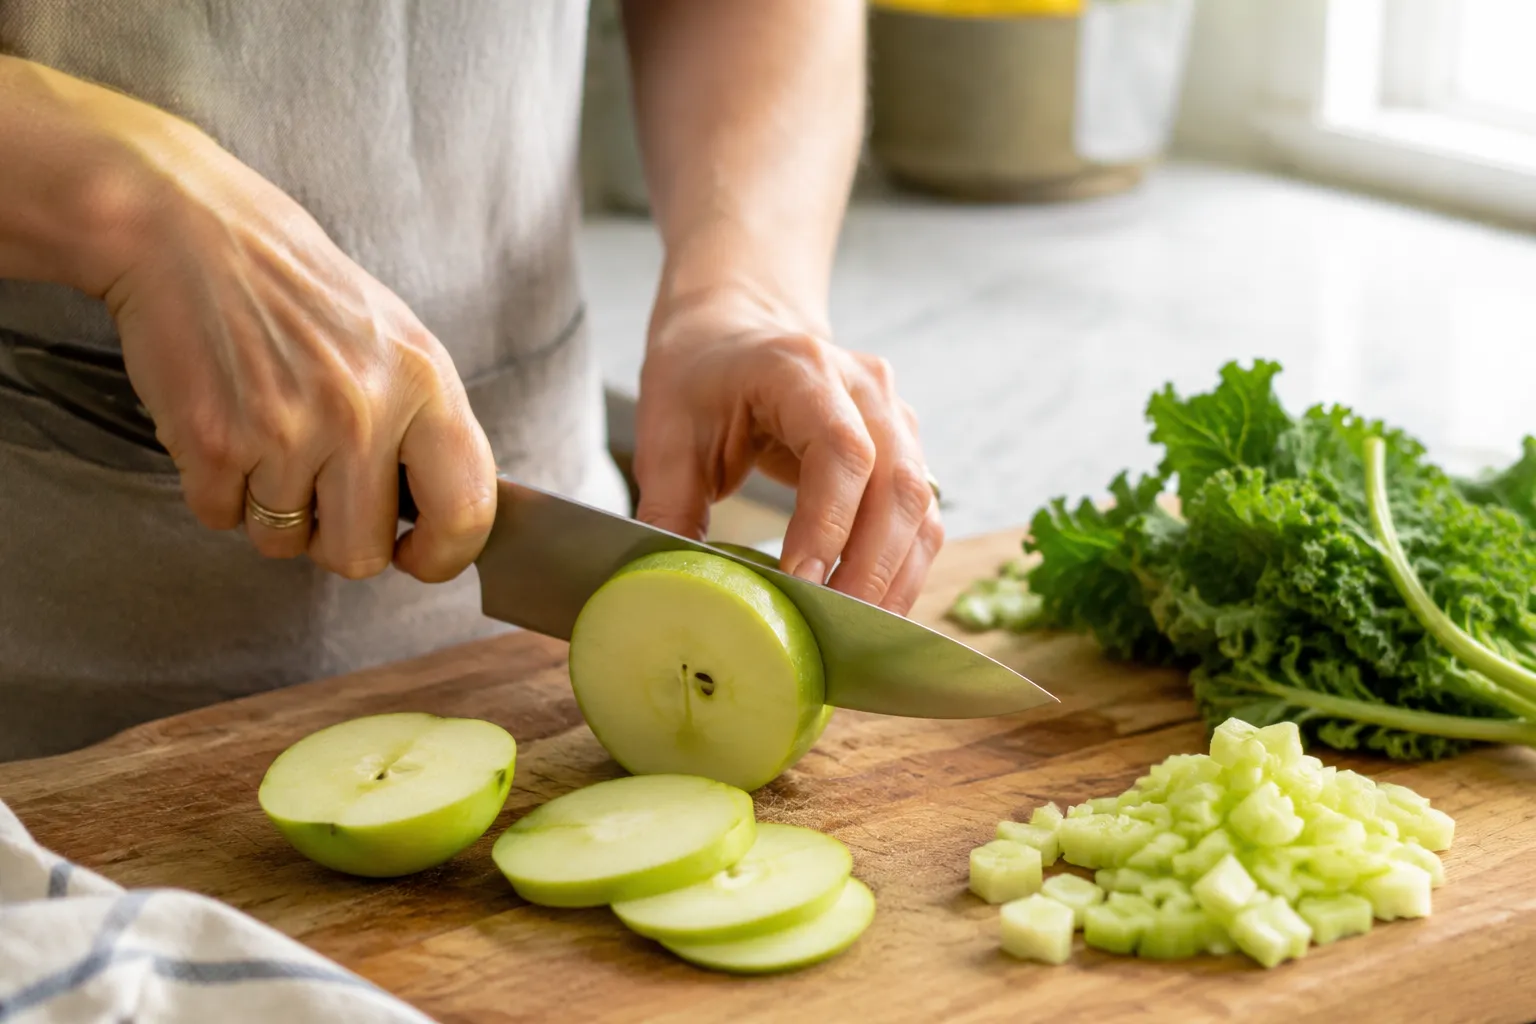
The greens are the star here. Two cups of packed baby spinach delivers mildness and that signature jewel-tone color, while two large kale leaves bring a slight earthy depth and a real chlorophyll punch. Spinach blends practically into water, which keeps the texture smooth, and kale gives the drink the backbone we expect from a proper green tonic. Always strip the kale stems before blending. They're fibrous, tannic, and your strainer will thank you.
Cucumber and celery form the hydrating base that makes this drink genuinely thirst-quenching. A whole medium cucumber adds about a cup of natural water with a clean, almost sweet finish. Celery contributes a savory, slightly mineral note that balances the apple's sweetness. If you've been reading up on celery juice benefits and want to lean into that wellness angle, two stalks is plenty here without making the whole drink taste vegetal.
One green apple does all the heavy lifting on the sweet side. Granny Smith is my go-to because it's tart enough to keep the drink from sliding into dessert territory. Then there's the juice of one whole lemon, which brightens everything and locks in those vibrant green tones instead of letting them go dull. The acid also helps your body absorb iron from the leafy greens, which is a small but meaningful bonus.
One inch of peeled fresh ginger transforms this from green water into something with real character. It adds warmth, a faint pepperiness, and that addictive sinus-clearing kick. If you love a good ginger shot recipe and want a more potent version, you can absolutely double the ginger. For first-timers, stick with the inch and adjust up next time.
You can make this two ways, and both work. The method I rely on most uses a high-speed blender plus a nut milk bag, the same kind of bag you'd reach for if you were making homemade almond milk. You blend everything with cold water, then pour the slurry through the bag and squeeze. The fiber stays in the bag, and the smooth juice flows into your glass.
A traditional juicer (centrifugal or masticating) skips the blending step and extracts juice directly from the produce. It's faster cleanup-wise once you're committed, but the upfront cost is real, and a juicer takes up a serious chunk of counter space. Masticating juicers produce slightly more nutritious results because they don't introduce as much heat or air during extraction, but for casual home use the difference is marginal at best.
Honestly, the blender method is what I'd recommend for most people. You probably already own a Vitamix, NutriBullet, or similar power blender. A nut milk bag costs about ten dollars and lasts forever. The texture you get is genuinely indistinguishable from juicer output once you've strained twice. I've served both side-by-side to skeptical friends and nobody could pick out which was which on flavor or mouthfeel.
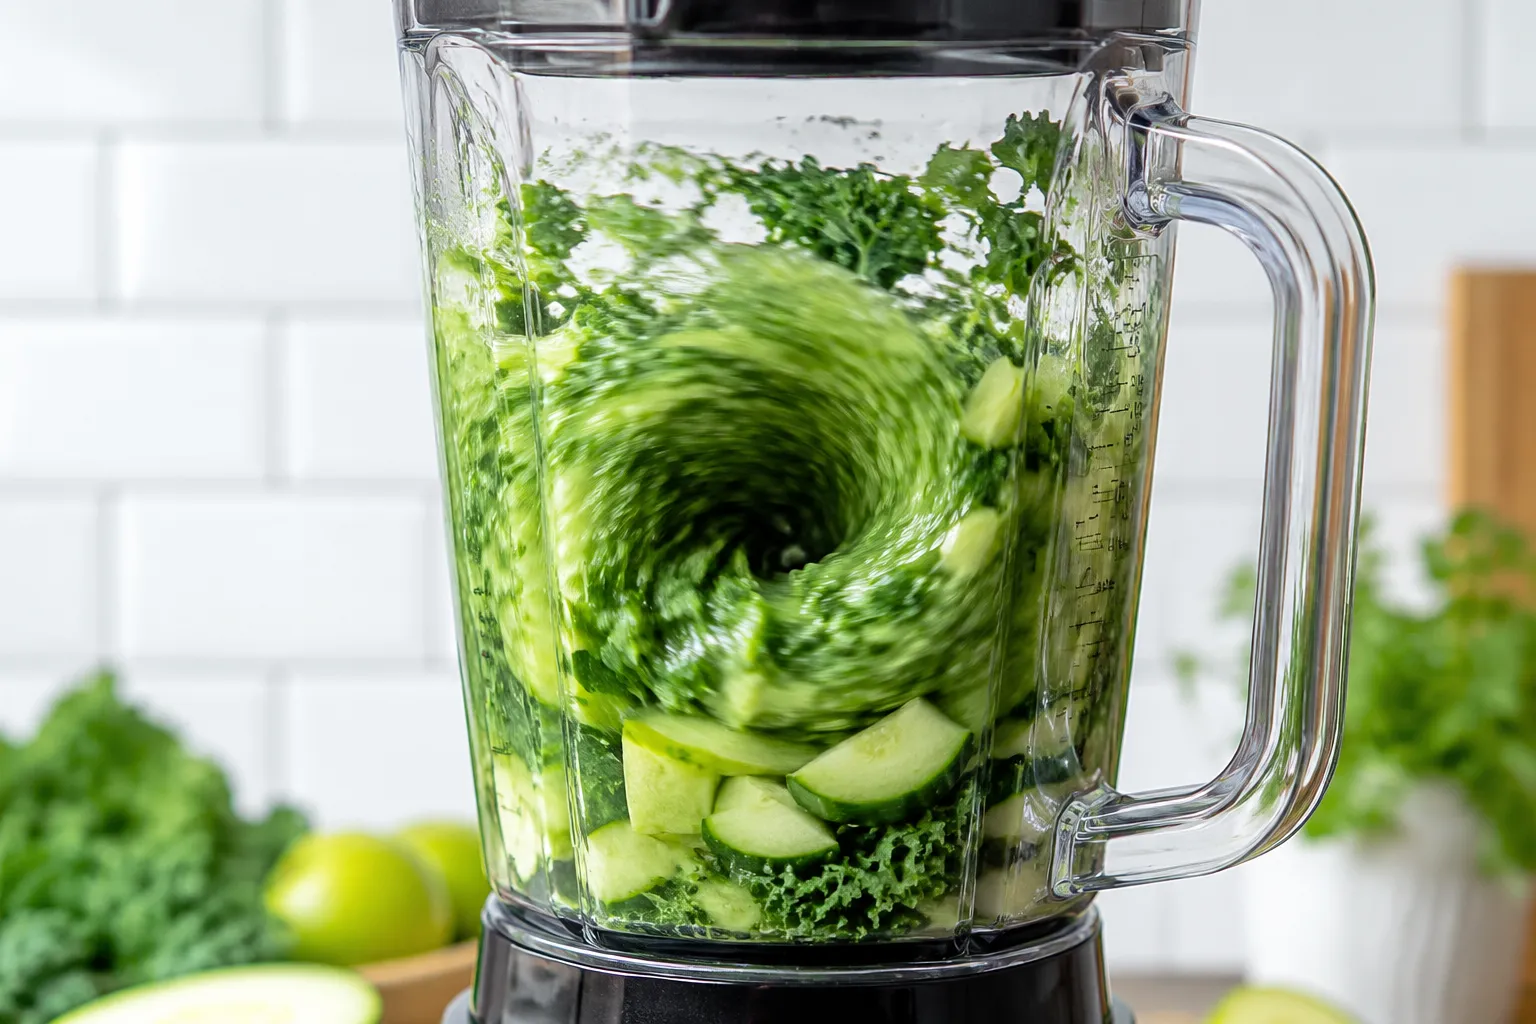
The full step-by-step lives in the recipe card below, but here's the high-level flow so you know what you're getting into. Start by giving your produce a thorough rinse. Kale especially likes to hide grit between its curly ridges. Roughly chop everything into one-inch pieces. You don't need to be precise because the blender will pulverize it. Stack the leafy greens at the bottom of the pitcher, then add the cucumber, celery, apple, ginger, and lemon juice on top, finishing with a cup of cold filtered water.

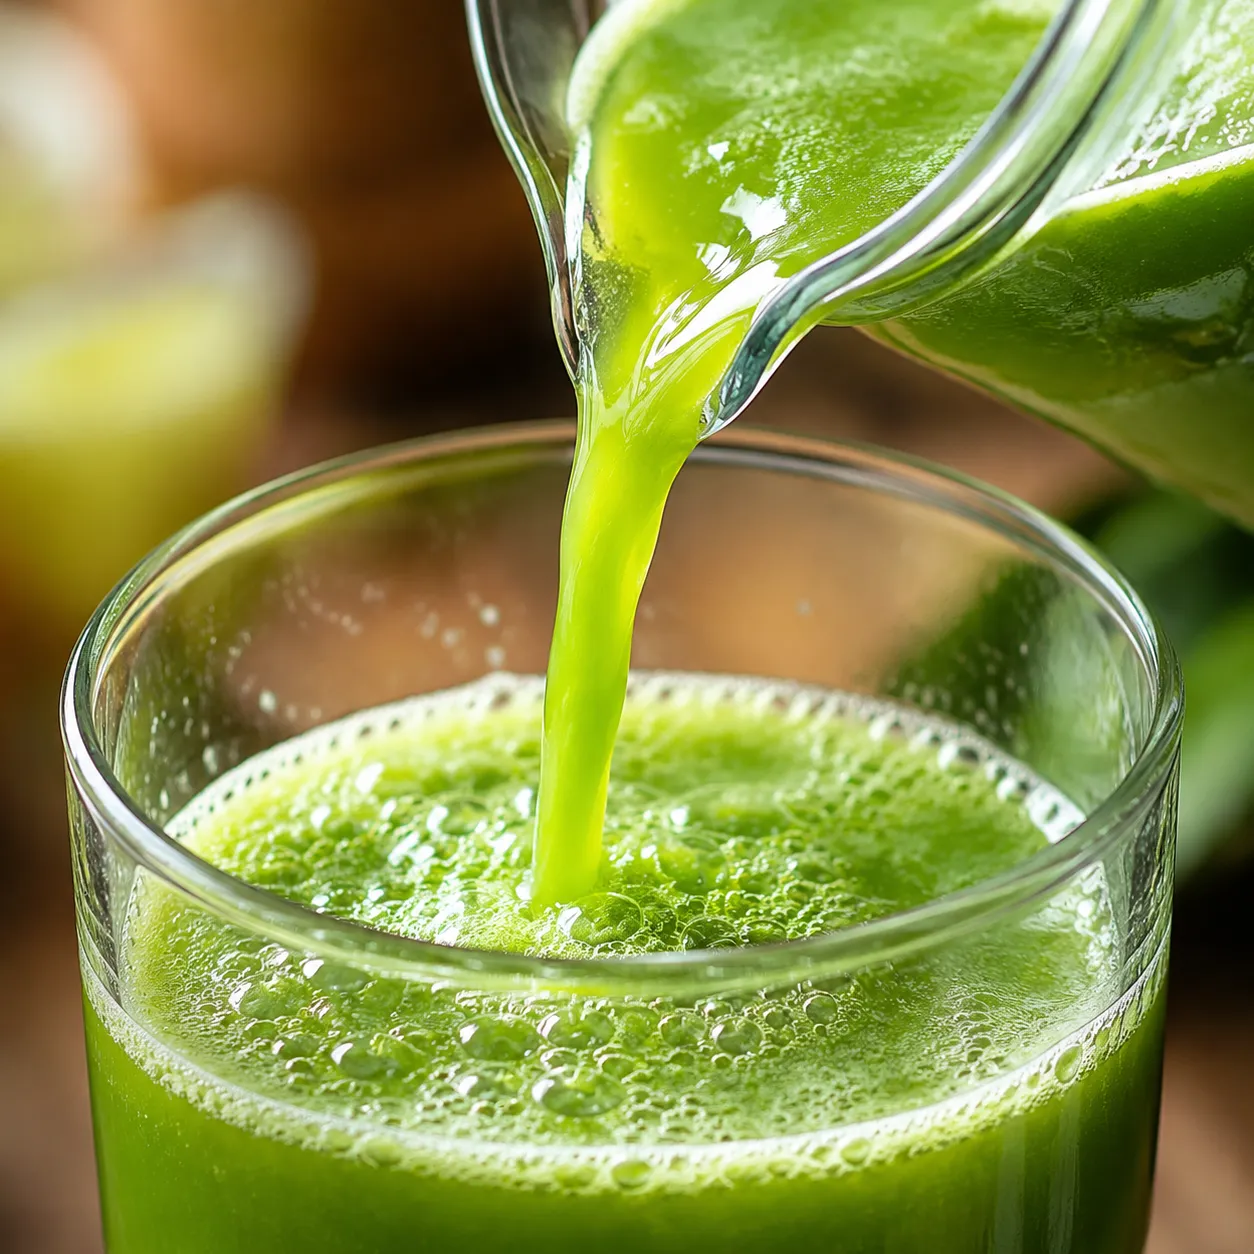
Blend on high for sixty to ninety seconds, until you have a smooth, swirling green vortex with no visible chunks. Pour the mixture into a nut milk bag set over a large bowl or four-cup measuring cup, then gently squeeze from the top down. Resist the urge to wring it aggressively right away. Let gravity do most of the work for the first thirty seconds, then finish with a firm squeeze. You'll be surprised how much liquid hides in that pulp.
Taste before you pour. Too tart? A splash more apple or a teaspoon of maple syrup. Too sweet? A bigger squeeze of lemon. Want more bite? Grate in a tiny bit more ginger. This is the moment that separates good green juice recipes from the forgettable ones, adjusting to your own palate before it hits the glass.
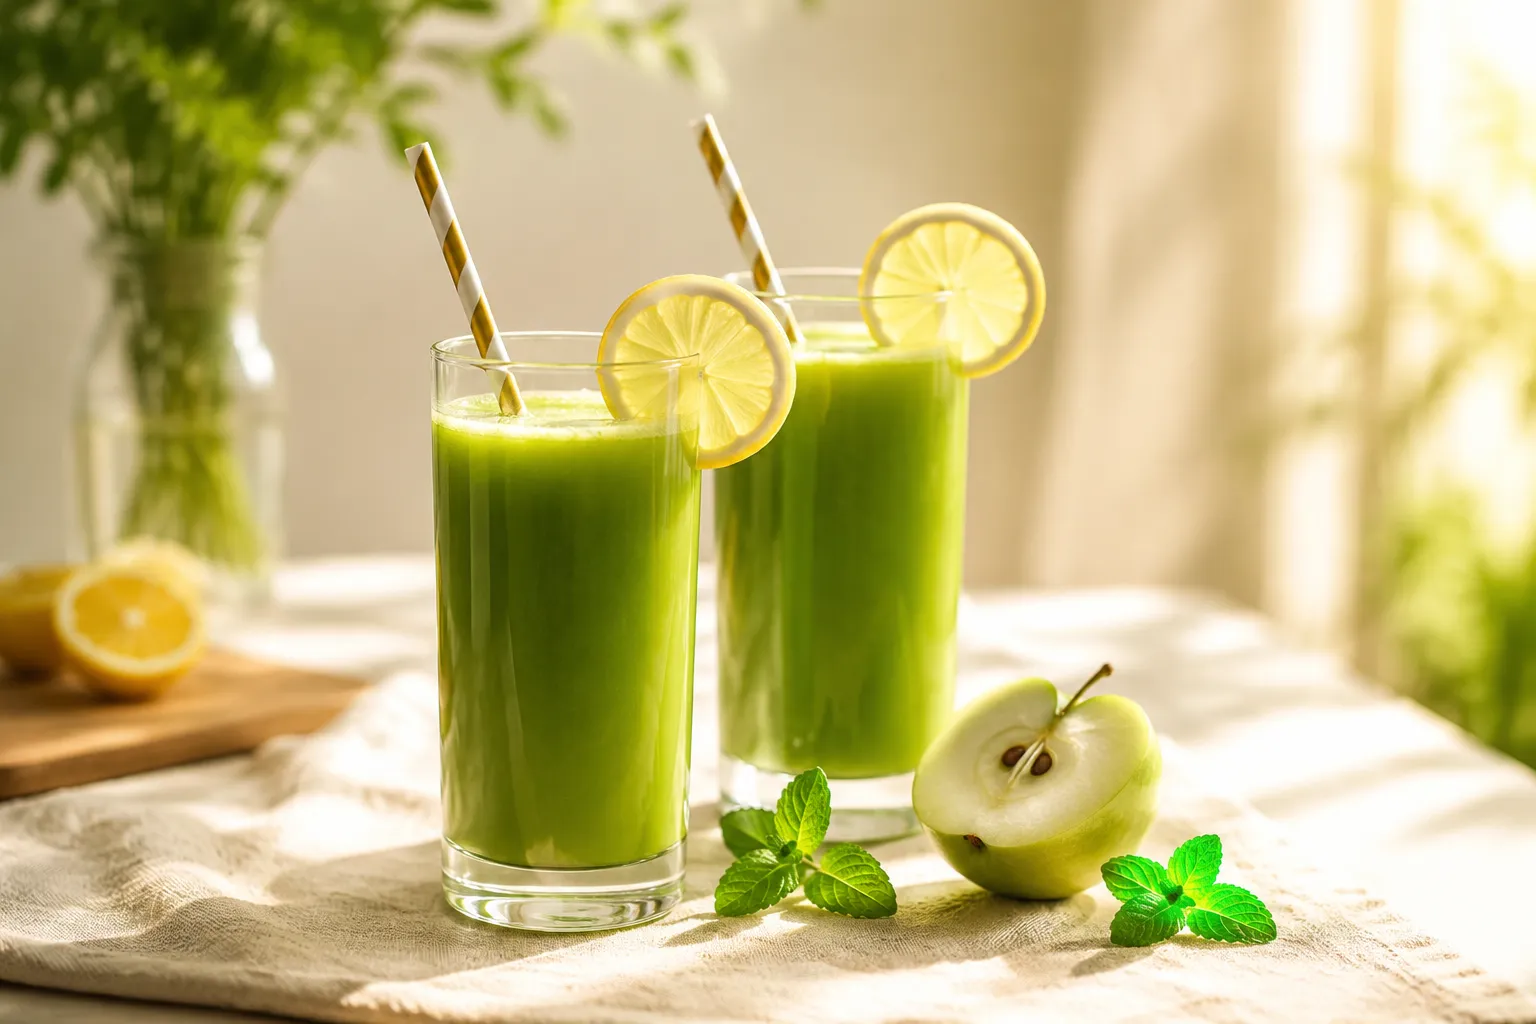
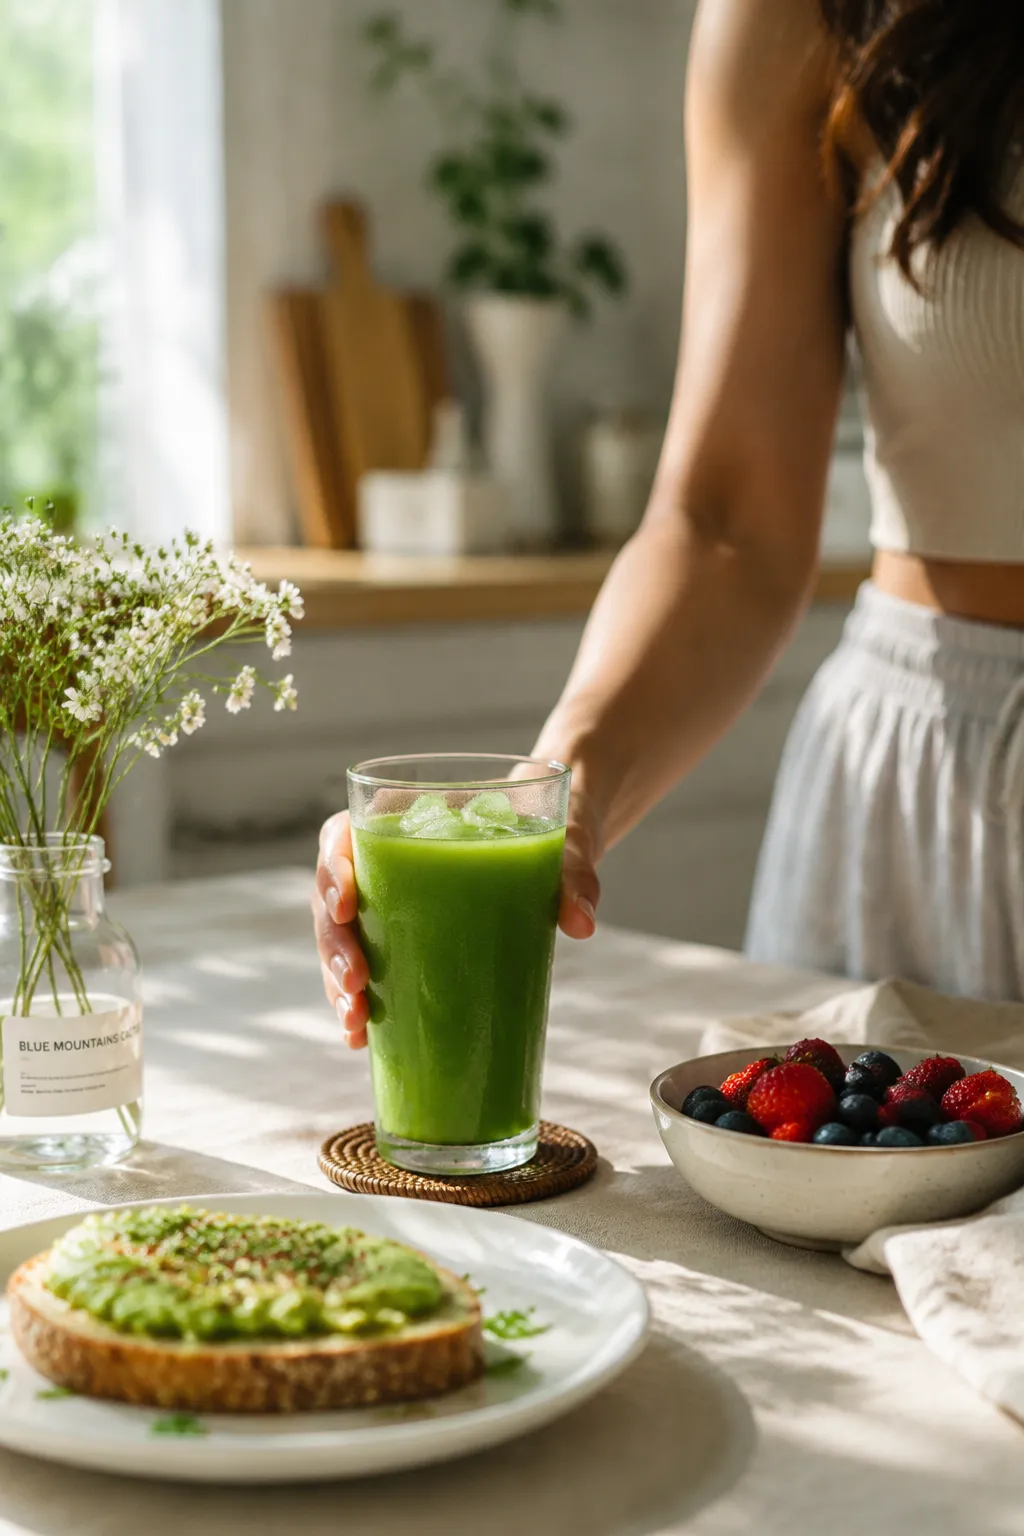
I love serving this in a tall, chilled glass with a paper straw and a thin lemon wheel on the rim. It elevates an ordinary Tuesday morning into something that feels intentional. Pair it with avocado toast, a soft-boiled egg, or a bowl of yogurt and granola. The acidity cuts through richer breakfast foods beautifully, and the sharpness of the ginger wakes up your palate before that first bite.
For a brunch crowd, serve small pours alongside a pitcher of blender lemonade so guests can mix and match. The two citrus profiles complement each other and create a beautiful color contrast on the table. You can also use a half cup of finished juice as the liquid base for a detox breakfast smoothie by blending it with frozen pineapple, banana, and a scoop of vanilla protein for something thicker and more filling.
If you're new to drinking your greens, start with a smaller four-ounce pour first thing in the morning before coffee. Most people build up to a full eight to twelve ounces over a week or two, and you'll quickly find yourself craving that crisp, slightly sweet hit. There's something about the combination of leafy greens, cool cucumber, and zippy ginger that genuinely jumpstarts the day in a way caffeine alone can't quite match.
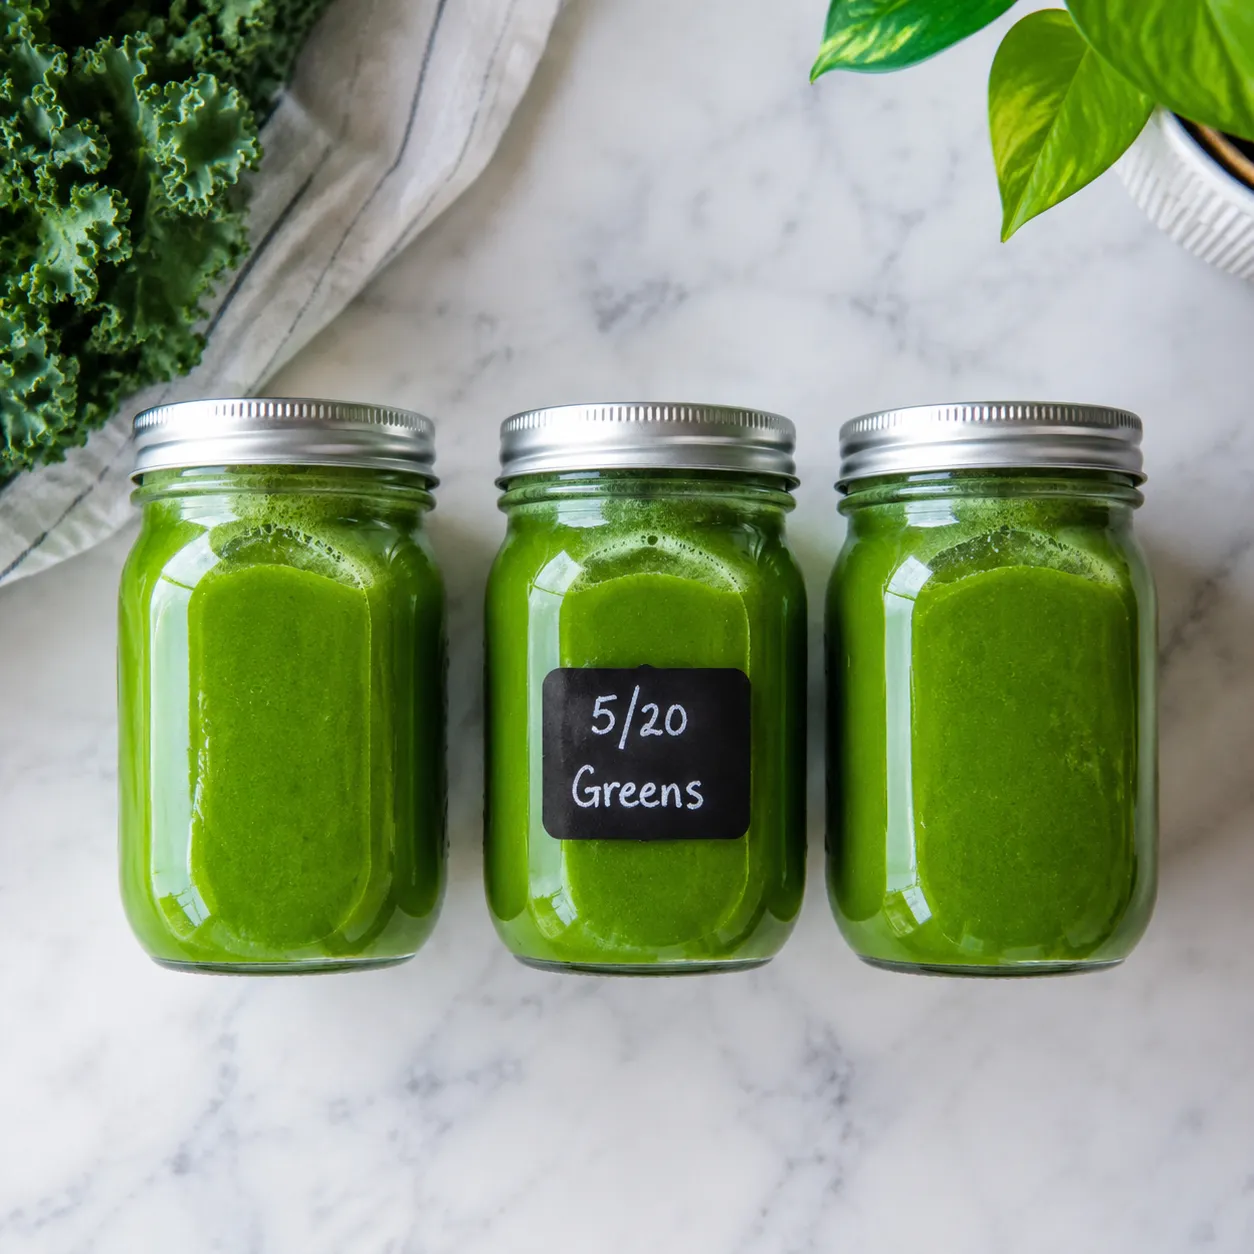
This recipe doubles or triples beautifully when you're feeding a brunch crowd or prepping for a busy stretch. On Sunday afternoons I'll often run a big batch and divide it into individual mason jars so weekday mornings stay easy. Fill the jars to the very top to minimize air exposure, seal them tightly, and label with the date if you're juggling a few different versions in the fridge at once.
If your household runs on different preferences, batch the base recipe and let people customize at the glass. A splash of pineapple juice for the kids, an extra knob of ginger for the grown-ups, a pinch of cayenne for whoever wants a wake-up call. It turns a simple drink into a small daily ritual, and it gives everyone a reason to actually sit down at the breakfast table for two extra minutes.
Once you have the base method down, this recipe becomes a template you can riff on endlessly. The ratios stay roughly the same: leafy greens, hydrating base, sweet element, acid, and a flavor booster. Swap in seasonal produce or play with the spice level depending on your mood.
Stored in a sealed glass jar in the back of the refrigerator (where temperatures stay coldest and most stable), homemade green juice keeps well for 24 to 48 hours. Flavor and nutrient content peak within the first 12 hours, so try to drink it the same day whenever possible. After about a day, the bright emerald color will start to deepen and the flavor will lose some of its zing. Still safe to drink, just past its best. Always fill the jar to the very top before sealing to minimize air exposure, since oxygen is the main enemy of color, taste, and vitamin retention.
For longer storage, this juice freezes beautifully. Pour cooled juice into freezer-safe glass jars or silicone molds, leaving about an inch of headspace to allow for expansion. Frozen, it keeps for up to three months without significant flavor loss. Thaw single-serve portions overnight in the refrigerator and shake vigorously before drinking, since natural separation is normal. Avoid thawing on the counter, which can encourage bacterial growth and dull the flavor. A quick re-blend after thawing also helps revive the texture.