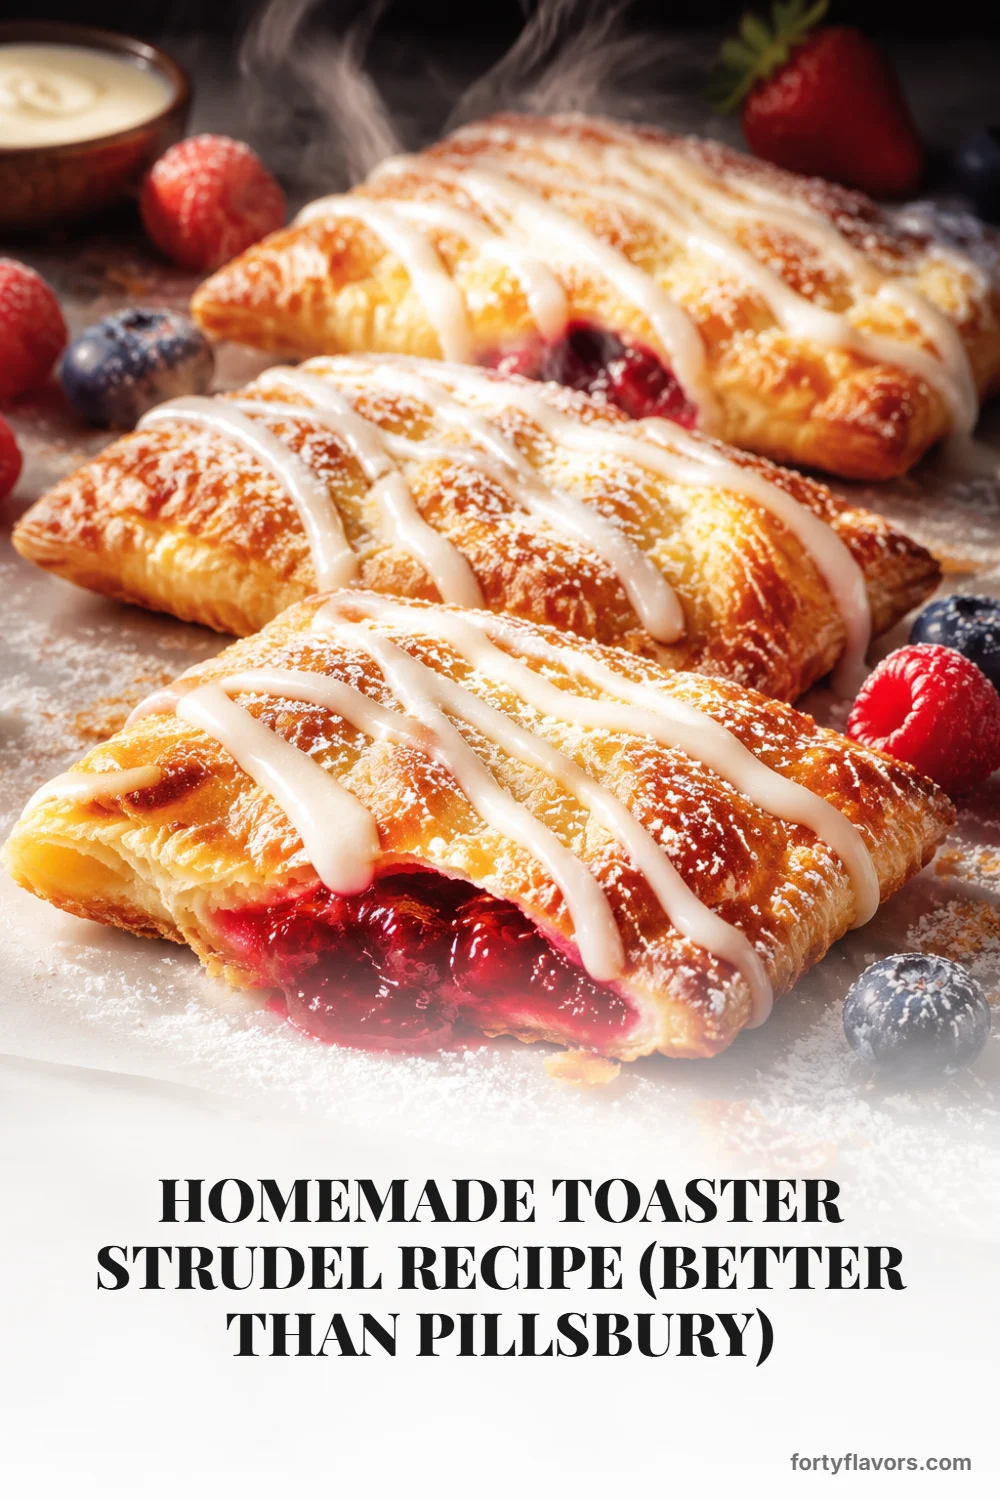
Homemade Toaster Strudel Recipe (Better Than Pillsbury)
Ingredients
Scale
Skip the freezer aisle and make bakery-style toaster strudels at home with flaky puff pastry, jammy fruit filling, and that iconic vanilla icing drizzle.
This toaster strudel is everything we wished the freezer-aisle box could be: buttery, shatteringly flaky, filled with real berries, and finished with a thick vanilla drizzle that melts into every golden ridge. It has all the nostalgic joy of the Pillsbury copycat breakfast pastry you grew up warming before school, but the flavor is fresher, fruitier, and a little more bakery-case special.
The best part is that you do not need to laminate dough from scratch to get those crisp, tender layers. Store-bought puff pastry does the heavy lifting, while a quick mixed berry filling and simple vanilla icing bring the whole thing together in about 35 minutes. If you love puff pastry breakfast recipes, this one belongs firmly in your weekend rotation.
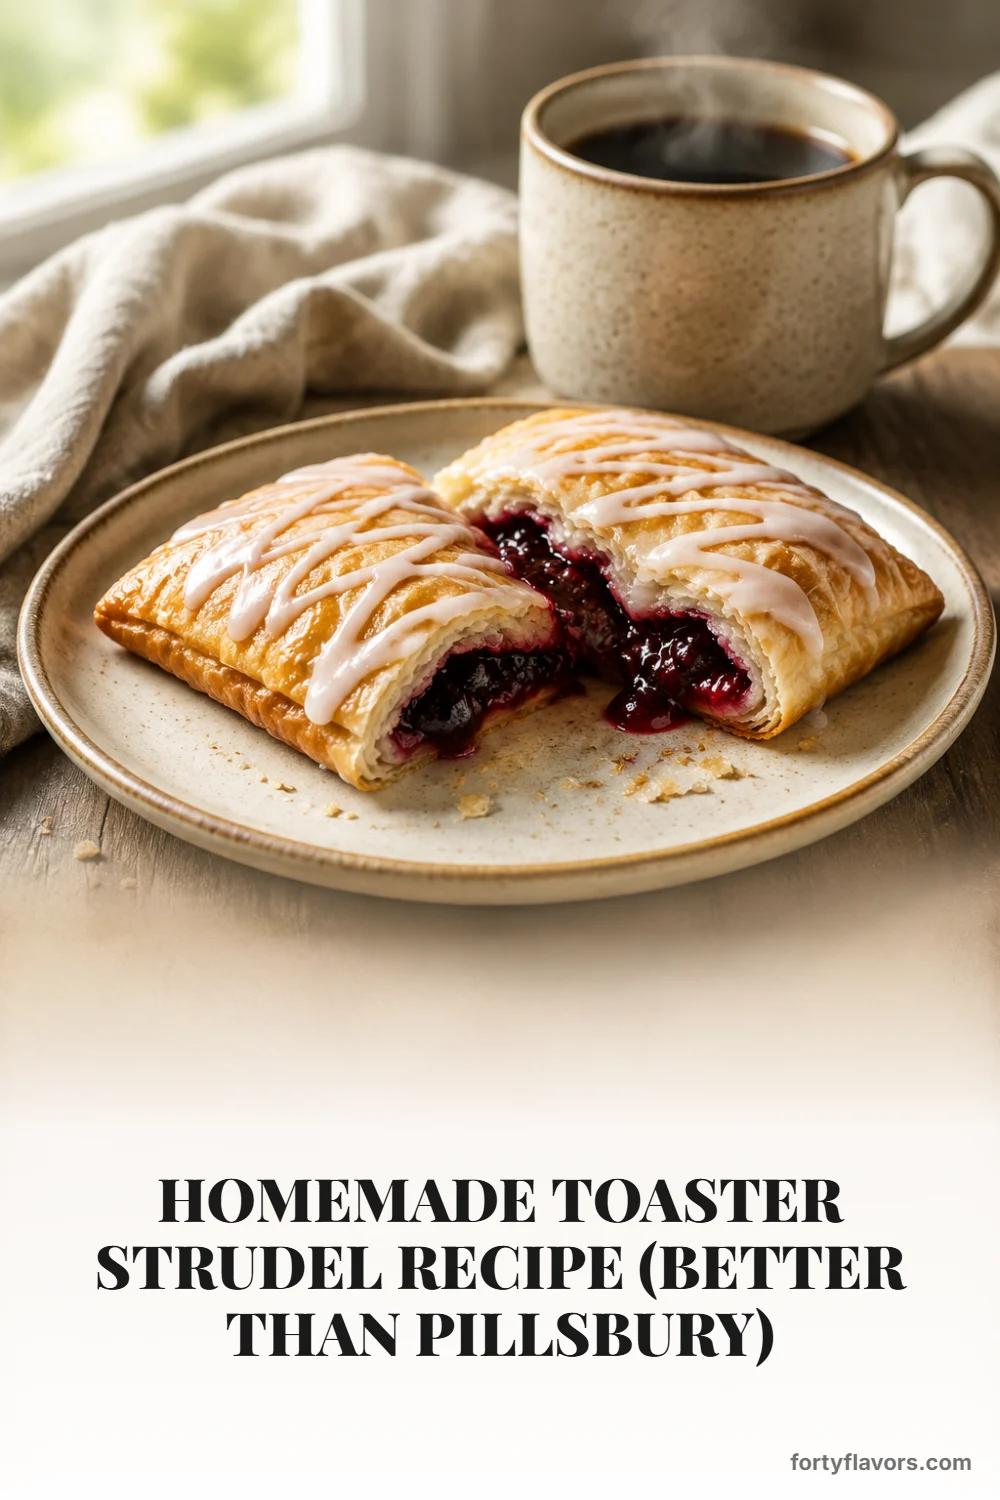
There is a reason this kind of breakfast pastry has such a loyal following: it is crisp at the edges, soft in the middle, and basically built for that final swoop of sweet icing. This homemade toaster strudel leans into everything people love about the original while skipping the slightly flat, packaged flavor. The puff pastry bakes into tall, flaky pastry layers with a buttery aroma that fills the kitchen before the timer even goes off. Inside, the berries turn glossy and jammy, giving you a bright pop of fruit instead of a barely-there filling. Think of it as the brunch cousin to homemade pop tarts, only lighter, flakier, and finished with icing you can drizzle as generously as you like.
Because this recipe starts with thawed frozen puff pastry, it is realistic for busy mornings, brunch plans, and even low-effort holiday breakfasts. You can make them with jam alone, but adding fresh berries gives the centers a more vibrant, spoonable texture. The icing is intentionally thick, more like the classic packet-style topping than a thin glaze, so it sits beautifully on the warm pastry instead of disappearing completely. Serve them just slightly cooled, when the pastry is crisp and the center is still soft and fruity.
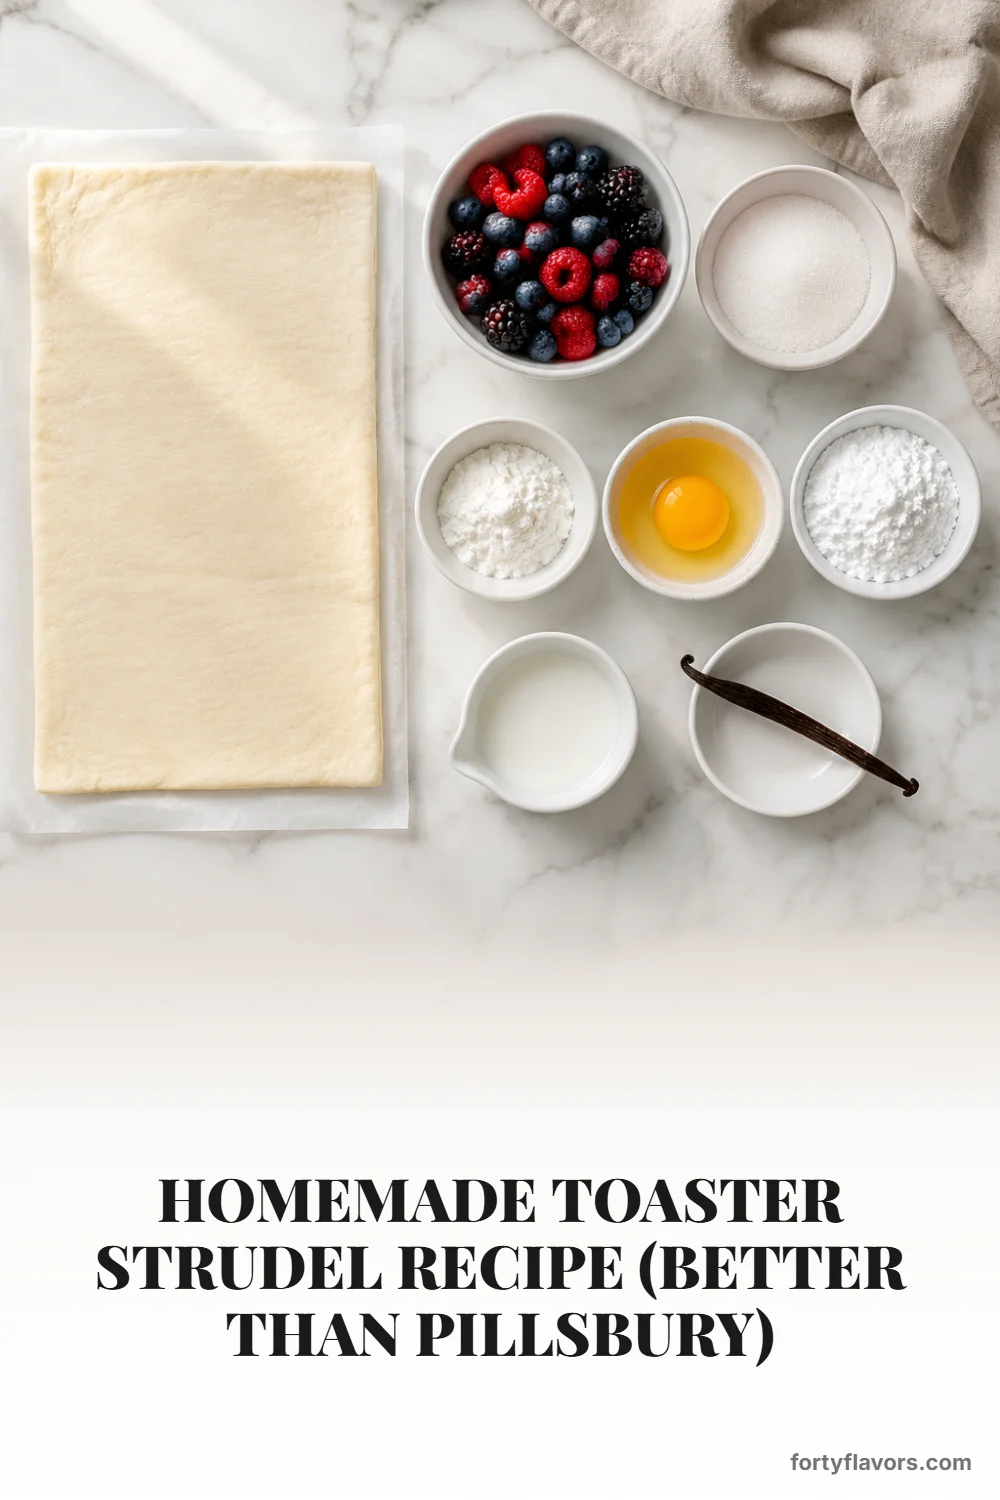
The ingredient list is short, which means each piece matters. Look for an all-butter puff pastry if you can find it, though any good-quality frozen sheet will work well once thawed. The pastry should feel cold and pliable, not sticky or warm, before you roll and cut it. A simple egg wash gives the tops their deep golden color and helps seal the edges so the berry filling stays tucked inside. For the fruit, mixed berry jam creates the sweet base, while fresh raspberries, blueberries, or blackberries add natural tartness and texture.
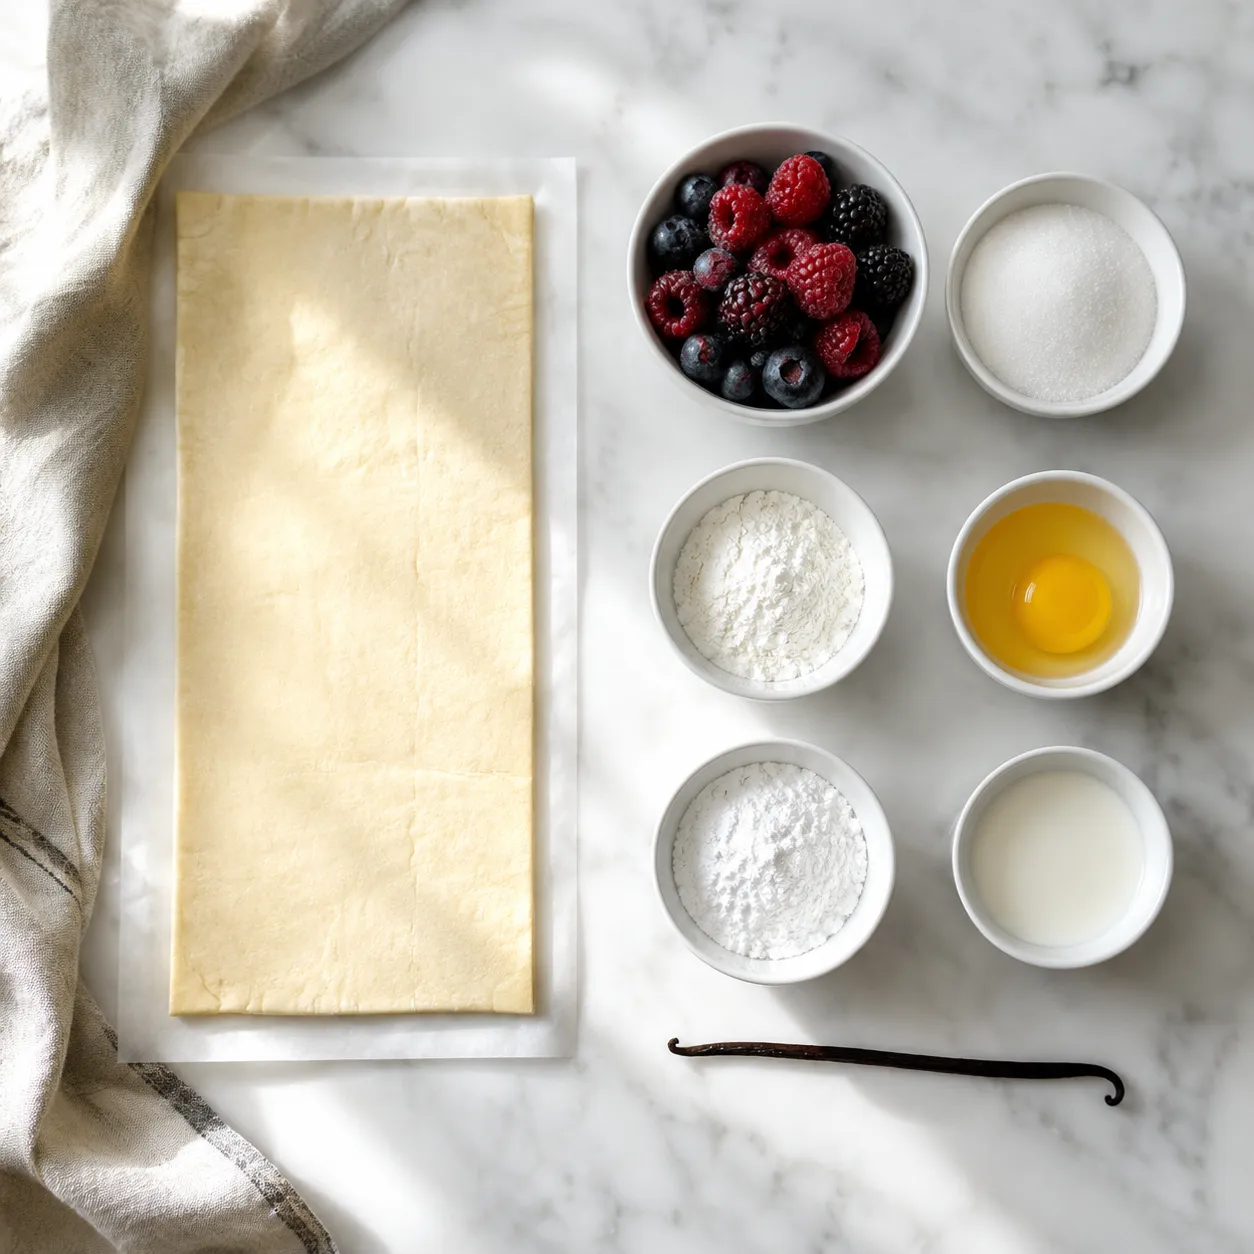
The signature finish is a vanilla icing glaze made with powdered sugar, milk, and vanilla extract. It should be thick enough to ribbon from a spoon but loose enough to drizzle in those nostalgic zigzags. If your kitchen is warm or your pastry feels soft, slide the cut rectangles into the refrigerator for a few minutes before filling. That one small pause helps the layers puff rather than slump in the oven.
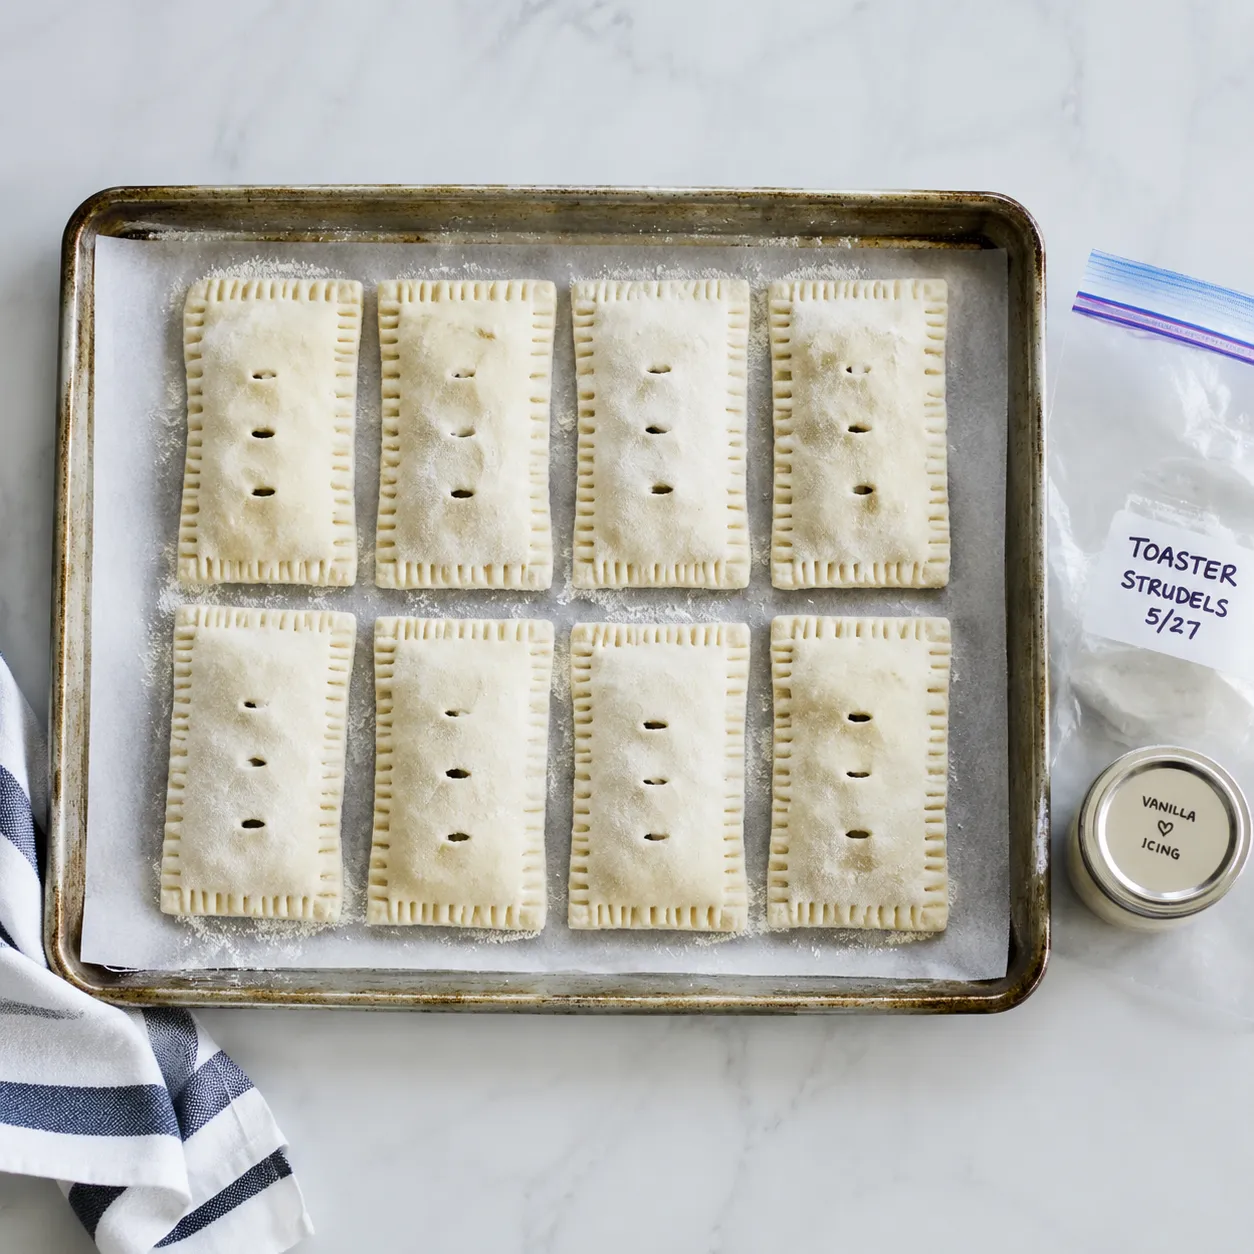
Start by unfolding the thawed puff pastry on a lightly floured surface and rolling it just enough to smooth the seams. You are not trying to make it paper-thin; you simply want an even sheet that can be cut into rectangles. A sharp knife or pizza cutter gives you clean edges, which encourages the pastry to rise evenly. Keep the pieces similar in size so they bake at the same rate. If the dough resists or shrinks back, let it rest for a minute, then continue gently.
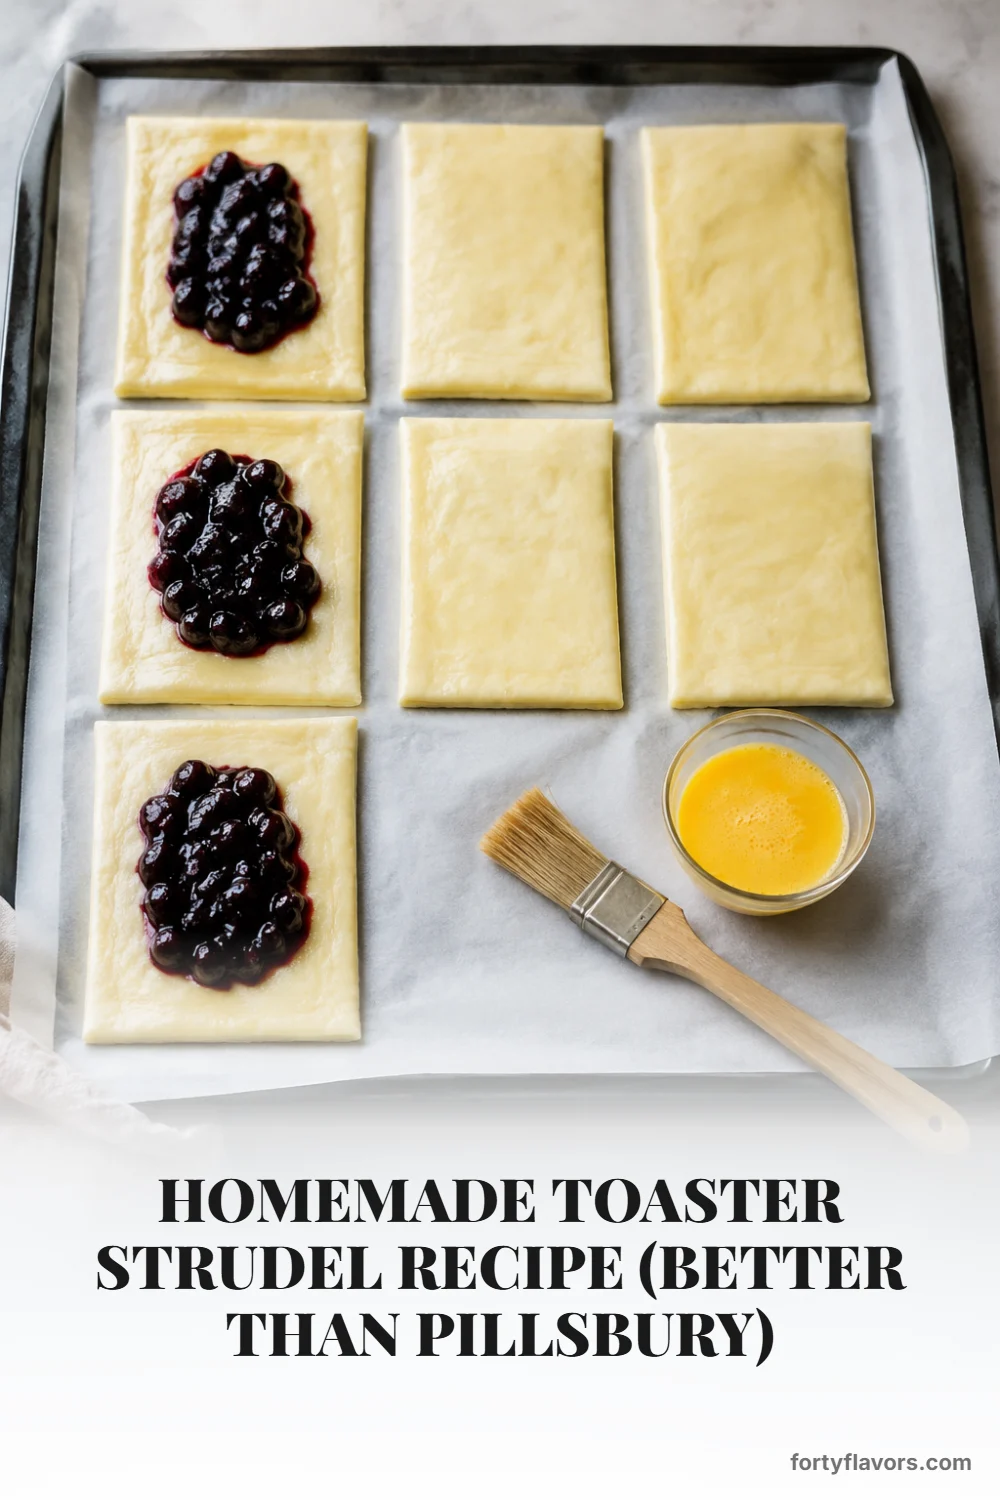
Once the pastry is cut, arrange half the rectangles on a parchment-lined baking sheet. Spoon a small mound of the mixed berry filling into the center of each piece, leaving a clean border all the way around. This border is important because it gives you room to brush on egg wash and crimp the edges securely. The filling will spread slightly as it heats, so a modest spoonful is plenty. If you want a brighter fruit flavor, mash a few fresh berries into the jam before spooning it onto the pastry.
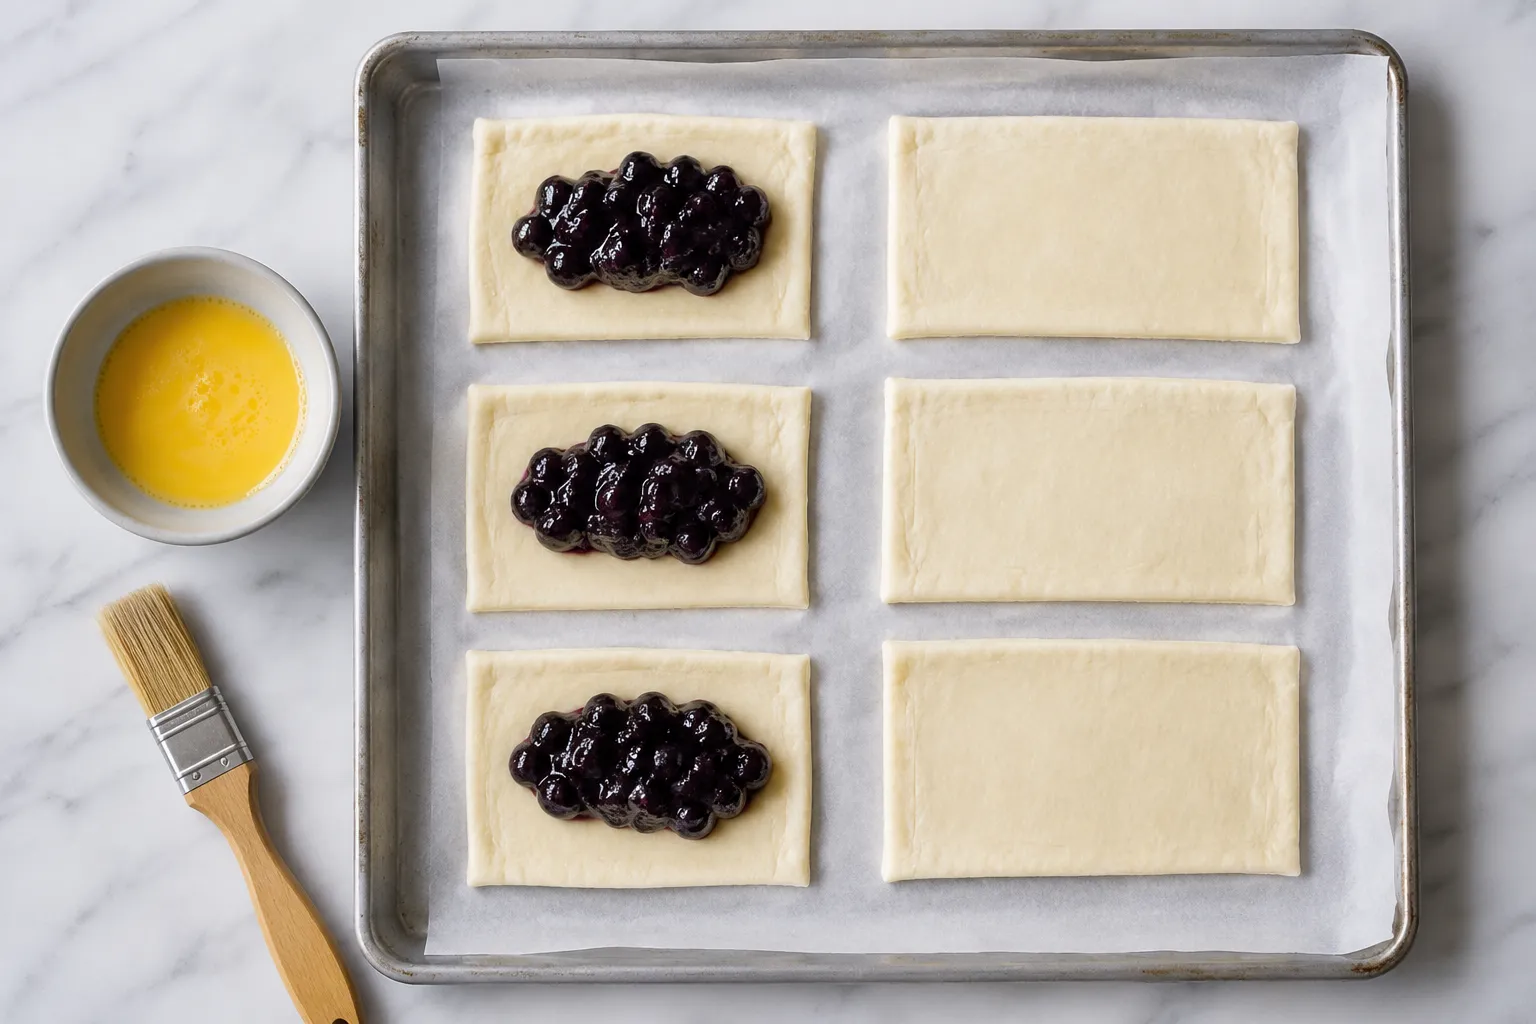
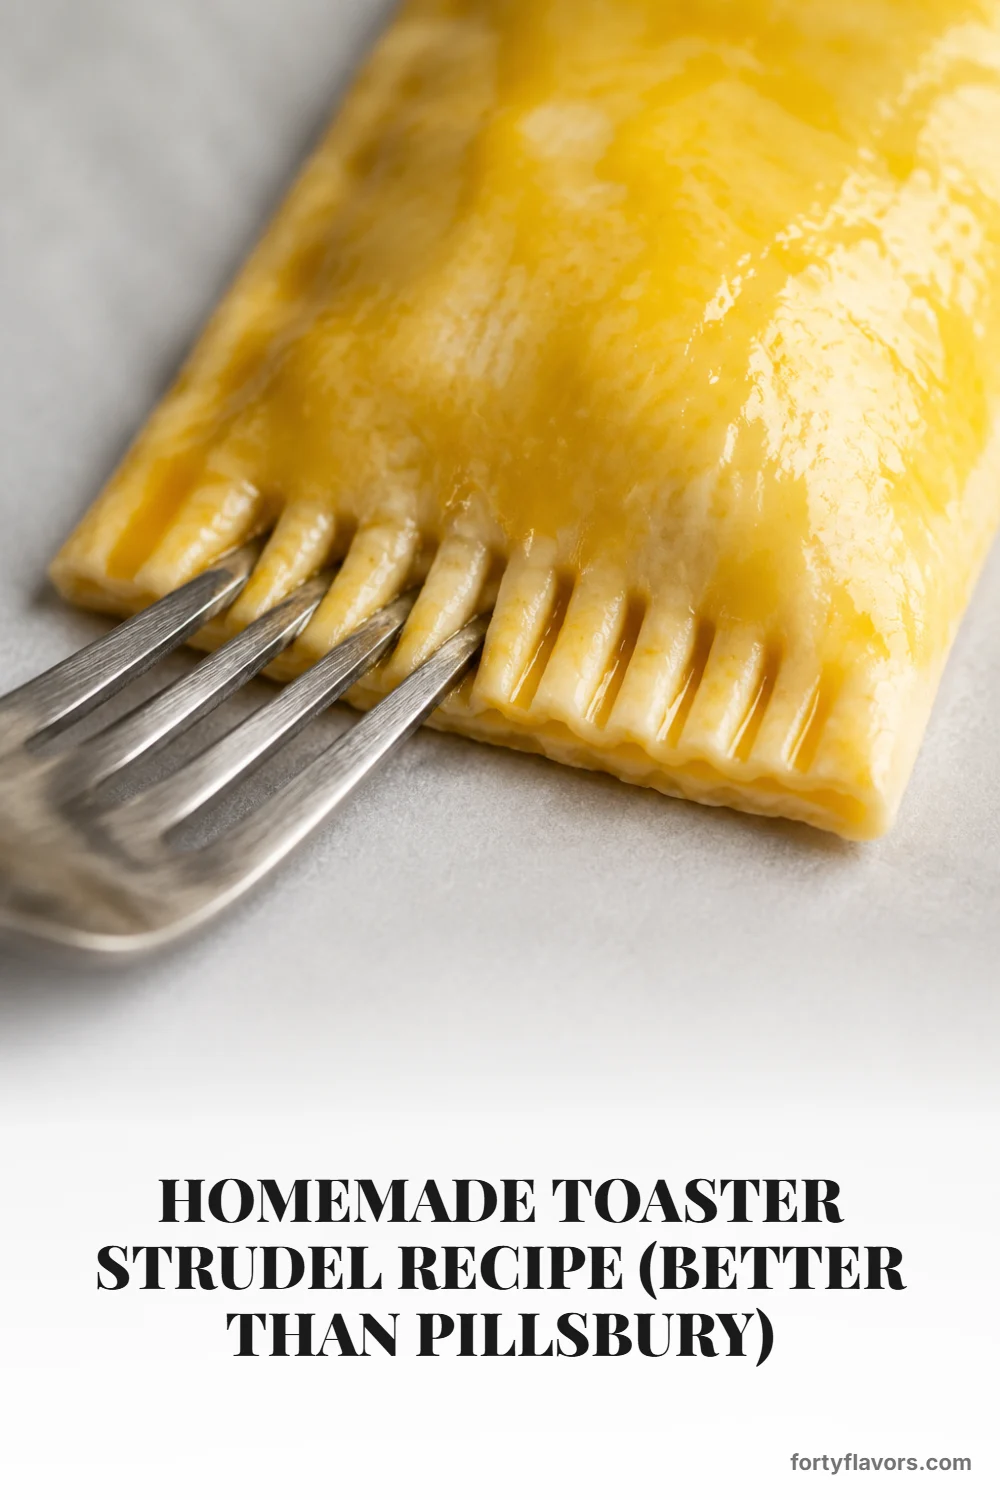
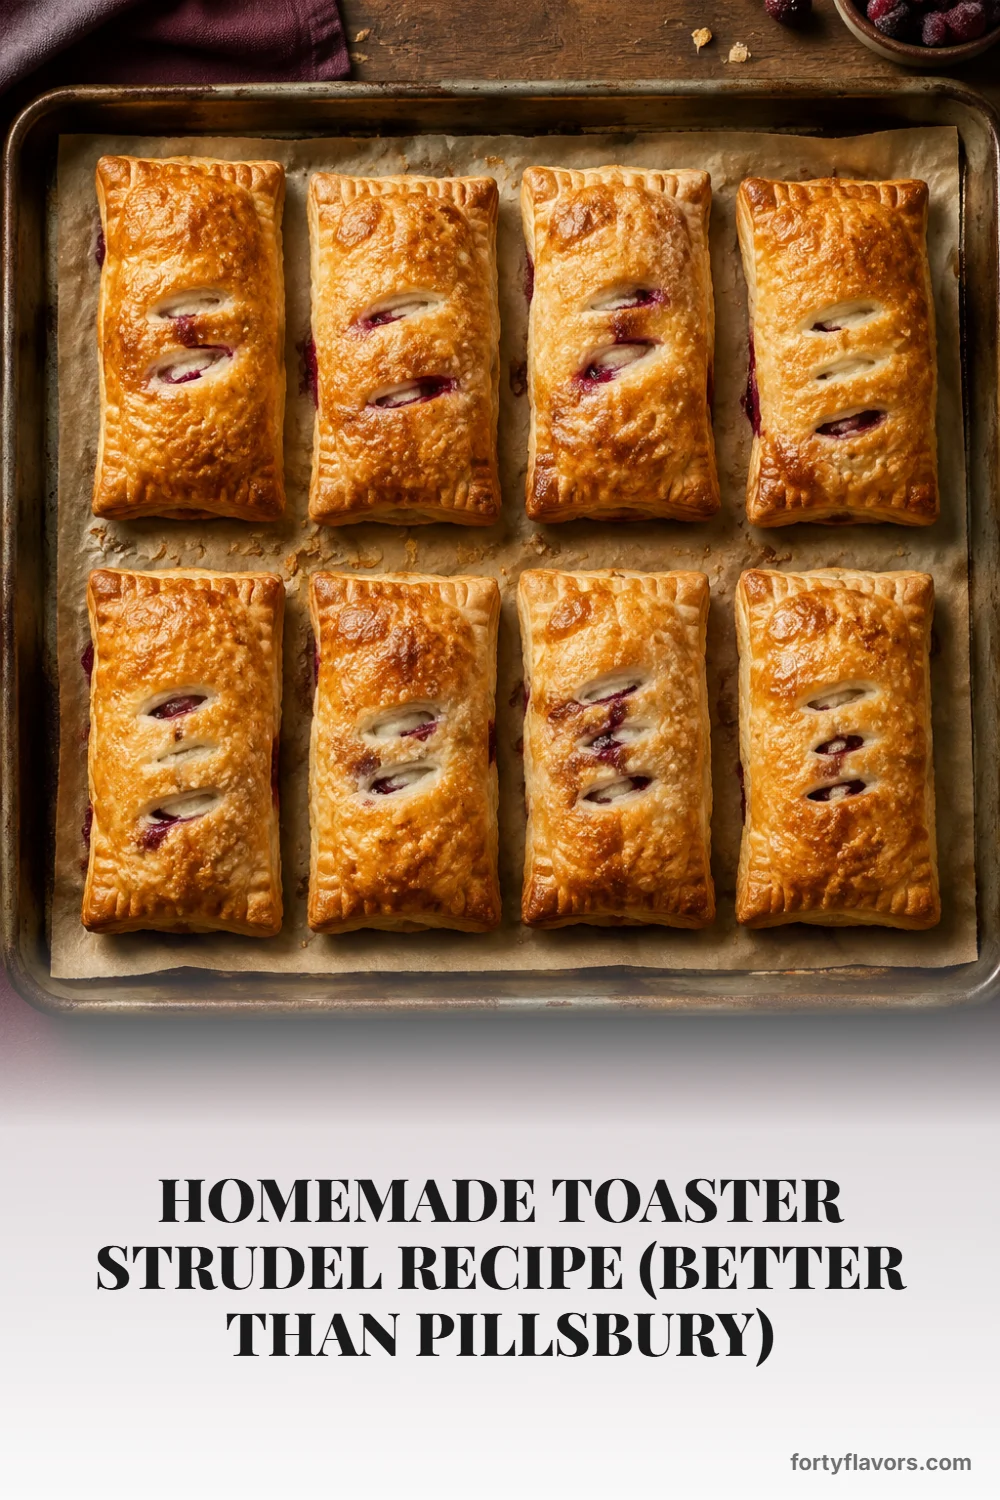
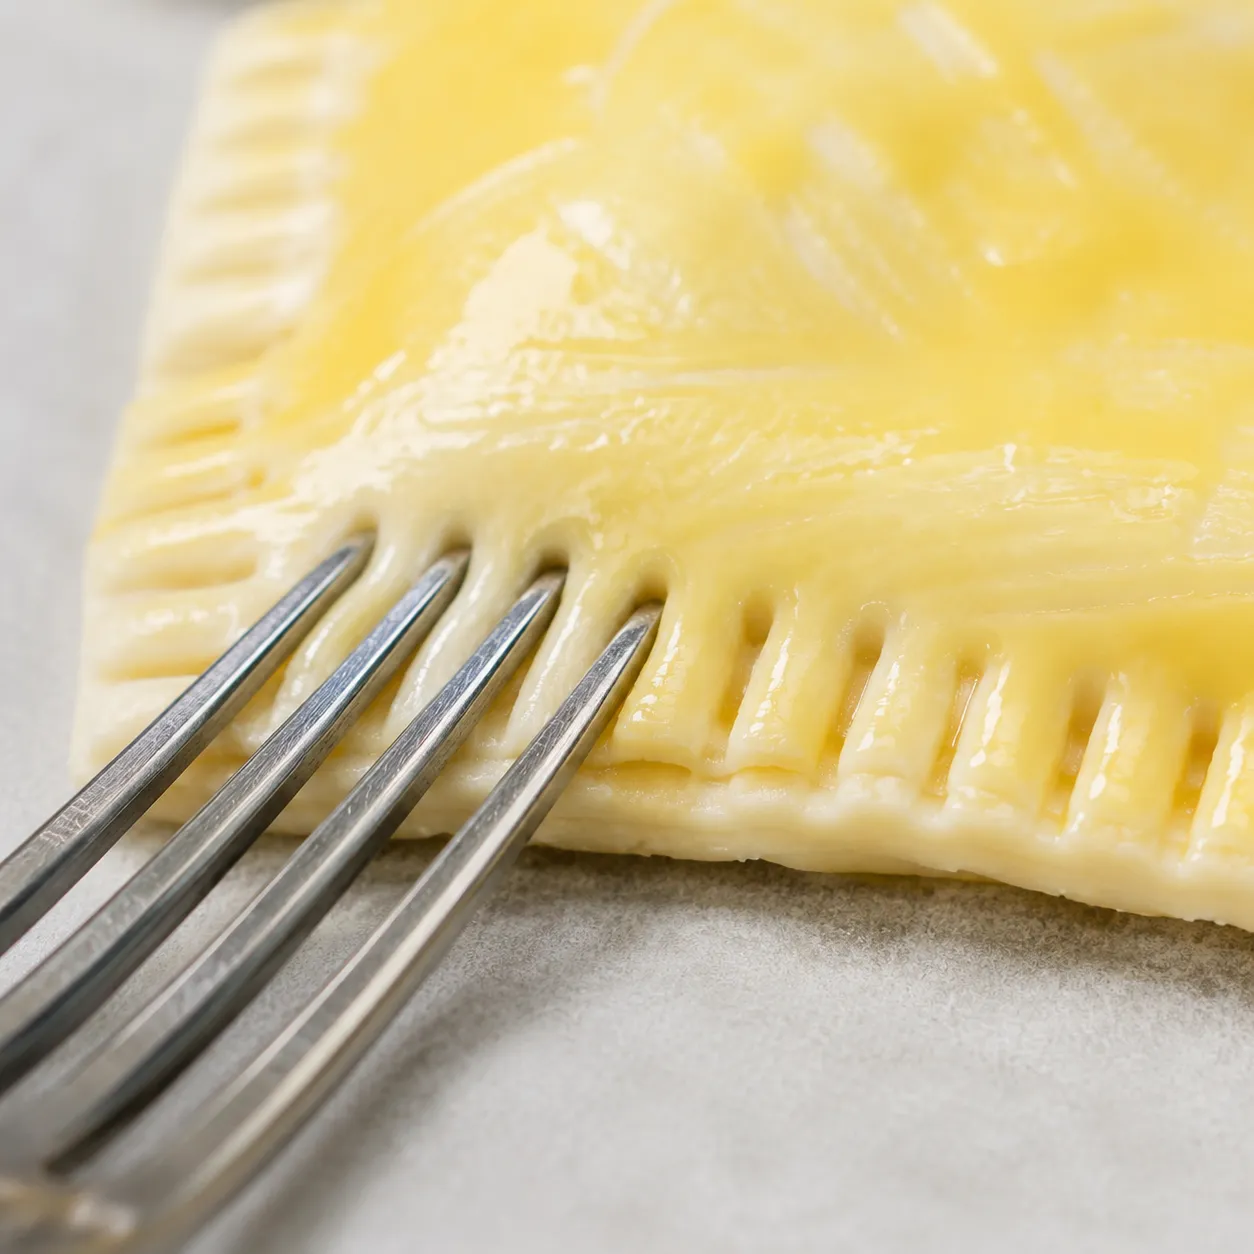
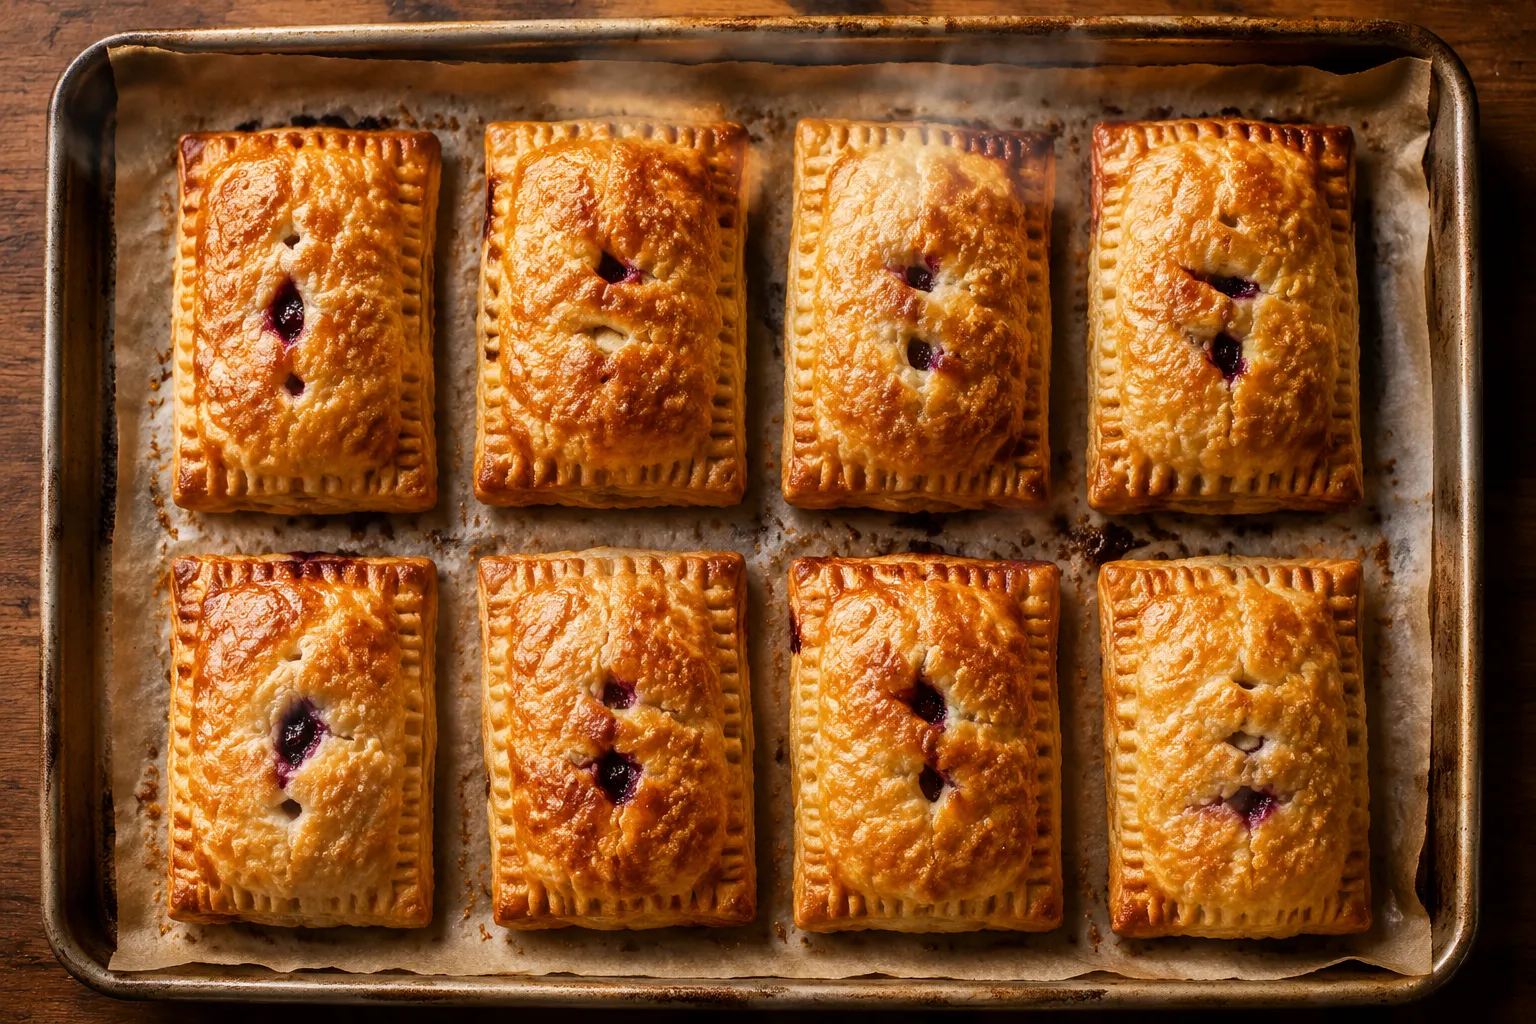
Brush the borders with egg wash, then place the remaining pastry rectangles on top and press lightly around the filling to push out air pockets. Crimp the edges with a fork, making sure the top and bottom sheets are sealed together. A few small vents in the top help steam escape and keep the pastry from ballooning too much. Brush the tops with more egg wash for that glossy, bakery-golden finish. At this point, the pastries should look tidy, plump, and ready for the oven.
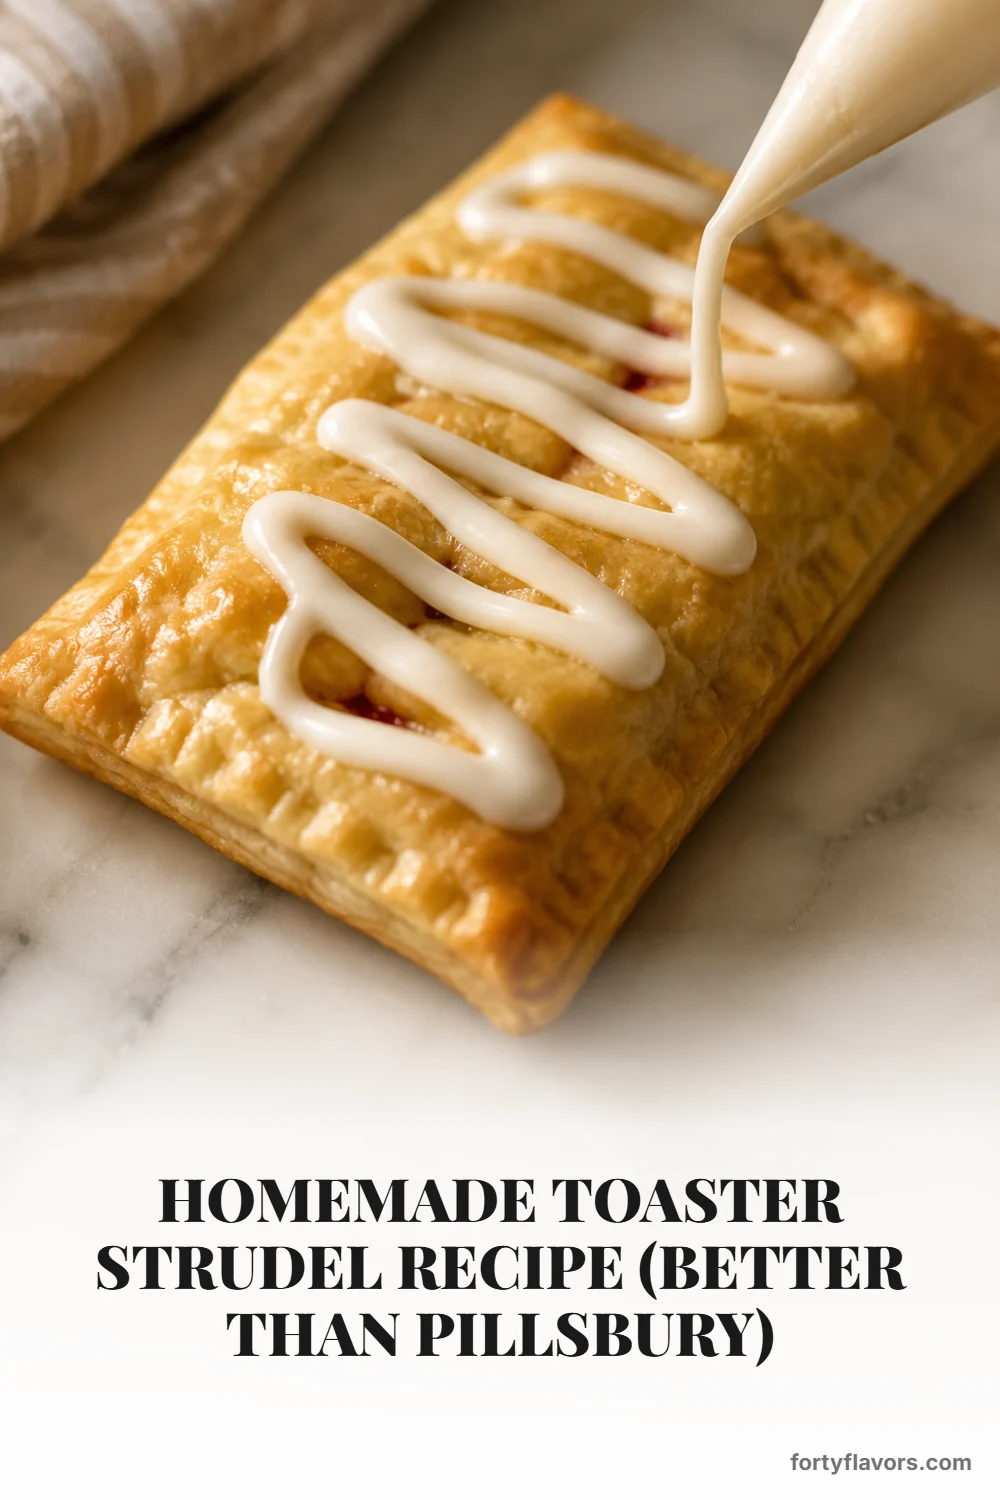
Bake until the pastries are puffed, deeply golden, and crisp at the seams. You will see the layers lift and separate, and a little bit of ruby filling may bubble at the edges in the most delicious way. Let them cool on the baking sheet for several minutes before moving them, because the centers are hot and the pastry is delicate right out of the oven. While they cool, whisk together the powdered sugar, milk, and vanilla until smooth. The icing should fall in thick ribbons from the spoon, not run off like water.
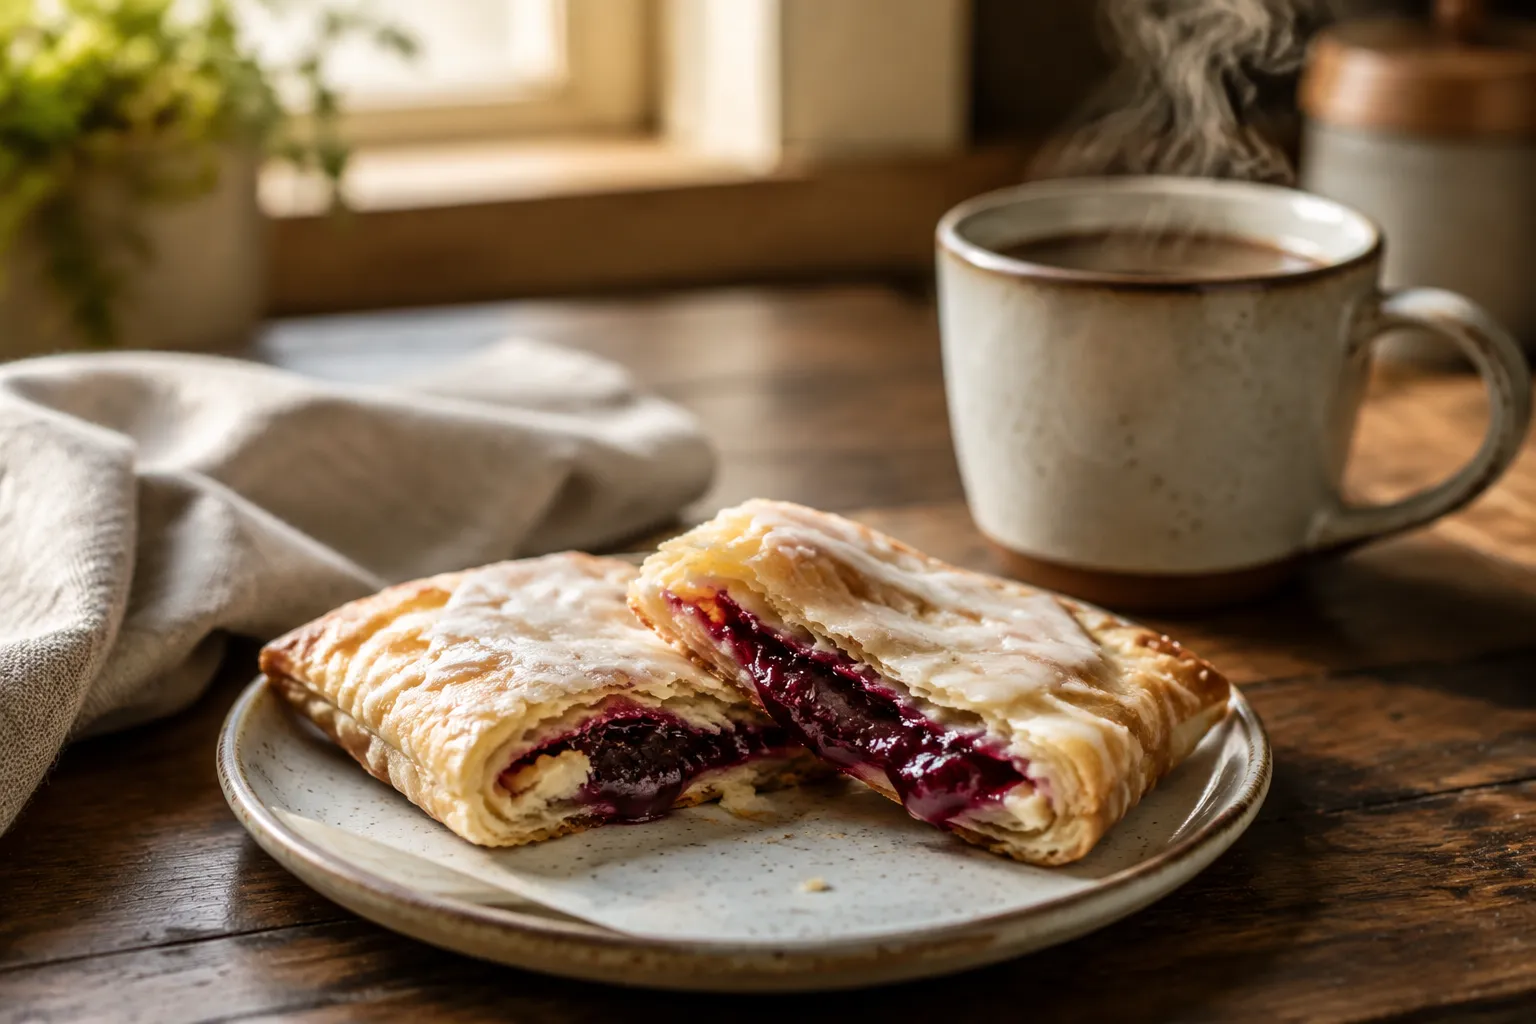
Drizzle the icing over the warm pastries in zigzags, swoops, or full-on bakery-style ribbons. The warmth softens the icing just enough so it settles into the flaky ridges while still staying visible on top. This is the moment that makes the whole kitchen smell like butter, berries, and vanilla.
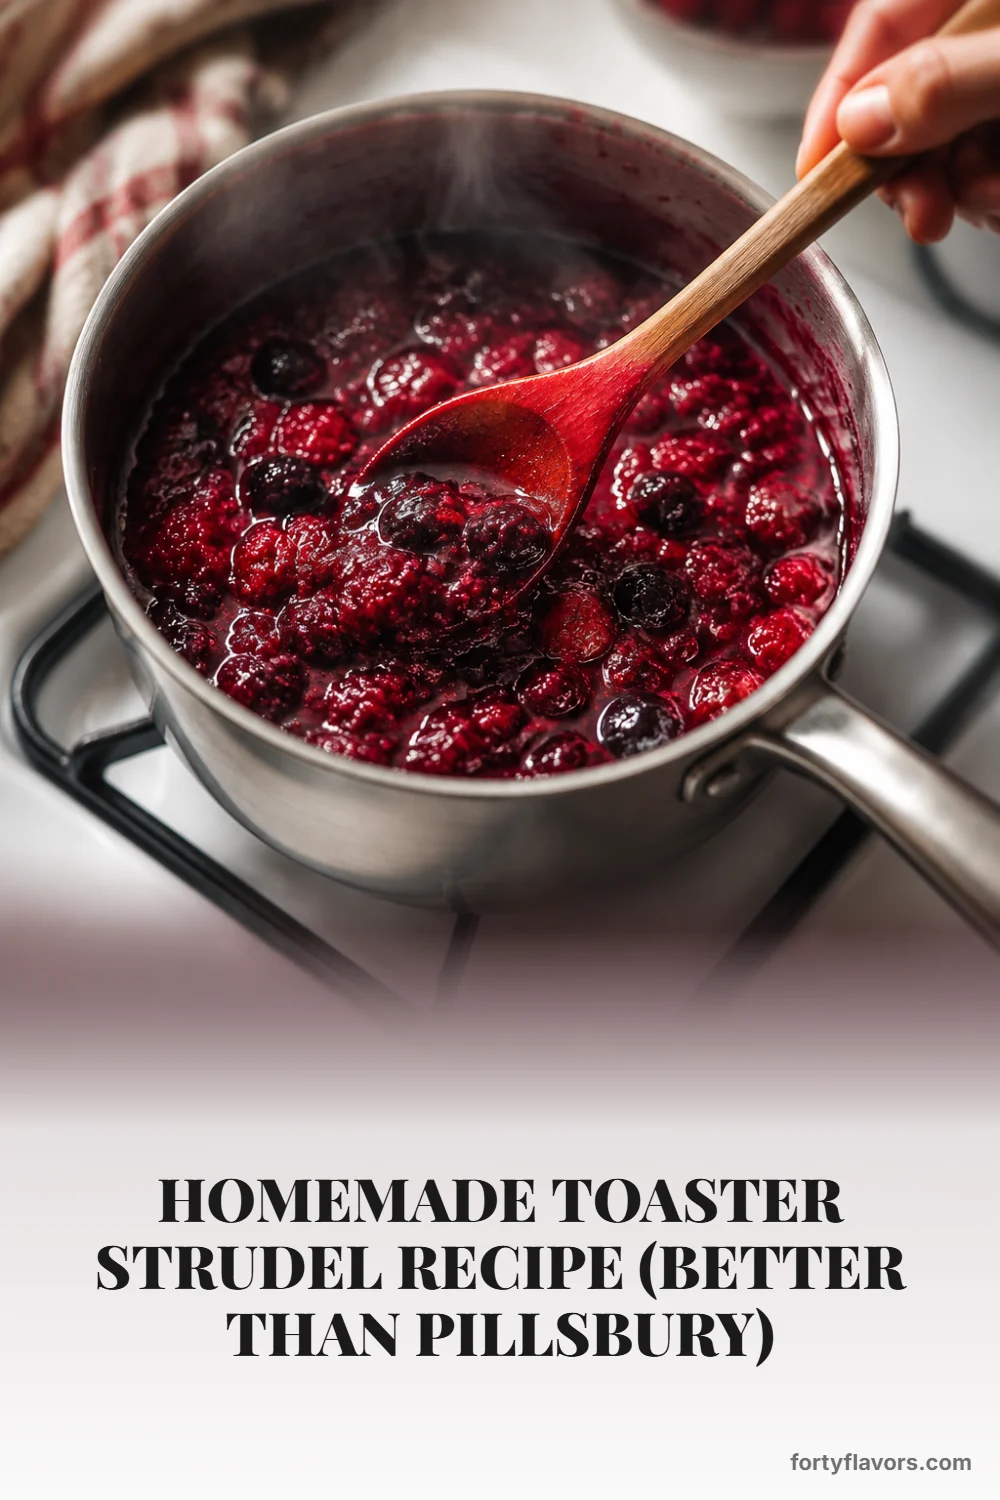
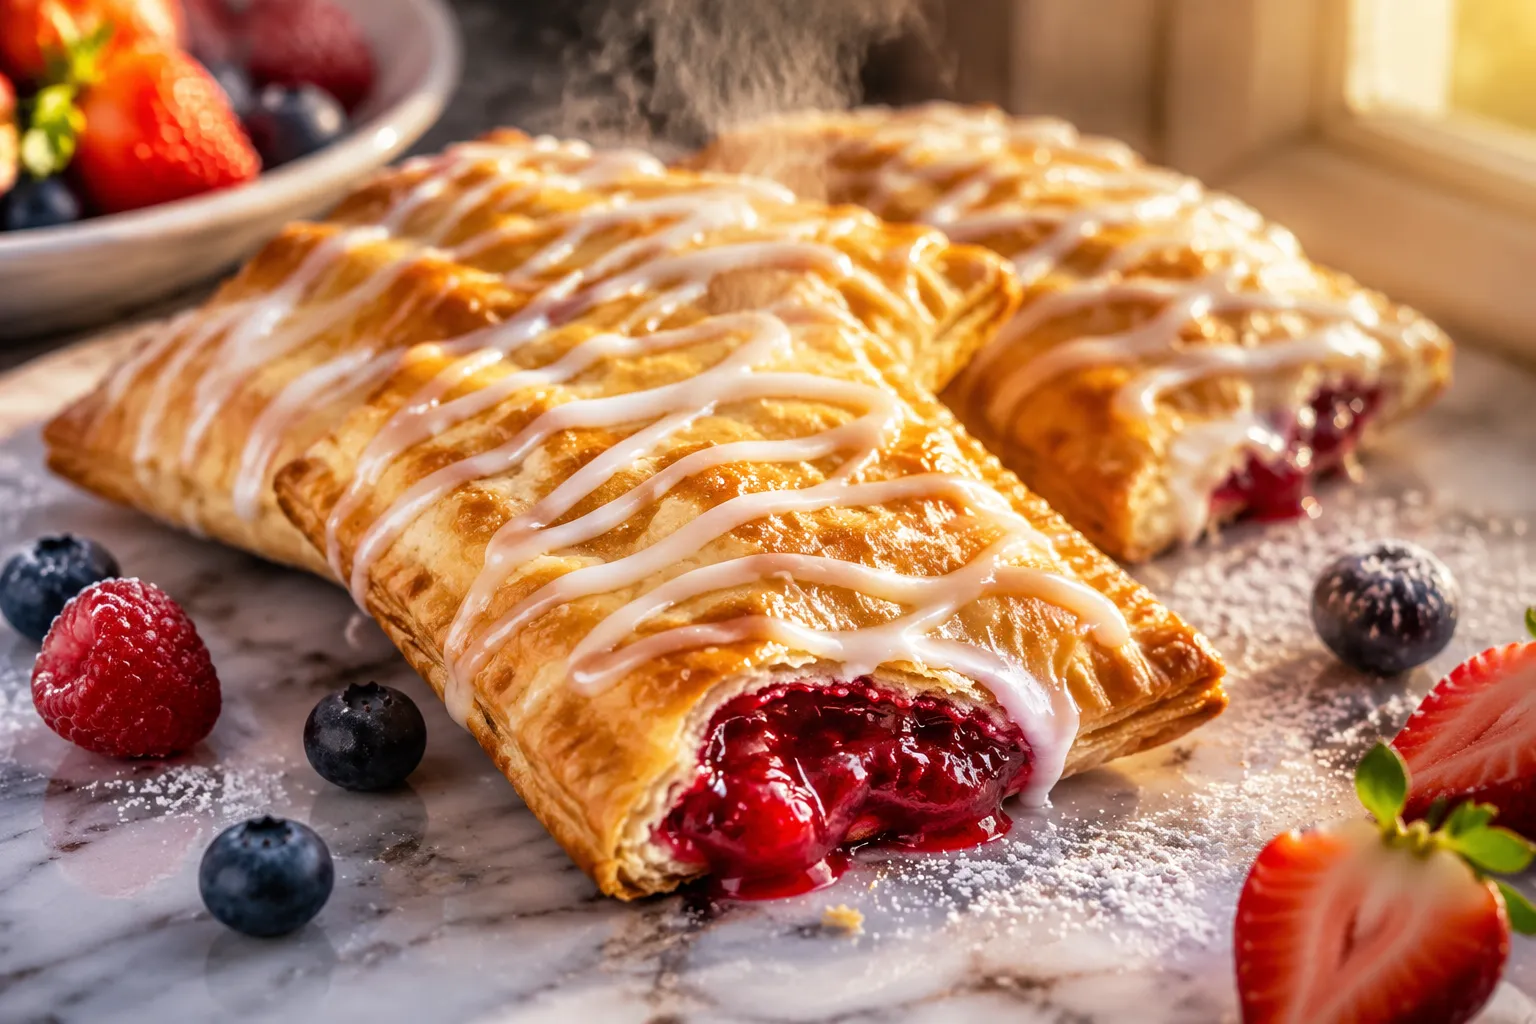
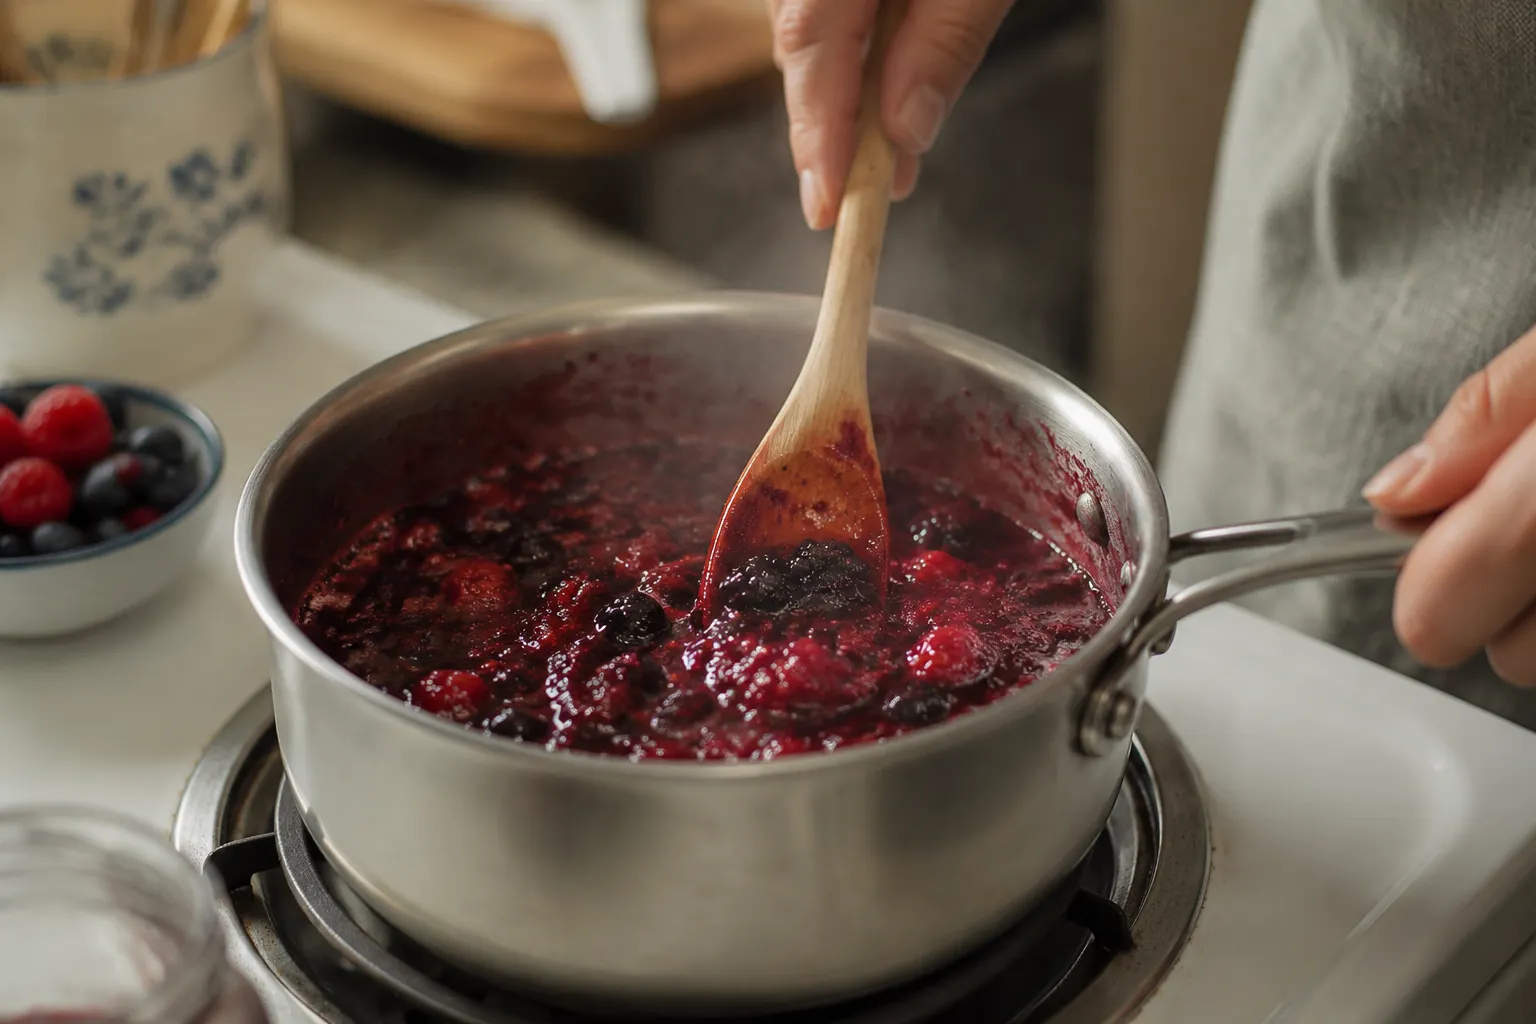
The filling is intentionally simple: jam for body, fresh berries for brightness, and a tiny pinch of salt if you want the fruit to taste even more vivid. Mixed berries work beautifully because raspberries bring tartness, blueberries add sweetness, and blackberries give the center a deeper jammy flavor. You can use all one berry if that is what you have, but the blend gives the pastries that jewel-toned, bakery-style center. The key is to keep the texture thick enough that it spoon-fills the pastry instead of soaking into the layers. That balance is what makes the inside glossy and fruity while the outside stays crisp.

If your berries are especially juicy, toss them with a teaspoon of cornstarch before mixing them into the jam. This helps thicken the juices as the pastries bake and makes the filling less likely to escape. You can also cook the berries and jam together for a few minutes on the stovetop, then cool completely before using, if you prefer a more uniform fruit center. Either way, avoid warm filling on cold pastry, because heat softens the butter layers too quickly. Cold pastry plus thick fruit equals the best rise.
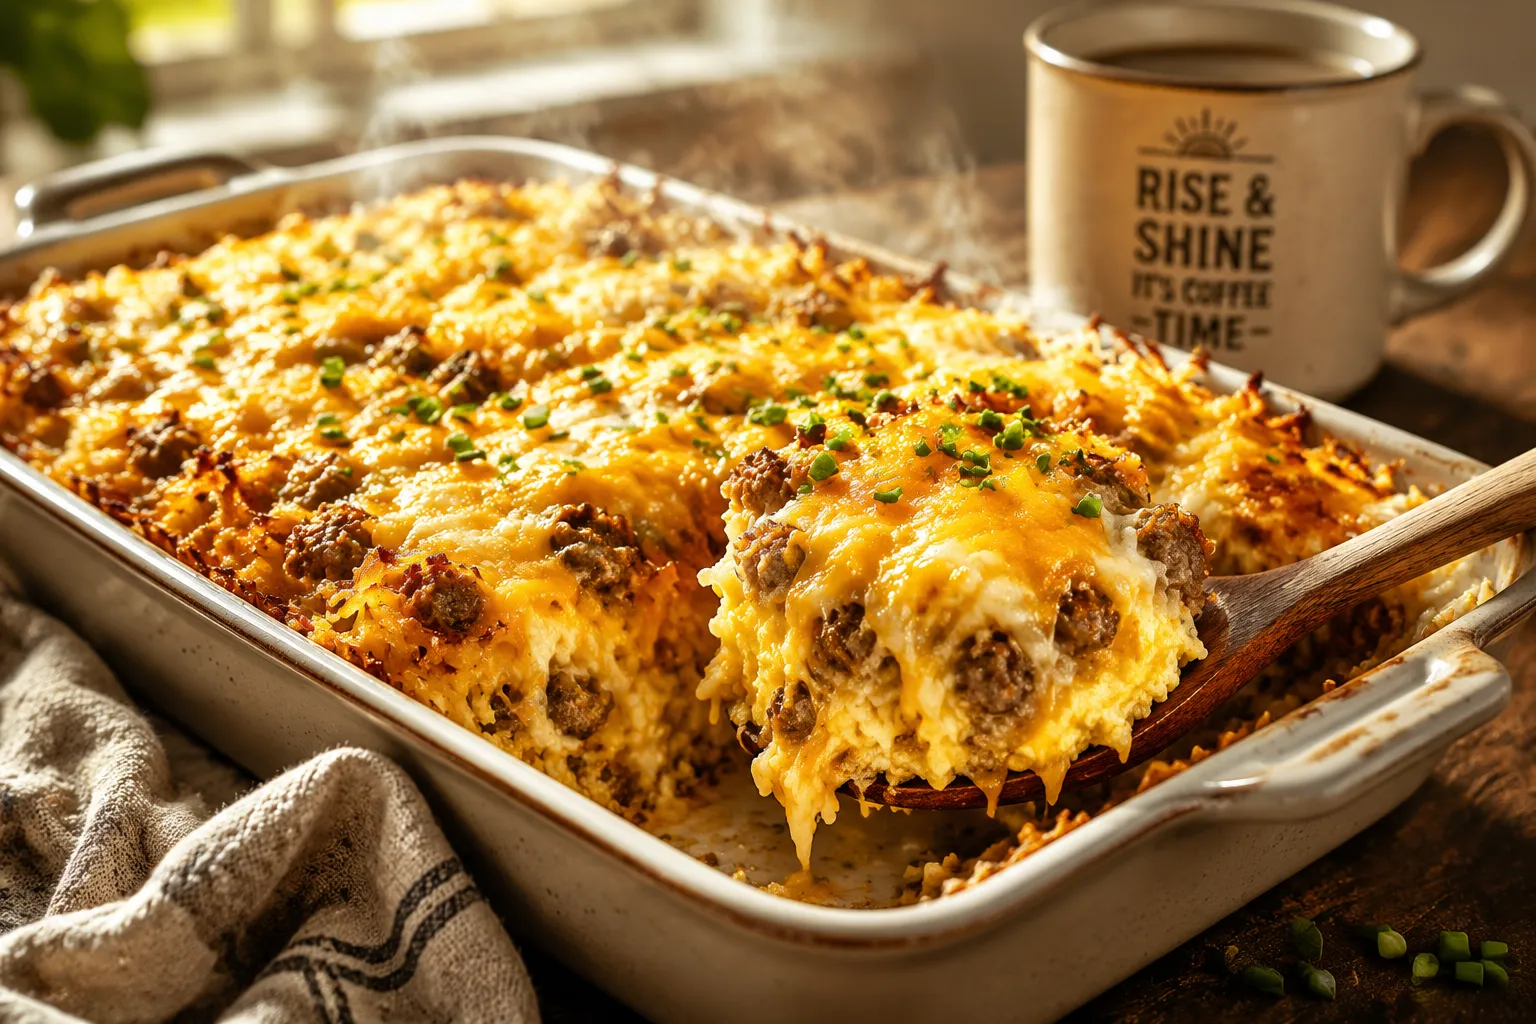
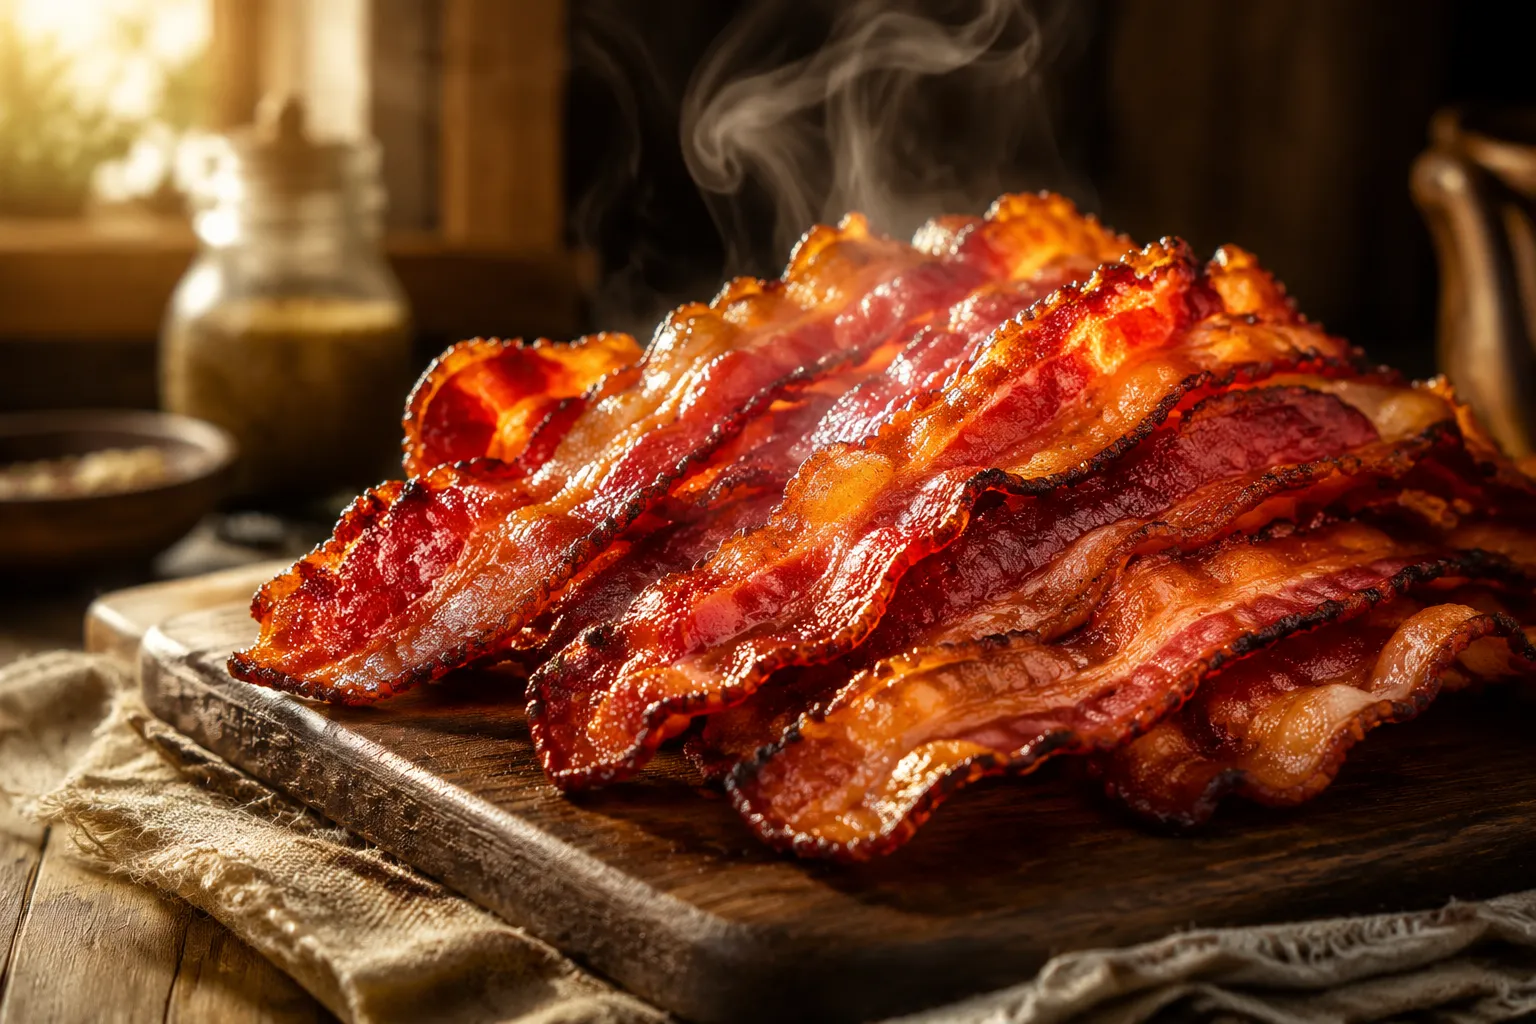
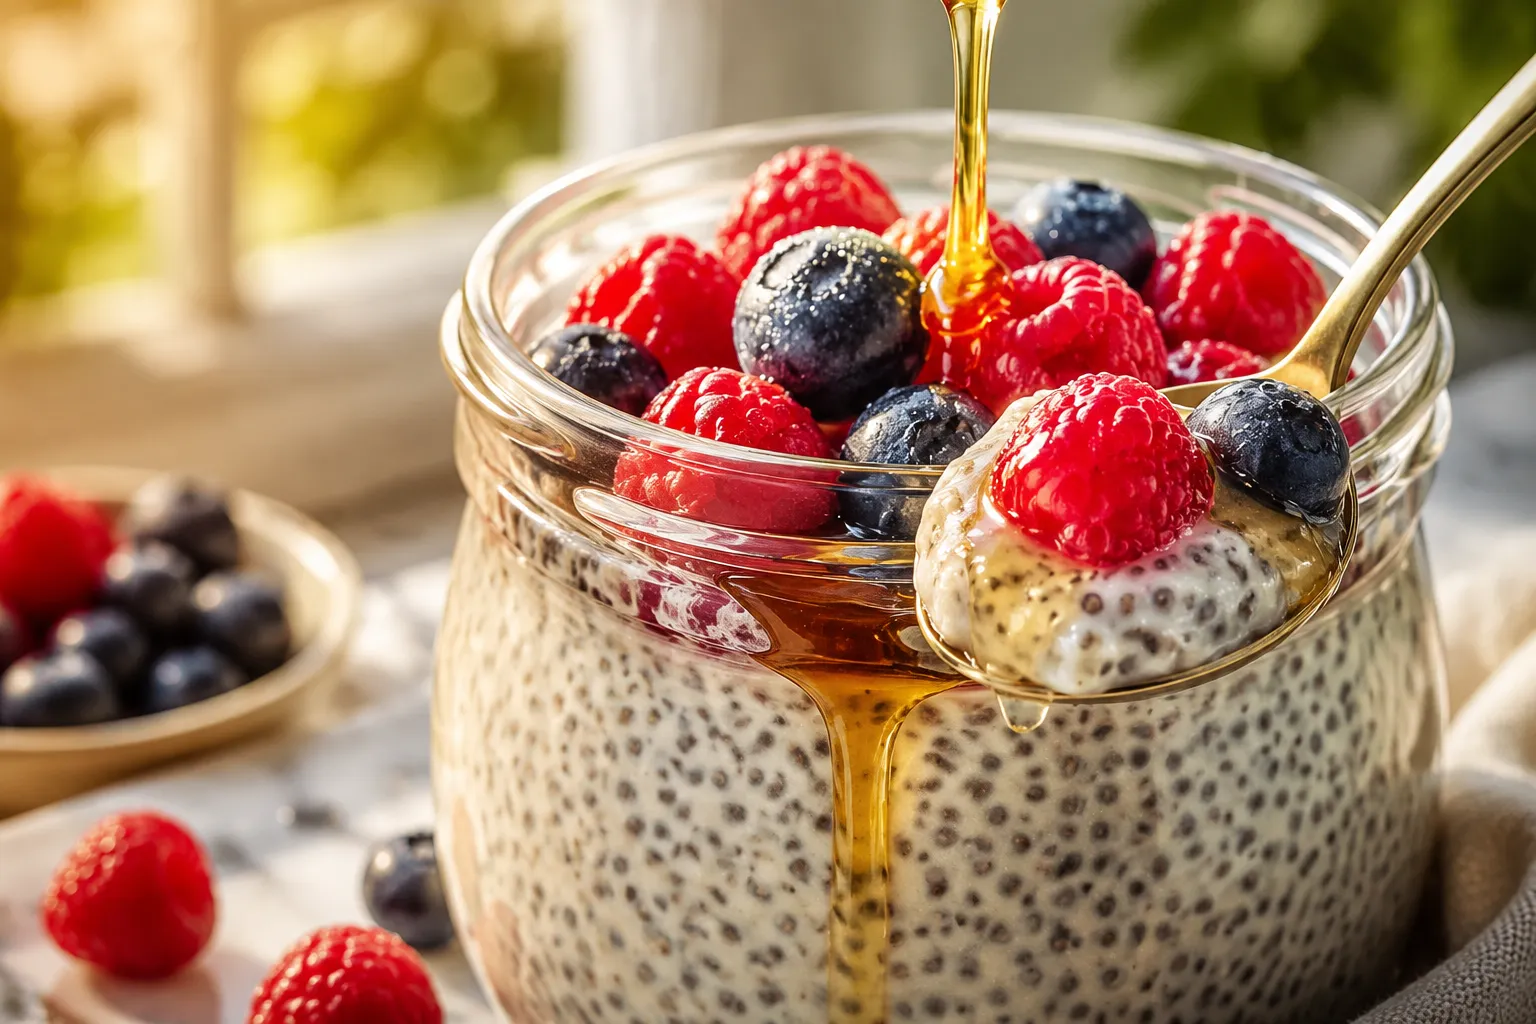
These are dreamy with hot coffee, a foamy latte, or a glass of cold milk for the full nostalgic breakfast experience. For a more rounded plate, add Greek yogurt and fresh fruit on the side to balance the buttery pastry. If you are serving brunch, pair them with scrambled eggs, bacon, or a simple fruit salad so guests can mix sweet and savory bites. They also make a fun addition to a tray of easy breakfast pastries when you want something homemade without starting dough from scratch.
For a brunch board, slice a few pastries in half so everyone can see the ruby berry center and flaky layers. Add bowls of extra icing, fresh berries, and maybe a second fruit jam for dipping. They are best served warm, but room temperature pastries are still tender and delicious, especially if the icing has had time to set. If you are making these for kids, let them drizzle their own icing at the table; it is messy, charming, and almost always the most memorable part.
If your mornings move fast, you can assemble the pastries ahead and bake them when you are ready. Arrange the filled and sealed pastries on a parchment-lined tray, freeze until firm, then transfer to a freezer bag for longer storage. Bake straight from frozen, adding a few extra minutes to the oven time, and wait to add the vanilla icing until after baking. This gives you the feel of a warm store-bought pastry with the taste of real butter and fruit.
For the flakiest reheated texture, use an oven or toaster oven rather than the microwave. The microwave will warm the filling but softens the pastry, while dry heat brings back the crisp edges. If the pastries are already iced, reheat gently so the icing does not melt away completely.
This recipe is proof that a nostalgic breakfast can be simple and still feel special. With a box of puff pastry, a spoonful of jam, and a quick vanilla icing, you get golden pastries that taste fresh, buttery, and bright. The method is forgiving, the ingredients are easy to find, and the result feels like a bakery treat without the extra stop. Make a batch for a slow weekend breakfast, freeze a few for future mornings, and do not be shy with the icing.
Store cooled pastries in an airtight container at room temperature for up to 2 days, or refrigerate them for up to 5 days. If they are already iced, place parchment between layers to prevent sticking. Reheat in a 325°F oven or toaster oven until warm and crisp.
To freeze, assemble the pastries but do not bake or ice them. Freeze flat on a parchment-lined tray until firm, then transfer to a freezer-safe bag or container for up to 2 months. Bake from frozen, adding a few extra minutes, and drizzle with icing only after they come out of the oven.
Hover any image and hit “Pin it” to save it to your Pinterest boards.