1 Cup to Grams: The Ultimate Kitchen Conversion Chart
Ingredients
Scale
Wondering how to convert 1 cup to grams for your favorite recipe? Here's the only cups-to-grams chart you'll ever need — accurate, printable, and bakery-tested.
Converting 1 cup to grams is the question every home baker asks the moment they pull up a recipe from a UK food blog or a French pastry book. The frustrating truth? There's no single magic number. A cup of feathery flour weighs almost nothing compared to a cup of dense brown sugar, and that difference is exactly why your cookies sometimes spread into puddles or your cakes turn out gummy.
I built this guide after years of fielding the same question from readers: which gram weight is the right one for my recipe? It pulls together every ingredient I've actually weighed in my own kitchen, cross-checked against King Arthur, USDA, and professional pastry references. The result is the most thorough cups to grams reference you'll find online, organized by ingredient family so you can find what you need in seconds.
Whether you're scaling a recipe up, halving a batch of brownies, or finally ditching your dusty measuring cup for a kitchen scale, you'll find the exact weights below. There's a printable chart, partial-cup math, a quick tutorial on how to measure without a scale, and a deep dive on why grams will always beat volume for serious baking.
A cup is a measure of volume — how much space something takes up. A gram is a measure of weight — how heavy that something is. Those two numbers only line up when an ingredient has a known density, which is rarely the case in baking. Flour can compact or fluff up by 30% depending on how you scoop it, while liquids like water and milk are predictable down to the milliliter.
That's why 1 cup to grams isn't one answer but dozens. A cup of water weighs 240 grams. A cup of all-purpose flour weighs around 125 grams. A cup of honey clocks in at 340 grams. Same volume, wildly different weights, because density is what's really being measured beneath the surface.
Volume tells you how much room an ingredient takes up in a measuring cup. Weight tells you how much matter is actually inside. For dense, packable ingredients like brown sugar or powdered cocoa, volume measurement leaves enormous room for error. A heavy hand can pack 30 to 50 percent more product into the same cup, throwing off ratios that recipes depend on for tenderness, rise, and structure.
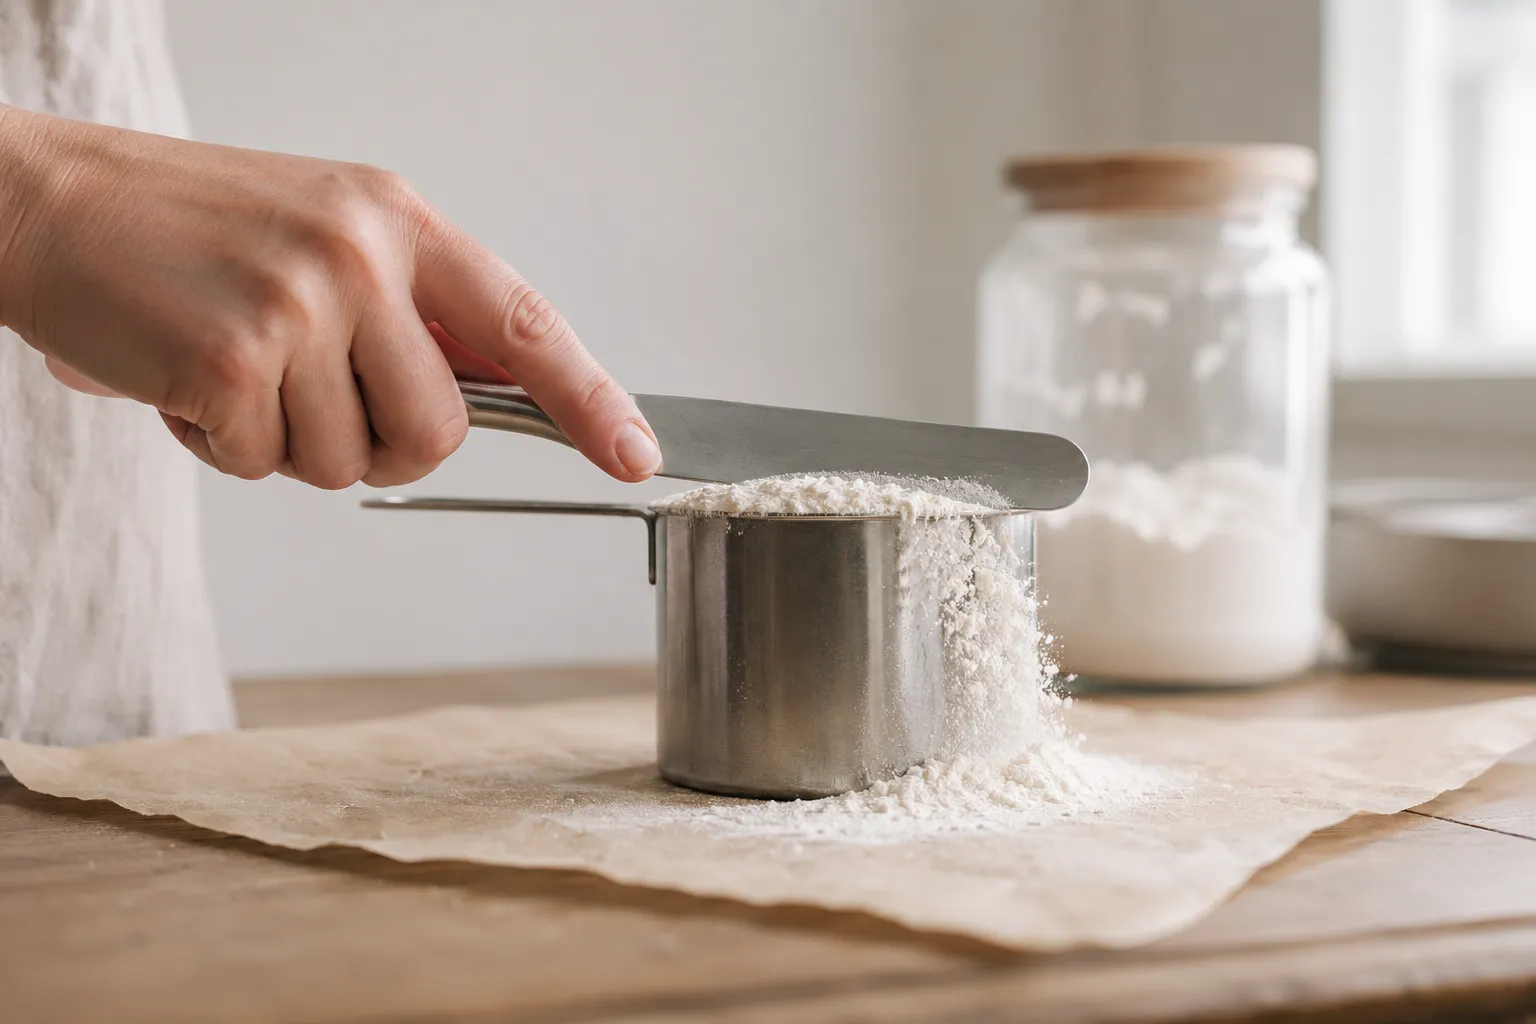
Professional bakers weigh everything because baking is chemistry. Two extra tablespoons of flour can turn tender shortbread into hockey pucks. A digital kitchen scale removes that variable entirely — you tare your bowl, pour in the ingredient until you hit the target weight, and move on. It's faster than dirtying multiple measuring cups, more accurate, and saves you from washing sticky honey out of glassware.
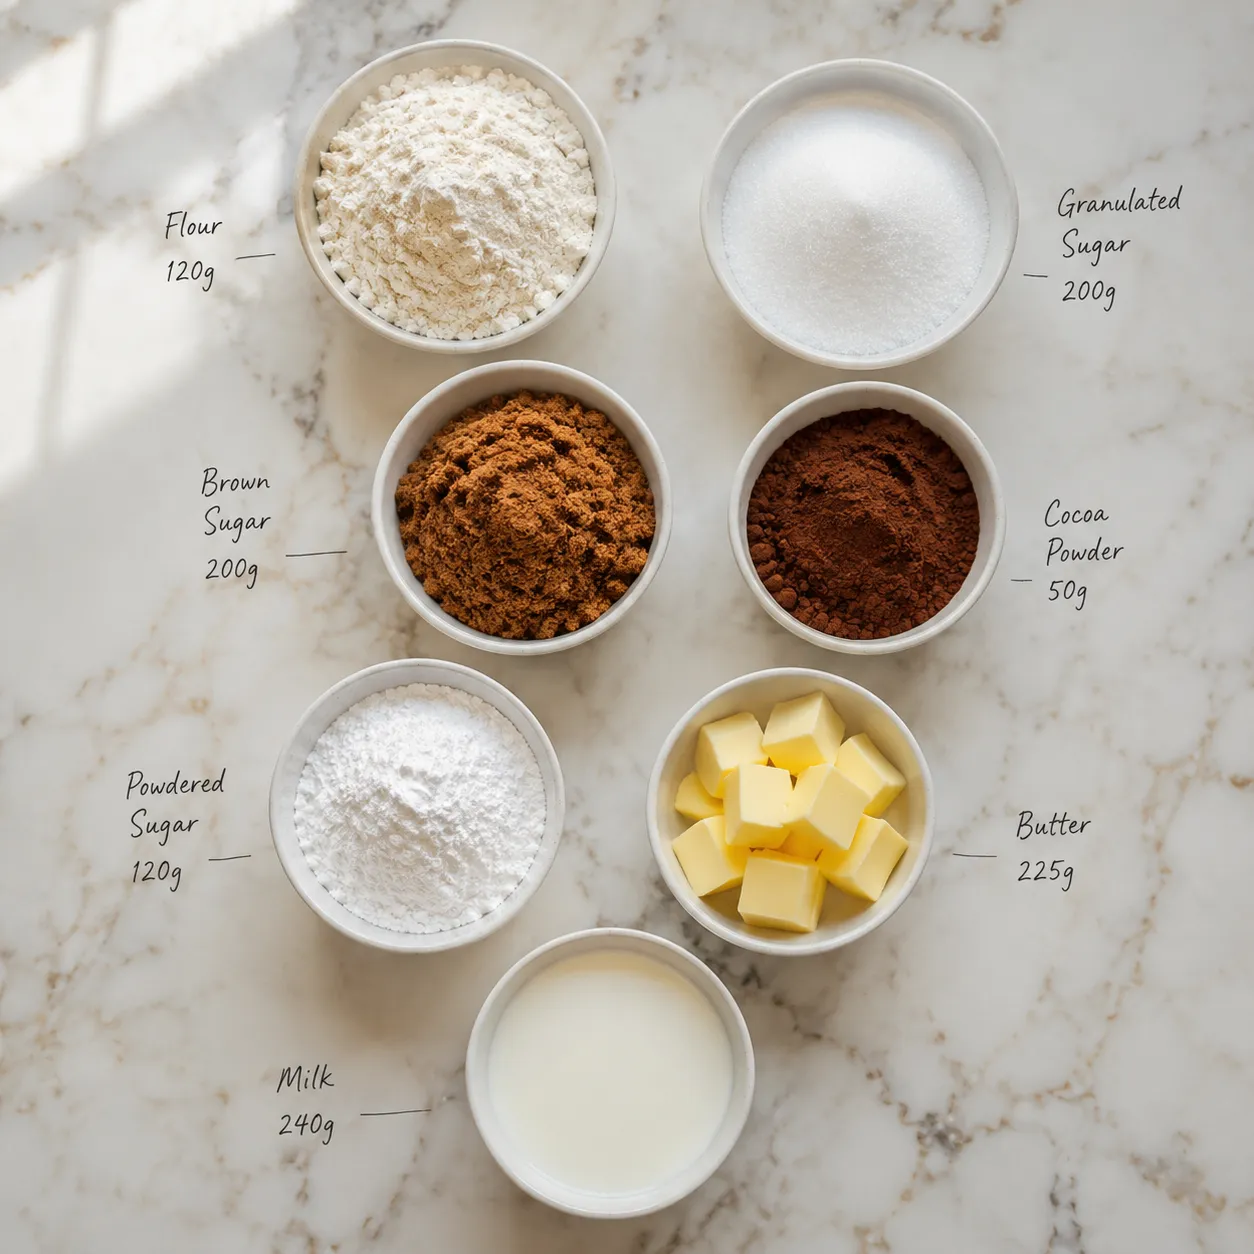
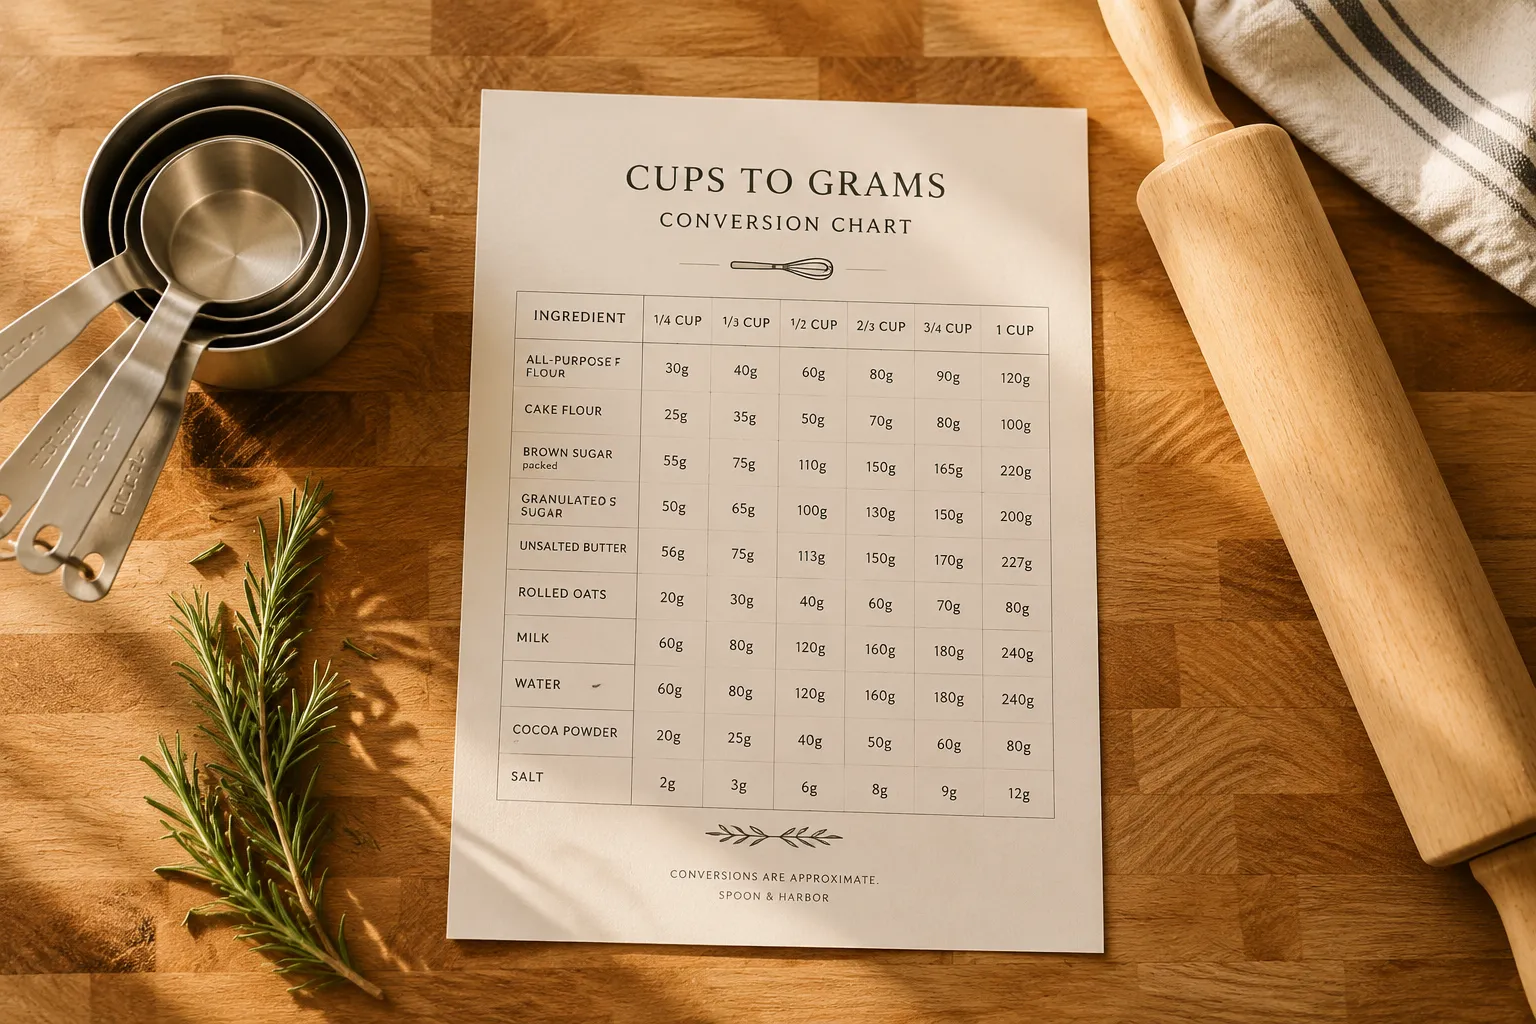
Bookmark this section. These are the gram weights I reach for daily, organized by category so you can find what you need fast. The numbers below are based on properly measured cups using the spoon-and-level method for dry ingredients and standard US fluid cups for liquids. Print it, tape it inside a cabinet door, and you'll never have to Google a conversion mid-recipe again.
This baking conversion chart covers the workhorses of a typical pantry. If you bake more than once a week, treat the chart as a starting point and a kitchen scale as the long-term upgrade.
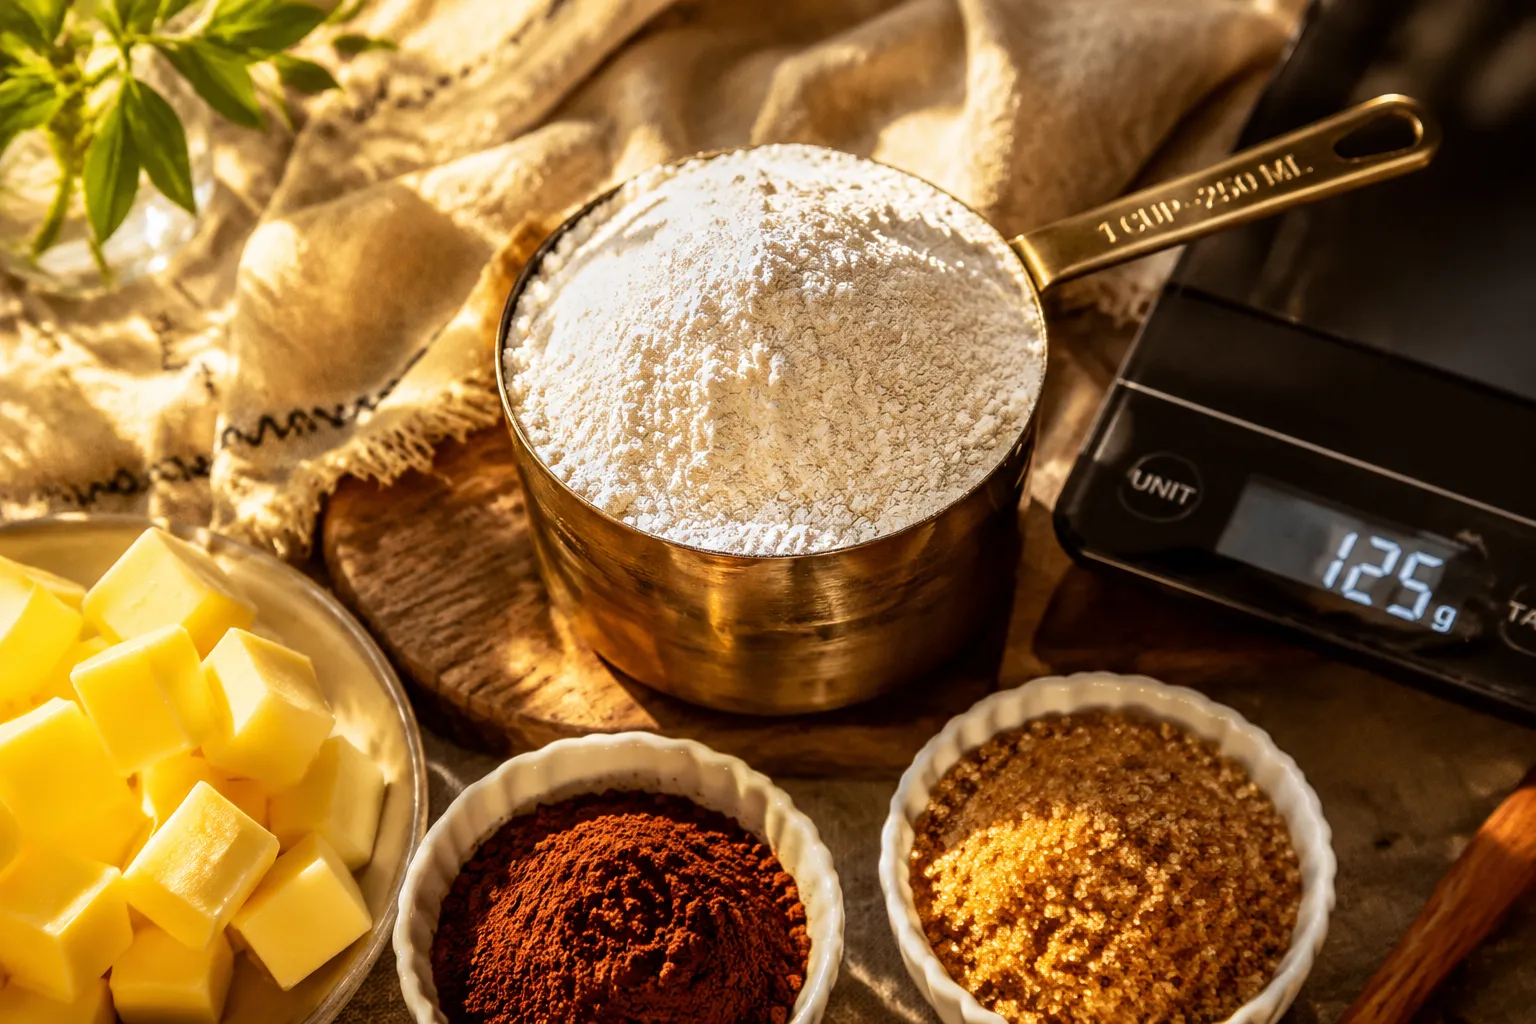
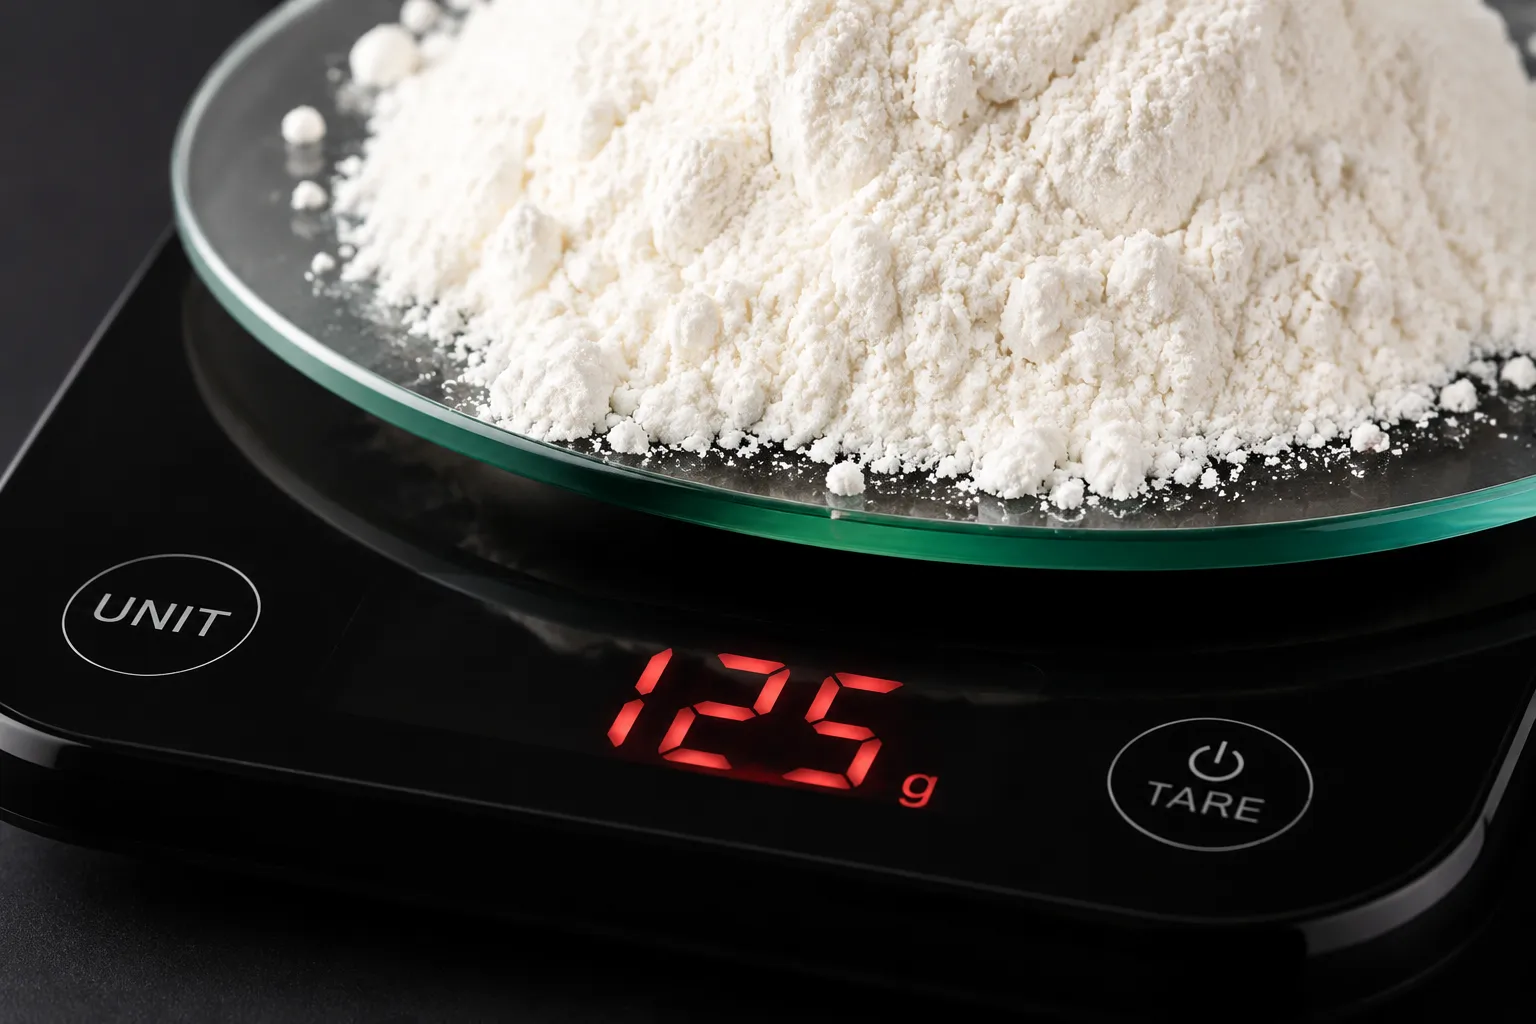
Flour is the most-asked-about ingredient because it's also the most variable. A scooped, packed cup can weigh 150 grams or more; a properly aerated, spooned cup hovers right around 125 grams. Get this number wrong and you've changed the entire hydration ratio of your dough. The 1 cup to grams math for flour deserves its own section because the difference between 120g and 150g is the difference between a tender crumb and a brick.
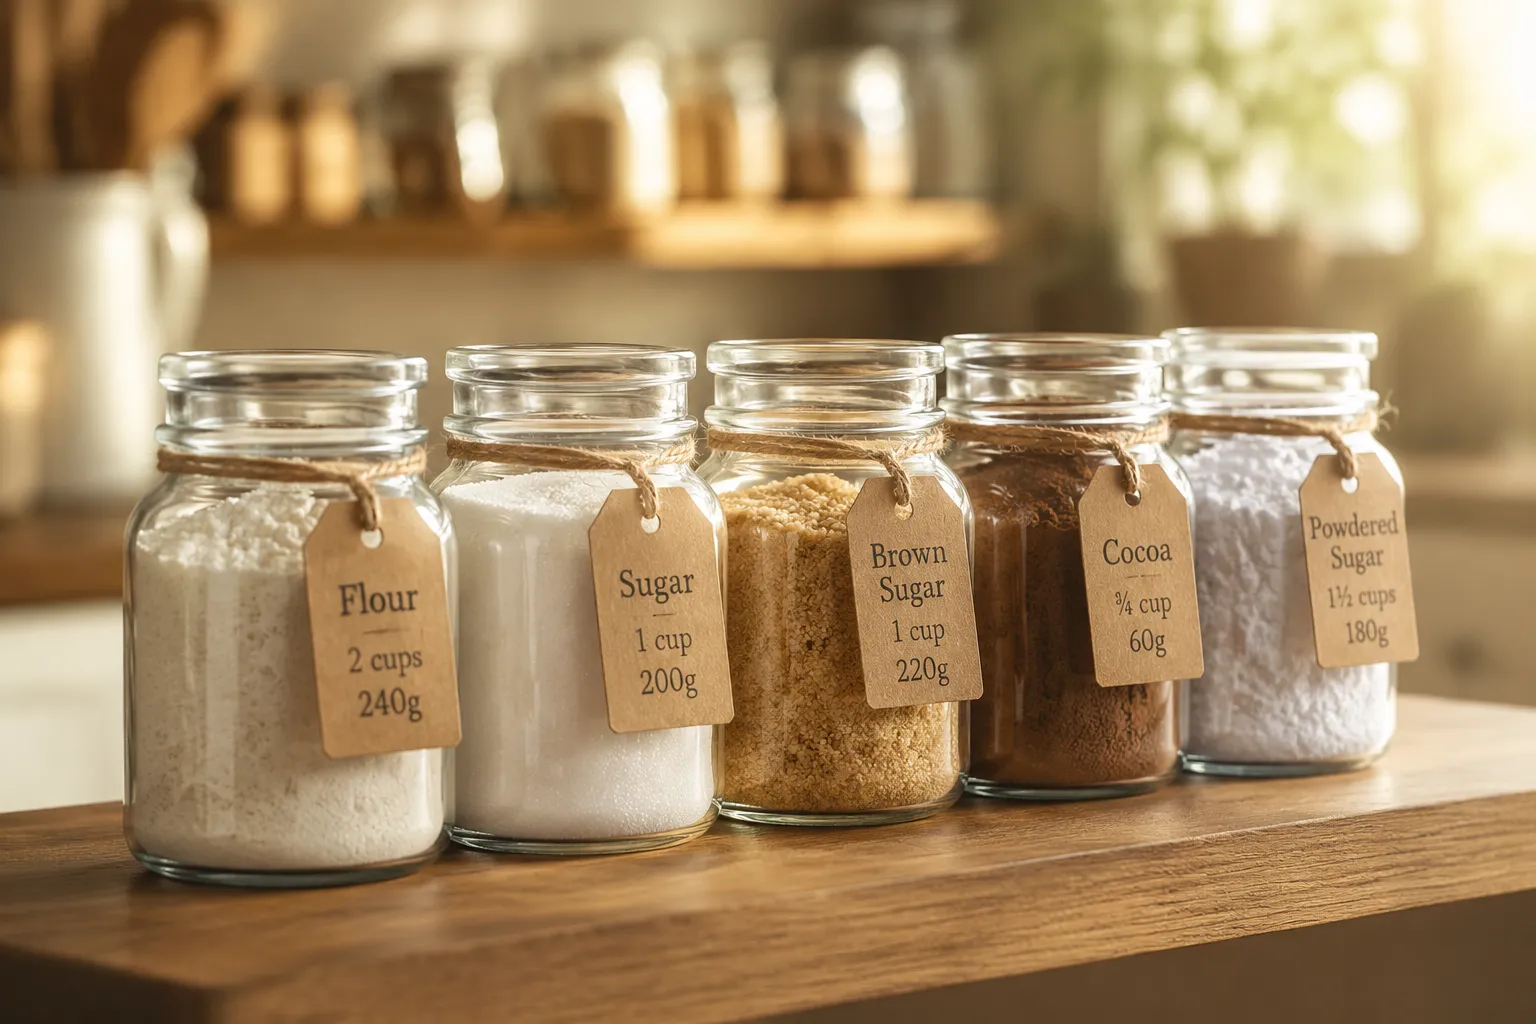
1 cup of all-purpose flour = 125 grams. King Arthur uses 120g, Bob's Red Mill uses 136g, and the USDA splits the difference at 125g. I default to 125 because it matches what most modern American cookbooks now standardize on. If a recipe specifies a brand or weight, always follow that gram value over a generic conversion.
Sugar weighs more than flour because the crystals pack more tightly. The good news? Sugar is far less variable than flour, so cup measurements work reasonably well even without a scale. The exception is brown sugar, which has its own packing rule that you'll see almost every recipe call out specifically.
1 cup of granulated sugar = 200 grams. This is the most consistent dry-ingredient conversion in baking. Sugar grains don't compress like flour does, so a scooped cup and a spooned cup land within a few grams of each other. Caster sugar (superfine) runs slightly heavier at about 215g per cup because the smaller crystals settle tighter.
1 cup of packed brown sugar = 220 grams. The phrase "packed" matters here. Recipes calling for brown sugar nearly always mean firmly pressed into the cup so it holds its shape when turned out. Loose, unpacked brown sugar runs about 145g per cup, which is rarely what the recipe writer intended. When in doubt, pack it down with the back of a spoon.
1 cup of unsifted powdered sugar = 120 grams. If a recipe specifies "sifted powdered sugar, 1 cup," sift first and then measure — you'll land closer to 100 grams. Confectioner's sugar is a great example of where a measuring cup gets unreliable fast, and where ounces to grams conversions become especially handy on the small end (1 oz = 28.35g).
Powders are tricky. They aerate, clump, and settle differently depending on humidity and how long the bag has been open. The 1 cup powder in grams question gets a different answer for almost every type, so here's a clean breakdown of the powders that show up most in modern recipes.
1 cup of unsweetened cocoa powder = 85 grams. Dutch-processed and natural cocoa weigh roughly the same. Sift it before measuring if it's been sitting in the pantry for a while — clumps will throw your weight off significantly, and clumpy cocoa is also nearly impossible to whisk smoothly into batter.
You'll almost never need a full cup of these, but for completeness: baking powder is about 192g per cup and 1 teaspoon equals 4g. Baking soda is denser at 220g per cup, with 1 teaspoon equal to 4.6g. For everyday baking, these are the two ingredients where teaspoon precision matters far more than cup math.
Most recipes call for partial cups, not full ones. The math is simple — divide the full-cup weight by 2, 3, or 4. The 1/2 cup to grams conversion is just half of whatever you'd measure for a full cup, and the same logic applies all the way down to teaspoons.
For 1/2 a cup to grams of any ingredient not listed, halve the full-cup gram weight from the chart above. The conversion holds whether you're working with liquids or dry ingredients, since both scale linearly with volume.
For very small amounts, switch to tablespoons to grams. One tablespoon equals 1/16 of a cup, which keeps the math clean:
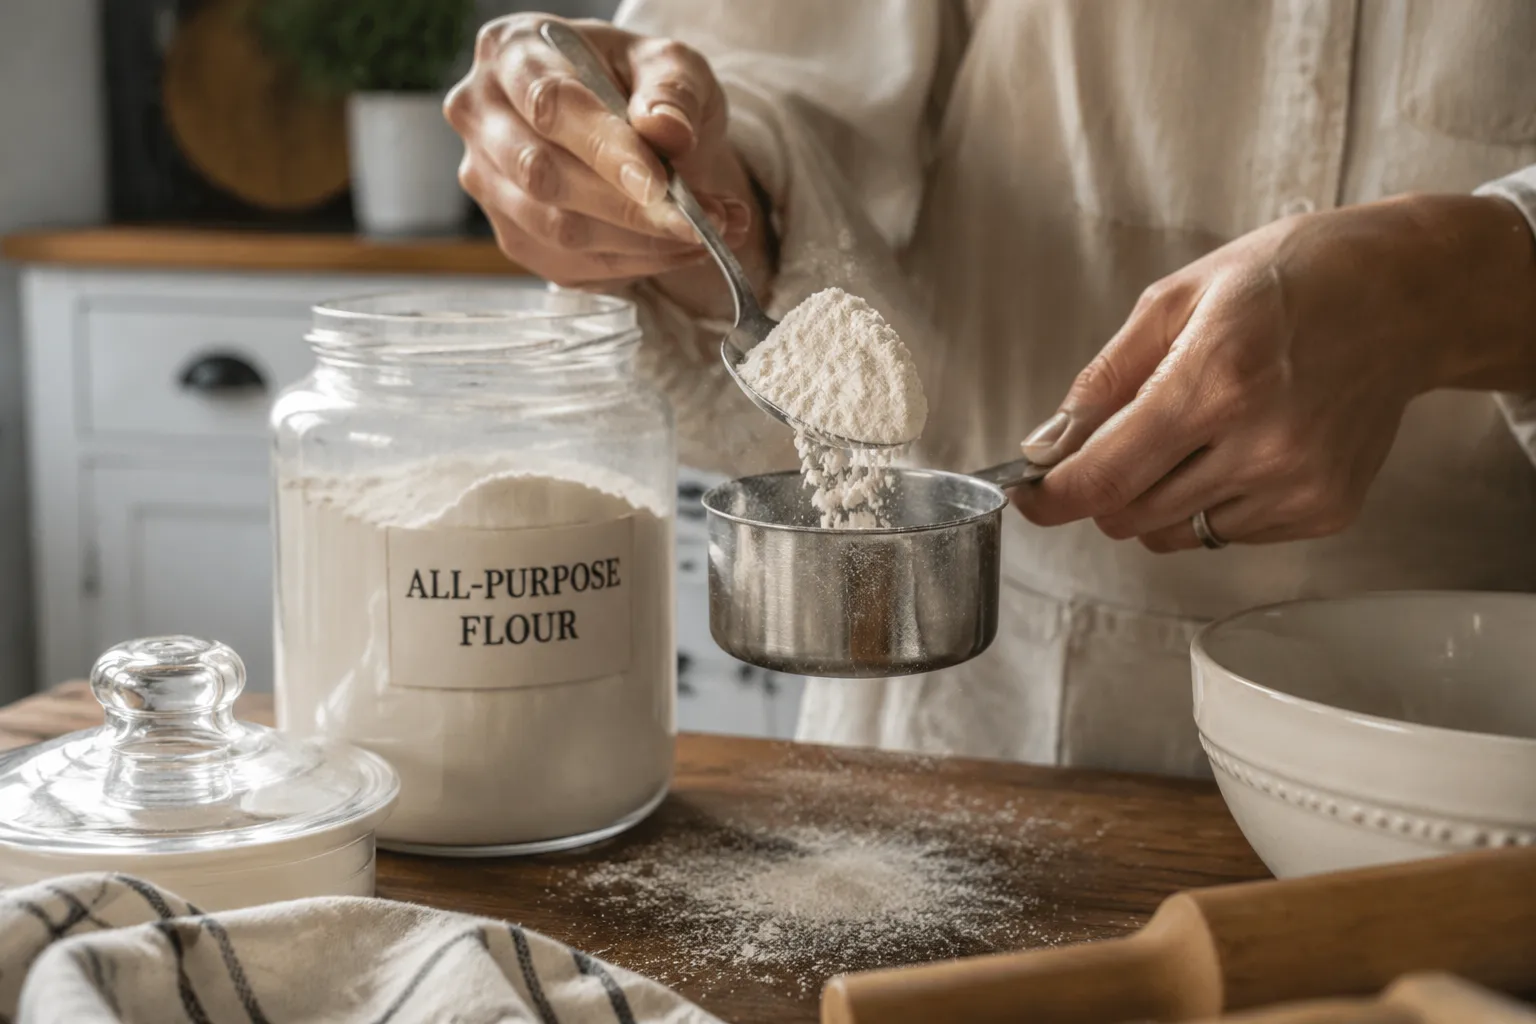
If you don't own a kitchen scale yet, proper technique becomes critical. Most American recipes assume you're using the spoon-and-level method, even when they don't say so explicitly. Master this and your cup measurements will land within about 5% of the gram values listed above — close enough for most home baking projects.
Fluff the flour in its container with a fork or spoon to break up any settling. Use a separate spoon to gently transfer flour into your dry measuring cup, mounding it slightly above the rim. Take the back of a butter knife and sweep across the top to level it flush. Do not tap the cup, do not shake it, and do not press down — every one of those moves adds weight you don't want.
The biggest error I see is scooping flour straight from the bag with the cup itself. That packs in 30 to 40 grams of extra flour and is the number-one reason home-baked goods turn out dry or dense. The second-biggest is measuring liquids in dry cups; use a clear graduated liquid cup at eye level so the meniscus sits right on the line. And finally, never substitute a coffee mug for a measuring cup — they hold anywhere from 8 to 16 ounces and are genuinely terrible benchmarks.
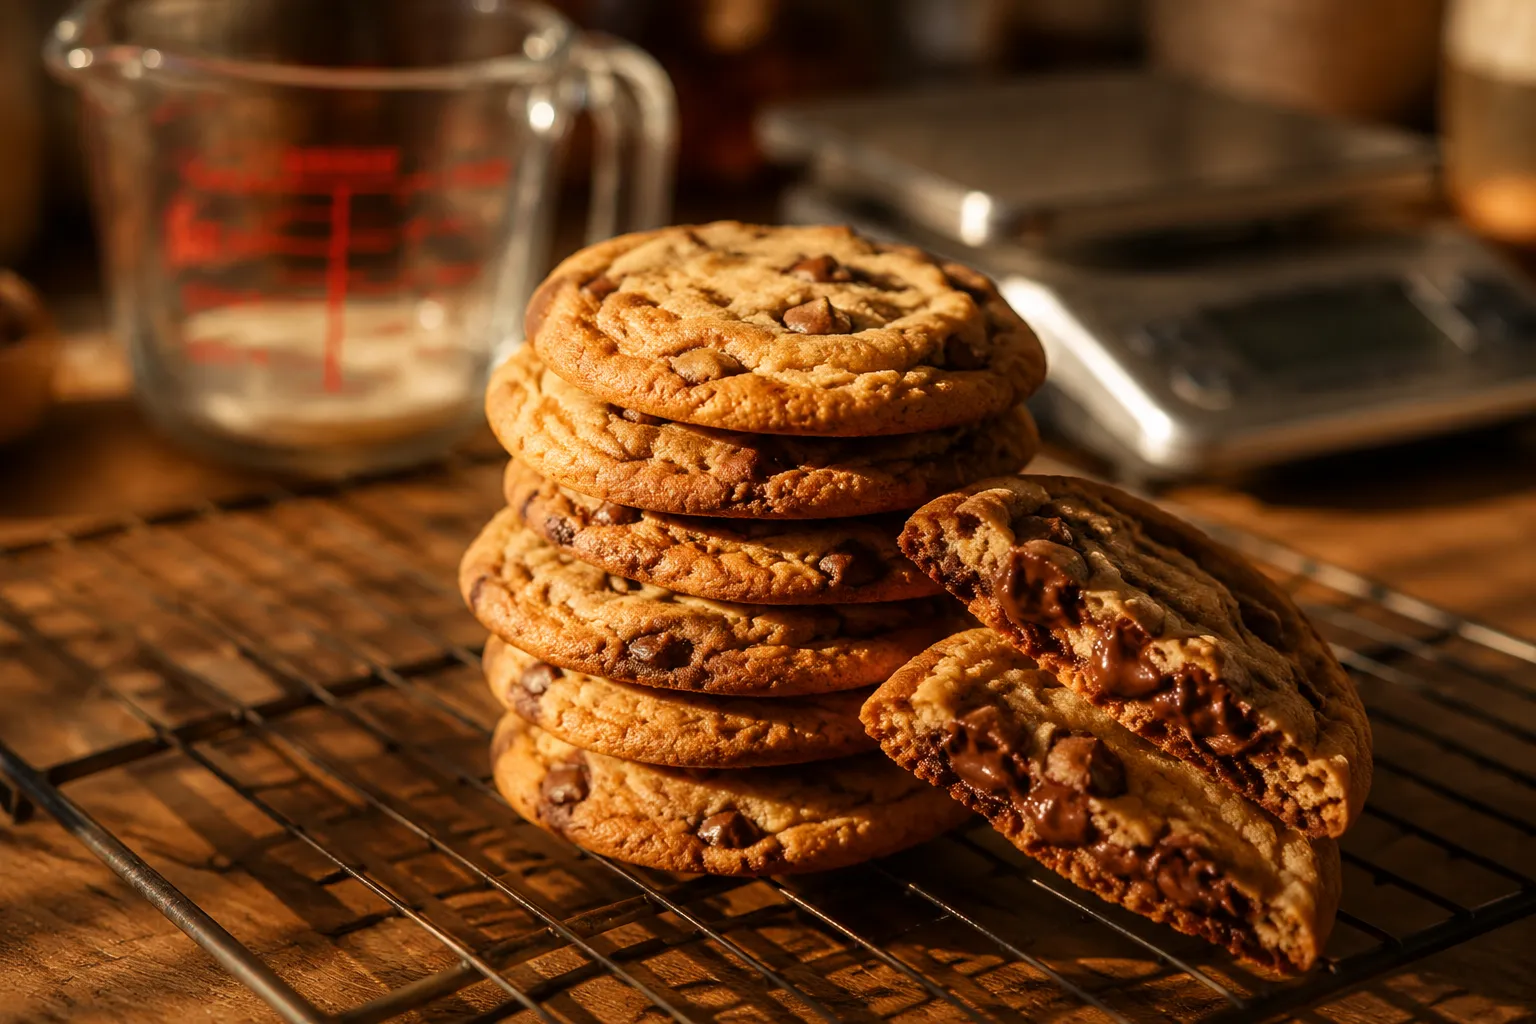
Conversions are just the start. Once you start weighing ingredients instead of scooping them, the difference in your bakes is immediate — cookies are chewier and more consistent, cakes rise truer, and breads develop the structure they're supposed to have. Save this 1 cup to grams cheat sheet, print the chart, and keep it tucked inside your favorite cookbook for the next time a recipe sends you scrambling for the calculator.

And if you've been on the fence about buying a digital scale, consider this your nudge. A good one runs about $15, lasts a decade, and removes the single biggest source of inconsistency in home baking. Your future cookies will thank you.
This chart is built around standard US measuring cups (240ml), but a few common variations are worth knowing if you bake from international recipes or older cookbooks:
Print this chart on standard letter paper, slide it into a clear sheet protector, and tape it to the inside of your most-used cabinet door — the same one where your measuring cups and scale already live. The sheet protector keeps batter splashes and butter smudges from ruining it, and the cabinet door keeps it visible without cluttering your counter.
If you'd rather go digital, save this page to your phone's home screen as a bookmark or screenshot the relevant section before you start baking. Either way, the chart never expires and gets more useful the more you cook from international recipes. Bookmark it now and you'll be reaching for it every time you bake.