Pumpkin Pumpkin Seeds: How to Roast Them Perfectly
Ingredients
Scale
Turn the seeds from your jack-o'-lantern into the crispiest, most addictive snack of fall. Here's exactly how to roast pumpkin pumpkin seeds at home.
If you're carving a jack-o'-lantern this weekend, those slimy pumpkin pumpkin seeds in the bottom of the bowl are about to become your favorite fall snack. With a quick rinse, a glug of olive oil, and a low-and-slow stint in the oven, that sticky pile of seeds turns into something shatter-crisp, salty, and impossible to stop eating. It's the kind of zero-waste kitchen win that makes the whole pumpkin feel worth carving in the first place.
I've been roasting these every October since I was a kid, and over the years I've landed on a method that takes the guesswork out: a brief salty boil, a low 325°F oven, and just enough oil to crisp the shells without greasing them. The result is a snack with proper crunch instead of the chewy, slightly leathery texture most stovetop recipes leave behind. It's also one of the easiest fall snack recipes you'll ever make, once you stop being intimidated by the pulp.
This guide walks through everything you need — the scoop-and-rinse routine that doesn't turn the kitchen into a swamp, the simmer trick I swear by, and five seasoning blends that take you from classic sea salt to maple cinnamon. Whether you're working through a pile of carving leftovers or you bought a sugar pumpkin specifically for this, you'll know exactly how to roast pumpkin seeds to crackling, golden perfection.
If you've ever wondered why grocery store pepitas look so different from the seeds inside your jack-o'-lantern, you're not alone. The seeds you scoop out of a fresh pumpkin are whole, wrapped in a pale, fibrous outer shell, while the bright green pepitas you buy in bags are hulled with that shell already removed. Both come from pumpkins and other winter squash, but most green pepitas come from a specific Mexican variety called the oilseed or "naked seed" pumpkin that grows seeds without a hull.
For roasting at home, the in-shell version is what you want. The shell is fully edible, crisps beautifully in the oven, and adds satisfying crunch and extra fiber to every handful. As for which pumpkin to grab: large carving pumpkins work fine, but smaller sugar pumpkins (the same ones used for homemade pumpkin puree) tend to have more tender shells and a sweeter, nuttier flavor. The seeds inside a sugar pumpkin are also a touch smaller, which makes them ideal for snacking by the fistful.
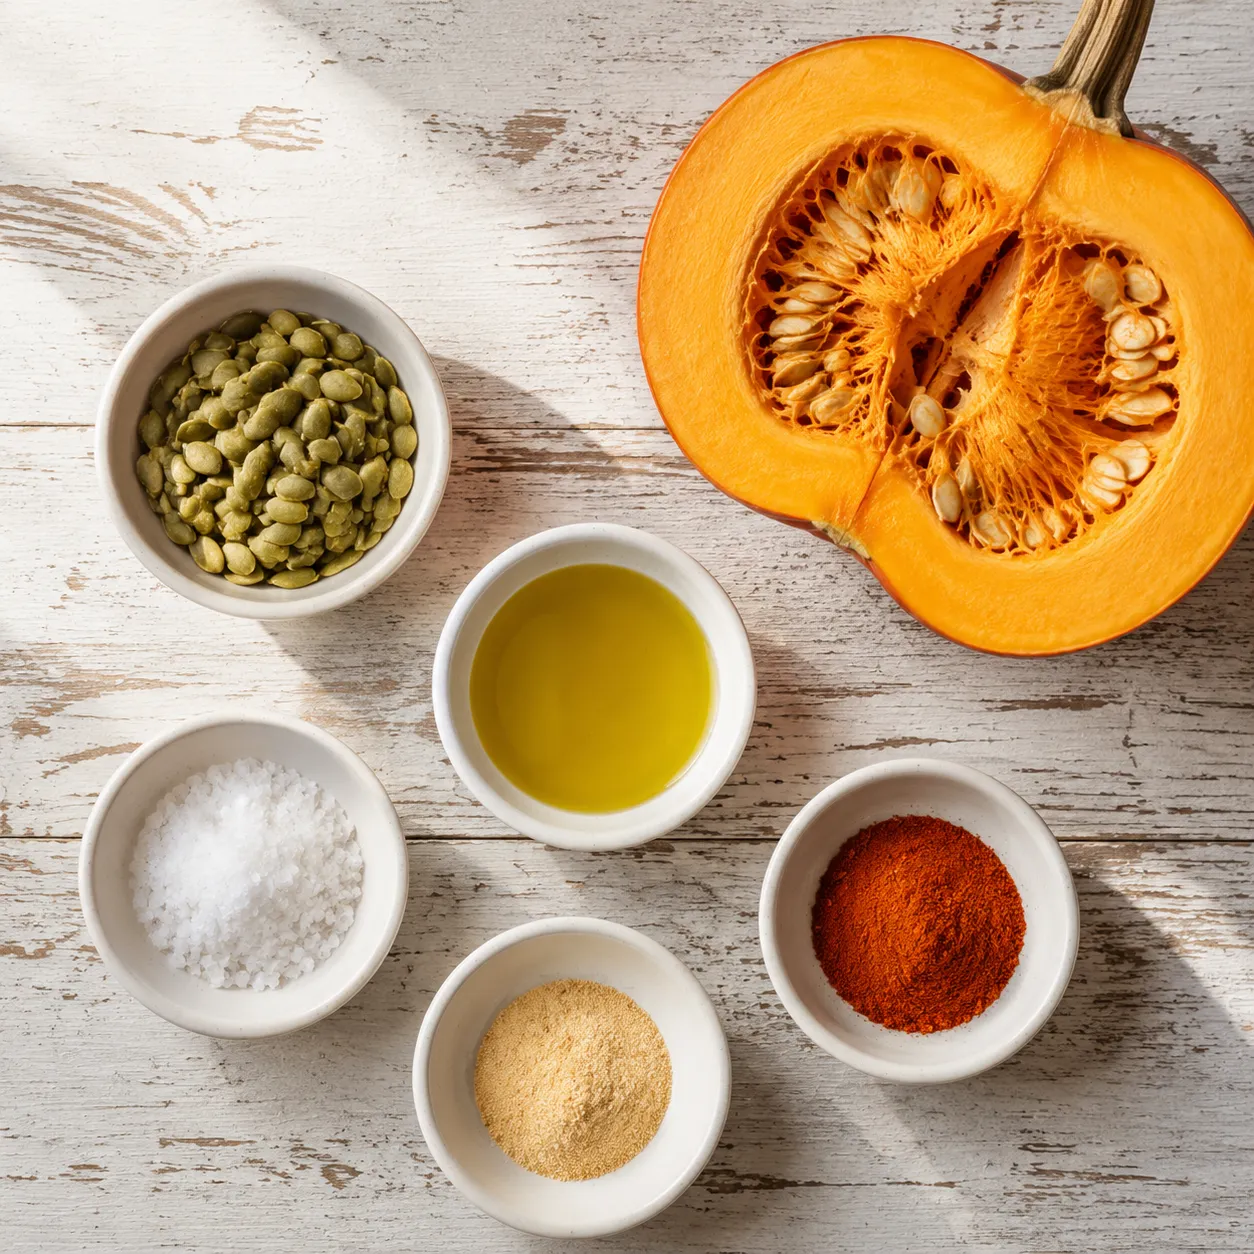
You only need three things to make a great batch, plus whatever spices you're in the mood for. Keep it simple and let the natural nuttiness come through, or lean into one of the spice blends in the variations section below for something more dressed up.
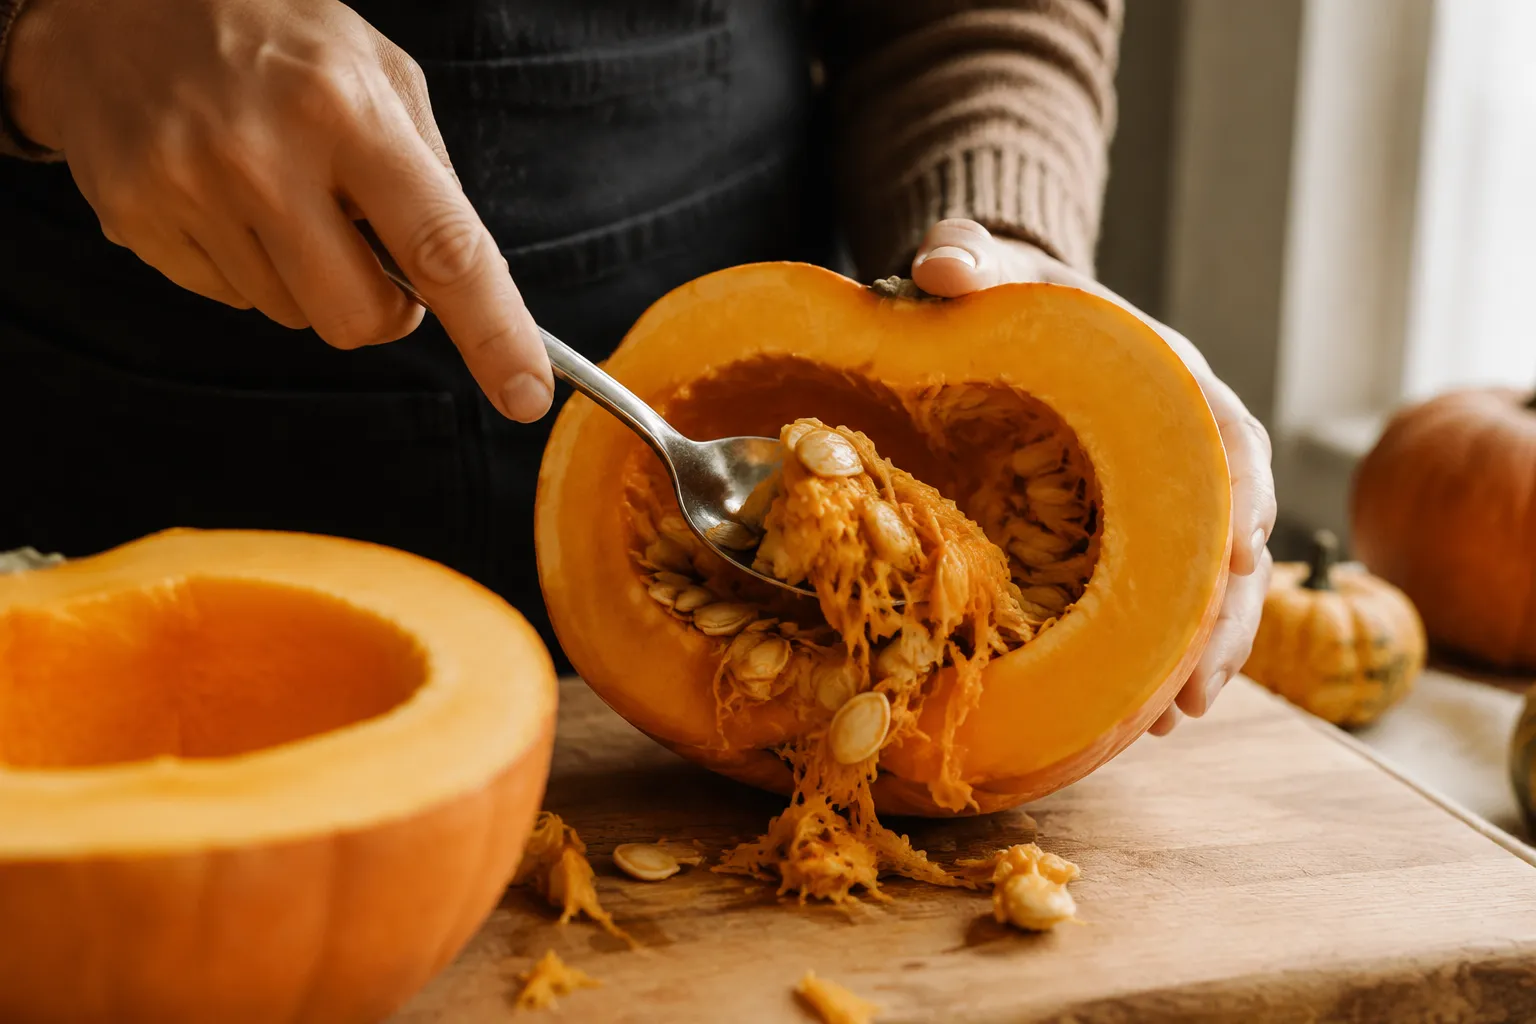
Cleaning is the only part that takes any real effort, but a smart trick makes it almost hands-off. Start by halving your pumpkin and scooping the seeds and pulp into a large bowl with a sturdy metal spoon or ice cream scoop. Don't worry about being precise here — you'll separate everything in the next step, so just get the cavity emptied.
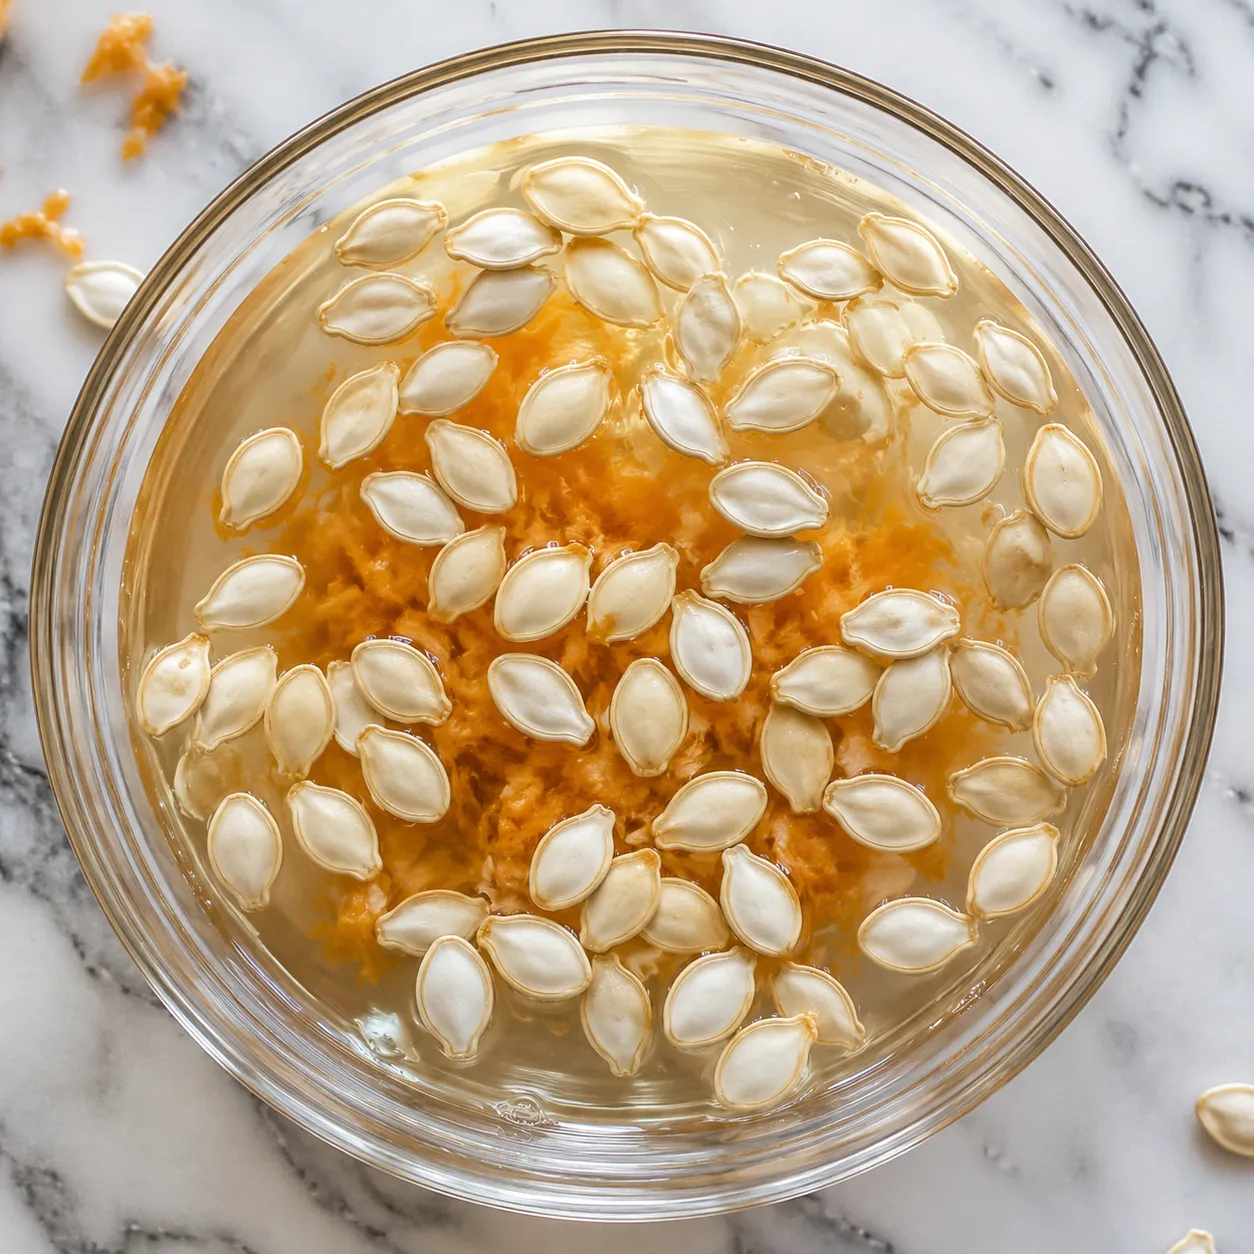
Now the magic. Cover the pulp and seeds with cool water and swish gently with your hands. The seeds float to the top while the heavy pulp and stringy bits sink. Skim the floating seeds into a colander, give them a final rinse to dislodge any clinging fibers, and pat them dry with a clean kitchen towel. Drying matters more than you'd think — wet seeds steam in the oven instead of crisping, so take an extra minute and really blot them.
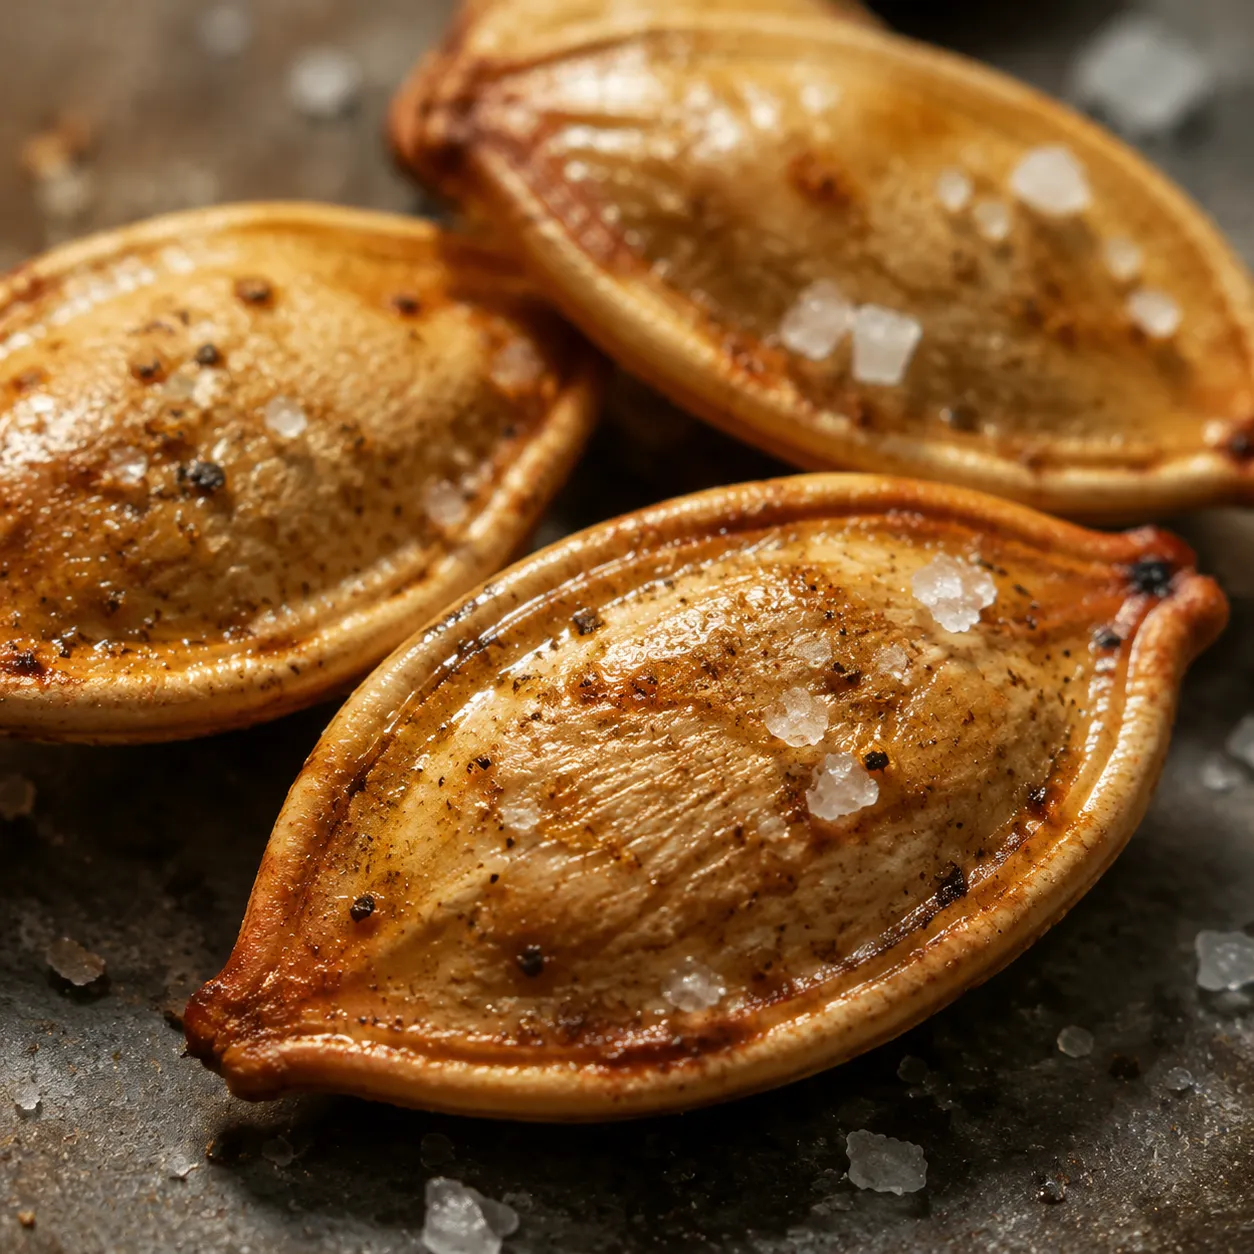
Here's the part that separates okay seeds from genuinely crispy pumpkin seeds: a quick simmer before they ever hit the oven. Bring 4 cups of water and a generous tablespoon of salt to a boil, add the cleaned seeds, and let them bubble for 10 minutes. This seasons them from the inside out and softens the shell just enough that it shatters cleanly after roasting instead of going chewy.
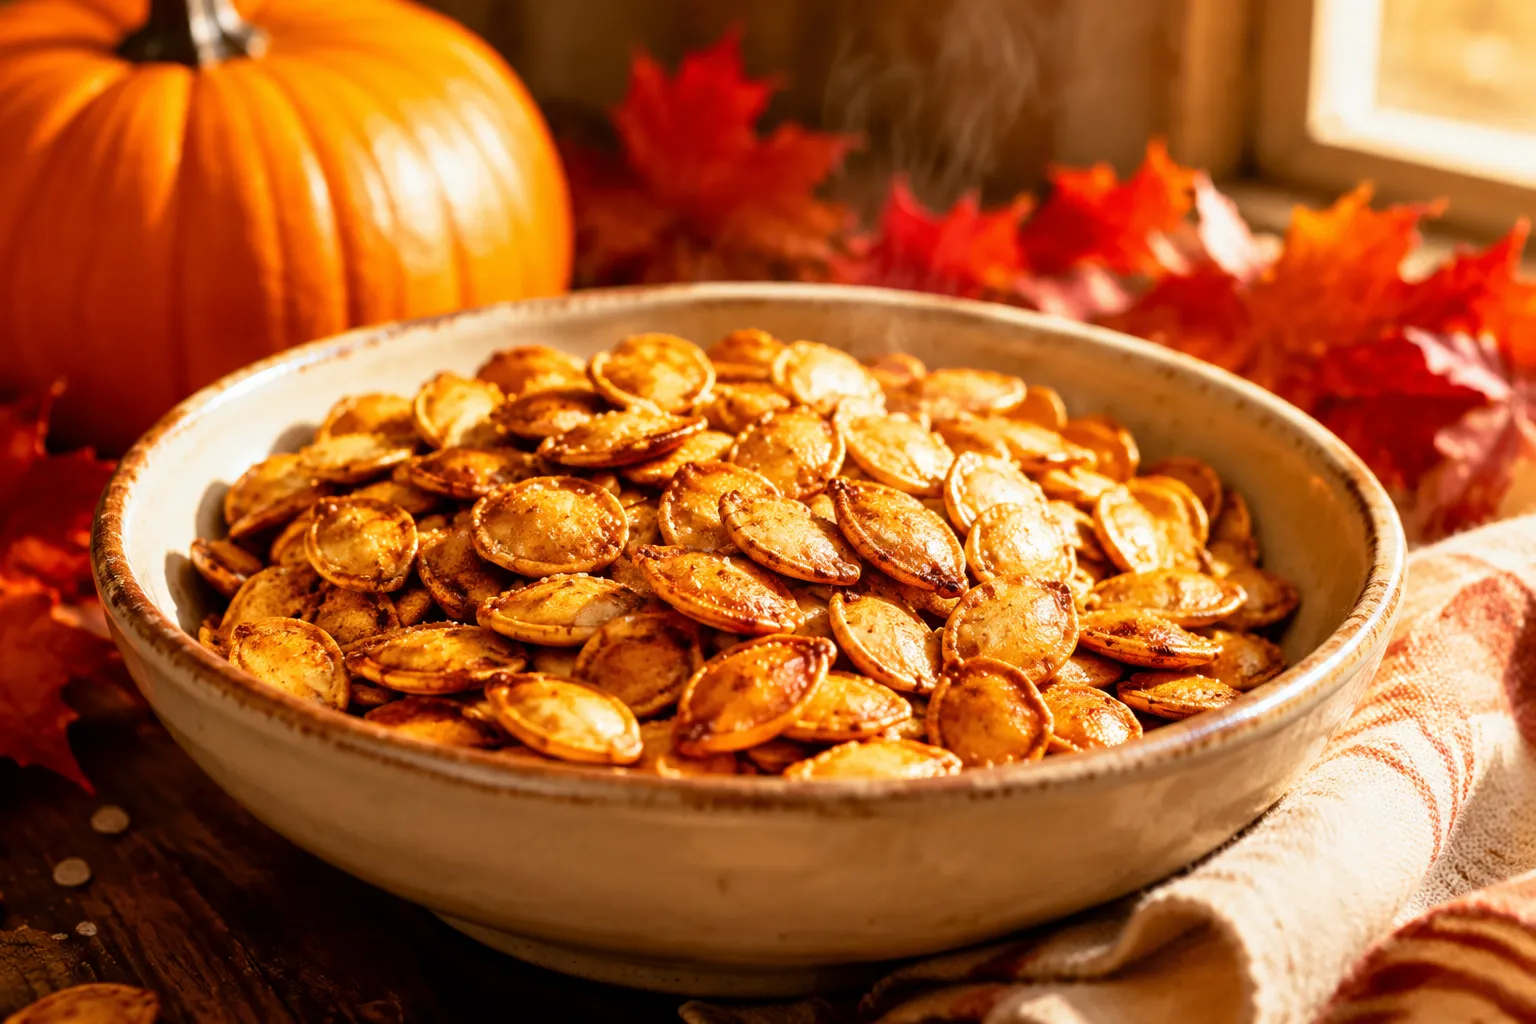
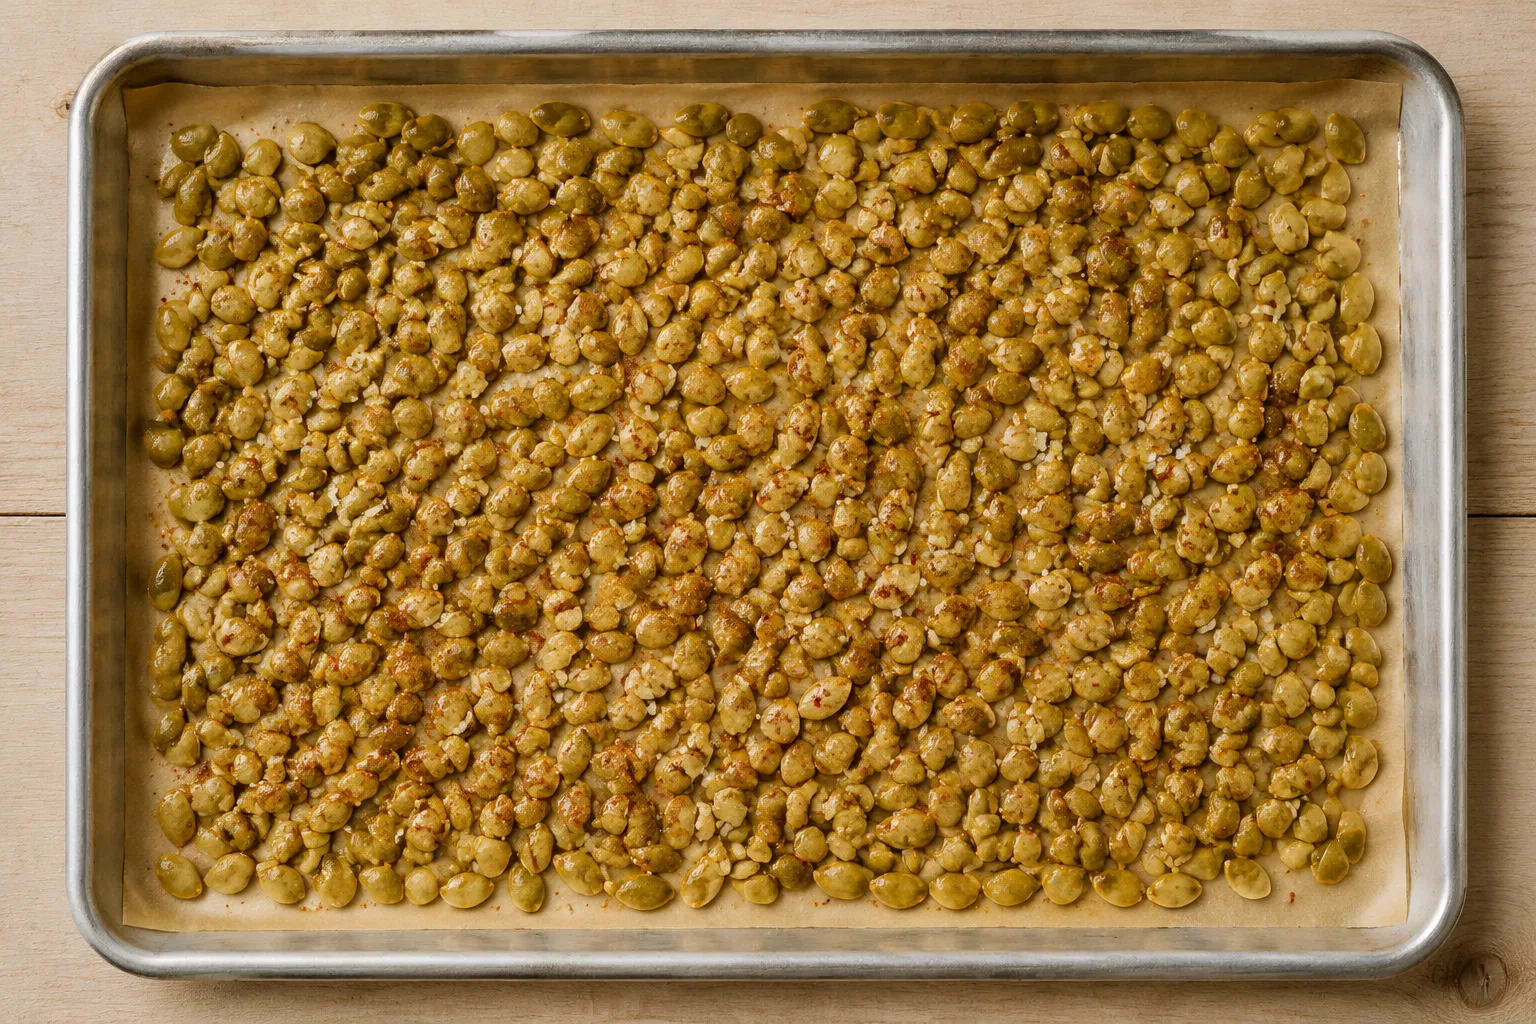
Drain the seeds, pat them dry one more time, then toss with olive oil and your seasonings on a parchment-lined sheet pan. Spread them in a single, even layer — crowding leads to steaming, and steaming is the enemy of crunch. Bake at 325°F for 35 to 45 minutes, stirring every 15 minutes, until the seeds are deeply golden and you can hear them rattle when you shake the pan.
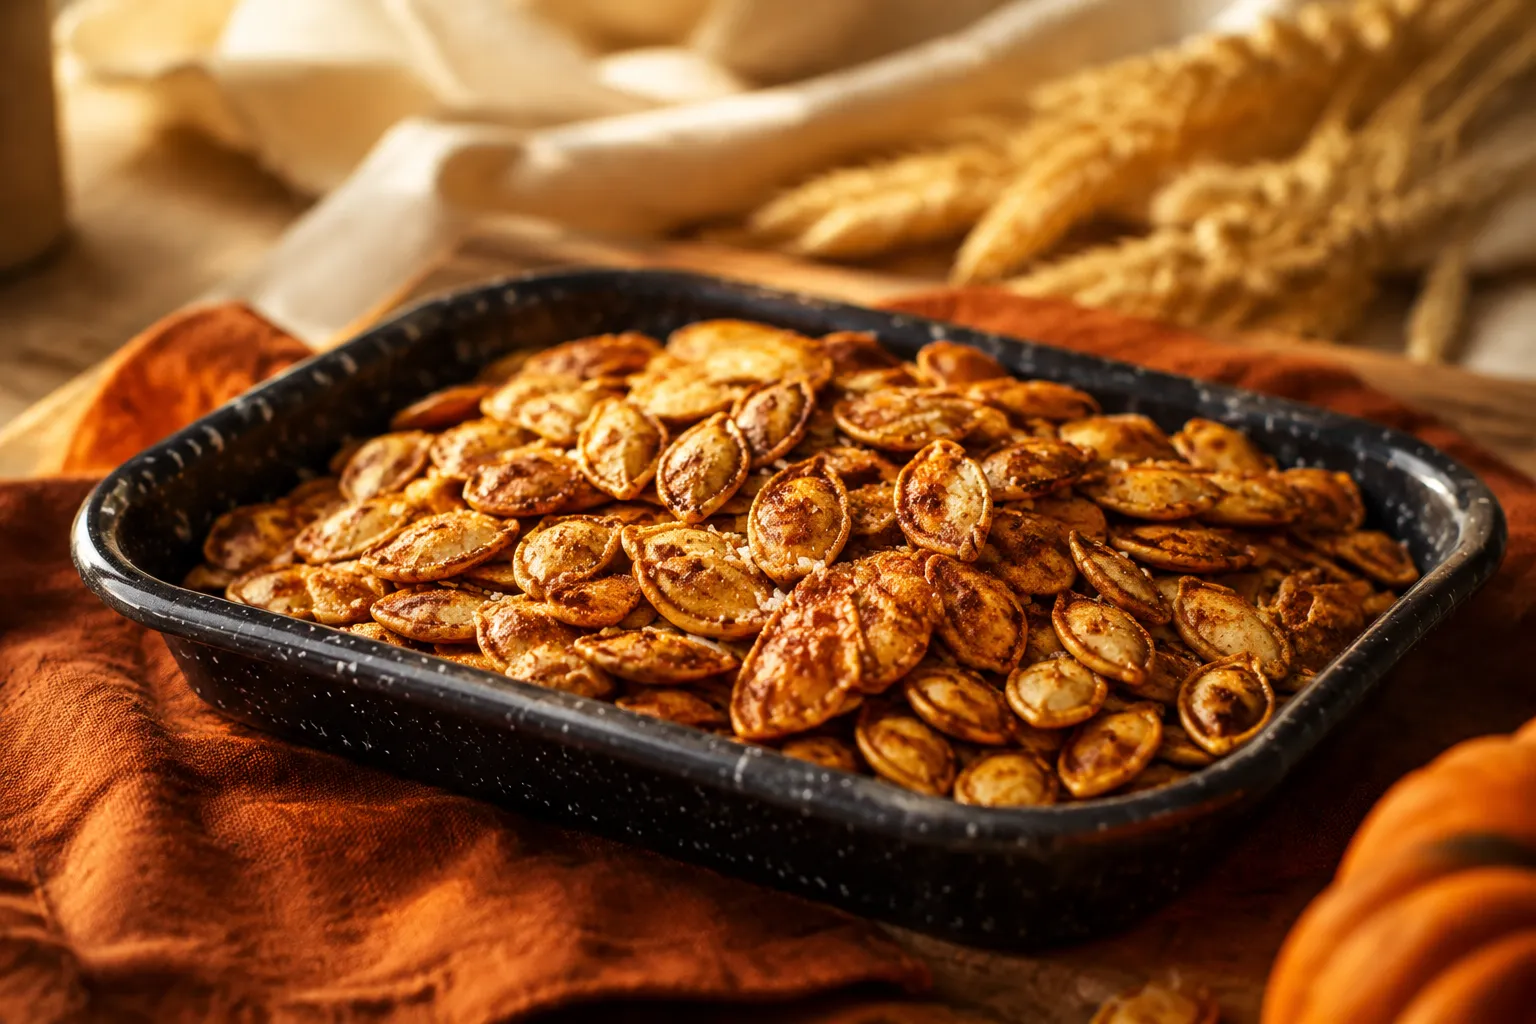
A low oven is the second secret. Most recipes call for 400°F, which scorches the outsides before the centers ever dry out. At 325°F you get even, all-the-way-through crunch with a beautifully toasted color and zero burnt edges. Let them cool completely on the pan — they continue to crisp as they cool, which is why a fresh-from-the-oven seed sometimes feels softer than you expected.
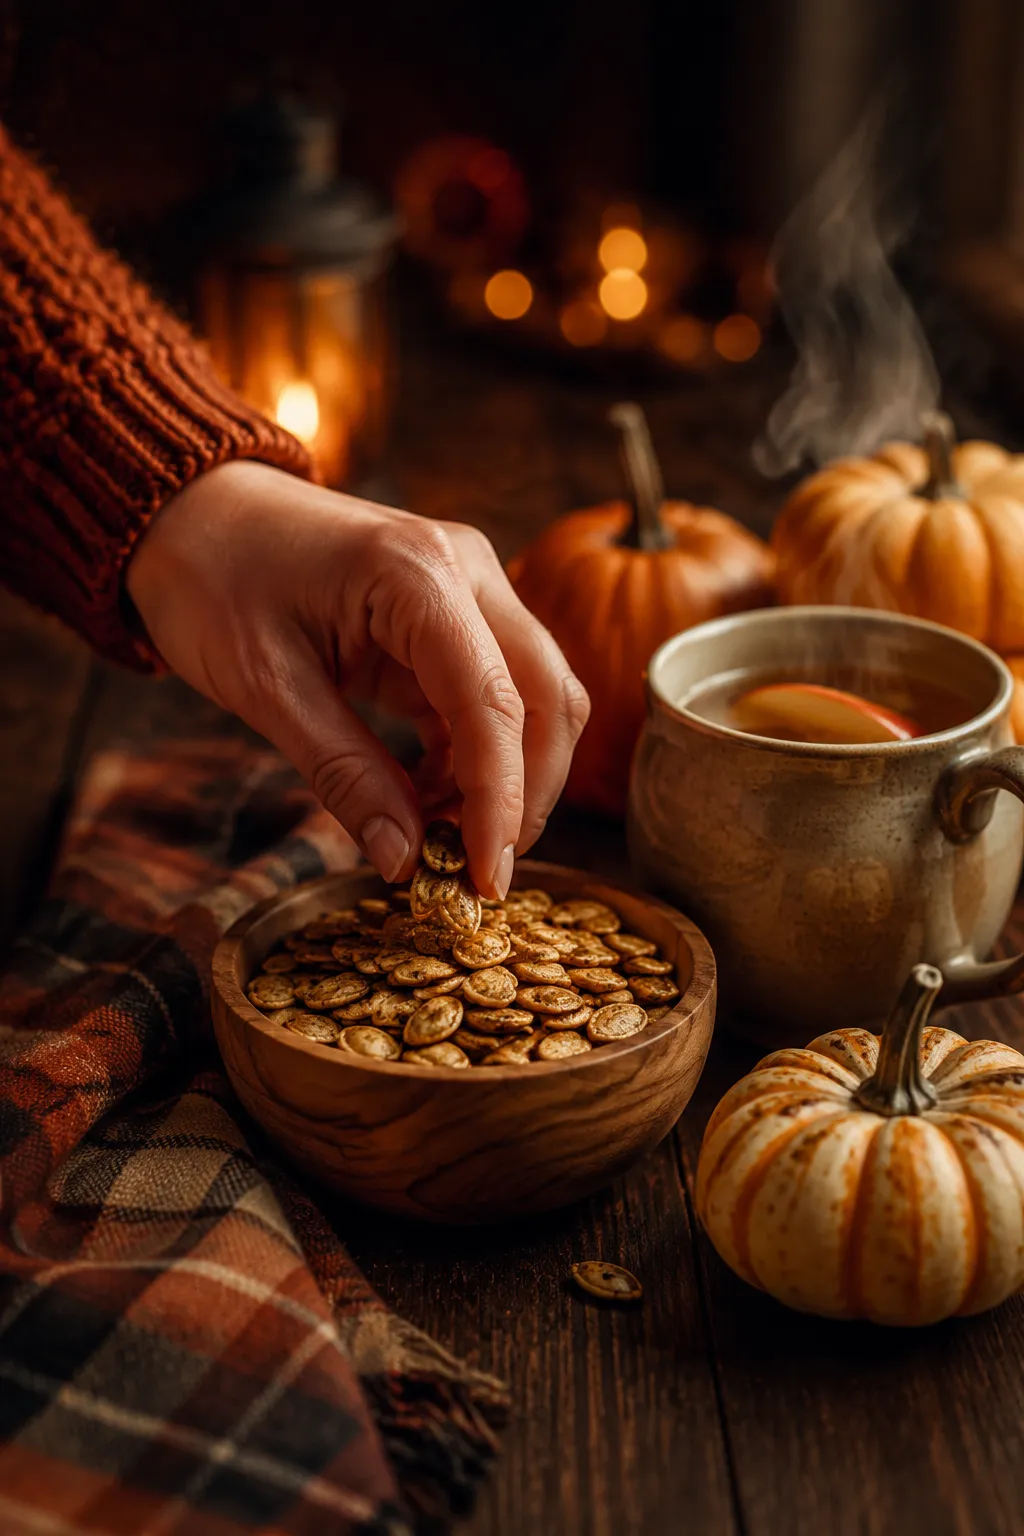
A bowl of warm, freshly toasted seeds next to a mug of cider is honestly all I want on a chilly October night, but these little crunchers are way more versatile than a pure snack. Sprinkle them over your favorite pumpkin soup recipe for instant texture, scatter a handful across an autumn grain salad, or fold them into granola for a fall-only batch with serious crunch. They also make a great topper for a wedge of roasted squash, an apple-and-cheddar tartine, or a thick slice of buttered sourdough.
They're a sneakily great party offering, too. Set them out in a small wooden bowl alongside other Halloween pumpkin ideas like spiced cider, mini pumpkin tarts, or a wheel of warm baked brie. Kids inhale them straight from the pan, and adults will reach for them between sips of wine without even noticing. Pack a little jar in school lunches, top a creamy butternut bisque with them, or crush a few into pesto for an unexpected nutty depth.
The flavor possibilities are wide open. A dusting of pumpkin spice mix turns these into a sweet companion for coffee, while smoked paprika and lime push them squarely into bar-snack territory. Once you've nailed the base technique, the seasoning is where you get to play, and a single carving pumpkin can easily produce three or four small batches in different flavors.
So the next time you're staring at a pumpkin guts situation on the kitchen counter, don't toss it. Twenty minutes of light cleaning, an hour in a low oven, and you've turned what most people compost into a snack you'll be hiding from the rest of the household by tomorrow morning. It's the simplest, most rewarding fall kitchen project I know — and it costs you exactly nothing extra.
The base recipe is delicious as-is, but seasoning is where this snack really shines. Toss the cleaned, oiled seeds with any of these blends before they hit the oven, then finish with a fresh pinch of salt the moment they come out of the heat.
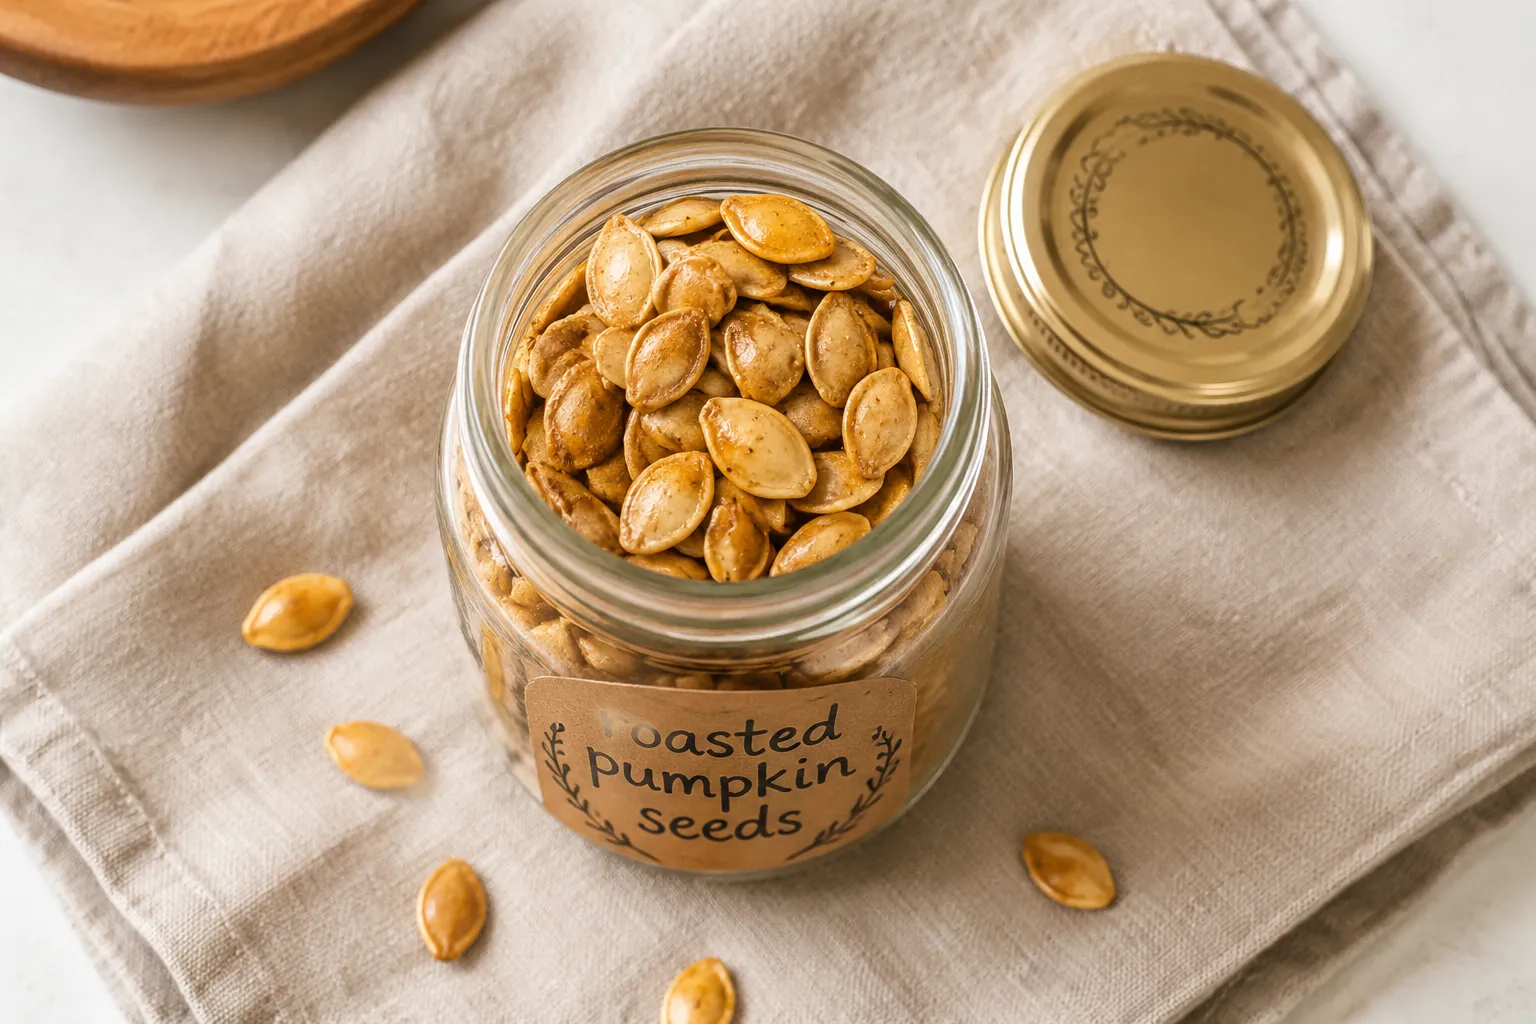
Once your seeds are completely cool, transfer them to an airtight container or glass mason jar and store at room temperature for up to one week. A small silica packet or a folded paper towel inside the jar helps absorb any lingering moisture and keeps the shells extra crisp through day seven.
For longer storage, freeze in a zip-top bag for up to two months. To refresh the texture, spread the frozen seeds on a baking sheet and warm them at 300°F for 5 to 7 minutes — they come out of the oven tasting like they were just roasted that morning.